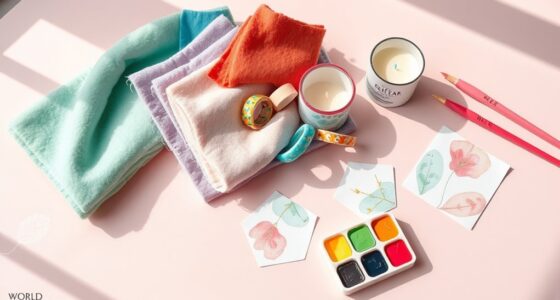

Get inspired with creative ways to decorate your Easter eggs, from classic dyed eggs with a twist, using natural dyes from fruits and vegetables, to marbled designs created with shaving cream and vibrant dyes. Add sparkle with glitter and metallic accents, or try stamping patterns and using colorful tape for fun stripes. Personalize with chalkboard paint for messages or embellish with beads and glitter for a festive touch. Keep exploring for more inspiring ideas!
Key Takeaways
- Incorporate natural dyes from fruits and vegetables for organic, gradient, and striped egg designs.
- Use marbling techniques with shaving cream or watercolor washes for soft, artistic effects.
- Add metallic accents with gold paint, glitter, or Sharpies for elegant, shiny details.
- Decorate with stickers, stamps, washi tape, and chalkboard paint for customizable, playful patterns.
- Embellish with beads, glitter, and final sealing to create textured, durable, and eye-catching decorations.

PAAS Deluxe Easter Egg Decorating Kit – America's Favorite Easter Tradition
With 9 different colors of dye, this kit is perfect for making eggs of every imaginable shade and…
As an affiliate, we earn on qualifying purchases.
As an affiliate, we earn on qualifying purchases.
Classic Dyed Eggs With a Twist
While traditional dyed eggs are a staple of Easter celebrations, adding a creative twist can make your eggs stand out. Instead of plain colors, experiment with layered dyeing techniques, like dipping eggs multiple times in different shades to create a gradient effect. You can also use natural dyes from fruits and vegetables—think beet juice for pink or spinach for green—to give your eggs a unique, earthy look. For a fun twist, try adding patterns with rubber bands before dyeing; once removed, they reveal striking stripes. Using metallic or glitter accents can also add a modern touch. Incorporating glycolic acid into your skincare routine can improve skin texture and radiance, making your hands and face look even more vibrant during your Easter celebrations. These simple ideas let you elevate classic dyed eggs, making your Easter display more vibrant and personalized without losing that traditional charm.

Watkins Assorted Food Coloring, 1 Each Red, Yellow, Green, Blue, Total Four 0.3 oz bottles, 4 Count (Pack of 1)
Derived from pure vegetable juices and spices including beet juice, turmeric and spirulina extract.
As an affiliate, we earn on qualifying purchases.
As an affiliate, we earn on qualifying purchases.
Elegant Marbled Eggs Using Shaving Cream
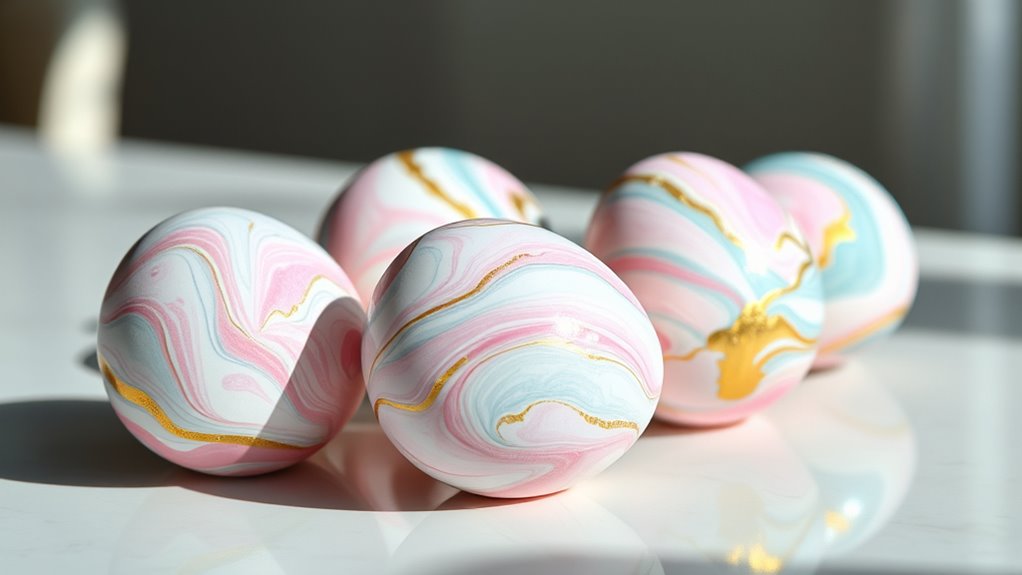
Create stunning marbled effects on your Easter eggs by using shaving cream and vibrant dyes. First, spread a thick layer of shaving cream over a tray or baking sheet. Drip or drop your chosen dye colors onto the shaving cream, then use a toothpick or skewer to swirl the colors gently, creating beautiful marbled patterns. Roll each hard-boiled egg in the shaving cream mixture, ensuring it’s fully coated. Let the eggs sit for a few minutes to absorb the colors. Rinse each egg carefully with cold water, removing the shaving cream to reveal the marbled design. Pat dry with paper towels, and you’ll have elegant, one-of-a-kind eggs that showcase a sophisticated marbled look perfect for any Easter celebration.

Harry's Original Shaving Kit for Men – Razor Handle, 3 Razor Blade Refills, Foaming Shave Gel, and Travel Blade Cover – German Engineered – Charcoal
HARRY'S SHAVE KIT FOR MEN: Includes a Harry's Truman razor handle, three razor blade refills, Harry's Foaming Shave…
As an affiliate, we earn on qualifying purchases.
As an affiliate, we earn on qualifying purchases.
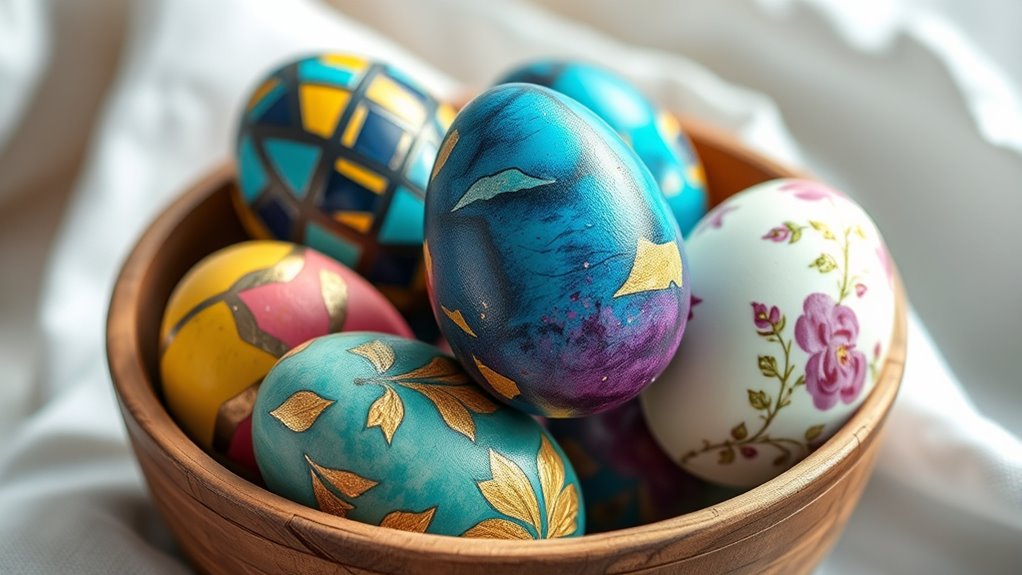
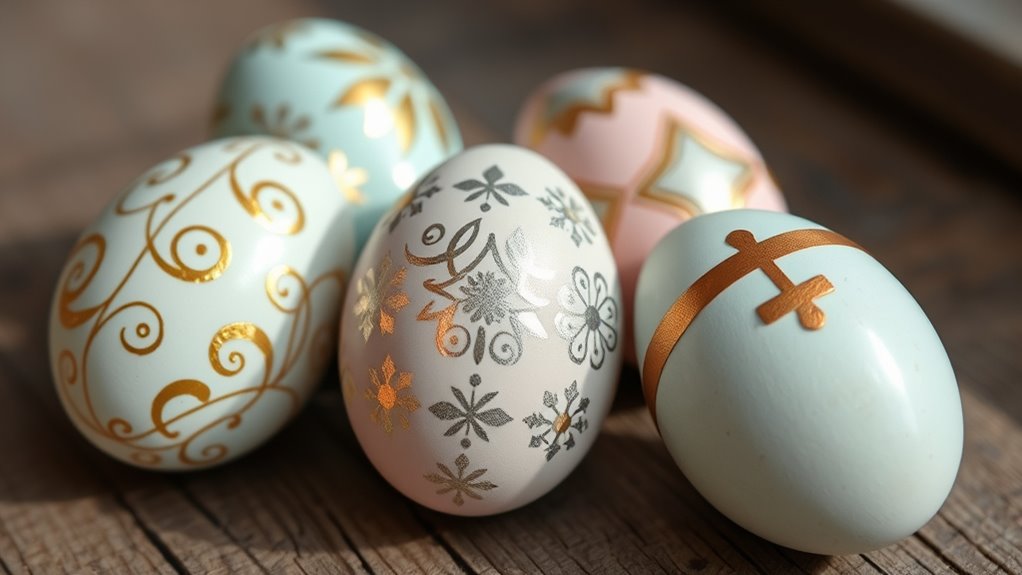
Glittery Gold Accents for a Touch of Glamour

Adding glittery gold accents instantly elevates your Easter eggs with a touch of glamour and sophistication. To achieve this, start by applying a thin layer of craft glue or mod podge to your egg’s surface where you want the gold accents. Use a fine-tip brush or a toothpick to carefully add small details, stripes, or patterns. Then, sprinkle loose gold glitter over the glued areas, tapping off the excess gently. For a more polished look, use metallic gold paint and a fine brush to add delicate touches or borders. Let everything dry completely before handling. These shimmering accents make your eggs stand out, adding an elegant, festive flair perfect for any Easter celebration. The result is stylish eggs that radiate a luxurious glow. When working with metallic paints, choose high-quality products for the best finish and durability. Additionally, ensure your drivetrain components are clean and well-maintained so your tools work smoothly during projects. Using proper decorative techniques can further enhance your designs and make your eggs truly unique. Incorporating visual harmony into your pattern choices can also help create a more cohesive and attractive appearance on your decorated eggs.

LEOBRO Gold Glitter, 100 g / 3.5 oz Holographic Fine Glitter for Crafts, Resin, Flowers, DIY Jewelry Party Decorations
Bulk Gold Glitter: N.W. 100 g / 3.5 oz holographic gold glitter, besides basic metallic gold color, with…
As an affiliate, we earn on qualifying purchases.
As an affiliate, we earn on qualifying purchases.
Nature-Inspired Natural Dyes
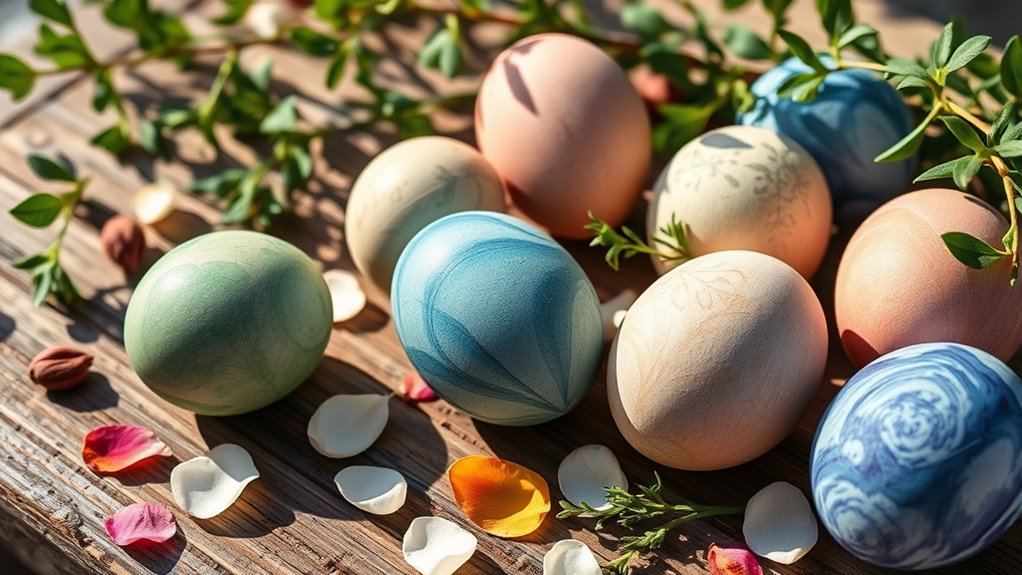
Have you ever wondered how to give your Easter eggs a natural, earthy hue? Using nature-inspired dyes is simple and eco-friendly. You can extract vibrant colors from common kitchen ingredients. For example, boil red cabbage leaves for a rich blue, or simmer onion skins to create warm shades of orange and brown. Beets provide a deep pink or red, while turmeric yields a bright yellow. Just chop your chosen ingredients, simmer them in water for about 30 minutes, then strain the liquid. Dip your eggs into the cooled dye, leaving them for a few minutes until you reach your desired shade. These natural dyes not only produce beautiful, organic colors but also add a touch of nature’s artistry to your Easter celebration.
Colorful Rubber Band Stripes
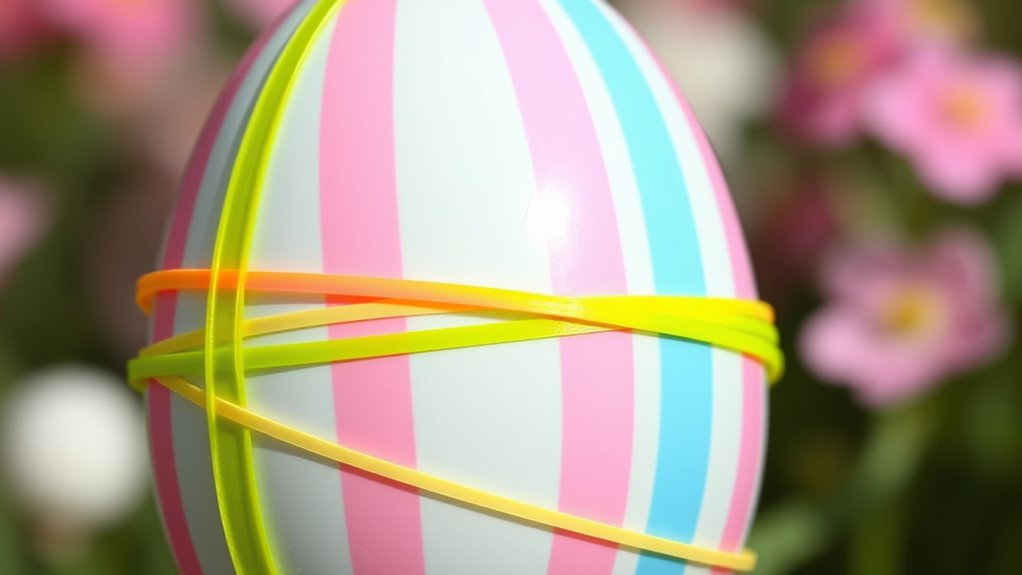
Using colorful rubber bands to decorate Easter eggs is a fun and easy way to achieve vibrant, striped patterns. First, hard-boil your eggs and let them cool completely. Place rubber bands around the egg in your desired pattern, overlapping or spacing them out. The tighter you stretch the bands, the cleaner your stripes will be. Once secured, dip the egg into dye, making sure the bands stay in place. Let it sit for a few minutes, then carefully remove the rubber bands to reveal bold, colorful stripes. This method creates eye-catching designs perfect for festive displays or gift-giving. Plus, it’s simple, mess-free, and allows for endless pattern variations. For best results, ensure your eggs are thoroughly dry before applying the rubber bands to improve adhesion. To achieve a more authentic farmhouse look, consider choosing vintage-inspired dye colors that complement rustic decor. Incorporating exfoliation benefits from glycolic acid into your skincare routine can help in preparing your skin for future decorating activities by keeping it smooth and healthy. Additionally, selecting high-quality dyes can enhance the vibrancy and longevity of your designs. Proper preparation and attention to detail can also prevent color bleeding and ensure your patterns stay sharp and vibrant.
Watercolor Paint Washes for a Soft Look

To achieve a soft, watercolor wash on your Easter eggs, focus on blending techniques that create smooth shiftings between colors. Choose light watercolors to keep the look delicate and subtle. Apply even washes to guarantee the color coverage is consistent and gentle across the surface. Developing your attention skills through consistent practice can help you better control the blending process for more refined results. Incorporating mindfulness during your craft can also enhance your focus and achieve a more harmonious appearance. Additionally, cultivating a calm mindset can improve your overall patience and precision during the painting process.
Blending Techniques for Softness
Creating a soft, delicate look on your Easter eggs becomes effortless when you master watercolor paint washes. To achieve this, focus on blending colors smoothly. Start with a diluted wash and layer gently, allowing the colors to flow into each other. Use a wet brush to soften edges and create seamless gradations. Lightly drag or stipple the brush to blend different shades, avoiding harsh lines. If you want more depth, add additional washes gradually, waiting for each layer to dry before applying the next. Remember, patience is key—build up the softness slowly. Keep your brush damp and work quickly for a natural, airy effect. Applying blending techniques from Hyundai models can inspire creative ways to refine your artistic process. Additionally, practicing controlled color transitions can help you achieve a more harmonious and gentle appearance. Developing a good understanding of watercolor techniques can elevate your egg decorating skills to a new level. Incorporating proper color mixing techniques ensures the hues blend seamlessly and enhances the overall softness of your design. With practice, your eggs will have a beautifully muted, watercolor-inspired appearance that exudes gentle elegance.
Choosing Light Watercolors
Choosing light watercolors sets the perfect foundation for achieving a soft, ethereal look on your Easter eggs. Opt for pastel shades like pale pinks, blues, and greens to create gentle washes that won’t overwhelm the surface. Dilute your watercolor paints with plenty of water; this produces a transparent, delicate hue that enhances the egg’s natural shine. Test your colors on scrap paper first to gauge how light they’ll appear once applied. Using light washes allows you to build layers gradually, adding depth without losing the softness. Keep your brush strokes loose and fluid, which helps maintain the airy, subtle effect you want. Remember, the key is to be patient and let each wash dry before adding the next, ensuring a seamless, gentle shift of colors.
Applying Even Washes
Applying even washes is essential for achieving a smooth, uniform background on your Easter eggs. To do this, load your brush with diluted watercolor paint and start from one edge, gently sweeping across the surface. Keep the brush steady and maintain consistent pressure to avoid streaks or patchiness. If you need to reapply, do so before the previous layer dries to blend seamlessly. Practice on scrap eggs first to perfect your technique. Additionally, using a 3.5mm Jack or compatible headphones can help you listen to tutorials or music while working on your project. Below is a helpful guide:
| Step | Tip | Result |
|---|---|---|
| Prepare the wash | Mix water and paint thoroughly | Even, smooth color base |
| Use a flat brush | Keep the brush moist and even | Consistent coverage |
| Work quickly | Avoid overworking, keep a steady hand | Soft, uniform look |
| Reapply if needed | Layer while still damp | No streaks or uneven patches |
| Dry completely | Let eggs sit undisturbed | Perfectly smooth finish |
Metallic Sharpie Designs
Metallic Sharpie designs add a striking shine to your Easter eggs with their bright metallic colors. You can create elegant line art or detailed patterns that stand out beautifully. Using precise techniques, you’ll achieve a polished look that’s both simple and sophisticated. Incorporating these designs can also help you develop attention to detail, a skill valuable in many creative projects. To ensure your designs stay vibrant, consider using safe and non-toxic Sharpie markers specifically designed for crafts.
Bright Metallic Colors
Bright metallic colors can instantly make your Easter eggs stand out with a stunning, eye-catching shimmer. Using metallic Sharpies, you can create bold, vibrant designs that catch the light from every angle. Start by selecting bright gold, silver, or copper shades to add a festive touch. Draw geometric patterns, swirls, or doodles directly onto the eggs for a modern look. For more precision, use stencils or tape to create clean lines and shapes. Metallic colors pop against traditional dyed backgrounds, so consider combining techniques for a layered effect. Keep your strokes smooth and steady to maintain a polished finish. With just a few metallic Sharpies, you can transform plain eggs into dazzling art pieces perfect for your Easter celebration.
Elegant Line Art
To achieve a sophisticated look on your Easter eggs, try creating elegant line art with metallic Sharpies. Use smooth, continuous strokes to draw delicate patterns like swirls, floral motifs, or geometric shapes. The metallic finish adds a shiny, luxe touch that instantly elevates your design. To keep things simple yet stylish, consider mixing bold outlines with subtle accents for contrast.
| Tip | Example |
|---|---|
| Use thin tips for details | Fine lines for intricate patterns |
| Keep steady hand | Avoid smudges and uneven lines |
| Plan your design first | Sketch lightly with pencil before inking |
| Experiment with colors | Combine gold, silver, and copper |
| Practice on scrap eggs | Perfect your technique before finalizing |
Precise Detailing Techniques
When adding intricate details to your Easter eggs, using metallic Sharpies allows for sharp, clean lines that stand out beautifully. To achieve precise designs, steady your hand and plan your pattern carefully before drawing. Use fine-tipped Sharpies to create detailed images, geometric shapes, or delicate patterns. For added depth, layer different metallic shades or combine patterns for contrast. Consider practicing on scrap eggs or paper first to improve control. Keep a steady hand by resting your hand on a surface and drawing slowly. Metallic Sharpies provide a vibrant, shiny finish that elevates simple designs into stunning art.
- Practice with light sketches before finalizing your design
- Use masking tape for straight lines and sharp edges
- Incorporate small dots and fine lines for intricate details
Decoupage Eggs With Fabric or Paper
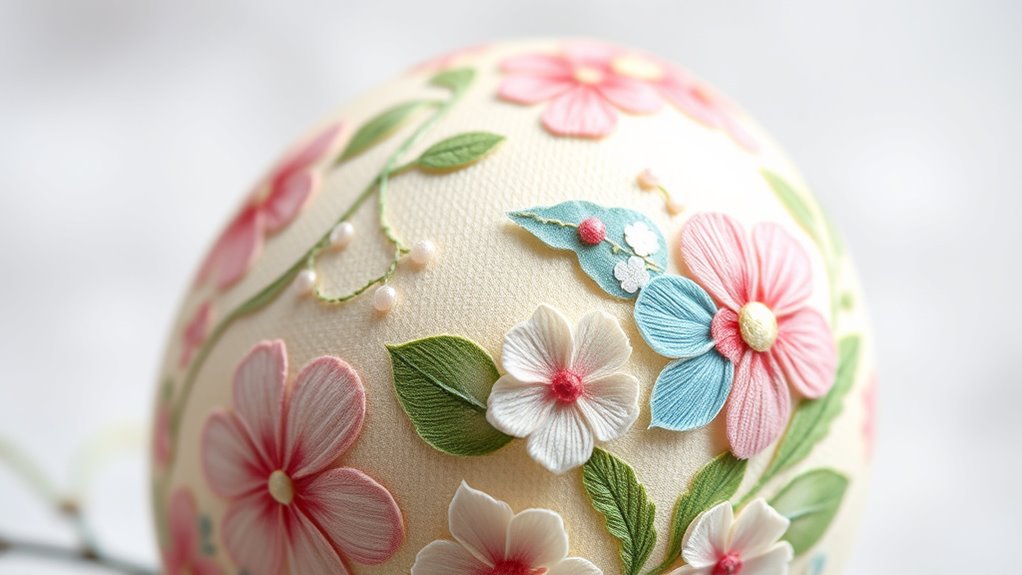
Decoupage eggs with fabric or paper is a simple and creative way to add texture and pattern to your Easter decorations. Begin by selecting lightweight fabric or decorative paper with fun patterns or bright colors. Cut your chosen material into small, manageable pieces or shapes that fit your egg’s surface. Apply a thin layer of decoupage glue or Mod Podge over the egg, then carefully place the fabric or paper pieces onto the glue. Smooth out any wrinkles or air bubbles with your fingers or a soft brush. Once all pieces are adhered, brush a layer of glue over the entire egg to seal everything in place. Allow it to dry thoroughly, and you’ll have uniquely textured, beautiful eggs perfect for your holiday display.
Stamped Egg Patterns With Rubber Stamps

Using rubber stamps to create patterns on Easter eggs is an easy and fun way to customize your decorations. First, choose rubber stamps with fun designs, like flowers or geometric shapes. Lightly carve or carve your eggs, then dip the stamp in a diluted dye or ink pad. Gently press it onto your egg’s surface to create consistent, crisp patterns. For best results, work on dry eggs and use a steady hand to avoid smudging. You can also experiment with different ink colors for a vibrant look or layer multiple stamps for complex designs. Consider these tips for more detailed outcomes:
- Use waterproof ink or dye to prevent smudging
- Practice on a spare egg before decorating your main ones
- Combine stamps for unique, layered patterns
Creative Tape and Sticker Designs
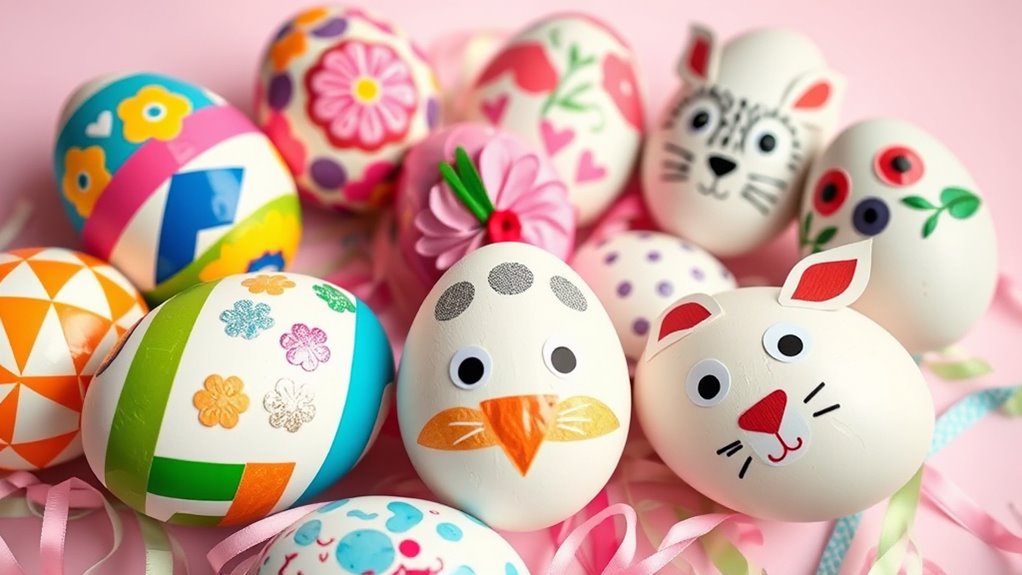
Creative tape and sticker designs offer an easy way to add vibrant, personalized touches to your Easter eggs. You can choose colorful washi tape to create stripes, zigzags, or geometric patterns that instantly brighten your eggs. Simply cut the tape into desired shapes or strips and stick them onto the eggshells, pressing down firmly to prevent peeling. Stickers are another fun option—select themed designs like bunnies, flowers, or eggs, and place them strategically for a playful look. For extra flair, layer different tapes or combine stickers with minimal paint accents. This method requires minimal skill and dries quickly, making it perfect for last-minute decorating or kids’ crafts. With creative tape and sticker designs, you can personalize your eggs effortlessly and showcase your unique style.
Chalkboard Eggs for Personalized Messages

Have you ever thought about turning your Easter eggs into mini chalkboards? This simple idea allows you to add personalized messages or fun doodles directly onto your eggs. To create chalkboard eggs, start by painting the shells with chalkboard paint and letting them dry completely. Once ready, use chalk or chalk markers to write messages, names, or designs. This technique is perfect for adding a personal touch to your Easter celebration. You can also:
- Write encouraging words or holiday greetings for guests
- Create a themed message, like “Happy Easter!”
- Design small illustrations or patterns for visual interest
These eggs become interactive and customizable, making your Easter décor more engaging and memorable. Plus, they’re easy to wipe clean and reuse for future celebrations.
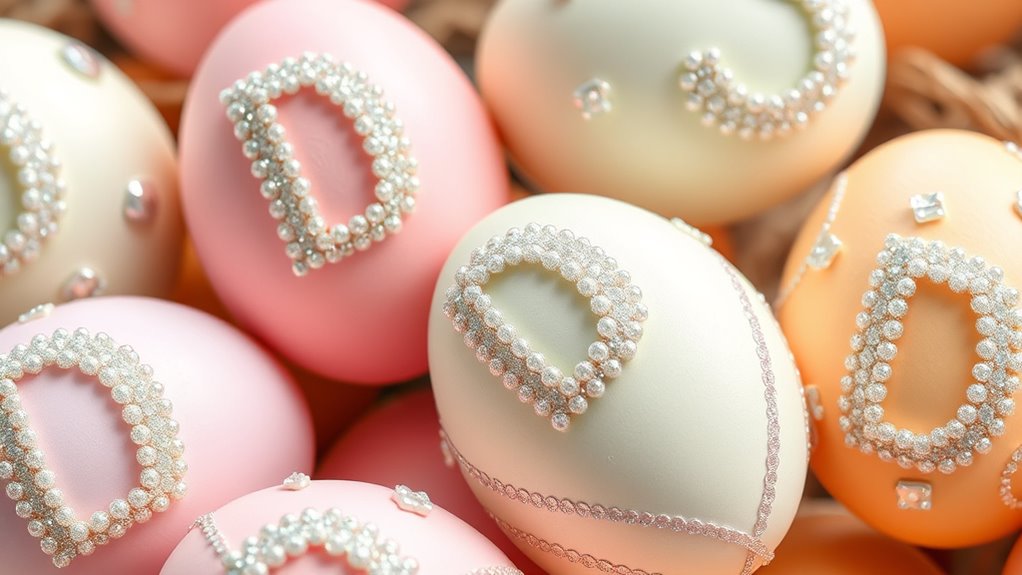
3D Embellished Eggs With Beads and Glitter
Choosing the right beads and glitter can transform your eggs into stunning decorations. Next, you’ll want to focus on applying them carefully to create eye-catching designs. With a bit of patience, your embellished eggs will shine beautifully this Easter.
Choosing Embellishments
Adding beads and glitter to your Easter eggs instantly elevates their appearance, giving them a festive and personalized touch. When choosing embellishments, consider the color scheme you want to achieve—metallic beads add elegance, while bright, colorful beads create a playful vibe. Think about the texture and size of the beads: tiny seed beads offer delicate detail, whereas larger ones make bold statements. Glitter options vary from fine, shimmer, to chunky, giving different visual effects depending on your preference. To guarantee a cohesive look, pick embellishments that complement your paint colors or theme. Keep in mind that less is often more; select a few key elements to avoid overwhelming your design. Carefully plan your embellishments for a balanced, eye-catching finish.
Applying Beads and Glitter
To apply beads and glitter effectively, start by securing a base layer of paint or adhesive where you want to add these embellishments. Use a glue that dries transparent to prevent any visible residue. Once the base is dry, sprinkle glitter over the adhesive, pressing it gently to ensure it sticks well. For beads, apply small dots of hot glue or craft glue in the desired pattern, then carefully place each bead onto the glue. Hold each bead briefly until it sets. To keep the design neat, work in small sections and use tweezers for precise placement. After everything dries, gently shake off any excess glitter or beads. Finish with a clear sealant spray to lock in your decorations and add a polished look.
Frequently Asked Questions
How Can I Make My Easter Eggs More Eco-Friendly?
You can make your Easter eggs more eco-friendly by choosing natural dyes from fruits, vegetables, and herbs like beet juice, spinach, or turmeric. Instead of plastic decorations, opt for biodegradable or reusable materials such as paper or fabric. Use non-toxic paints and avoid spray paints or glitter containing microplastics. Additionally, dye eggs using boiled onion skins or coffee grounds, which are sustainable and safe for the environment.
What Safety Tips Should I Follow When Using Dyes and Paints?
When using dyes and paints for decorating, you should prioritize safety. Always work in a well-ventilated area and wear gloves to protect your skin. Keep dyes and paints out of reach of children and pets, and avoid ingestion or contact with eyes. Follow the manufacturer’s instructions carefully, and clean up spills immediately. Using non-toxic, eco-friendly products can also reduce health risks and make your decorating safer and more environmentally friendly.
How Long Do Decorated Eggs Typically Last Before Spoiling?
Eggs exhibit excellent endurance, typically lasting about a week when refrigerated properly. You should store them in a sealed container to prevent spoilage and avoid leaving them out at room temperature for too long. If an egg develops an unpleasant odor or slimy surface, it’s time to toss it. Keep your decorated eggs fresh and fabulous by handling them hygienically and refrigerating promptly, ensuring they stay splendid throughout your celebration.
Can These Decorating Ideas Be Adapted for Kids of All Ages?
You can easily adapt Easter egg decorating ideas for kids of all ages. Younger children will enjoy simple designs like stamping or painting, while older kids can tackle more intricate patterns like dyeing or using stickers. You’ll want to supervise activities involving small items or sharp tools. By choosing age-appropriate methods, you guarantee everyone stays safe and has fun creating festive eggs together.
What Are Some Creative Ways to Reuse or Repurpose Decorated Eggs?
You can get creative by turning decorated eggs into charming ornaments for your home or garden. Hang them on trees or create a festive display inside by placing them in clear bowls or jars. Use eggs as unique gift tags or embellishments for gift wrapping. You might also transform them into mini planters or candle holders. Reusing decorated eggs adds a fun, sustainable touch to your holiday celebrations.
Conclusion
As you try these creative Easter egg ideas, remember that each one is like a blank canvas waiting for your unique touch. Just as a painter transforms a simple stroke into a masterpiece, your personalized decorations turn ordinary eggs into keepsake treasures. Embrace the process, enjoy the little imperfections, and let your imagination run wild. After all, the joy of crafting is in the journey—much like planting seeds that bloom into beautiful, memorable moments.