
To make your own Halloween paper garland with bats, cats, and ghosts, gather colorful construction paper, scissors, glue or tape, and string. Cut out fun silhouettes, adding details like wings, whiskers, or spooky eyes to bring your shapes to life. Punch holes at the top or attach shapes directly to the string, then hang your garland across your space for a festive touch. Keep exploring to discover tips that’ll make your decorations truly stand out.
Key Takeaways
- Cut out Halloween shapes like bats, cats, and ghosts from colorful construction paper with irregular edges for a spooky effect.
- Use small holes or glue to attach shapes to string or twine, spacing them evenly or clustering for visual interest.
- Incorporate additional elements like moons, spiders, or pumpkins for variety and enhanced Halloween ambiance.
- Hang the garland across doorways, mantels, or windows to create a festive, spooky atmosphere.
- Enhance the decorations with glitter, glow-in-the-dark accents, or personalized patterns for extra flair.

Looking for a simple way to add spooky charm to your Halloween decorations? Creating a DIY Halloween paper garland is an easy and affordable solution that instantly transforms your space into a haunted haven. Whether you’re decorating your front porch, hanging it inside your home, or sprucing up a party area, this craft adds a festive touch that’s both charming and spooky. Plus, it pairs perfectly with your favorite costume ideas and spooky recipes, making your Halloween festivities more cohesive and fun.
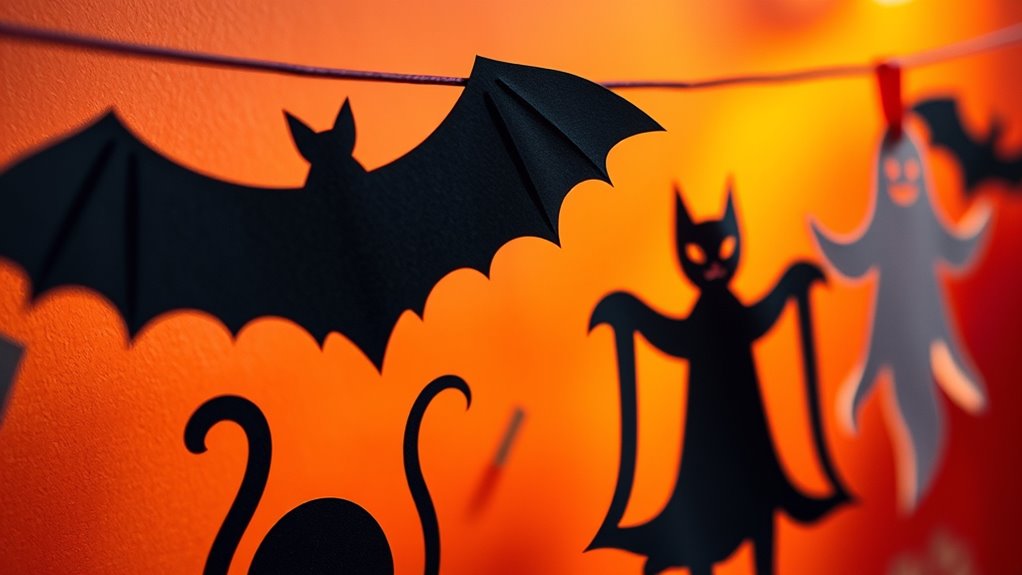
Start by gathering your supplies: colored construction paper, scissors, string or twine, and glue or tape. Bright oranges, blacks, purples, and whites work great to capture that classic Halloween vibe. Once you have everything, you can begin designing your shapes. Bat silhouettes with pointed wings, grinning black cats with arched backs, and floating ghosts with blank eyes are classic choices. If you want to go more creative, add in moons, spiders, or pumpkins. Cut out these shapes in various sizes to create visual interest, and don’t worry about perfection—irregular edges add to the spooky charm.
Gather supplies and cut spooky shapes in vibrant colors for a charming Halloween paper garland.
Stringing the garland is straightforward. Punch small holes at the top of each shape or use glue to attach them directly to the string. Space them out evenly for a balanced look, or cluster certain shapes for a more dynamic display. Hang your garland across doorways, along mantels, or around windows. It’s lightweight and easy to move if you want to change the layout later. As you work on this project, think about how it complements your overall Halloween theme, whether it’s creepy and eerie or cute and whimsical. Incorporating creativity techniques like divergent thinking can help you come up with even more unique and personalized decorations.
While making your garland, you can also experiment with spooky recipes and costume ideas to complete your decorations. For example, you might prepare spider-shaped cookies or a bubbling witch’s brew to serve alongside your festive setup. For costumes, consider simple DIY ideas like black cat ears, ghostly capes, or vampire fangs to match your paper decorations. The key is to keep everything cohesive, so your spooky, fun vibe shines throughout your space.
This craft doesn’t take long, and it’s a perfect activity to do with family or friends. Plus, it’s customizable—add glitter, use patterned paper, or incorporate glow-in-the-dark elements for an extra fright factor. As your paper garland sways gently, it’ll cast playful shadows and add to the spooky atmosphere you want for Halloween. With just a little time and effort, you’ll create a charming, spooky display that’s sure to impress everyone who visits.

CUUSNNY Halloween Garland Streamers,Purple Bat White Ghost Black & Orange Circle Dot Hanging Paper Banner Bunting for Halloween Party, Birthday, Fireplace, Indoor Home Decorations(3Pcs,33Ft)
Halloween Garland Set – Includes 3 handmade Halloween garlands with purple bats, white ghosts, black and orange circle…
As an affiliate, we earn on qualifying purchases.
As an affiliate, we earn on qualifying purchases.
Frequently Asked Questions
What Are the Best Paper Types for Durability?
For durability, you should choose thicker types of paper like cardstock or craft foam. These options withstand handling and hanging better than regular paper. To boost durability, use durability tips like applying a clear sealant or laminate coating. Avoid flimsy paper types such as tissue or newspaper, which tear easily. Opt for sturdy materials, and reinforce edges if needed, to make certain your Halloween garland stays intact and looks great throughout the season.
How Can I Make the Garland Reusable?
Coincidentally, you can make your garland reusable by laminating the paper or using a fabric backing, which adds durability and flexibility. Laminate each piece to guard against tearing and moisture, then string your decorations on a sturdy cord. Alternatively, sew or glue fabric backing onto the paper for a resilient, washable option. These methods guarantee your spooky decor stays intact and ready for next year’s celebration.
Are There Eco-Friendly Materials Suitable for This Project?
Yes, you can make your Halloween paper garland eco-friendly by using recycled materials like scrap paper or old newspapers. Biodegradable options, such as plant-based kraft paper or bamboo paper, are also great choices. These materials not only decrease waste but also guarantee your decorations break down naturally after use. Opting for these sustainable options helps you create festive decor while being kind to the environment.
How Do I Prevent the Paper From Tearing During Assembly?
To prevent tearing, use thicker paper and reinforce edges with clear tape or glue. The sturdier material provides durability, while reinforcing adds extra support, especially around delicate areas. Handle the paper gently during assembly, avoiding excessive force. This way, your garland stays intact and looks professional. Remember, combining stronger paper with reinforcement techniques helps your Halloween decorations stay spooky and sturdy throughout the season.
What Safety Tips Should I Follow When Using Scissors and Glue?
When using scissors and glue, always prioritize safe handling by keeping scissors sharp and using them carefully to avoid slips. Store scissors and glue out of children’s reach when not in use. Work on a stable surface to prevent accidents, and cut away from your body. Follow the manufacturer’s instructions for glue, and clean up spills promptly. Proper storage and cautious handling help guarantee a safe, fun crafting experience.

ASTARON 90 Sheets Halloween Pattern Paper Set A5 Size (5.5 x 8.2”) Decorative Paper for Card Making Craft Scrapbook decoration, 10 Styles
Halloween Decorative Paper Set: 10 unique designs. With popular Halloween elements, like pumpkin, bat, spider, dots, waves, stripes,…
As an affiliate, we earn on qualifying purchases.
As an affiliate, we earn on qualifying purchases.
Conclusion
Now that you’ve crafted your spooky paper garland, your Halloween decor is truly coming to life. Think of it as the cherry on top of your haunted house, adding charm and creepiness in equal measure. With just a few simple supplies and your creative spirit, you’ve turned paper into a festive masterpiece. Hang it up and let your handmade decorations cast a spell of Halloween fun that’ll delight guests and set the perfect spooky scene!

FFZZKJ Halloween Lights String Garland Creepy Black Cloth Timer 8 Modes Battery Operated/USB Powered Indoor Outdoor 9.9FT 30LED Black Gauze Hanging Halloween Decorations, Orange&Purple
【Halloween Decorations Lights String】Our Halloween lights string is made of an orange purple lights string and a black…
As an affiliate, we earn on qualifying purchases.
As an affiliate, we earn on qualifying purchases.

Halloween Party Favors – DIY Crafts Stickers – Halloween Decorations Gifts Activities Party Supplies(24 Sheets)
Halloween Decorations: Halloween party favors, halloween party decorations, halloween stickers, halloween party supplies, halloween goodie bags, halloween gifts,…
As an affiliate, we earn on qualifying purchases.
As an affiliate, we earn on qualifying purchases.