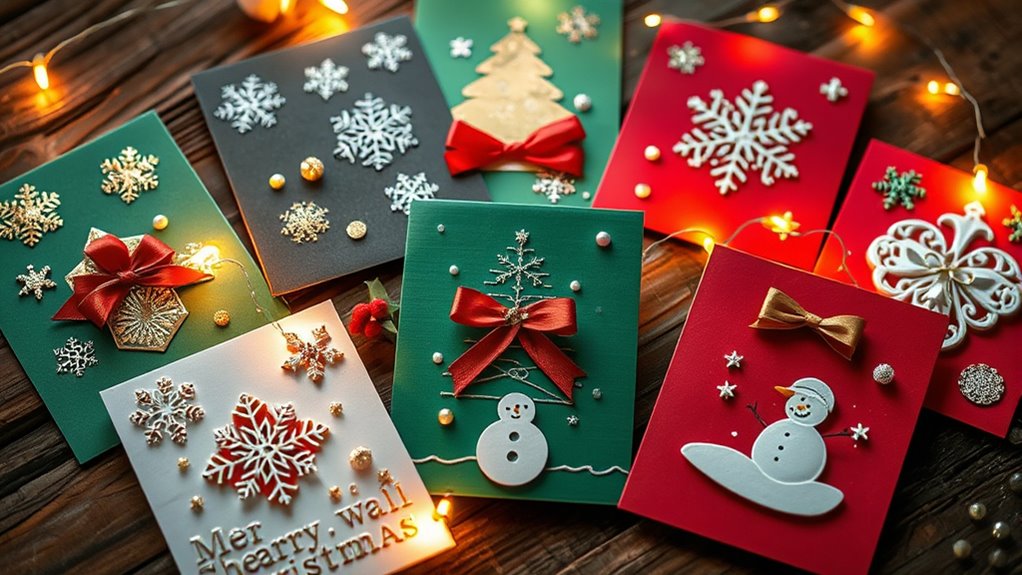

Discover 10 fun DIY handmade Christmas card ideas to add a personal touch to your holiday season. You can create pop-up cards with folded shapes, paint delicate watercolor snowflakes, or craft collages with festive paper scraps. Enhance your designs with glittery trees, embossed wreaths, and ribbon bows. For a stylish look, try minimalist black and gold cards or rustic kraft paper with stamps. Keep exploring for inspired techniques to make your cards truly special.
Key Takeaways
- Create pop-up cards with cutouts of Christmas trees, Santa, or ornaments using cardstock, scissors, and glue for easy homemade designs.
- Use embossed patterns like wreaths or textured stamped images to add dimension and elegance to your holiday cards.
- Incorporate glitter, metallic accents, and layered embellishments to make your cards sparkle and stand out.
- Use watercolor painting or paper collage techniques to craft unique, artistic holiday scenes and characters.
- Personalize cards with ribbon bows, kraft paper backgrounds, or minimalist black and gold themes for a stylish, handcrafted finish.
Festive Pop-Up Christmas Cards

Festive pop-up Christmas cards instantly add a wow factor to your holiday greetings and are surprisingly easy to make at home. You can create these vibrant, three-dimensional cards with just a few simple materials like cardstock, scissors, and glue. Start by folding your cardstock in half to form the card base. Cut out shapes such as Christmas trees, Santa, or ornaments from additional colored paper. Attach these cutouts inside the card with small folded tabs or tabs glued to the back, so they pop up when opened. Use bright colors and fun embellishments like glitter or stickers to enhance the festive look. With a little creativity, your handmade pop-up cards will impress friends and family, spreading holiday cheer in a unique and personal way.
Hand-Painted Watercolor Snowflakes
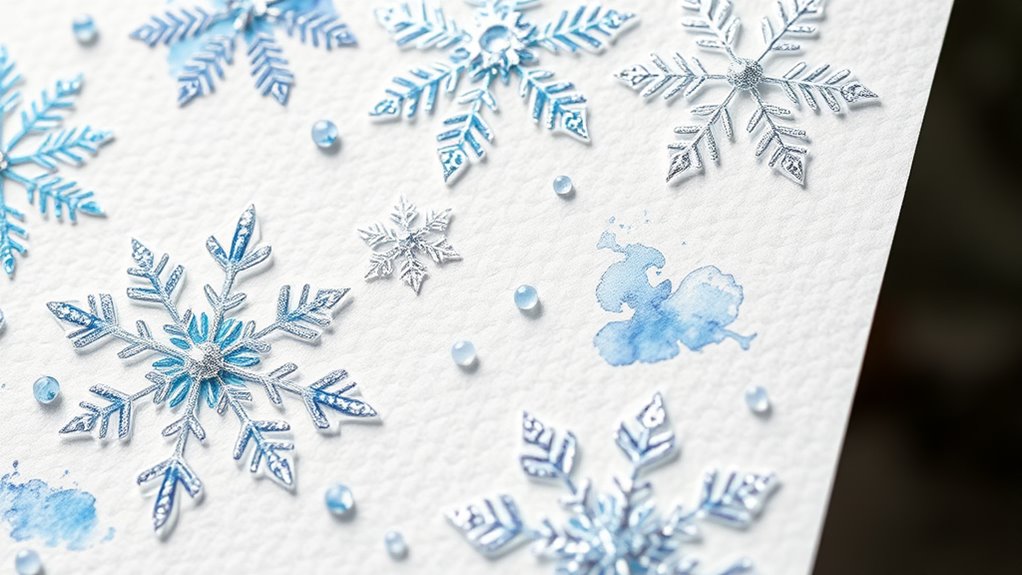
After adding lively pop-up elements to your holiday cards, why not create a serene winter scene with hand-painted watercolor snowflakes? Start by lightly wetting your watercolor paper with clean water. Then, choose cool shades like icy blues, soft purples, and gentle grays. Use a fine brush to paint delicate snowflake shapes, allowing the colors to blend naturally for a frosty effect. You can create variety by varying the size and complexity of each snowflake. Let the paint dry completely. For an added touch, sprinkle some glitter or use metallic pens to highlight the intricate patterns. This method produces a peaceful, elegant look that captures the quiet beauty of winter. Establishing a bedtime routine can also help children feel more secure and promote better sleep habits. Your personalized snowflake watercolor cards will surely evoke warm holiday feelings.
Reindeer and Santa Paper Collage
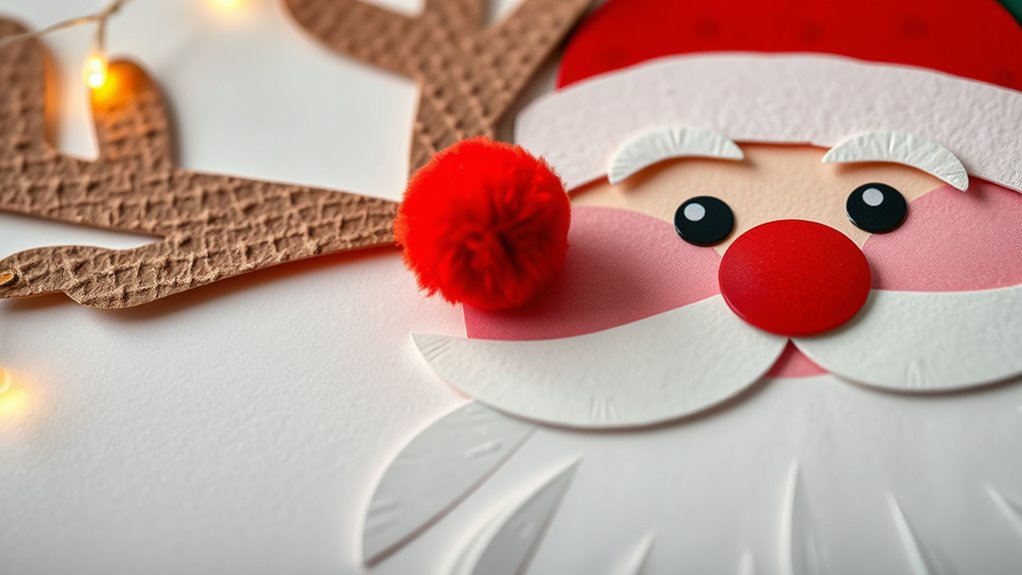
Have you ever considered creating a charming reindeer and Santa paper collage to add a whimsical touch to your holiday cards? To make it, gather colorful paper scraps, magazine cutouts, or patterned craft paper. Start by sketching simple outlines of Santa and reindeer on sturdy paper or cardstock. Cut out the shapes carefully, then layer and glue the pieces to add depth and detail. Use small paper pieces for facial features, antlers, and hats. You can enhance the collage by adding tiny embellishments like buttons or glitter for extra sparkle. This project is fun and allows you to customize your characters with your favorite colors and patterns. Incorporating collage techniques can elevate your design and make your cards even more unique. Utilizing recycled materials in your collage can also make your craft more environmentally friendly and sustainable. Additionally, experimenting with different adhesive types can help you achieve the desired texture and durability for your collage. Understanding color accuracy can help you select the best paper and embellishments to ensure your characters look vibrant and true to life. Moreover, choosing the right adhesive ensures that your collage stays intact over time. The finished collage will look delightful and personal, making your Christmas cards stand out with a handcrafted charm.
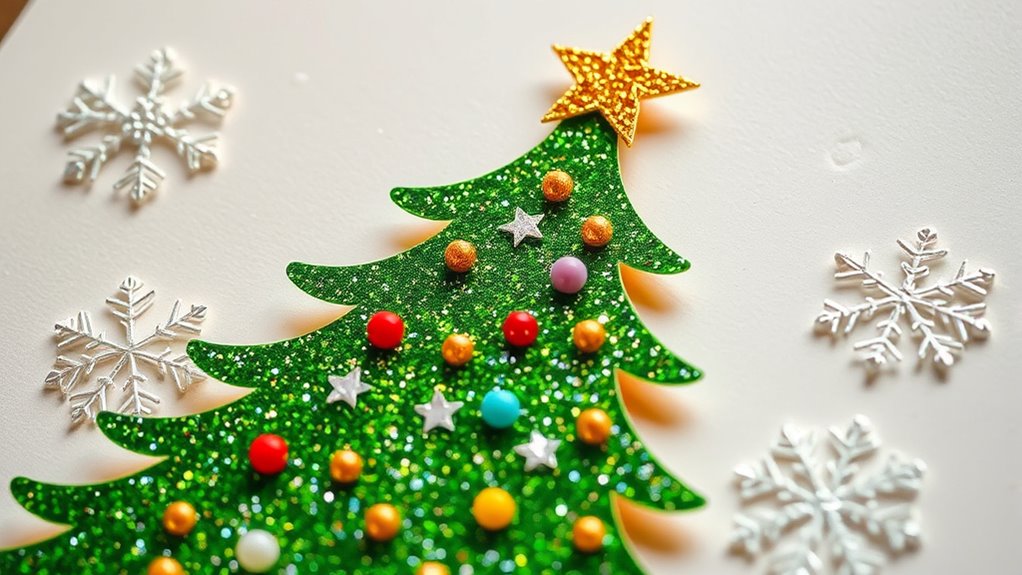
Sparkly Glitter Christmas Trees
To make your glittery Christmas trees truly stand out, start with tips for applying glitter smoothly and evenly. You can experiment with different tree shapes and layering techniques to add dimension. Choosing the right colors and embellishments will make your designs sparkle even more on your handmade cards. Incorporating protective styling benefits, such as using a sealant or setting spray, can help your glitter stay in place longer. Additionally, incorporating specialty tea elements, such as using tea-inspired colors or textures, can also inspire unique color palettes and textures to enhance your craft. Practicing stillness during the creative process can improve your focus and attention to detail, resulting in more polished designs. Selecting a dog breed name as inspiration for your color scheme can add a fun personal touch to your designs.
Glitter Application Tips
Applying glitter to your Christmas tree shapes can be simple and fun if you follow a few key tips. First, use a good adhesive, like craft glue or double-sided tape, to make sure the glitter sticks well. Apply a thin, even layer to prevent clumping or messy overflow. For precise edges, consider using a small brush or a glue applicator. To avoid excess glitter falling off, gently press the glitter onto the glue and then shake off the excess over a scrap paper. To keep your workspace tidy, work over a tray or newspaper. Additionally, choosing high-quality glitter can prevent glitter shedding and ensure a more professional finish. Using proper storage methods can also help keep your glitter in good condition for future crafts. Being aware of small mistakes can help you avoid common crafting pitfalls and achieve a more polished look. Incorporating sustainable materials into your craft supplies can also make your holiday projects more eco-friendly. Furthermore, selecting environmentally friendly glitters can contribute to a more eco-conscious craft project. With these tips, your sparkly Christmas trees will look polished and festive.
Tree Design Ideas
Sparkly glitter Christmas trees instantly add festive charm to your handmade cards, and there are many creative ways to design them. You can cut out tree shapes from green cardstock and coat them with glue before sprinkling on glitter for a sparkling effect. Alternatively, create a textured look by applying glue in zigzag or swirl patterns and then adding glitter. For a more layered approach, stack small paper triangles in varying shades of green to form a tree, then dust with glitter for extra sparkle. You might also draw a simple tree outline and fill it in with glitter glue, allowing you to customize the design easily. Using metallic or holographic glitter can give your trees a more glamorous and eye-catching finish, perfect for holiday cards. Incorporating rustic decor elements like twine or burlap accents can enhance the farmhouse charm of your handmade Christmas cards.
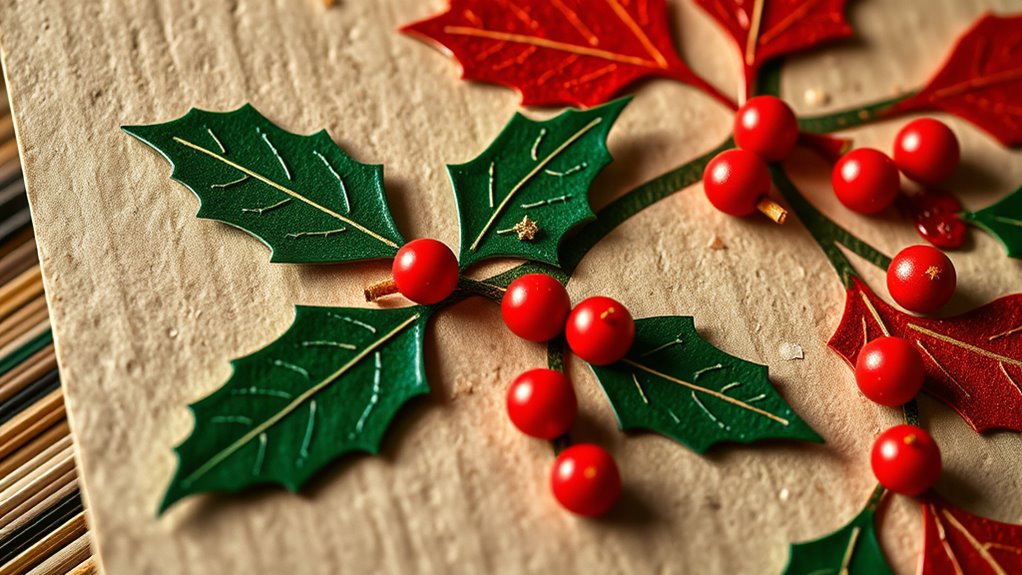
Wreath Embossed Card Designs
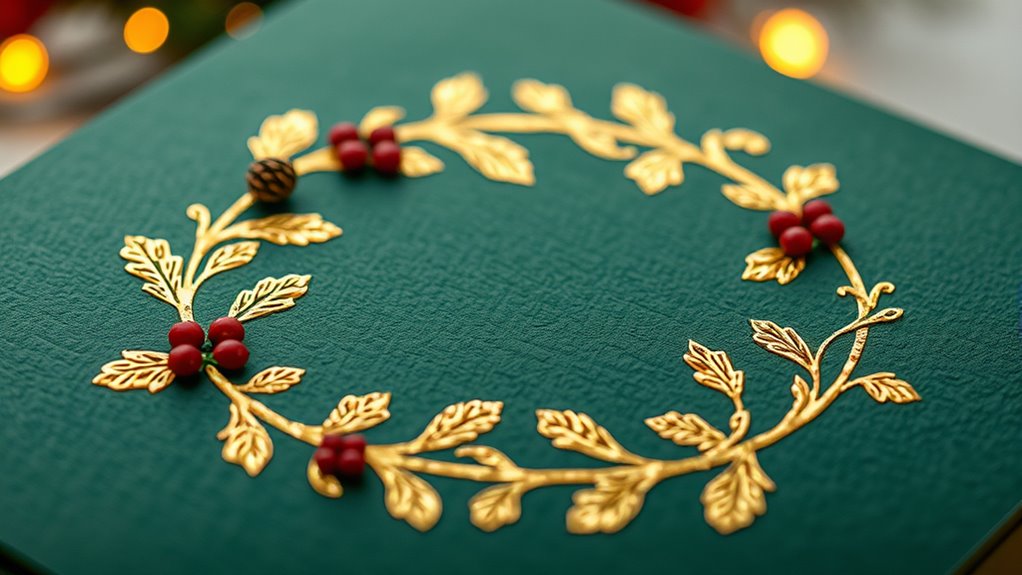
Creating wreath embossed card designs adds a touch of elegance and texture to your handmade Christmas cards. To achieve this, start by choosing a sturdy cardstock and using an embossing folder with a wreath pattern. You can also create a custom wreath by stamping or drawing, then embossing or adding embossed details for dimension. Incorporate metallic or glitter accents to make the wreath pop. For extra flair, add small embellishments like berries, bows, or tiny ornaments. Here are some ideas to inspire your design:
- Embossed wreath with gold or silver foil accents
- Wreath stamped and embossed with textured ink
- Layered wreaths with added 3D embellishments
- Minimalist embossed wreath with a simple sentiment
These techniques help you craft sophisticated and festive wreath cards that stand out.
Felt Snowman and Winter Scene
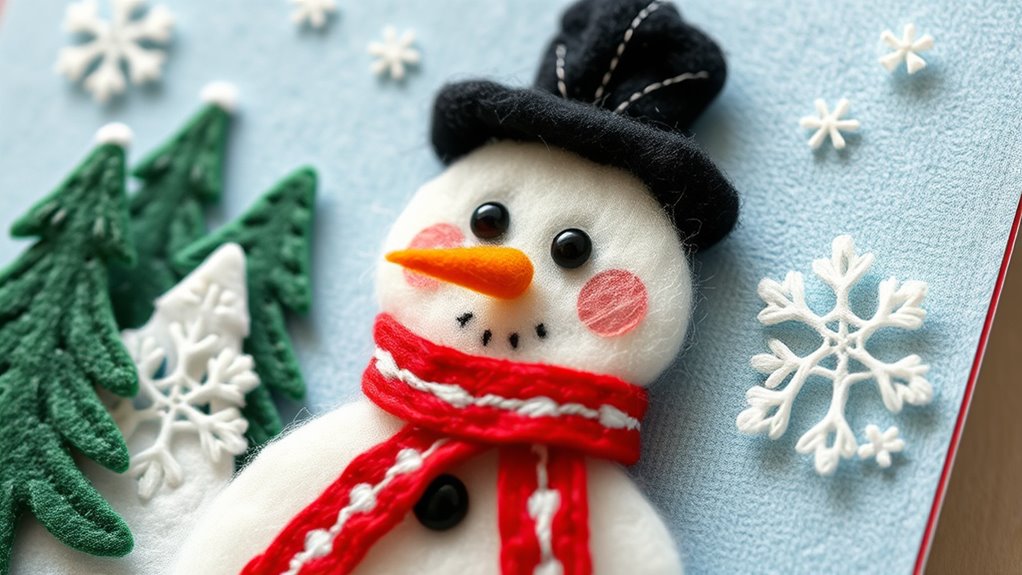
Have you considered adding a cozy, tactile element to your Christmas cards? A felt snowman and winter scene bring warmth and texture that truly stand out. Use soft felt to craft snowmen with buttons, scarves, and carrot noses, then arrange them on a winter background with snowflakes and trees. Cut out shapes precisely and layer them for dimension. To elevate your design, incorporate small details like glitter snow or stitched edges. This tactile approach makes your card memorable, inviting recipients to touch and appreciate your craftsmanship. Incorporating textile techniques can further personalize your holiday greetings, and understanding branding strategies can help you create a signature style that resonates with your audience. Additionally, adding interactive elements like pop-ups or movable parts can enhance the tactile experience and make your cards even more special.
Christmas Card With Ribbon and Bow Accents

Adding ribbons and bows to your Christmas cards instantly elevates their festive charm. You can create stunning designs by carefully choosing ribbon colors that match your theme, like classic reds and greens or metallic golds. Use bows as focal points—attach them to the corners, centers, or even as tree toppers on your card. Incorporate different ribbon textures, such as satin for elegance or burlap for a rustic touch. Layer ribbons to add dimension and interest. Here are some ideas to inspire you:
Adding ribbons and bows transforms your Christmas cards into festive masterpieces.
- Tie a large bow in the center for a focal point
- Wrap ribbon around the card as a border
- Create a bow cluster for a 3D effect
- Use ribbon to simulate gift wrapping or ornaments
Get creative and have fun with ribbon accents!
Rustic Kraft Paper Cards With Stamps
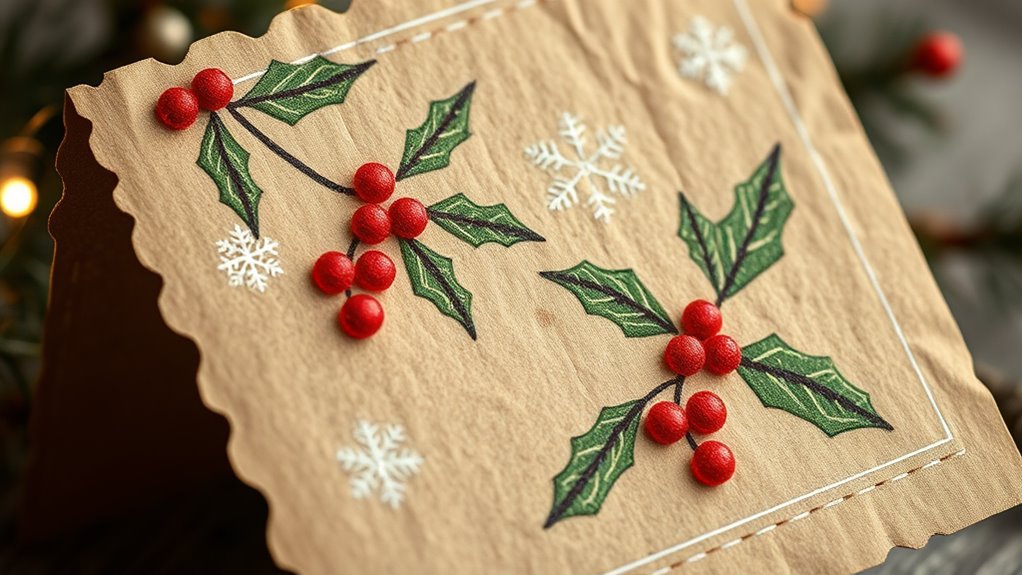
Rustic kraft paper cards with stamps offer a charming and versatile way to craft holiday greetings that feel warm and personal. You can easily create a cozy, handmade look by choosing kraft paper as your base, which adds natural texture and earthy appeal. Use holiday-themed rubber stamps, such as snowflakes, reindeer, or Christmas trees, to decorate your cards. Ink the stamps with vibrant or vintage-inspired colors to make your designs stand out. Keep your layouts simple for a rustic vibe or add handwritten touches for extra personality. These cards are perfect for those who love a handcrafted feel and want to keep their holiday mailing authentic and heartfelt. With just a few supplies, you can make beautiful, personalized Christmas cards that truly reflect your festive spirit.
Minimalist Black and Gold Holiday Cards
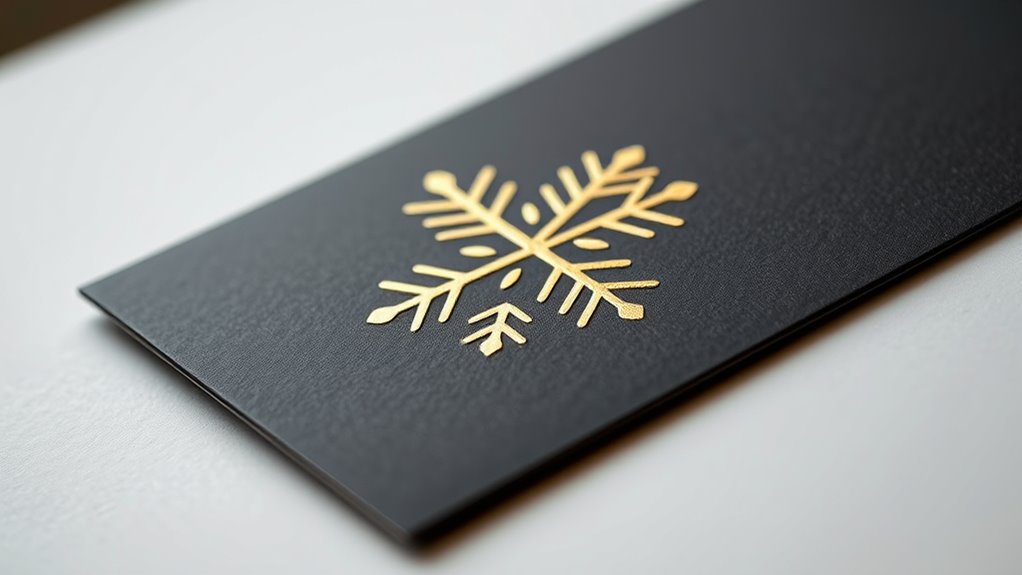
Switching from the cozy charm of kraft paper to sleek, modern designs can give your holiday cards a fresh and sophisticated look. Minimalist black and gold cards are perfect for creating an elegant, understated vibe. Use thick black cardstock as your base for a bold background. Add gold foil accents or stamped details to make your design pop. Keep your message simple with clean, modern fonts or handwritten calligraphy. Incorporate subtle design elements like geometric shapes or delicate stars for visual interest without clutter. Here are some ideas to inspire you:
- Gold foil holiday greetings on black backgrounds
- Simple black line drawings of trees or ornaments
- Gold embossed borders or accents
- Minimalist typography with a festive message
These ideas help you craft chic, stylish cards that stand out effortlessly.
Reusable Stencil Christmas Greetings
Choosing the right stencil material is key to creating clean, reusable designs that last. You can experiment with different textures and thicknesses to find what works best for your style. Once you have your stencil, try various design techniques like layering or masking to make your holiday greetings stand out.
Stencil Material Selection
Selecting the right material for your reusable stencil is essential to creating clean, professional-looking Christmas greetings. You want a material that’s durable, flexible, and easy to cut. Consider options like:
- Mylar sheets for their sturdiness and flexibility
- Plastic acetate for affordability and ease of use
- Template plastic for a lightweight, reusable option
- Metal sheets if you need maximum durability
Each material has its benefits: Mylar is popular for its longevity, while acetate is great for detailed designs. Metal sheets offer strength but can be harder to cut. Choose based on your comfort level with tools and the complexity of your design. The right material guarantees your stencil lasts through multiple uses and produces crisp, clear greetings every time.
Creative Design Techniques
Creative design techniques can elevate your reusable stencil Christmas greetings from simple to stunning. To achieve this, experiment with layering colors for depth and vibrancy. Use different textures, such as adding glitter or embossing powders, to make your design pop. Incorporate complementary inks or paints to create gradients or shading that add dimension. Play with negative space by masking parts of your stencil for unique patterns. Combining multiple stencils can produce intricate, layered scenes that captivate recipients. Don’t be afraid to mix mediums—watercolors, metallics, or acrylics—to enrich your cards. Remember, slight imperfections can add charm, so embrace spontaneity. With these techniques, your Christmas cards become personalized works of art, making your holiday greetings truly special.
Frequently Asked Questions
What Are the Best Types of Paper for Handmade Christmas Cards?
When choosing paper for your handmade Christmas cards, you want something sturdy and attractive. Cardstock is ideal because it’s thick enough to hold embellishments and stands up well. You might also consider textured or metallic papers for added elegance. Avoid flimsy paper, as it can tear easily. Ultimately, pick colors and finishes that match your design theme, making your cards both durable and beautiful for the holiday season.
How Can I Personalize My DIY Christmas Cards?
You can personalize your Christmas cards by adding heartfelt messages, customizing designs with photos or drawings, and using unique embellishments like ribbons, stickers, or stamps. Consider including the recipient’s name or a personal note to make each card special. You can also experiment with different color schemes or themes that reflect their personality or shared memories. These personal touches make your cards stand out and show genuine thoughtfulness.
Which Tools Are Essential for Card-Making at Home?
Did you know 85% of crafters say basic tools boost their creativity? For card-making at home, you’ll want scissors, glue, and a ruler for precise cuts. A craft knife comes in handy for detailed designs, while markers and stamps add personal touches. Don’t forget a cutting mat to protect your surface. With these essentials, you can craft beautiful, personalized Christmas cards easily and confidently.
How Long Does It Take to Complete a Handmade Christmas Card?
The time it takes to complete a handmade Christmas card varies depending on your design and skill level. On average, you might spend 30 minutes to an hour per card, especially if you’re adding intricate details or personalized touches. If you’re experienced, you could finish faster. Keep in mind, more detailed or elaborate designs will naturally take longer, so plan accordingly to enjoy the process without feeling rushed.
What Eco-Friendly Materials Can I Use for Christmas Cards?
When considering eco-friendly materials for your Christmas cards, you can choose recycled paper or cardstock, which reduces waste and conserves resources. You might also use plant-based dyes or natural elements like pressed leaves and flowers to add a personal touch. Incorporating materials like bamboo paper or seed paper allows recipients to plant the card afterward. These options help you create beautiful, sustainable cards that are gentle on the environment.
Conclusion
Now, imagine your handmade Christmas cards bursting with vibrant colors, shimmering glitter, and heartfelt touches. Picture your loved ones opening each card to find cozy wreaths, cheerful reindeer, and delicate watercolor snowflakes that warm their hearts. With just a few simple supplies, you can create festive keepsakes that sparkle like holiday lights. Embrace your creativity, and let these ideas turn your heartfelt wishes into beautiful, memorable works of art this holiday season.