
To make your own trick-or-treat tote bag, start by gathering sturdy fabrics like canvas or denim and the basic sewing supplies. Choose fun Halloween-inspired patterns or decorations that match your costume, then cut and assemble the fabric into your desired bag shape, sewing the sides and handles securely. Add spooky embellishments using fabric paints, patches, or appliqué to make it festive. Keep experimenting with designs—if you continue exploring, you’ll discover even more creative ideas for a truly unique bag.
Key Takeaways
- Choose durable fabrics like canvas or denim and cut pattern pieces carefully with sharp tools for a sturdy tote.
- Personalize your bag with Halloween motifs using fabric paints, appliqué, or embellishments for a festive look.
- Sew the bag’s sides, bottom, and handles securely, hemming the top edge for durability and a polished finish.
- Add themed decorations such as ghosts, bats, or mini pumpkins, ensuring they are safely attached and weather-resistant.
- Incorporate safety features like reflective elements and keep essentials like flashlights inside for a fun and secure trick-or-treat experience.
Gathering Your Supplies and Tools

Before you start creating your trick-or-treat tote bag, it’s important to gather all the necessary supplies and tools. Begin by selecting your crafting patterns, which will guide your bag’s shape and design. These patterns help guarantee your project turns out just right, so choose one that matches your style or the theme you want. Next, focus on choosing fabrics—pick sturdy, durable materials like canvas, denim, or sturdy cotton that can handle frequent use and carrying candies. Gather scissors, pins, a sewing machine or needle and thread, and chalk or fabric markers for tracing. Having your supplies organized upfront makes the process smoother, saves time, and helps you stay focused on creating a fun, personalized tote that’s perfect for Halloween adventures. Additionally, understanding the importance of material durability ensures your tote can withstand the wear and tear of a busy trick-or-treat night. Incorporating proper construction techniques can further enhance the strength and longevity of your tote. To further enhance your tote, consider using quality storage materials that can prolong its lifespan and keep it looking great after multiple uses. Employing reinforced stitching can also contribute significantly to the tote’s durability during active use. Using lightweight yet sturdy electric bike materials can help ensure your tote remains comfortable to carry, especially if it’s decorated with heavier embellishments.
Designing Your Halloween Tote

Start by personalizing your tote with spooky motifs that match your style, then pick vibrant Halloween colors to make it pop. Add fun, themed embellishments to give your bag a unique and festive look. These choices will help your tote stand out while reflecting your Halloween spirit. Incorporating sound effects into your project can add an extra layer of excitement and engagement. Using seasonal decorations can also enhance the festive appearance of your tote and make it truly special. Additionally, selecting the right USB cable type can ensure your electronic decorations work smoothly throughout the holiday. An understanding of market trends can help you choose popular themes and materials for your design, especially considering the low light office plants that can add a charming touch to your Halloween display.
Personalize With Spooky Motifs
Adding spooky motifs is a fun way to make your Halloween tote truly unique. You can draw inspiration from Halloween history, which often features ghosts, bats, and witches, to create a themed design. Incorporate imagery that reflects classic Halloween symbols to enhance the spooky vibe. While personalizing, keep trick or treat safety in mind—avoid cluttered or obstructive decorations that could cause hazards for others or yourself. Use fabric paints, iron-on patches, or appliqué to add motifs that stand out. This not only makes your tote eye-catching but also showcases your creativity. Remember, the goal is to make a fun, festive bag that’s safe for trick or treaters and fun to carry all night long.
Choose Vibrant Halloween Colors
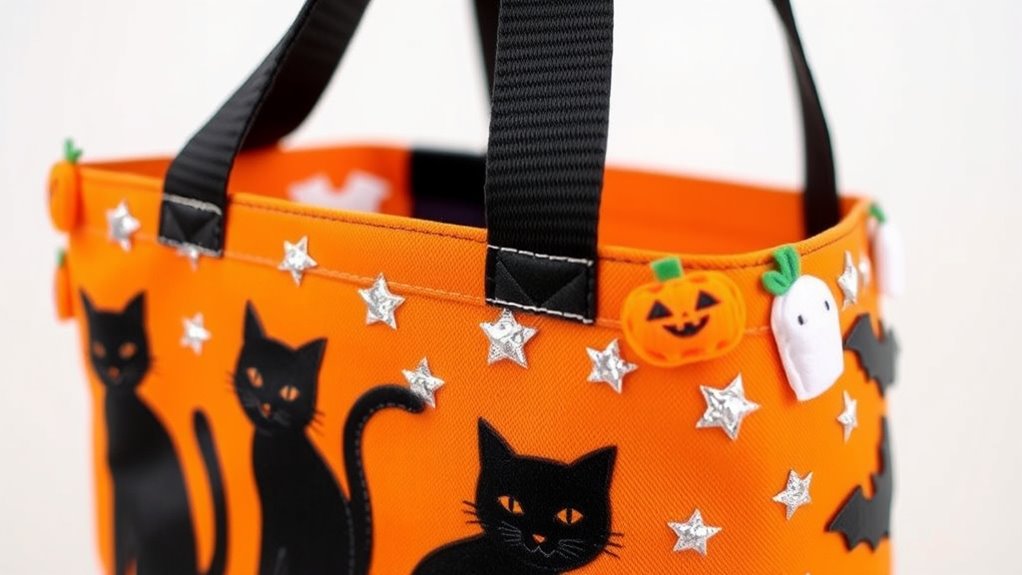
Choosing vibrant colors is a great way to make your Halloween tote stand out and capture the festive spirit. Bright oranges, deep purples, vivid greens, and striking blacks can instantly energize your design. To create a lively look, consider these options:
- Use a bold orange background with pumpkin patterns to evoke classic Halloween imagery.
- Incorporate ghost motifs in white or pale hues for a spooky, yet playful vibe.
- Mix contrasting colors like purple and green to add visual interest.
- Highlight details with metallic or glitter accents to make your tote pop.
Add Fun, Themed Embellishments
Ever wonder how to make your Halloween tote truly stand out? Adding fun, themed embellishments transforms a plain bag into a festive statement piece. Think about attaching costume accessories like mini hats, glittery bats, or spooky charms for instant character. You can also incorporate seasonal scents with scented stickers or sachets to evoke pumpkin, cinnamon, or apple aromas that enhance the Halloween experience. To organize your ideas, consider this table:
| Embellishment Type | Example Ideas |
|---|---|
| Costume Accessories | Mini hats, masks, spooky charms |
| Seasonal Scents | Pumpkin spice sachets, cinnamon stickers |
| Fabric Paints | Glow-in-the-dark designs |
| Appliqué Patches | Halloween-themed shapes |
| Embroidered Patches | Ghosts, pumpkins, bats |
These touches make your tote uniquely yours and irresistibly festive.
Preparing and Cutting Fabric or Materials

Before you start cutting, make sure your fabric is clean, smooth, and free of wrinkles. Use sharp scissors or a rotary cutter to get clean, accurate edges. Precise measurements and steady cuts will guarantee your tote bag turns out perfect. Additionally, choosing a well-draining material can help ensure your tote holds up well during use. Incorporating fabrics with exfoliating properties can also be beneficial if you want a tote that resists dirt and stains more effectively. Remember, selecting the right fabric can also reflect your creativity and personality, making your tote truly unique. Considering the popularity of pinball machines can inspire creative themes or embellishments for your tote design. Using crochet techniques for decorative accents can add a personalized touch to your design.
Preparing Fabric for Tote Bag
To prepare your fabric for making the tote bag, start by washing and drying it to remove any sizing or residues that could affect the final product. Once clean, consider these steps for ideal results:
- Check fabric textures to ensure they suit your tote design, opting for sturdy materials like canvas or denim.
- Iron the fabric to eliminate wrinkles, making cutting and sewing easier.
- Select appropriate sewing techniques based on fabric texture—for example, reinforced stitches for thick fabrics.
- Fold and pin the fabric to keep it aligned, preventing slipping during sewing.
Proper preparation helps your tote bag hold its shape and last longer. Being mindful of fabric textures and sewing techniques now will give you a professional finish later.
Cutting Materials Precisely
When cutting your fabric, precision is key to ensuring your tote bag comes together smoothly and looks professional. Start by choosing the right fabric selection—sturdy cotton or canvas work well for durability. Before cutting, carefully align your pattern pieces, paying close attention to pattern alignment, especially if your fabric has a directional print or design. Use sharp scissors or a rotary cutter for clean, accurate cuts. Always pin or weight your pattern pieces securely to prevent shifting. Measure and mark cutting lines clearly with fabric chalk or a washable pen, ensuring your measurements are precise. Take your time, double-check your pattern placement, and cut slowly to avoid mistakes. Proper cutting sets a strong foundation for a neat, well-constructed tote bag.
Assembling and Sewing Your Tote Bag

Once you’ve gathered all your fabric pieces, it’s time to start assembling and sewing your tote bag. Follow these steps to make sure a sturdy, fun bag perfect for Halloween costumes and trick-or-treat safety:
- Pin the side and bottom pieces to the main fabric, aligning edges carefully.
- Sew along the edges with a straight stitch, leaving the top open.
- Fold and sew the handles in half lengthwise, then attach them securely to the bag’s opening.
- Finish by hemming the top edge for a clean look and added durability.
Adding Spooky Decorations and Details

Are you ready to give your trick-or-treat tote a truly spooky transformation? Adding decorations and details is the perfect way to make your bag stand out. Use fabric paints or adhesive embellishments to create creepy eyes, ghostly faces, or cobwebs. Attach small plastic spiders or felt bats for extra flair. Consider incorporating festive snack ideas, like mini pumpkins or candy corn, as decorative accents. These little touches add a fun, edible element to your bag’s theme. For costume inspiration, think about matching your tote’s decorations to your outfit—like witches, zombies, or vampires. Applying skincare patches as a fun, themed embellishment can add an unexpected, spooky twist to your design. Interestingly, incorporating smart toilet features such as automatic cleaning and hygienic bidet functions can inspire creative, high-tech elements in your Halloween decor. Additionally, understanding AI technology can help you craft interactive or digitally augmented decorations that wow your trick-or-treaters. Incorporating specialty coatings can also help your decorations stay vibrant and weather-resistant throughout the night. With a few simple supplies, you can craft a spooky, eye-catching tote that’s as creative as your costume. The key is to have fun and let your imagination run wild! Additionally, you might want to consider entertainment and parks hours when planning your Halloween activities to ensure a smooth and enjoyable experience.
Final Touches and Tips for Use
To guarantee your trick-or-treat tote stays in great shape throughout the night, double-check that all decorations are securely attached. This helps prevent losing items and keeps your bag looking spooky. When preparing for trick or treat safety, consider these final tips:
- Ensure your costume and tote are visible and reflective for safe trick or treat safety.
- Keep essential items, like a flashlight or glow sticks, handy inside your bag.
- Coordinate your costume with your tote’s theme for a cohesive look.
- Regularly check your surroundings and watch out for traffic while collecting treats.
- Incorporate mindfulness practices to stay alert and prevent accidents during your Halloween adventures.
These steps promote safety and fun, making your Halloween experience smooth and memorable. Properly prepared, you’ll enjoy a safe night of trick or treat adventures while showing off your creative tote.
Frequently Asked Questions
Can I Customize the Tote for Different Age Groups?
You can definitely customize the tote for different age groups by choosing age-appropriate designs and personalization options. For younger kids, opt for fun, colorful characters or cute themes. For older children or teens, select more sophisticated or trendy designs. Using personalization options like names or initials makes each tote unique. Tailoring the design to the age guarantees your trick-or-treat bag is both functional and perfect for the recipient’s style.
What Safety Tips Should I Consider When Sewing?
When sewing, prioritize safety by selecting appropriate fabric that’s safe and non-toxic, especially for kids. Always use sharp tools carefully and keep them away from children. Make sure your workspace is well-lit, and avoid distractions to prevent accidents. Follow sewing safety guidelines, such as unplugging machines when not in use and keeping scissors and needles organized. These steps help protect you and ensure your tote is safe and fun to use.
Are There Eco-Friendly Material Options for the Tote?
You can choose eco-friendly materials like recycled fabrics or organic textiles for your tote bag. Recycled fabrics help reduce waste and give new life to old materials, while organic textiles are grown without harmful chemicals, making them safer for the environment. Both options are sustainable choices that allow you to create a stylish, eco-conscious tote bag. By selecting these materials, you support eco-friendly practices and reduce your environmental footprint.
How Can I Make the Tote Waterproof or Weather-Resistant?
Imagine your tote as a brave knight facing stormy weather. To make it waterproof or weather-resistant, you can use waterproof fabrics like nylon or treated canvas. Apply weatherproof coatings or sealants to the surface for extra protection. These coatings act like an invisible shield, repelling water and keeping your treats dry. With the right materials and sealants, your tote will brave any weather, ensuring your Halloween haul stays safe and dry.
What Are Some Beginner-Friendly Design Ideas for Kids?
You can create beginner-friendly designs by choosing fun fabric patterns like polka dots or animal prints. Use simple embellishment techniques such as appliqué or sewing on felt shapes to add personality. Keep the design easy with bold colors and basic shapes, making it fun for kids to customize. These ideas help you craft a cute tote that’s simple to make and perfect for little hands.
Conclusion
Now that you’ve crafted your own trick-or-treat tote, you’re all set for a fun and festive Halloween! Did you know that the average trick-or-treater collects over 4 pounds of candy? With your personalized tote, you’ll stand out and make collecting treats easier and more exciting. Plus, every time you use it, you’ll have a fun reminder of your creative skills. Happy Halloween and enjoy your spooky, stylish new tote!