To start crafting with clay, choose beginner-friendly options like polymer or air-dry clay, and gather basic tools such as knives, shaping tools, and rollers. Set up a clean, well-ventilated workspace with organized supplies and proper storage to keep your clay fresh. Practice simple shaping techniques like pinching, coiling, and slab building. Once comfortable, explore adding color, texture, and finishing touches. Keep experimenting, and if you keep exploring, you’ll uncover more tips and ideas to enhance your clay projects.
Key Takeaways
- Choose beginner-friendly clay types like polymer or air-dry clay, and set up a well-ventilated, organized workspace.
- Gather essential tools such as knives, shaping tools, and cutting blades, maintaining them for safe, effective use.
- Start with basic techniques like pinching, coiling, and slab building to develop foundational skills.
- Practice making simple projects like beads, charms, or small bowls to improve control and understanding of clay properties.
- Finish your creations with coloring, texturing, and proper curing to enhance durability and appearance.
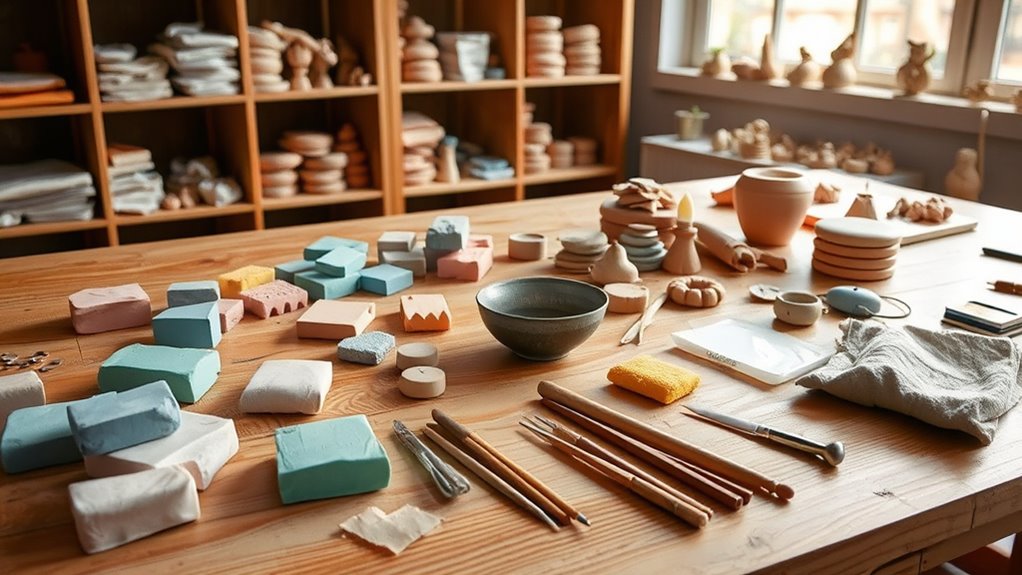
Choosing the Right Type of Clay for Beginners
If you’re just starting out with clay crafting, selecting the right type of clay can make a big difference in your experience. For beginners, polymer clay is a popular choice because it’s easy to work with, comes in many colors, and stays workable for a long time. Air-dry clay is another good option; it doesn’t require a kiln and dries naturally, making it convenient. If you prefer a more traditional approach, modeling clay or earthy clay types like terracotta can be rewarding, but they may need special tools or firing. Consider your project goals, budget, and whether you want to work indoors or outdoors. Also, understanding sound healing science and how vibrations can influence materials might inspire new techniques in your crafting process. Picking the right clay early on helps you enjoy the process and achieve better results. Additionally, exploring materials and techniques for working with different clays can enhance your skills and broaden your creative possibilities. Incorporating knowledge about clay properties can help you select the most suitable type for your specific projects. Gaining insights into clay characteristics can further improve your craftsmanship and outcomes. For example, understanding how clay flexibility varies between types can influence your choice for certain projects.
Essential Tools and Supplies for Clay Crafting
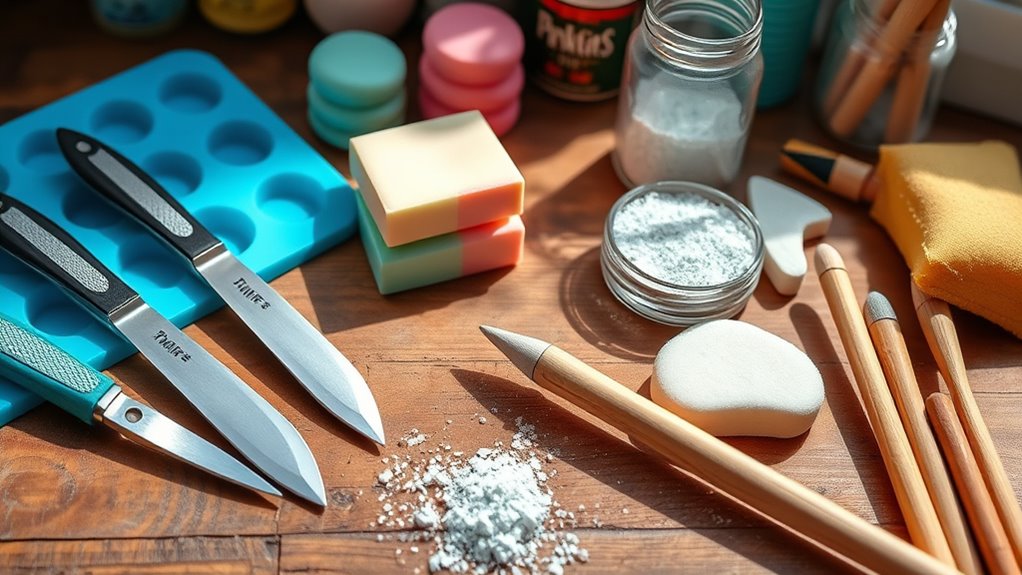
To start creating with clay, you need the right tools and supplies. Knowing the basics of tool selection helps you work efficiently and achieve better results. Choosing the appropriate clay types and features ensures your project’s durability and appearance. Additionally, understanding self watering plant pots can inspire creative projects such as decorative planters or functional art pieces. Incorporating survivalist tools like multi-tools or portable solar chargers can also enhance your crafting experience, especially when working outdoors or in off-grid settings. Using sound design techniques, such as layering and manipulation, can also inspire innovative surface textures and effects in your clay creations. Exploring gelato-inspired color palettes can add a vibrant and appealing aesthetic to your designs, making your projects stand out.
Tool Selection Basics
Have you ever wondered which tools are essential for creating with clay? The key is selecting versatile, easy-to-use tools that match your project needs. Start with a basic set of sculpting tools, including knives, needles, and rubber-tipped tools for shaping and detailing.
A rolling pin helps you flatten clay evenly, while a wire cutter makes slicing easier. Soft brushes are great for smoothing surfaces or adding textures. Sponges and cloths can assist in cleaning and refining your work. Additionally, incorporating decorative elements like textured stamps or paint can enhance your finished piece. Understanding color accuracy can help you choose the right paints or finishes for your clay projects. Moreover, familiarizing yourself with clay properties ensures you select the best type of clay for your specific craft needs. Staying aware of AI security considerations can also inform you about safe and responsible use of digital tools in your creative process.
Keep in mind, quality matters—invest in tools that feel comfortable and are durable. As you progress, you might add specialty tools, but this core set ensures you’re well-equipped to start exploring your creativity confidently.
Must-Have Supplies
Starting with the right supplies can make all the difference in your clay crafting experience. You’ll need a good quality clay, such as polymer or air-dry, depending on your project. Keep a set of basic tools like carving tools, rollers, and a variety of shaping instruments to help refine your work. A cutting blade or craft knife is essential for clean cuts, while sandpaper or fine files smooth out surfaces. Don’t forget to have some water or slip for joining pieces and keeping your hands moist. To protect your workspace, use a non-stick mat or parchment paper. Storage containers are handy to keep unused clay fresh. Additionally, understanding appliance maintenance plans can help ensure your tools and equipment stay in good condition for long-lasting use. Proper cleaning techniques can prevent residue buildup and maintain the quality of your supplies, making your crafting sessions more enjoyable. Regular tool upkeep is also crucial to keep your tools sharp and effective over time. Incorporating inventory management practices can help you keep track of your supplies and prevent shortages, ensuring a smoother crafting process. Using proper storage methods can extend the lifespan of your supplies and keep your workspace organized, making your clay crafting more efficient and enjoyable. These supplies form the foundation for successful, enjoyable clay crafting sessions.
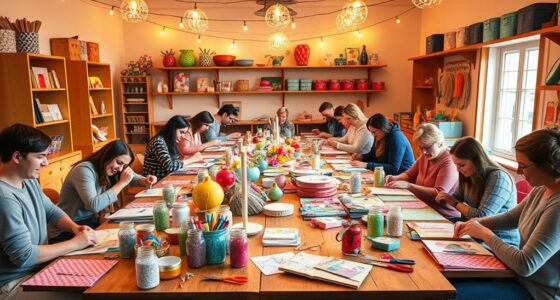
Preparing Your Workspace for Clay Projects
Before you start working with clay, find a space with good ventilation to keep fumes and dust at bay. Make sure your tools and supplies are organized so you can access everything easily and stay focused. A well-prepared workspace helps you create smoothly and safely. Additionally, understanding the importance of automation in business can inspire you to set up your workspace efficiently, ensuring a seamless creative process. Establishing an organized environment can further enhance your efficiency and reduce clutter during crafting sessions. Incorporating proper safety measures into your setup can also improve focus and reduce stress, leading to a more enjoyable crafting experience.
Subheading 1: Choosing a Well-Ventilated Area
Creating a well-ventilated workspace is essential for safe and enjoyable clay crafting. Proper airflow helps prevent inhaling dust or fumes, especially when working with certain clays or sealants.
To set up effectively, consider these key points:
- Pick a spot near an open window or door to ensure constant fresh air circulation.
- Use a fan to improve airflow if natural ventilation is limited.
- Avoid working in small, enclosed spaces without ventilation, which can lead to dust buildup or exposure to fumes.
Subheading 2: Organizing Tools and Supplies
Organizing your tools and supplies before beginning a project helps streamline your workflow and keeps your workspace safe. Start by gathering all your clay, sculpting tools, and accessories, then arrange them within easy reach.
Use containers or drawers to separate different tools, like carving instruments, rollers, and brushes, so nothing gets lost or mixed up. Keep your clay in airtight containers to prevent it from drying out.
Clear your workspace of clutter, ensuring there’s enough room to work comfortably. Labeling storage areas makes it easier to find what you need quickly.
This organization not only saves time but also reduces frustration, allowing you to focus fully on your creative process. A tidy workspace makes for a more enjoyable and efficient crafting experience.
Basic Techniques for Shaping and Molding Clay
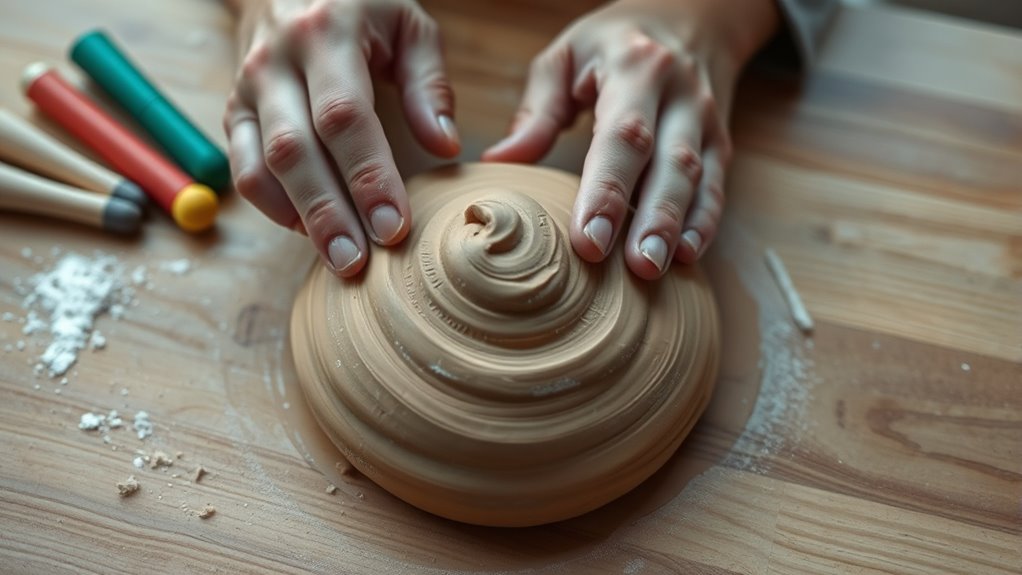
Mastering the basic techniques for shaping and molding clay is essential for bringing your creative ideas to life. Once you get the hang of these skills, you can craft everything from simple ornaments to intricate sculptures.
Here are three core techniques to get you started:
- Pinching – Use your fingers to pinch and shape small pieces of clay, perfect for creating bowls or tiny details.
- Coiling – Roll clay into long, thin snakes and layer them to build up forms. This technique is great for vessels and textured surfaces.
- Slab Building – Flatten clay into sheets and cut or shape them into desired forms. It is ideal for geometric projects or joining pieces.
Practice these methods to develop control and precision, laying a solid foundation for your projects.
How to Properly Store and Keep Your Clay Fresh
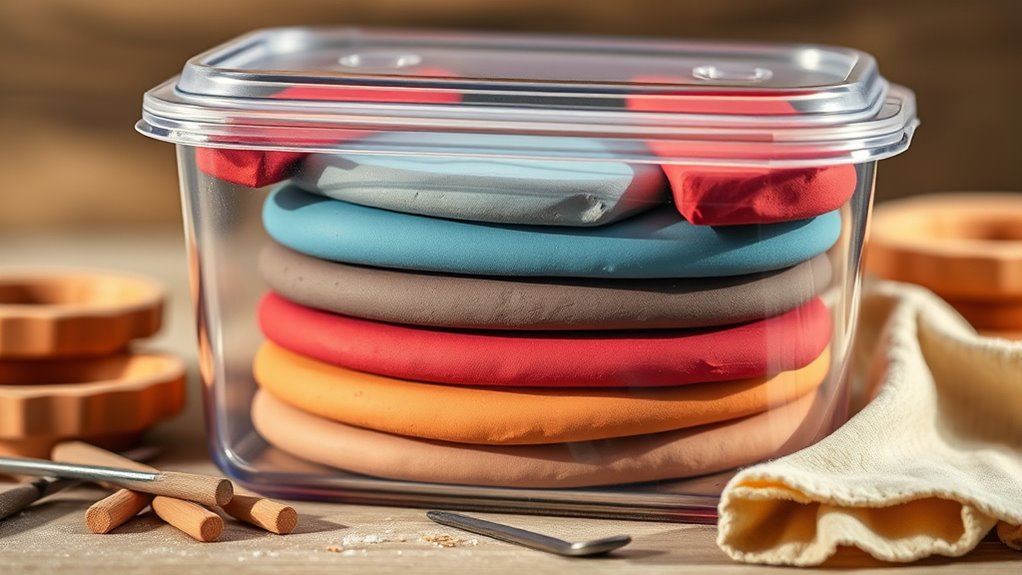
To keep your clay fresh, store it in airtight containers to prevent it from drying out.
Place the containers in a cool, shaded spot away from direct sunlight to maintain its consistency.
Proper storage helps guarantee your clay stays workable and ready for your next project.
Airtight Containers Essential
Keeping your clay fresh starts with the right storage method. Airtight containers are essential because they prevent air from drying out your clay, maintaining its pliability. Proper sealing keeps moisture locked in, so your projects stay smooth and workable over time.
To get the most out of your clay, consider these tips:
- Use containers with tight-fitting lids to prevent air exposure.
- Choose plastic or glass containers that are durable and easy to clean.
- Label your containers with the date to track freshness and avoid waste.
Keep in Cool Place
Have you considered how temperature affects your clay’s freshness? Keeping your clay in a cool place prevents it from drying out or becoming too soft, which can hinder your work. Store it away from heat sources like radiators or direct sunlight. The ideal storage spot is a cool, dry area, such as a cupboard or shelf. To emphasize, here’s a quick overview:
| Temperature Range | Effect on Clay | Storage Tip |
|---|---|---|
| 50-60°F (10-15°C) | Maintains consistency | Store in a cool, dark place |
| Above 70°F (21°C) | Softens or dries out | Avoid direct sunlight |
| Below 50°F (10°C) | Hardens or cracks | Keep away from freezing |
Storing your clay properly ensures it stays pliable and ready for your next project.
Avoid Sunlight Exposure
Exposure to direct sunlight can quickly dry out your clay and compromise its texture, making it difficult to work with. To keep your clay fresh and workable, you should store it in a cool, shaded area away from sunlight.
Here are three tips to help you:
- Use airtight containers or sealed plastic bags to prevent moisture loss.
- Keep your clay in a temperature-controlled environment, avoiding places like windowsills or sunny countertops.
- Cover unfinished projects with plastic wrap to prevent drying out during breaks.
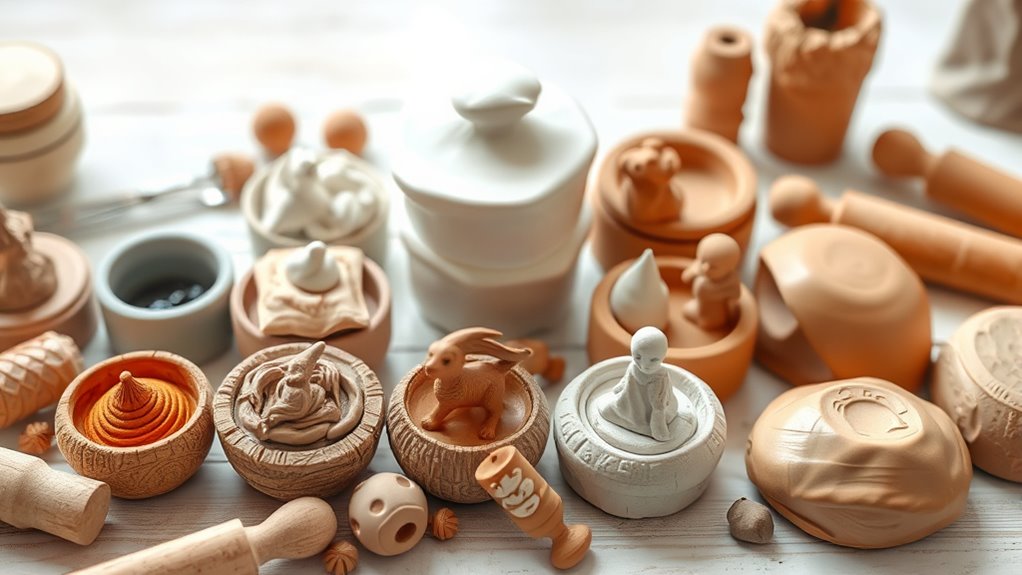
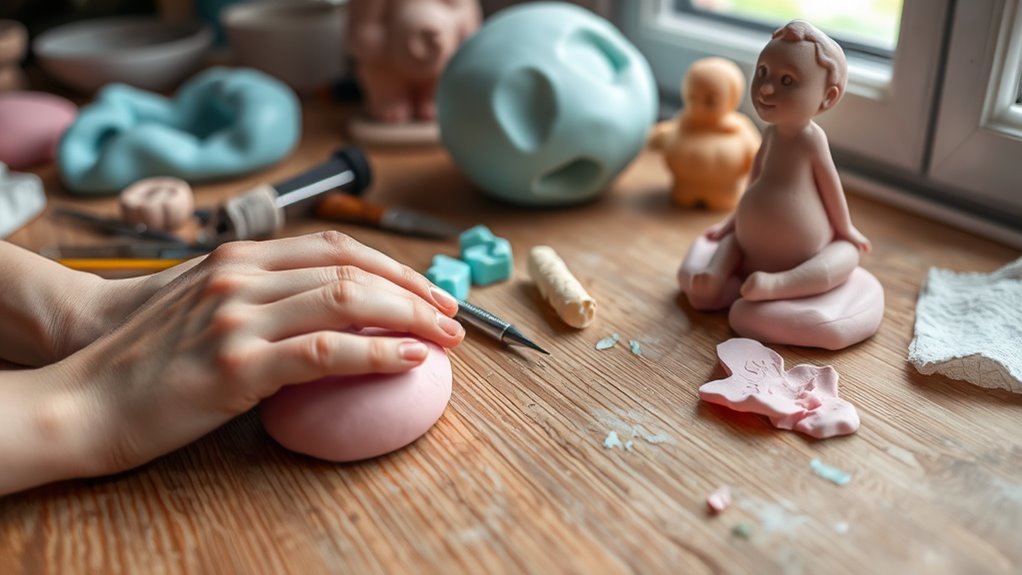
Simple Projects to Practice Your Skills
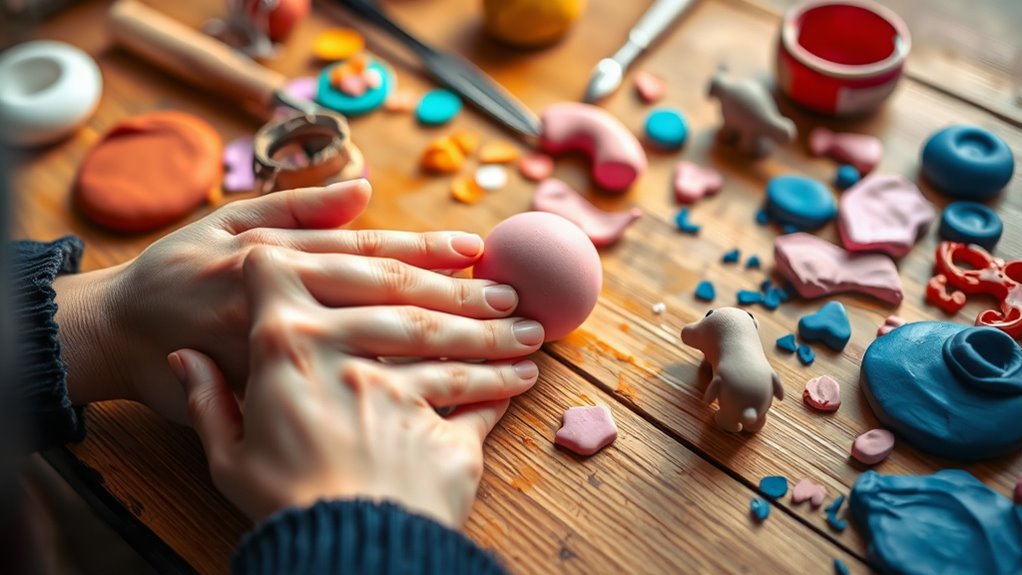
Starting with simple clay projects is a great way to build your confidence and refine your techniques. Begin with basic shapes like balls, coils, or flat discs to get comfortable handling the material.
Try making small items such as beads, pendants, or charms—these are quick to complete and perfect for practicing shaping and smoothing.
You can also create simple pinch pots or thumb bowls to learn about forming and opening the clay. Focus on controlling your pressure and movement to develop steady hands.
Don’t worry about perfection; the goal is to familiarize yourself with the clay’s texture and working properties. These projects help you build skills gradually, setting a solid foundation for more complex creations later on.
Adding Color and Texture to Your Creations

Adding color and texture to your clay creations transforms simple forms into mesmerizing pieces. You can achieve this through various techniques that make your projects stand out.
- Use acrylic paints or colored slips to add vibrant hues after shaping your piece. Apply thin layers for a smooth finish or layer for depth.
- Incorporate textured tools like stamps, brushes, or household items to create patterns and surface details that add visual interest.
- Experiment with combining different clay types or adding inclusions like glitter or mica powder for shimmering effects.
Baking, Curing, or Finishing Your Clay Items
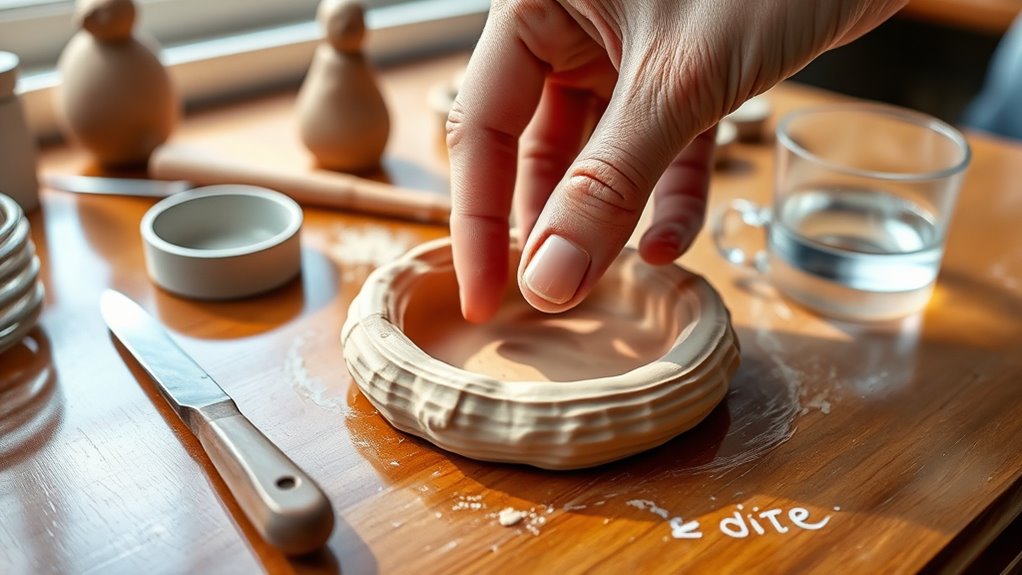
Have you chosen the right method to finish your clay piece? Depending on the type of clay you used, you’ll need to bake, cure, or air-dry it.
Choosing the correct finishing method ensures your clay creation remains durable and beautifully polished.
For polymer clay, follow the manufacturer’s instructions and bake it in your oven at the recommended temperature for the specified time.
If you’re working with air-dry clay, let it sit in a well-ventilated area until completely dry, which can take from a few hours to several days.
Some clays require curing in a kiln, so ensure you have proper equipment and follow safety guidelines.
After baking or drying, you might want to sand smooth any rough edges or add a sealant for extra durability.
Finishing properly guarantees your creation lasts and looks polished.
Tips for Troubleshooting Common Crafting Challenges
When you encounter common crafting challenges, staying calm and evaluating the situation can save you time and frustration. First, identify the problem—whether your clay is cracking, sticking, or drying unevenly.
Once you know the issue, try these troubleshooting tips:
- Cracks or breaks: Smooth the area with a bit of water or slip and rejoin the pieces, then gently reshape.
- Clay sticking to tools or surfaces: Lightly dust with cornstarch or use non-stick tools to prevent sticking.
- Uneven drying or warping: Cover your project loosely with plastic to slow drying or support fragile parts with extra clay or wire.
Addressing issues early helps ensure your final piece turns out just right. Keep experimenting and don’t get discouraged!
Ideas for Inspired Clay Crafting Projects

Getting creative with clay opens up endless possibilities for unique and personalized projects. You can craft charming jewelry, like earrings or pendants, that showcase your style. Small sculptures or figurines make great decorative pieces, perfect for displaying around your home.
Personalized keychains or fridge magnets are fun and functional projects that add a touch of personality to everyday items. You might also try making custom ornaments for holidays or special occasions, adding a handcrafted touch to your celebrations.
For a practical approach, create mini planters or candle holders that blend art with utility. If you enjoy painting, paint intricate designs or patterns on your finished pieces for added flair.
The key is to explore different shapes, textures, and colors—there’s no limit to what you can create with clay.
Frequently Asked Questions
How Long Does It Take for Clay Projects to Dry or Cure?
You’re wondering how long it takes for clay projects to dry or cure. Generally, air-dry clay takes about 24 to 72 hours, depending on the size and thickness of your piece.
For oven-bake clay, it’s quicker, usually 15 to 30 minutes at the recommended temperature.
Always follow your specific clay’s instructions, and verify your piece is fully dry or cured before painting or handling to prevent damage.
Can I Use Clay Outdoors or in Humid Environments?
You can use clay outdoors or in humid environments, but you should choose the right type. Air-dry clay works well outside if you protect it from excessive moisture and direct sunlight, which can cause cracking.
Polymer clay is more durable and resistant to humidity, making it a better choice for outdoor projects. Just remember to seal your finished piece with a waterproof sealant for added protection.
What Safety Precautions Should I Follow When Working With Clay?
You might think safety precautions are overly cautious, but they’re essential. When working with clay, always work in a well-ventilated area to avoid inhaling dust particles.
Wear a mask if you’re sanding or carving, and wash your hands thoroughly afterward.
Use non-toxic clay products, especially if you plan to make items for children or food use.
Keep tools sharp and store materials safely to prevent accidents.
Are There Eco-Friendly or Non-Toxic Clay Options Available?
Yes, you can find eco-friendly and non-toxic clay options that are safe for both you and the environment. Look for brands that specify non-toxic, biodegradable, or natural ingredients, such as air-dry clay made from natural materials or clay labeled as non-toxic for children.
These options often have fewer chemicals and reduce environmental impact. Always check labels and product descriptions to verify they meet your eco-friendly and safety standards.
How Can I Fix Mistakes or Reshape Dried Clay?
When you make a mistake or want to reshape dried clay, try using a bit of water or a damp brush to gently soften the area.
If the clay is too dry, you can also use a small tool or your fingers to carefully carve or re-sculpt.
Keep in mind, once clay dries completely, it’s harder to modify, so work slowly and patiently for the best results.
Conclusion
Remember, each clay creation is a reflection of your unique imagination—like a seed nurturing your artistic soul. With patience and practice, your skills will blossom, transforming simple materials into meaningful masterpieces. Embrace the process, and let your passion be the guiding light through every mold and color. In this craft, you’re shaping more than clay—you’re shaping memories, confidence, and a lifelong love for creativity. Keep molding, and watch your artistry flourish.