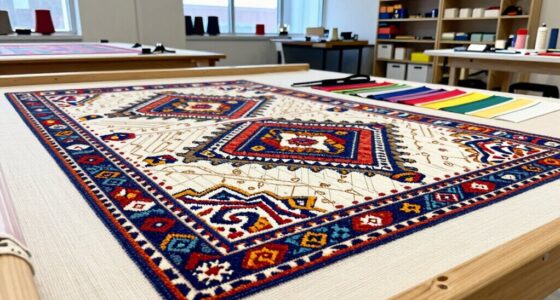
To get started with sublimation printing, you’ll need special sublimation paper, vivid dye-based inks, and polyester blanks or surfaces coated for sublimation. The process involves printing your design onto the paper, then using a heat press to transfer the image with high heat and pressure, turning the ink into gas that bonds with the surface. Mastering these basics will help you create vibrant, durable products—keep exploring for more tips to perfect your process.

Get business pricing on tools and workshop supplies
- Business-only prices and quantity discounts
- Tax-exempt purchasing
- Multiple users, one account, clear invoices
Key Takeaways
- Use sublimation-specific paper designed for high ink transfer and vibrant color output.
- Choose dye-based sublimation inks formulated for optimal bonding with polyester surfaces.
- Select polyester blanks or coated surfaces, as sublimation ink bonds only with polyester or polyester-coated items.
- Ensure proper heat press settings (375°F–400°F, 30–60 seconds, even pressure) for effective transfers.
- Properly calibrate your printer and monitor colors to achieve accurate, vibrant, and durable sublimation prints.

Have you ever wondered how vibrant, full-color images are transferred onto fabrics and surfaces with such precision? The secret lies in sublimation printing, a process that relies heavily on the right equipment and techniques. When you’re preparing to get started, understanding how a heat press and color management play vital roles can make all the difference in achieving professional-quality results.
First, a heat press is your primary tool for transferring images from sublimation paper onto your chosen surface. Unlike traditional printing, sublimation requires heat and pressure to turn ink into gas, which then bonds permanently with polyester or coated surfaces. You’ll want to set your heat press to the correct temperature, usually around 375°F to 400°F, depending on the material. Applying even pressure ensures that the ink sublimates uniformly, avoiding streaks or uneven colors. Timing, too, is essential; most transfers take about 30 to 60 seconds. Mastering your heat press control helps you produce crisp, vibrant images that won’t crack or peel over time.
A heat press applies heat and pressure to transfer sublimation ink onto surfaces effectively.
Color management is equally important in sublimation printing. You need to guarantee that the colors in your digital design match the final output. This involves calibrating your monitor and choosing the right color profiles so what you see on screen accurately reflects what gets printed. When you print your sublimation paper, using high-quality, dye-based inks designed specifically for sublimation ensures bright, vivid colors. These inks are formulated to vaporize at high temperatures and bond with polyester fibers, creating images with incredible detail and color depth. Additionally, understanding color profiles and how they influence print output can help prevent color shifts and dullness, leading to more consistent and professional results.
As an affiliate, we earn on qualifying purchases.
Frequently Asked Questions
What Are the Best Polyester Blends for Sublimation?
You should choose polyester blends with at least 60-100% polyester for ideal sublimation results. Fabrics with higher polyester durability, like 80/20 or 90/10 blends, offer vibrant, long-lasting prints and better color retention. Look for fabric blending that guarantees the material remains soft and comfortable while providing enough polyester content for vivid sublimation. Avoid low-polyester fabrics, as they won’t produce the bright, durable images you want.
How Long Does Sublimation Ink Last on Printed Items?
Think of sublimation ink as a lifelong partner, standing strong on your printed items. Usually, it lasts around 5 to 10 years, but this can vary with usage and care. To keep your designs vibrant over time, focus on ink durability and fading prevention—use proper sealing and avoid harsh sunlight. With good habits, your prints stay fresh and colorful, just like the day they were created.
Can Sublimation Be Used on Dark-Colored Fabrics?
You can’t use sublimation on dark-colored fabrics because dye penetrations don’t work well with fabric color compatibility. Sublimation requires a white or light-colored polyester surface to produce vibrant, lasting images. Dark fabrics absorb too much dye, preventing proper transfer and resulting in dull or unclear images. For dark fabrics, consider alternative printing methods like heat transfer vinyl or direct-to-garment printing to get the best results.
What Temperature and Time Settings Are Optimal for Sublimation?
Did you know that ideal sublimation temperature ranges from 375°F to 400°F? To get the best results, you should set your sublimation equipment to around 385°F to 400°F, with a pressing time of 60 seconds. Make sure to check your temperature calibration regularly to avoid color inconsistencies. Proper temperature and time settings ensure vibrant, durable prints on polyester blanks, giving your projects a professional finish every time.
Is Special Software Required for Designing Sublimation Prints?
You don’t need special software to design sublimation prints, but using digital design programs like Photoshop or Illustrator helps you create detailed, vibrant images. These tools support proper color management, ensuring your colors stay true during printing. With good software, you can easily adjust designs, optimize color profiles, and prepare files correctly for sublimation, resulting in professional-looking results every time.
Conclusion
Think of sublimation printing as your gateway to transforming plain surfaces into vibrant stories. The paper and ink are your brush, while the polyester blanks are your canvas—each element working in harmony to bring your vision to life. When you master this process, you hold the key to opening endless creativity, turning simple materials into symbols of your unique expression. Embrace the journey, and let your designs become timeless symbols of your artistry.
Fall Picks
fall essentials
As an affiliate, we earn on qualifying purchases.