Discover inspiring handmade crafts inspired by botanical shapes, like pressed flower art, leaf-shaped wall decor, and floral-patterned pillows. Use natural materials such as leaves, twigs, and organic fibers, and explore techniques like pressing, painting, and embroidery to create vibrant, meaningful pieces. Incorporate symbolism with roses, laurel, ivy, and lotus for added depth. Whether you want eco-friendly projects or personalized gifts, there’s a wide variety of ideas to explore—just keep going to learn even more.
Key Takeaways
- Create pressed flower wall art or framed botanical arrangements using natural shapes and preservation techniques.
- Design botanical-themed jewelry with resin-embedded flowers or leaf-shaped pendants.
- Craft leaf or flower-shaped candles, soaps, or terrariums inspired by plant forms.
- Make woven wall hangings or mobiles mimicking vines, leaves, or floral symmetry.
- Develop textured greeting cards or stationery featuring botanical motifs, embossing, and vibrant colors.

Relaxing Garden Pressed Flower Craft Kit for Adults & Women, DIY Floating Double Glass Frame Kit with Real Dried Flowers, Handmade Gift Art Project for Home Décor, Keepsake & Creative Crafts
- DIY Pressed Flower Craft Kit: Create your own pressed flower art
- Includes Real Dried Flowers & Tools: Vibrant flowers, tweezers, and design tools
- Floating Double Glass Frame: Modern display for botanical art
As an affiliate, we earn on qualifying purchases.
As an affiliate, we earn on qualifying purchases.
Understanding Botanical Shapes and Their Creative Uses
Have you ever noticed how botanical shapes—like the delicate curves of a fern or the bold symmetry of a sunflower—can inspire creative projects? Understanding plant anatomy helps you see these shapes more clearly, from leaf veins to petal arrangements. Recognizing these natural forms allows you to mimic or stylize them in your crafts. Botanical symbolism adds layers of meaning; for example, a rose can symbolize love, while a laurel wreath represents victory. By studying these symbols and the underlying structure of plants, you can craft items that are not only visually appealing but also rich in meaning. Exploring plant anatomy can deepen your appreciation for natural forms and enhance your ability to incorporate them into your textile crafts. This knowledge transforms simple shapes into powerful design elements, inspiring natural-inspired projects that are both beautiful and meaningful. Additionally, understanding the diversity of plant structures can open up new avenues for creative experimentation in your projects. Recognizing the structural differences among various plants allows for more nuanced and authentic designs in your handmade crafts.
How to Choose Materials for Botanical Crafts

When selecting materials for botanical crafts, consider natural options that match your project’s needs, like leaves, twigs, or flowers. Think about how durable and flexible each material is to guarantee your creation holds together and moves as you want. Also, choose colors and textures that enhance the botanical shapes and bring your design to life. Incorporating modern bathroom fixtures can inspire innovative design ideas and ensure your crafts complement contemporary spaces. Additionally, paying attention to the materials’ sustainability can help you create eco-friendly projects that are both beautiful and environmentally conscious. Understanding holistic health principles can further guide you in choosing materials that support your well-being and harmony with nature. Moreover, selecting environmentally friendly materials can promote a healthier home environment and align with sustainable practices. Considering biodegradable options can further reduce your ecological footprint and ensure your crafts are truly eco-conscious.
Suitable Natural Materials
Choosing the right natural materials is essential for creating botanical crafts that are both beautiful and durable. Look for organic fibers like cotton, linen, or hemp, which offer a natural, authentic feel. These fibers are sustainable and can be easily shaped or woven into various forms. When adding color, opt for plant-based dyes derived from berries, leaves, or roots, ensuring your projects stay eco-friendly. These dyes produce rich, earthy tones that complement botanical themes beautifully. Avoid synthetic materials, as they can detract from the natural aesthetic and durability. Instead, prioritize materials that come directly from nature, are non-toxic, and age gracefully. By selecting organic fibers and plant-based dyes, you create crafts that truly celebrate the beauty and integrity of botanical inspiration. Additionally, understanding caring for natural materials can help prolong the lifespan of your botanical crafts and maintain their visual appeal over time. Proper storage techniques are also important to protect your creations from environmental damage and wear. Incorporating appropriate preservation methods can further enhance their longevity and keep them looking their best for years to come. Knowing how to prevent deterioration of natural craft materials can help you maintain their appearance and structural integrity over the years, especially when combined with proper handling practices.
Durability and Flexibility
Selecting materials that are both durable and flexible is essential for botanical crafts that last and adapt well to shaping. To guarantee durability, perform durability testing by bending, stretching, or exposing materials to moisture to assess their resilience. Flexibility techniques, such as soaking or conditioning natural fibers, help make materials more pliable without compromising strength. Consider options like wire for support, which offers both flexibility and durability, or treated botanicals that resist breaking over time. Avoid materials that crack or become brittle easily, as they won’t withstand handling or environmental changes. Incorporating appropriate textile choices can further enhance the resilience and flexibility of your projects. Additionally, understanding the properties of natural fibers allows for better material selection and improved craft longevity. Recognizing how natural fibers respond to environmental conditions can guide you in choosing materials that perform well in varying climates. Using up-to-date industry insights can help you select the most suitable materials for your specific botanical craft project. Being aware of material aging processes can also help you anticipate how your crafts will change over time. Balancing durability and flexibility ensures your botanical craft remains beautiful and functional, whether it’s a delicate leaf sculpture or a sturdy wreath. Proper material choice is key to long-lasting, adaptable creations.
Color and Texture Options
After ensuring your materials are durable and flexible, it’s time to think about how color and texture can enhance your botanical crafts. Color blending is key to creating realistic or vibrant botanical shapes; choose hues that mimic nature or contrast for visual interest. Consider layering shades to add depth and dimension. Texture enhancement involves selecting materials that add tactile appeal—think rough bark-like surfaces or smooth, glossy finishes. Mix different textures to mimic the varied surfaces found in nature, such as velvety leaves or woody stems. Use a variety of mediums like fabric, paper, or clay to achieve the desired effect. Paying attention to natural color palettes can help you select hues that enhance realism and harmony in your designs. Additionally, understanding material versatility allows you to experiment with different combinations for unique textures and effects. Recognizing color harmony is essential to creating visually pleasing and cohesive botanical crafts. Incorporating techniques for blending colors can further elevate the lifelike quality of your creations. Being aware of color psychology can also help you evoke specific moods or feelings through your botanical designs. By carefully balancing color blending and texture enhancement, your botanical crafts will look more lifelike, dynamic, and engaging.
Basic Techniques for Botanical Crafting
To create botanical-inspired crafts, mastering some basic techniques is essential. Start by understanding botanical symbolism, which helps you convey specific meanings through shapes and colors. For instance, roses symbolize love, while oak leaves represent strength. Using natural materials like pressed flowers or leaves enhances authenticity and texture. You can also incorporate herbal remedies, such as dried herbs, into your projects for added scent and visual interest. Techniques like pressing, gluing, and shaping are fundamental; pressing preserves the plant’s form, while gluing helps assemble layered designs. Handling these materials with care guarantees your crafts stay durable. Practice patience and precision when working with delicate botanical elements, and always consider the symbolism or herbal significance to enrich your creations. Incorporating home decor elements inspired by botanical shapes can also elevate your space and complement your crafts.
Making Leaf-Shaped Wall Art
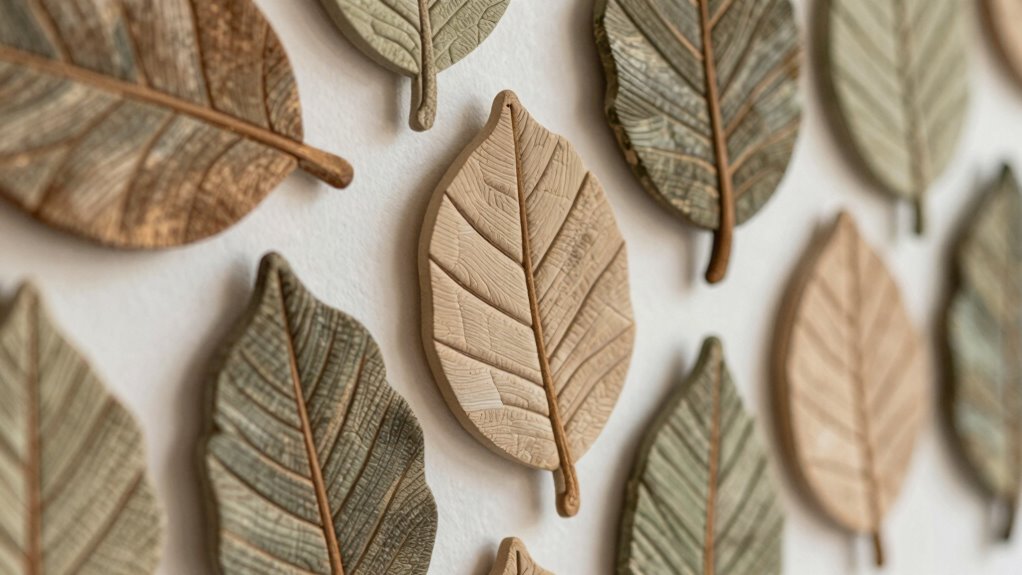
When making leaf-shaped wall art, you should start by selecting the right leaf motifs that match your style. Choosing the best materials, like fabric, paper, or metal, can enhance your design’s impact. Finally, consider how you’ll display your art to highlight its natural beauty and complement your space.
Choosing Leaf Motifs
Choosing leaf motifs for your wall art allows you to bring a touch of nature indoors with simplicity and elegance. When selecting leaves, consider leaf symmetry—some leaves display perfect mirror symmetry, creating a balanced, harmonious look, while asymmetrical shapes add visual interest. Think about botanical symbolism, as different leaves can convey meanings like growth, renewal, or tranquility. For instance, broad, rounded leaves often symbolize abundance, while slender, pointed ones suggest agility. Your choice of leaf shape can reflect the mood you want to evoke and enhance your space’s aesthetic. Pay attention to the details of each motif, ensuring they complement your overall design. By thoughtfully choosing leaf motifs, you can craft a meaningful and visually striking piece that celebrates nature’s diversity.
Material Selection Tips
Selecting the right materials for your leaf-shaped wall art can considerably influence its overall look and durability. Consider botanical symbolism when choosing materials, as different plants carry unique meanings. Seasonal plant variations also add authenticity; for example, use dried autumn leaves for warmth or fresh greenery for vibrancy.
| Material | Benefits | Ideal Use |
|---|---|---|
| Wood | Sturdy, natural appearance, easy to carve | Wall accents with rustic charm |
| Clay | Flexible, paintable, lightweight | Detailed, textured leaf shapes |
| Metal | Durable, sleek, modern aesthetic | Minimalist, contemporary designs |
| Fabric | Soft, versatile, colorful | Layered or fabric-covered art |
Choose based on the style you want to evoke and the seasonal symbolism you wish to express.
Displaying Your Art
Once you’ve crafted your leaf-shaped wall art, the next step is to display it thoughtfully to maximize its visual impact. Choose a wall that highlights its botanical symbolism, perhaps near other nature-inspired decor. Consider seasonal plant trends—spring blooms or autumn foliage—to guide your placement and framing choices. Use complementary frames or mounting styles that enhance the organic shape, creating harmony with surrounding decor. Play with asymmetry or grouping multiple pieces for a dynamic display. Lighting is essential—soft, focused illumination can emphasize the texture and colors. Remember, your art should evoke the beauty of nature and seasonal changes. Thoughtful placement and styling elevate your handmade piece, making it a mesmerizing focal point that celebrates botanical inspiration year-round.
Designing Floral Patterned Decorative Pillows
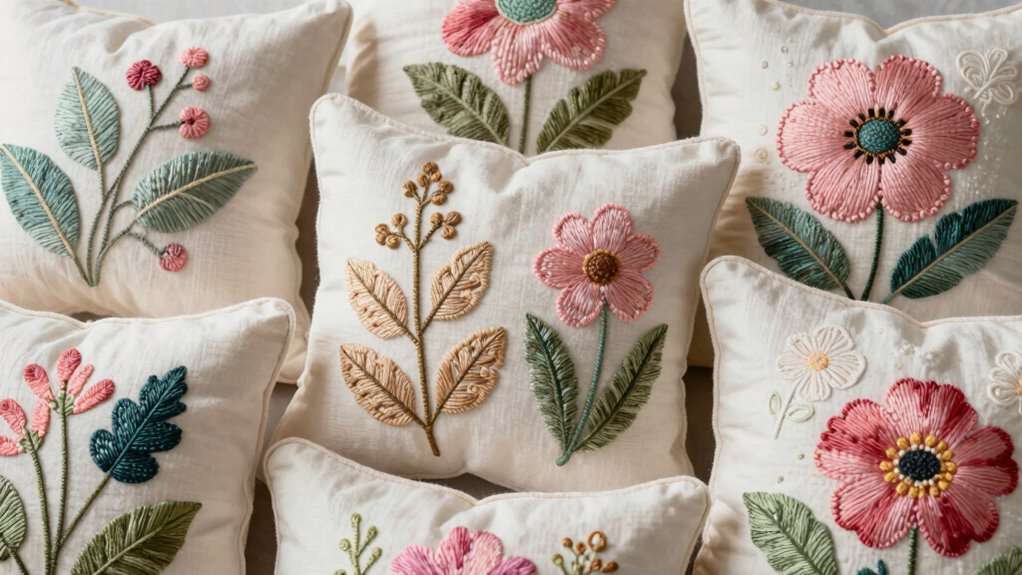
Designing floral patterned decorative pillows allows you to infuse your space with vibrant, botanical-inspired beauty. You can draw inspiration from wildflower arrangements, capturing their natural charm with bold, colorful prints or delicate embroidery. Incorporate botanical embroidery techniques to add texture and detail, mimicking the intricate patterns found in nature. Use vibrant hues and organic shapes to create eye-catching designs that evoke a sense of freshness. Mixing different floral motifs, such as daisies or poppies, helps craft a dynamic and lively look. Whether you choose hand-stitched embroidery or printed fabric, these pillows become a striking focal point. Personalize your designs by experimenting with various techniques and color palettes, transforming simple cushions into beautiful, nature-inspired accents for your home.
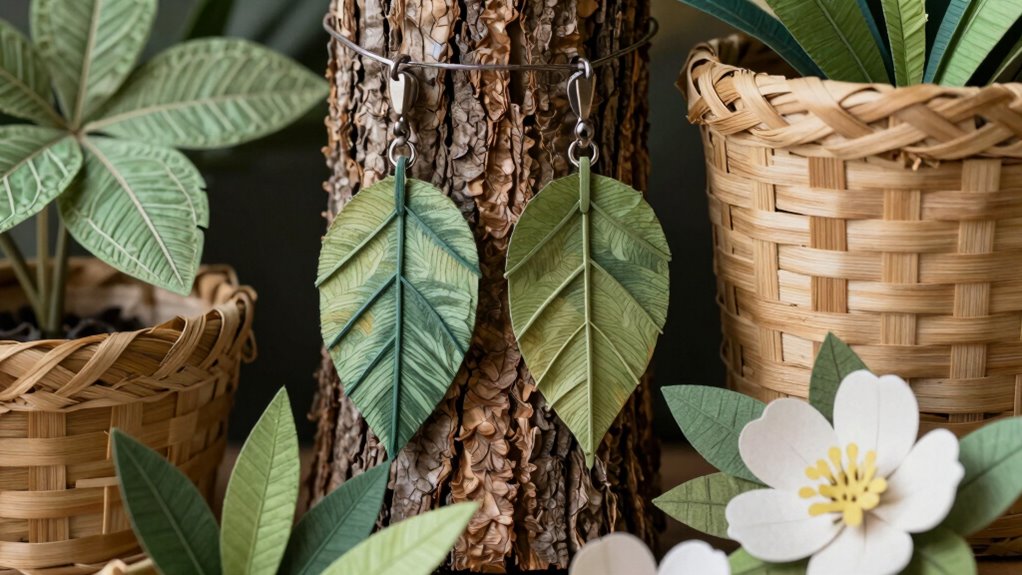
Creating Botanical-Inspired Jewelry

- Use pressed flowers embedded in resin for a realistic effect.
- Incorporate natural stones resembling plant colors and textures.
- Design dangling earrings mimicking leaf shapes or floral clusters.
- Add meaningful charms that symbolize specific botanical elements.
These techniques help you create jewelry that’s not only beautiful but also rich with symbolism.
Embroidering Botanical Motifs and Needlework Projects

Embroidering botanical motifs allows you to bring the delicate beauty of nature into your needlework projects with intricate detail and vibrant texture. By using plant-based pigments, you can create stunning, eco-friendly designs that echo natural colors. Botanical dyeing techniques enhance your embroidery, giving your threads a unique, organic hue. Incorporate motifs like leaves, flowers, or vines to add depth and realism. Mixing embroidery styles with botanical inspiration makes your work truly special. Experiment with different stitches to mimic textures found in nature, such as the veining of leaves or petal softness. The table below highlights some popular botanical motifs and their embroidery techniques:
| Motif | Technique | Tips |
|---|---|---|
| Fern leaves | Satin stitch | Use varying thread shades |
| Rose blossoms | French knots | Keep stitches tight |
| Vine tendrils | Stem stitch | Follow natural curves |
| Sunflower petals | Lazy daisy | Layer for fullness |
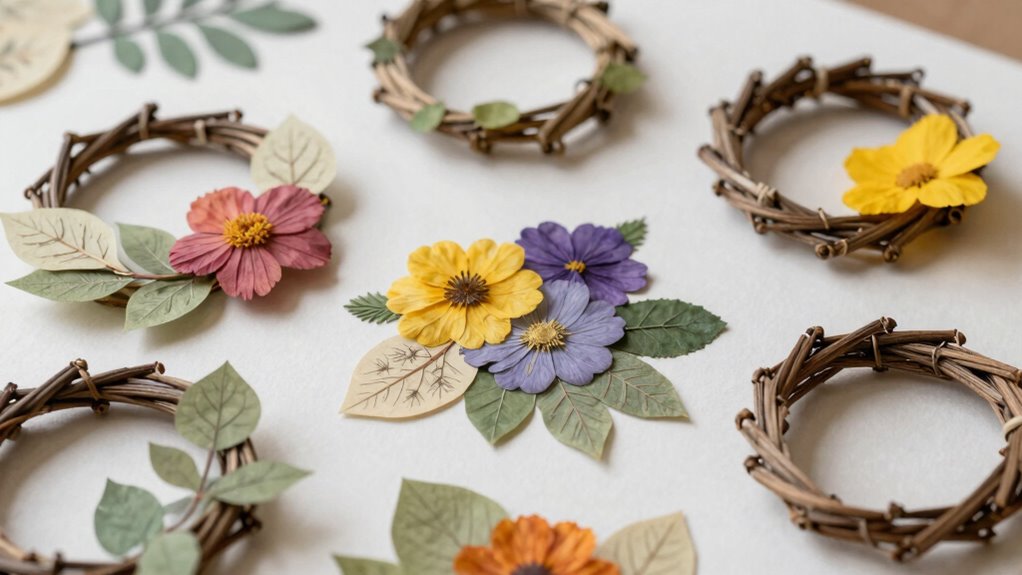
How to Make Pressed Flower Frames
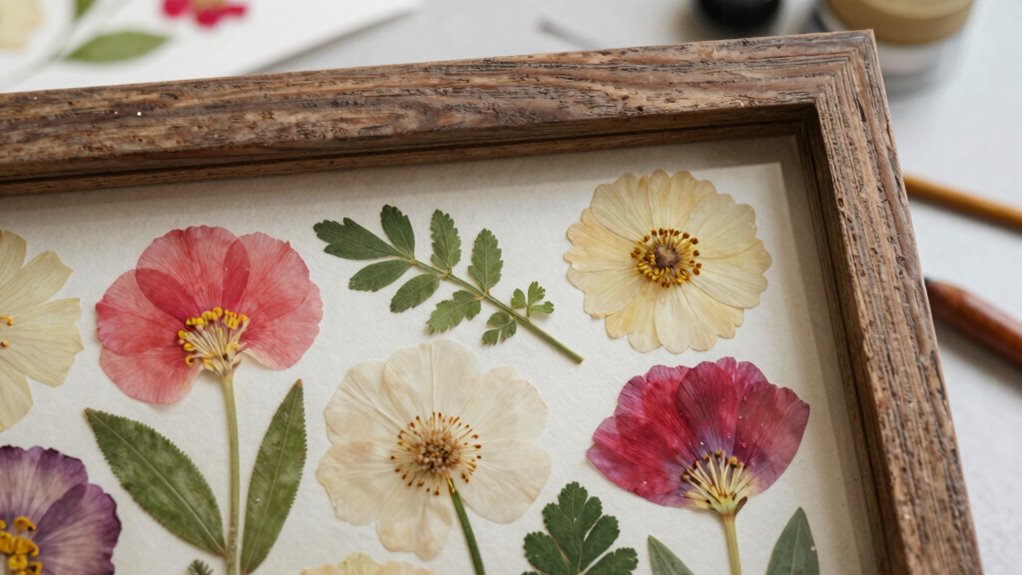
Start by choosing flowers that are flat and vibrant, ensuring they’ll look beautiful once pressed and preserved. Next, carefully arrange your flowers within a frame, securing them so they stay in place during pressing. Finally, follow proper preservation techniques to keep your pressed flowers looking fresh and colorful for years to come.
Selecting Perfect Flowers
Choosing the right flowers is essential for creating stunning pressed flower frames. Focus on flowers with meaningful flower symbolism and seasonal blooming to evoke specific moods or memories. When selecting, consider these key points:
- Symbolism: Pick flowers that represent feelings or themes you want to convey.
- Seasonality: Use blooms that are in peak season for freshness and easier pressing.
- Durability: Choose flowers with sturdy petals that will press well without crumbling.
- Color: Opt for vibrant, contrasting colors to make your frame visually appealing.
Framing and Preserving
Once you’ve selected the perfect flowers, the next step is to carefully press and preserve them to guarantee their colors and shapes remain vibrant. Botanical conservation is essential here, so handle your wildflower harvesting with care to ensure they stay intact. Use a clean, flat surface and place the flowers between sheets of absorbent paper or parchment. Apply gentle pressure with a heavy book or a flower press, and leave them for a week or more. Once dried, frame your pressed flowers behind glass or acrylic to protect them from moisture and dust. This preserves their delicate beauty and creates a stunning botanical display. Proper framing and preservation techniques ensure your pressed flower art remains vibrant for years to come.
Crafting Leaf Motif Mobile Hangings
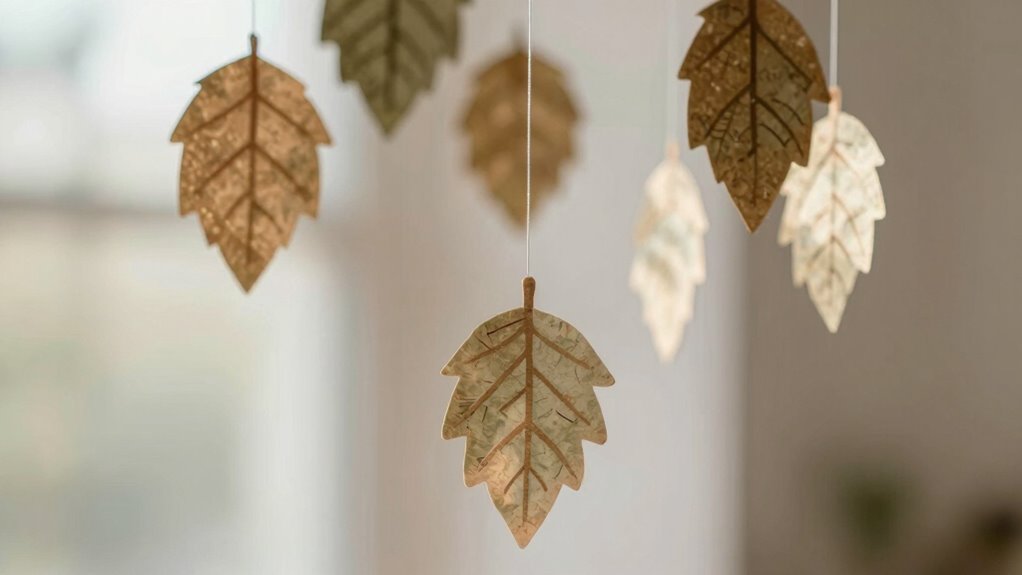
Creating leaf motif mobile hangings offers a charming way to bring the natural beauty of botanical shapes into your home decor. These hangings evoke botanical illusions, transforming simple leaves into mesmerizing art. As you craft, consider leaf symbolism, where each leaf represents growth, renewal, and connection to nature. To imbue your mobile with deeper meaning:
Creating leaf mobiles adds natural charm and symbolism, celebrating growth, renewal, and nature’s timeless beauty.
- Use different leaf shapes to symbolize diversity in nature.
- Incorporate varying shades to represent seasons or emotions.
- Hang leaves at different heights to signify life’s fluctuating rhythms.
- Add personal touches, like small charms, to reflect your unique connection with nature.
This approach amplifies the visual impact and emotional resonance of your mobile, making it a meaningful centerpiece that celebrates the timeless appeal of botanical illusions and leaf symbolism.
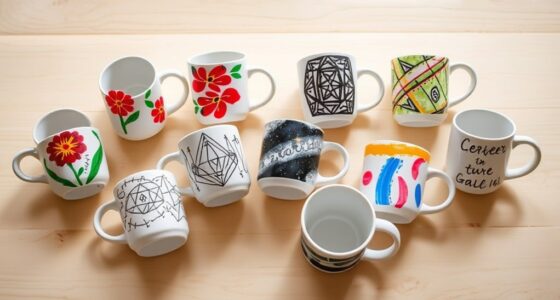
Painting Botanical Patterns on Ceramics
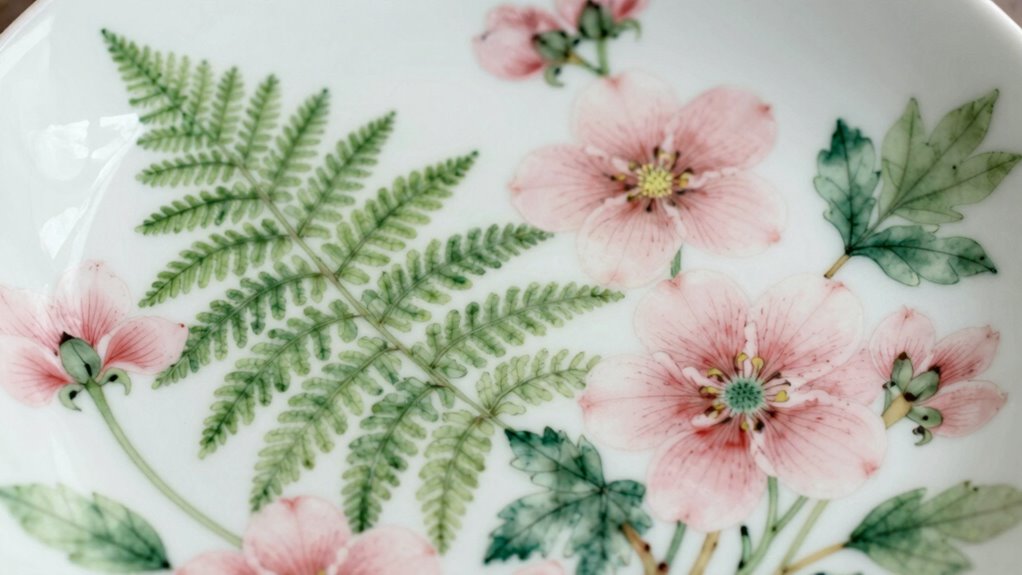
Building on the natural inspiration of botanical shapes, painting intricate patterns on ceramics allows you to capture the delicate beauty of plants in a durable and functional form. You can incorporate botanical symbolism, using specific plant motifs to convey meanings like growth, renewal, or tranquility. When designing, consider plant-inspired typography—integrating leaf or vine patterns into lettering to add a unique, organic touch. Use fine brushes and vibrant glazes to highlight details and bring your patterns to life. This approach not only enhances the aesthetic appeal but also creates meaningful pieces that reflect nature’s elegance. Whether decorating plates, mugs, or vases, painting botanical patterns transforms everyday ceramics into artful expressions of natural beauty and symbolism.
How to Make Beautiful Botanical Greeting Cards
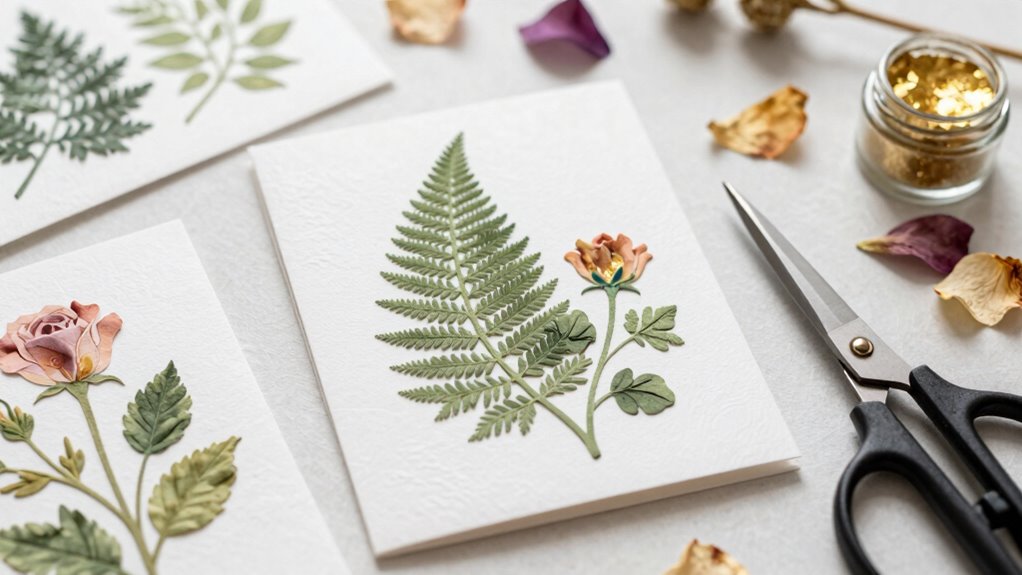
Start by choosing botanical motifs that resonate with your message, like delicate leaves or vibrant flowers. Use textured layers such as embossed paper or fabric to add depth and interest to your design. With these elements, your greeting cards will beautifully showcase the natural beauty of botanical shapes.
Selecting Botanical Motifs
Choosing the right botanical motifs is essential for crafting beautiful greeting cards that evoke nature’s elegance. To do this effectively, consider these four aspects:
- Botanical symbolism: Select motifs that convey specific emotions or messages, like roses for love or lilies for purity.
- Plant taxonomy: Use recognizable plant types to add authenticity and educational value, like ferns or daisies.
- Seasonality: Incorporate seasonal plants to match the occasion, such as poinsettias for winter or cherry blossoms for spring.
- Design harmony: Pick motifs that complement your card’s layout and color palette, ensuring visual balance.
Crafting Textured Layers
Adding textured layers to your botanical greeting cards brings depth and tactile interest that elevates your designs. You can mimic plant growth by layering different materials like embossed paper, fabric, or textured cardstock. To evoke a botanical scent visually, incorporate elements that resemble leaves or petals with varied textures. Use techniques like foam adhesive or torn edges to add dimension and realism. Mixing smooth and rough surfaces creates a dynamic feel, mimicking the richness of nature. Here’s a quick guide:
| Technique | Material | Effect |
|---|---|---|
| Embossing | Embossing folder | Raised, plant-like texture |
| Tearing | Paper or fabric | Organic, natural feel |
| Layering | Foam adhesive | Depth and visual interest |
These textured layers bring your botanical cards to life, capturing the essence of plant growth.
Creating Botanical Bookmarks
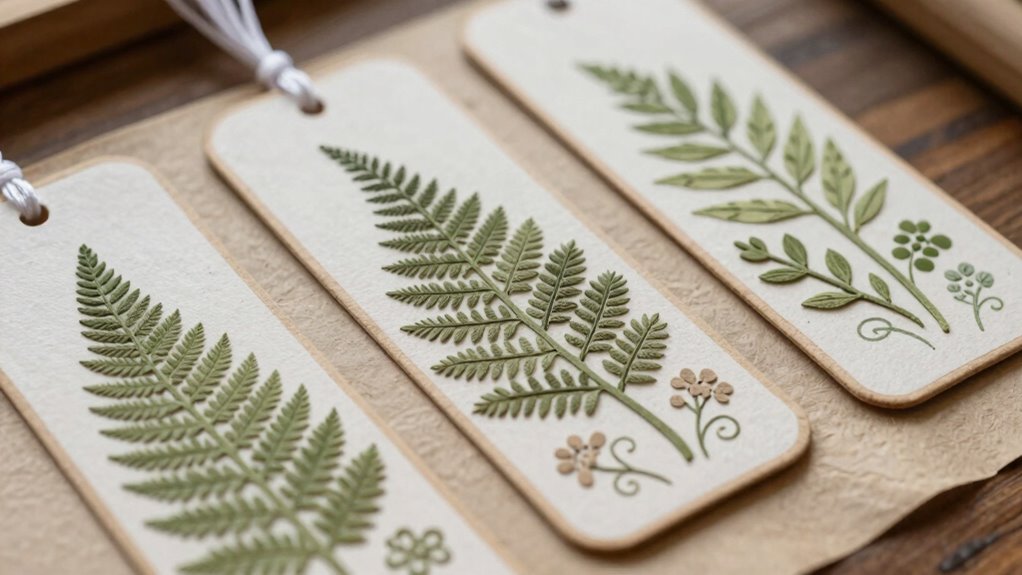
Have you ever thought about turning everyday botanical elements into charming bookmarks? Using leaves, flowers, or seeds, you can craft meaningful accessories rooted in botanical symbolism and herbal folklore. To create mesmerizing bookmarks, consider these ideas:
- Select a botanical symbol—like a fern or ivy—to represent growth or fidelity.
- Incorporate herbal folklore—such as lavender for peace or chamomile for relaxation—adding personal significance.
- Use pressed flowers or leaves to preserve their natural beauty and sentiment.
- Attach them to a sturdy backing like cardstock or fabric, ensuring durability.
These handmade bookmarks not only mark your place but also carry deeper meanings inspired by nature’s stories. They become personalized tokens, connecting you to botanical symbolism and herbal folklore with every page turn.
Making Natural Fiber Wall Hangings With Botanical Themes
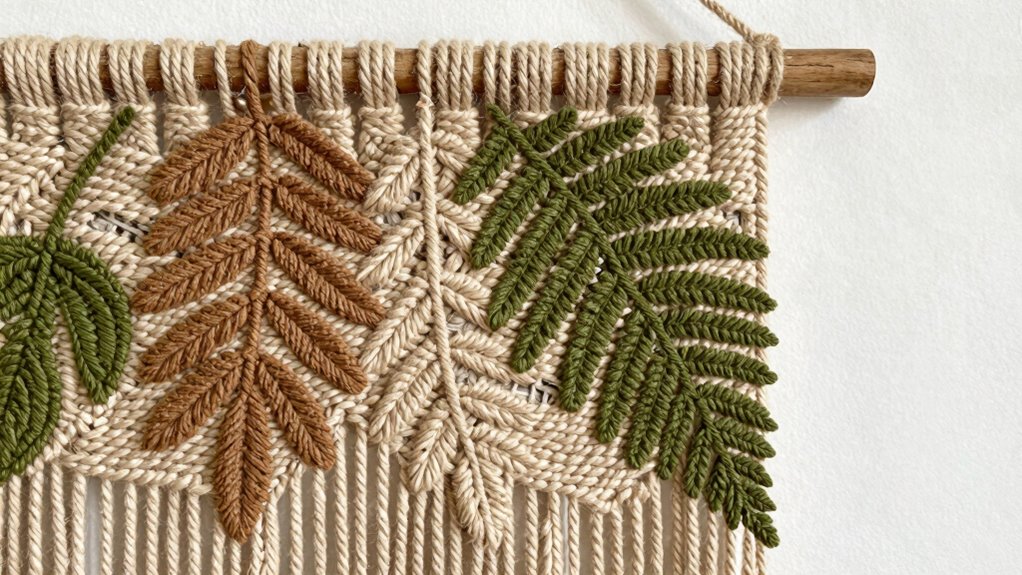
You can start by selecting natural fibers like jute, sisal, or cotton to create textured, eco-friendly wall hangings. Incorporate botanical patterns through weaving, knotting, or wrapping techniques that highlight leaf or floral shapes. With a few creative methods, you’ll craft stunning pieces that bring botanical beauty into any space.
Choosing Natural Fibers
Why choose natural fibers for botanical-themed wall hangings? Because they bring authenticity, texture, and eco-friendliness to your project. Natural fibers like jute, hemp, and organic cotton are sustainable choices, supporting sustainable harvesting practices without harming the environment. They also accept organic dyeing beautifully, allowing you to create vibrant, eco-conscious colors.
Consider these key points:
- Sustainable harvesting ensures you’re sourcing fibers responsibly, reducing environmental impact.
- Organic dyeing enhances the natural beauty of fibers while avoiding synthetic chemicals.
- Texture and durability add depth and longevity to your wall hangings.
- Authentic botanical feel connects your art directly to nature’s true forms, creating a harmonious, eco-friendly aesthetic.
Choosing natural fibers lets you craft with purpose, blending beauty and sustainability seamlessly.
Incorporating Botanical Patterns
Natural fibers provide a beautiful, textured canvas for botanical patterns, allowing you to bring leaf shapes, flowers, and other plant motifs to life with authenticity. When incorporating these patterns, consider the significance of plant symbolism; different plants carry unique meanings that can add depth to your wall hangings. For example, ivy symbolizes growth and fidelity, while lotus represents purity. You might also draw inspiration from botanical myths, using motifs like the mandrake or olive branch to evoke stories and traditions. By weaving these symbols into your design, you create a piece rich in cultural meaning and visual interest. This thoughtful approach helps your natural fiber wall hanging become more than decor—it becomes a narrative of nature’s stories and symbolism.
Techniques for Wall Hangings
Ever wondered how to bring botanical inspiration to life through fiber art? Creating natural fiber wall hangings with botanical themes involves techniques that emphasize botanical symbolism and plant-inspired color palettes. To start, choose fibers like jute or hemp for texture and authenticity. Next, incorporate knotting or weaving patterns that mimic leaves or vines. Consider layering different fibers to add depth and realism. Here are four key steps:
- Select colors inspired by nature, like soft greens or earthy browns.
- Use macramé knots to form botanical shapes, symbolizing growth and life.
- Incorporate natural elements such as dried flowers or leaves for added symbolism.
- Play with asymmetry to reflect the organic flow of plant life.
These techniques help craft wall hangings that beautifully express nature’s symbolism and vibrant botanical themes.
Crafting Botanical Candle Art for Home Décor
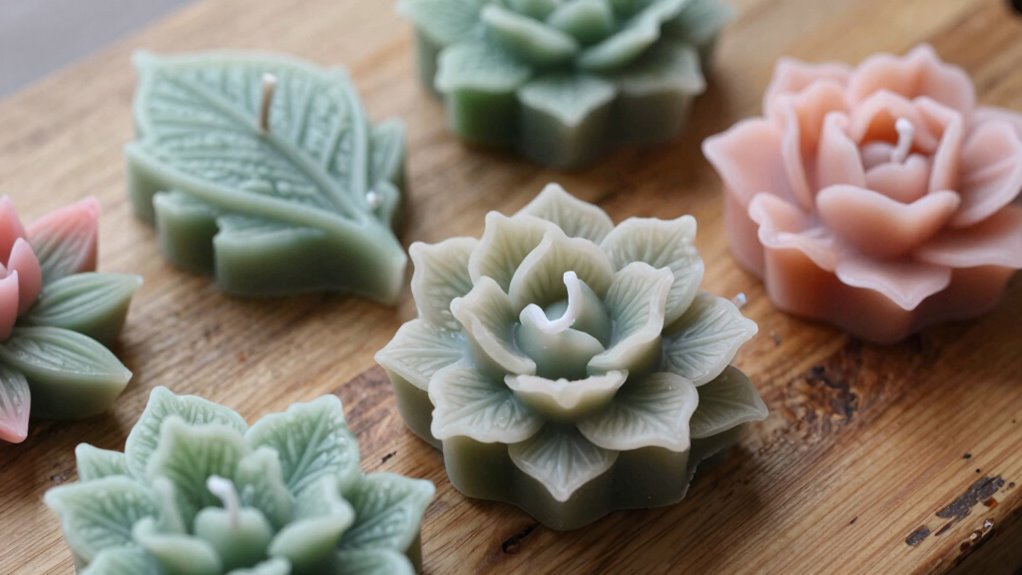
Creating botanical candle art is a delightful way to bring the beauty of nature into your home décor. You can craft candles that showcase plant symbolism, highlighting the meanings attached to different flora, like lavender’s calming properties or ivy’s resilience. Using botanical symbolism in your designs enhances their significance, turning simple candles into meaningful decorative pieces. Shape wax into leaves, flowers, or branches, capturing the intricate details of botanical shapes. Incorporate natural scents and colors that reflect specific plants’ characteristics. These handcrafted candles serve as both art and symbolism, creating a calming atmosphere while celebrating nature’s beauty. Whether for personal use or as gifts, botanical candle art adds a touch of organic elegance to any space.
Building Tiny Botanical Terrariums
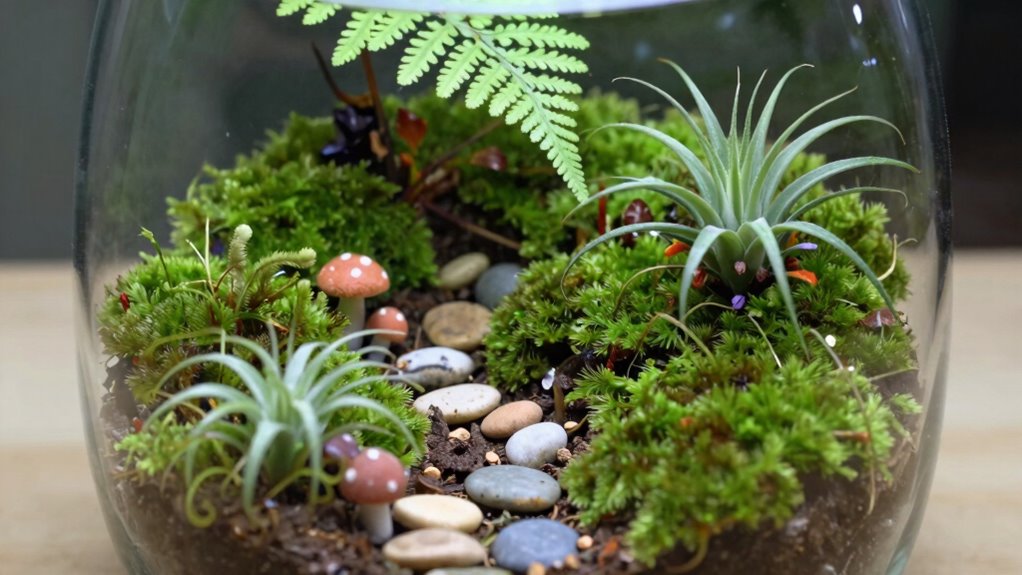
Have you ever considered how tiny, self-contained ecosystems can bring a touch of greenery into even the smallest spaces? Building tiny botanical terrariums is a simple, rewarding project. Start by choosing a glass container that suits your style. Then, layer small pebbles for drainage, add activated charcoal for freshness, and top with soil. Incorporate miniature moss and tiny succulents to create lush, low-maintenance landscapes. Focus on these key elements:
- Select plants that thrive in confined spaces.
- Arrange them to mimic natural growth patterns.
- Keep the terrarium in indirect sunlight.
- Water sparingly to prevent over-saturation.
Making Botanical Stamps and Printable Patterns

Transforming botanical shapes into stamps and printable patterns opens up a world of creative possibilities. You can carve designs from natural materials like potato or cork, then use plant-based inks for vibrant, eco-friendly prints. Experiment with botanical dyeing techniques to create unique backgrounds that enhance your stamped patterns. Using plant-based inks not only supports sustainable art but also allows for rich, earthy tones that complement botanical motifs. When making stamps, focus on detailed impressions of leaves, flowers, or seed pods to achieve authentic textures. Print patterns repeat seamlessly for wallpaper, stationery, or fabric designs. This process connects you to nature and encourages intuitive creativity, transforming simple botanical shapes into versatile art pieces that celebrate natural beauty.
Designing Floral Tote Bags With Botanical Prints

- Select flowers with meaningful symbolism to convey messages.
- Match botanical prints to the current season for relevance.
- Use vibrant colors to highlight seasonal florals.
- Incorporate diverse botanical shapes to add visual interest and authenticity.
Creating Botanical Coasters With Resin
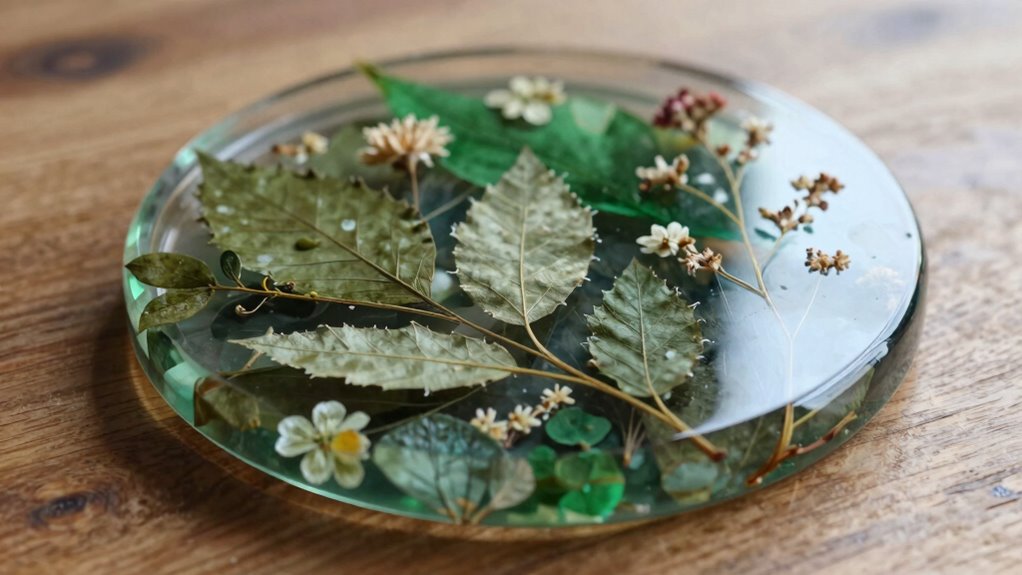
Creating botanical coasters with resin offers a beautiful way to preserve and showcase natural elements. You can incorporate botanical photography or small pressed herbs to create unique designs that highlight botanical shapes. To start, select flat, dried plant materials or pressed herbs that evoke herbal remedies or vibrant botanical imagery. Mix clear resin in a well-ventilated area and pour a thin layer into your molds. Arrange your botanical elements on the surface before pouring the next layer of resin, ensuring they stay in place. Once cured, sand the edges for a smooth finish. These coasters celebrate natural textures and botanical inspiration, making them perfect for adding a touch of nature to your home or gifting to fellow plant lovers.
Making Leaf-Shaped Soap Bars

- Choose a mold shaped like a leaf to enhance the botanical theme.
- Mix natural soap base with herbal essential oils for a fragrant touch.
- Pour the mixture into your mold and let it set completely.
- Wrap your soap bars with eco-friendly soap packaging that highlights their natural inspiration.
These steps not only produce beautiful, leaf-shaped soaps but also deepen your connection to nature. The herbal scent elevates the sensory experience, while thoughtful soap packaging makes your creations perfect for gifting or personal use.
Crafting Botanical Suncatchers With Colored Glass
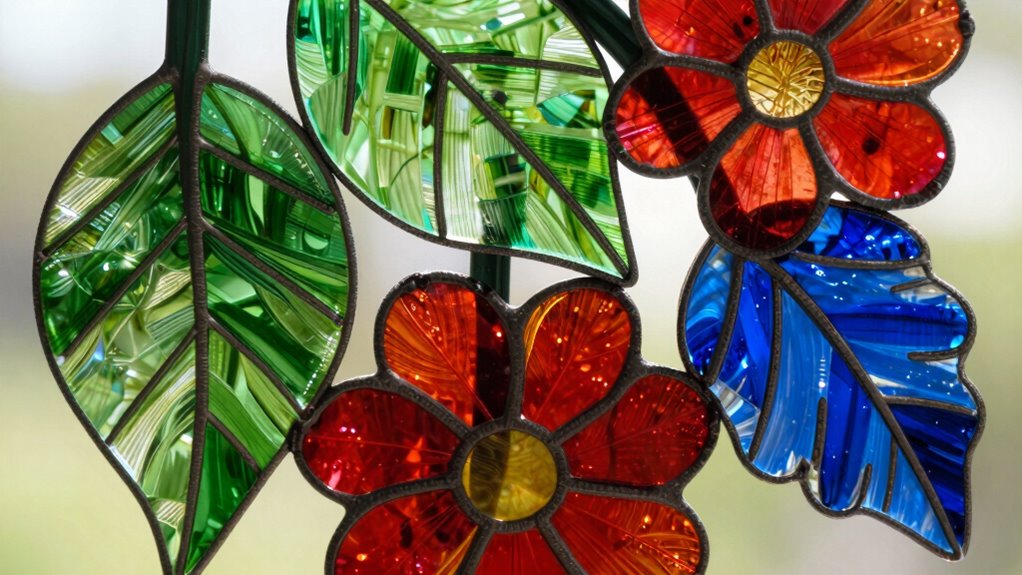
You should choose vibrant glass colors that catch the light and bring your botanical designs to life. As you assemble your suncatchers, focus on creating bright, eye-catching patterns that mimic natural shapes. This process allows you to craft stunning, colorful pieces that brighten any window.
Selecting Vibrant Glass Colors
Choosing vibrant glass colors is essential for bringing your botanical suncatchers to life, as the right hues can mimic the natural beauty of flowers and foliage. To achieve this, consider how color blending enhances depth and realism, creating seamless gradations between shades. Select bold colors that evoke energy, such as rich reds or vibrant greens, to make your design pop. Remember, glass etching can add subtle texture and contrast, emphasizing details like veins in leaves or petal edges. Keep these principles in mind:
- Use complementary colors to highlight natural harmony
- Mix shades thoughtfully for realistic color blending
- Focus on contrast to emphasize key botanical features
- Incorporate etched details to add texture and depth
Assembling Bright Botanical Designs
With vibrant glass colors selected, it’s time to assemble your botanical suncatcher to bring your bright design to life. Focus on botanical symbolism to add meaningful detail to your plant-inspired patterns. Carefully arrange your colored glass pieces, ensuring each element reflects the natural beauty of plant forms—think delicate leaves, blooming petals, or intricate vine shapes. Use solder or copper foil to join the pieces securely, creating a sturdy frame that highlights your design’s bright colors. As you assemble, consider how the light will filter through your glass, emphasizing the vibrant hues and symbolic elements. This step transforms your raw materials into a cohesive, eye-catching piece that captures the essence of nature’s botanical beauty, making your suncatcher a stunning display of light and symbolism.
Designing Nature-Inspired Table Centerpieces
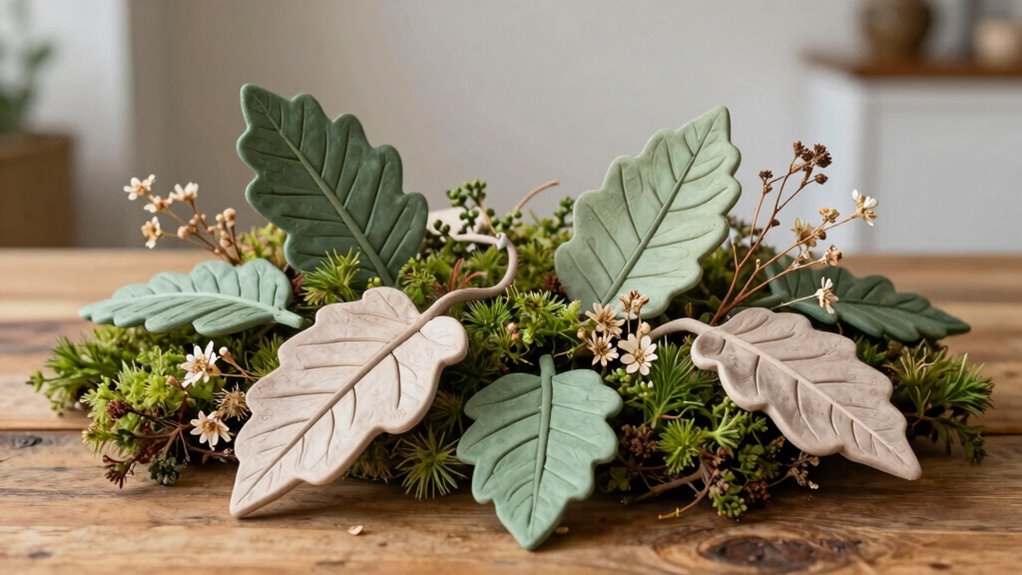
Have you ever considered how botanical shapes can transform a simple table into a natural masterpiece? By designing nature-inspired centerpieces, you bring the beauty of a botanical garden directly to your table. Focus on leaf symmetry to create balanced, harmonious arrangements that evoke natural elegance. To craft your centerpiece:
- Select leaves with symmetrical shapes for visual harmony.
- Combine different leaf sizes to add depth and interest.
- Use natural elements like twigs or small flowers for texture.
- Arrange pieces in a way that mimics a thriving botanical garden scene.
This approach emphasizes the organic balance found in nature, making your table inviting and lively. By thoughtfully incorporating botanical shapes, you turn everyday decor into a celebration of natural beauty.
Painting Botanical Wall Murals at Home
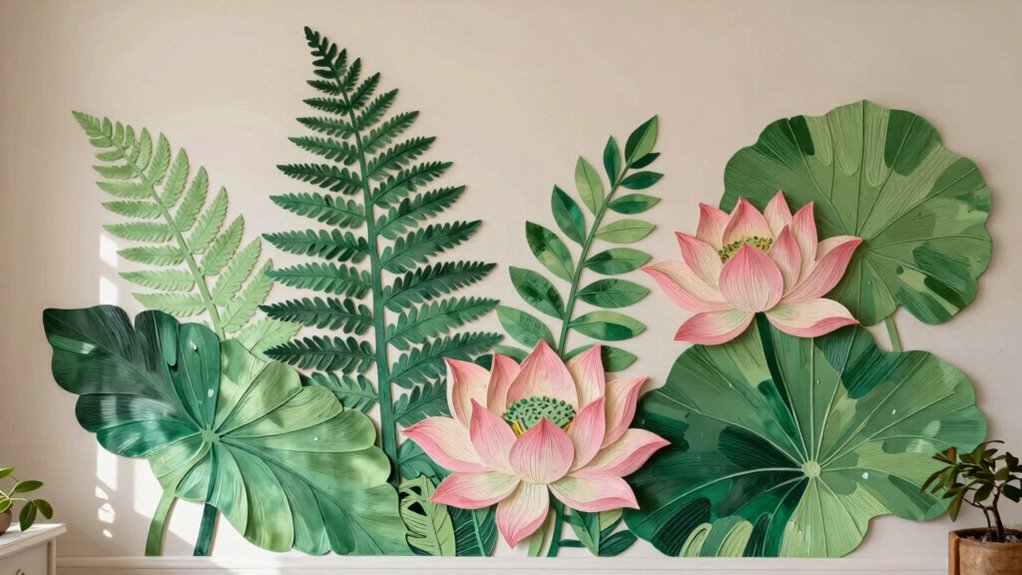
Transforming a blank wall into a stunning botanical mural is a rewarding way to bring nature indoors. You can incorporate botanical symbolism by choosing flowers and leaves that represent specific meanings, like roses for love or lavender for calm. Use seasonal flower arrangements as inspiration, highlighting blooms that are in season to create a vibrant, authentic look. Start with a clear plan or sketch to guide your painting, blending colors and shapes seamlessly. Consider layering different botanical elements to add depth and interest. This project allows you to personalize your space while celebrating nature’s beauty. Whether you opt for a detailed or minimalist style, painting botanical wall murals captures the essence of seasonal and symbolic flora, transforming your home into a lush, living canvas.
How to Wrap Gifts With Botanical-Themed Paper and Tags
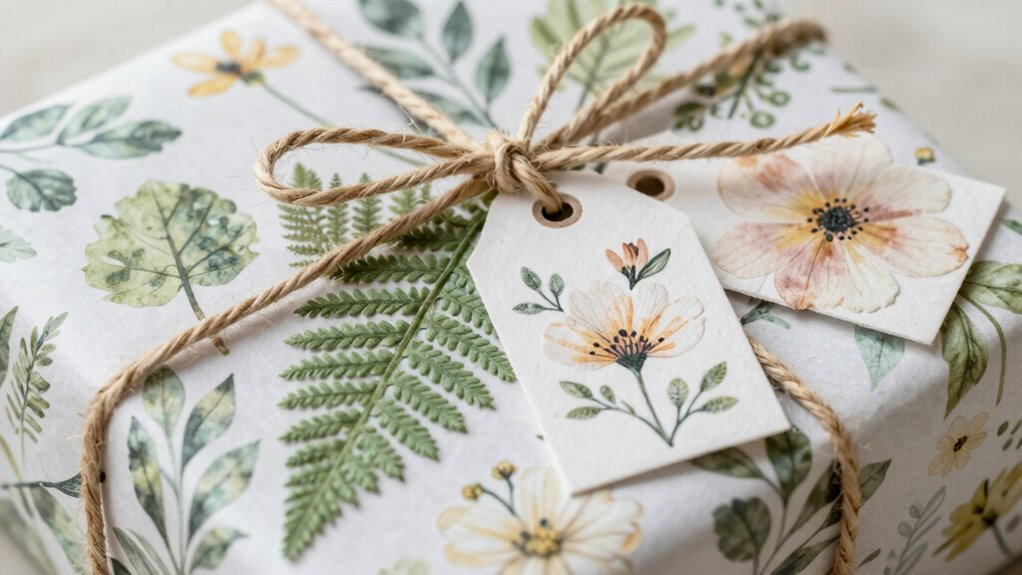
Building on your botanical decorating skills, wrapping gifts with botanical-themed paper and tags adds a finished, stylish touch that complements your nature-inspired decor. To achieve this, start with high-quality gift wrapping paper featuring floral or leaf patterns. Use botanical tags that mirror the theme for a cohesive look.
Here are four tips to elevate your gift wrapping:
- Select paper with natural motifs for an authentic feel.
- Tie the package with twine or ribbon that resembles vines or stems.
- Attach botanical tags with handwritten messages for a personal touch.
- Incorporate small pressed flowers or leaves on the wrapping for extra detail.
These steps help you create thoughtful, beautiful gift presentations that reflect your love for nature and botanical beauty.
Eco-Friendly Botanical Crafts From Recycled Materials

Using recycled materials for botanical crafts not only helps reduce waste but also sparks your creativity in creating beautiful, eco-friendly decorations. You can craft stunning wildflower arrangements using old glass jars or tin cans, giving new life to items you’d otherwise discard. These arrangements bring a touch of nature indoors while emphasizing sustainability. For botanical-themed journaling, repurpose scrap paper, cardboard, or old book pages to create textured backgrounds and embellishments that reflect botanical shapes. Incorporate pressed flowers and leaves collected from your environment, stored and reused in your projects. These eco-friendly crafts connect you more deeply with nature and encourage mindful consumption, all while producing charming, sustainable decorations that celebrate the beauty of botanical forms.
Personalization Tips for Botanical Crafts

Adding personal touches to your botanical crafts makes each piece unique and meaningful. To truly make your creations stand out, consider these tips:
Personalize your botanical crafts to create meaningful, unique treasures that reflect your style and story.
- Use natural floral fragrances—essential oils or dried flowers—to evoke specific moods or memories.
- Incorporate symbolic elements that represent personal stories or values, adding depth to your design.
- Protect your work from garden pests by sealing or treating materials, ensuring longevity and beauty.
- Customize with hand-painted details or engraved initials to create a one-of-a-kind piece. These touches not only elevate your craft but also reflect your personality. By thoughtfully personalizing your botanical projects, you turn simple materials into heartfelt treasures, making each craft a reflection of your unique journey.
Frequently Asked Questions
What Are the Best Botanical Shapes for Beginner Crafters?
For beginner crafters, flower patterns and leaf silhouettes are your best choices. These shapes are simple to cut and paint, helping you build confidence while creating beautiful botanical-inspired projects. Start with basic flower shapes like daisies or roses and leaf outlines such as fern or maple leaves. These shapes are versatile, look great in various crafts, and allow you to practice your skills without feeling overwhelmed.
How Can I Preserve Botanical Elements for Long-Term Crafts?
To preserve botanical elements for long-term crafts, you can use various preservation techniques, such as pressing, air drying, or silica gel drying. These botanical drying methods help retain shape and color, making your craft materials last longer. Make certain you store dried botanicals in a cool, dry place away from direct sunlight. Proper preservation techniques keep your botanical elements vibrant, allowing you to create beautiful, lasting handmade crafts inspired by nature.
Are There Eco-Friendly Alternatives to Synthetic Craft Supplies?
Yes, you can opt for eco-friendly alternatives like sustainable dyeing methods using natural pigments, which reduce environmental impact. Additionally, biodegradable adhesives made from plant-based ingredients offer a greener option compared to synthetic glues. By choosing these sustainable materials, you not only create beautiful botanical-inspired crafts but also support environmental conservation efforts. These alternatives guarantee your projects are both eco-conscious and visually appealing, aligning with a greener, more sustainable lifestyle.
Which Botanical Motifs Are Trending in Home Decor?
You’re in luck—plant silhouette and floral patterns are trending in home decor now. These motifs add a fresh, natural vibe and create a calming atmosphere. You can incorporate plant silhouettes in wall art or textiles, while floral patterns work beautifully on cushions and curtains. By embracing these botanical motifs, you turn your space into a lush retreat, proving that sometimes, a little greenery goes a long way in making your home feel inviting.
How Can Botanical Crafts Be Incorporated Into Seasonal Decorations?
You can incorporate botanical crafts into seasonal decorations by creating stunning wildflower arrangements that brighten up any space. Use leaf garland designs to frame doorways or mantels, adding a natural touch to your decor. For fall, incorporate dried botanicals; in spring, fresh blooms work beautifully. These handmade touches bring seasonal freshness and charm, making your home feel welcoming and aligned with nature’s changing beauty throughout the year.
Conclusion
Exploring botanical shapes offers endless creative possibilities that can brighten your space and bring a touch of nature indoors. With a little imagination and some simple techniques, you can craft beautiful, personalized pieces that subtly whisper of the outdoors. Embrace these ideas as gentle nudges to experiment and enjoy the process—you might find yourself pleasantly surprised by the charming results. After all, nurturing your creativity can be a quietly rewarding journey that blossoms over time.