To organize your creative chaos, try handmade projects like upcycled jars, fabric organizers, and custom drawer dividers. Use simple materials like recycled wood or cardboard to craft storage solutions that fit your space. Incorporate stylish labels, color coding, and hidden compartments to boost efficiency and visual appeal. Focus on sustainable, multi-functional designs that keep everything accessible and inspiring. Keep your system maintained with quick tips for long-term organization—more ideas await if you keep exploring.
Key Takeaways
- Create upcycled storage solutions using vintage textiles, furniture, and containers for personalized organization.
- Design wall-mounted shelves and labels to visually categorize and access craft supplies efficiently.
- Use fabric pockets and stackable bins to maximize space and keep small items orderly.
- Repurpose jars and bottles with decorative touches for stylish, functional storage of loose items.
- Build custom drawer dividers from recycled materials to organize small supplies neatly.

ComSaf 3-Pack 78oz Large Square Airtight Glass Jars for Bulk Food, Holds a 4lb Bag of Sugar or 5lb of Rice, Wide Mouth Canister for Flour, Coffee & Pantry Organization
The 4lb Sugar & 5lb Rice Solution: Finally, a worthy home for your bulk buys. Each extra-large 78oz…
As an affiliate, we earn on qualifying purchases.
As an affiliate, we earn on qualifying purchases.
Why Organizing Your Creative Space Matters
A well-organized creative space can substantially boost your productivity and inspire your best ideas. When your supplies and tools are neatly arranged, you’re more likely to experience a smooth creative flow. Clutter often causes distraction, leading to an overload of inspiration that’s difficult to manage. By organizing your space, you create an environment where ideas can flourish without interruption. This intentional setup can also help you develop efficient workflows, making your creative process more seamless. Incorporating sustainable living practices into your creative space can also promote environmental consciousness and reduce waste. Additionally, understanding the importance of sleep health can help you maintain the energy and focus needed for your creative endeavors. Creating a dedicated space for your projects can also help you establish habit formation, making it easier to maintain your organizational system over time. Keeping your workspace clean and well-maintained further supports a positive creative environment, encouraging ongoing inspiration and productivity.

Hanging Wall File Organizer, 5 Pocket, Black Wall Storage Pocket Charts with 2 Hangers, Oxford Cloth Storage Pocket, Over The Door File Organizer, Great for Classroom, Home or Office Use (5 Pocket)
Size of Product:14 in W * 27.5 in L of overall size, A total of 5 large pockets…
As an affiliate, we earn on qualifying purchases.
As an affiliate, we earn on qualifying purchases.
How to Assess Your Clutter and Find What’s Needed

Start by spotting the areas that feel most overwhelming, so you can focus your efforts effectively. Next, sort your items into clear categories to see what truly belongs where. Finally, identify the essentials you need to keep and let go of anything that no longer serves your creative process. Incorporating diversification strategies can also help you efficiently manage your materials and investments. Recognizing design thinking principles can guide you in creating more effective organization systems that foster creativity. Additionally, understanding functional aesthetics can ensure your organization remains both practical and visually inspiring. Considering smart home devices can further optimize your space by integrating technology that simplifies organization and enhances accessibility. Exploring ergonomic design can also improve comfort and efficiency in your creative workspace, making your organization more sustainable over time.
Identify Overwhelmed Areas
When clutter begins to feel overwhelming, taking a step back to assess your space can make a big difference. Look for areas where chaos seems concentrated—your desk, corner, or shelves. Notice how these spots affect your mood; clutter can drain your energy and cause stress. Addressing these overwhelmed areas with ergonomic seating and proper lighting can help you sit comfortably while sorting. Focus on what truly needs your attention, and identify patterns of clutter buildup. By pinpointing these hotspots, you can create a targeted plan to organize and declutter. Recognizing where chaos gathers allows you to prioritize, making your space more functional and calming. Incorporating visual organization tools can also enhance your ability to see and manage clutter more effectively. This step sets the foundation for effective organization and helps restore a sense of control. Understanding clutter assessment techniques can further improve your ability to identify these areas efficiently. Additionally, practicing consistent space evaluation can prevent clutter from accumulating again over time.
Categorize Items Clearly
Once you’ve identified the areas causing clutter, the next step is to categorize your items clearly. Start by sorting everything into broad groups, such as gardening tips supplies or cooking techniques tools. Use labeled bins or drawers to keep similar items together, making it easier to find what you need. For example, keep plant seeds and gardening gloves in one space, while spice jars and measuring spoons go in another. This process helps you assess what’s essential and what’s unnecessary. Clear categorization reduces overwhelm and saves time when you’re working on projects. It also encourages you to think about specific needs, whether it’s organizing your gardening tips or refining your cooking techniques. Well-placed categories create a simple, functional system for your creative chaos.
Determine Essential Needs
Before you can effectively organize your supplies, you need to determine which items are truly essential. Start by sorting through your garden tools and kitchen utensils. Ask yourself if each item gets regular use or if it’s just taking up space. Keep the tools that you rely on for gardening projects and the utensils you use daily in the kitchen. Discard or donate duplicates or broken items. Consider whether certain tools or utensils are outdated or rarely used. This process helps you focus on what’s necessary and reduces clutter. Once you identify your essentials, it becomes easier to create specific storage solutions, making your space more functional and less chaotic. Incorporating smart organization can further optimize your storage and maintain order over time. Clear priorities lead to a more organized environment, fueling your creative projects. Embracing inspirational quotes can also motivate you to maintain an organized and inspiring workspace.

Bamboo Drawer Dividers Organizers, Adjustable Drawer Separator Splitters, 17–22 Inches Expandable Drawer Divider Organizer for Large Utensils, Kitchen, Bedroom, Dresser & Office Drawers 4-Pack
✅ MEASURE YOUR DRAWER BEFORE PURCHASE: Please be aware that the Royal Craft Wood Drawer Divider Organizer is…
As an affiliate, we earn on qualifying purchases.
As an affiliate, we earn on qualifying purchases.
Choosing the Best Materials for DIY Storage Projects
When selecting materials for your DIY storage projects, consider their durability and strength to guarantee they hold up over time. Keep your budget in mind to choose options that balance cost with quality, avoiding overspending. Additionally, make sure the materials you pick are compatible with your project’s design and the items you’ll store. Incorporating child-friendly materials can also ensure safety and longevity for your storage solutions. To enhance the overall safety and suitability of your storage, understanding social norms related to safety standards can be beneficial. Being aware of material safety standards can help you select the safest options for your specific needs. Recognizing industry safety guidelines can further assist in making informed choices aligned with best practices. Considering regulatory requirements can also help ensure your DIY storage solutions meet all necessary safety and compliance standards.
Durability and Strength
Choosing the right materials is essential for ensuring your DIY storage projects can handle everyday use without falling apart. Durability testing helps you identify which materials will stand up to wear and tear over time. When selecting materials, consider strength and how well they resist damage like cracking, warping, or breaking. Solid wood, metal, and heavy-duty plastics often score high on durability tests, making them ideal choices. Avoid flimsy or low-quality options that may fail quickly. Material selection should focus on longevity, especially if you plan to store heavy or bulky items. Conducting durability assessments during your selection process can help you better understand each material’s resilience. Properly assessing material resilience ensures your storage solutions will withstand the test of time and daily use. Additionally, understanding how different cleaning tools can help maintain your surfaces can prolong the lifespan of your storage solutions. Regular maintenance and choosing appropriate cleaning methods can significantly enhance the durability of your materials. Incorporating weather-resistant finishes can also protect your projects from environmental damage, especially if they are placed outdoors. Ultimately, choosing strong, resilient materials keeps your creative chaos organized and your projects intact for years to come.
Cost and Budgeting
Selecting the right materials for your DIY storage projects involves balancing quality and cost to stay within your budget. Effective budget planning helps you allocate funds wisely, ensuring you don’t overspend on expensive materials when simpler options will do. Keep expense tracking in mind to monitor your spending as you shop for supplies, preventing surprises later. Look for affordable options like repurposed wood, cardboard, or recycled containers that still offer durability. Prioritize materials that meet your needs without inflating costs, and compare prices across suppliers. By staying organized with your budget planning and expense tracking, you can confidently choose materials that fit your project’s scope and your financial limits, making your creative chaos more manageable without breaking the bank.
Material Compatibility
Ensuring your materials work well together is key to creating effective and durable storage solutions. Consider color theory to choose complementary or harmonious hues, making your storage visually appealing. Opt for materials that align with your sustainability goals, prioritizing eco-friendly options like reclaimed wood or biodegradable plastics. Check that different materials are compatible in strength and flexibility to prevent cracking or warping over time. For example, combining metal with sturdy wood can provide stability, while lightweight plastics work well for portable bins. Be mindful of how finishes and adhesives interact, ensuring they won’t damage or weaken your materials. By thoughtfully selecting sustainable, color-coordinated materials that work cohesively, you’ll build storage solutions that are both functional and environmentally responsible.

Vtopmart 6 Qt Plastic Storage Bins with Lids, Clear Sensory Bins, Arts Crafts Organizers and Storage, Stackable Containers for Home Office and School Supplies, 4 Pack
【Suitable Size】The size is 14.25 inches x 10.51 inches x 2.83 inches, which is easy to move and…
As an affiliate, we earn on qualifying purchases.
As an affiliate, we earn on qualifying purchases.
Upcycling Old Items Into Functional Organizers

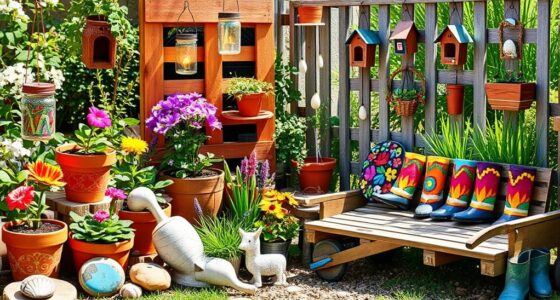
Have you ever looked at old items and wondered how they could serve a new purpose? Upcycling is a perfect way to turn vintage textiles and outdated furniture into functional organizers. For example, you can transform vintage textiles into hanging pockets or storage bins, adding a touch of charm to your space. Upcycled furniture, like an old dresser or wooden crates, can be repurposed into stylish storage solutions for craft supplies or office essentials. Sand and repaint the furniture to match your decor, then add baskets or hooks for extra organization. This process not only helps reduce waste but also creates unique, personalized pieces that keep your creative chaos tidy and accessible. Upcycling old items saves money and adds character to your organizing system.
Make Your Own Drawer Dividers for Small Supplies
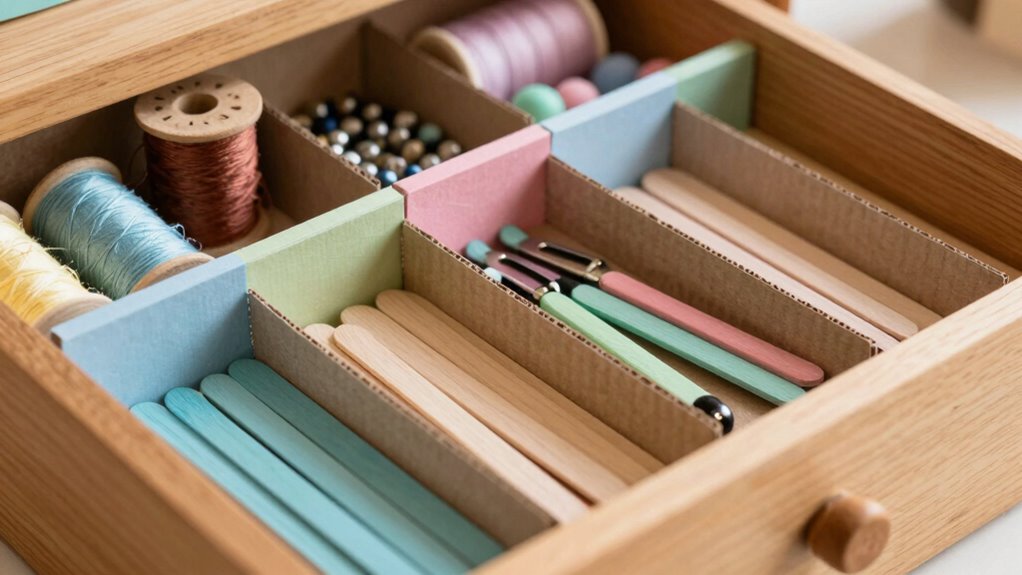
Creating your own drawer dividers is a simple and cost-effective way to organize small supplies. By customizing dividers, you can enhance color coordination and maximize space. Use cardboard, foam board, or repurposed materials to craft your dividers, fitting them precisely to your drawer’s dimensions. This customization prevents clutter and keeps supplies easily accessible. Consider dividing items by color or type to improve organization.
| Supplies Type | Example Colors |
|---|---|
| Beads | Red, Blue, Green |
| Brushes | Small, Medium, Large |
| Pins | Silver, Gold |
| Pens | Black, Blue, Red |
| Stickers | Assorted Colors |
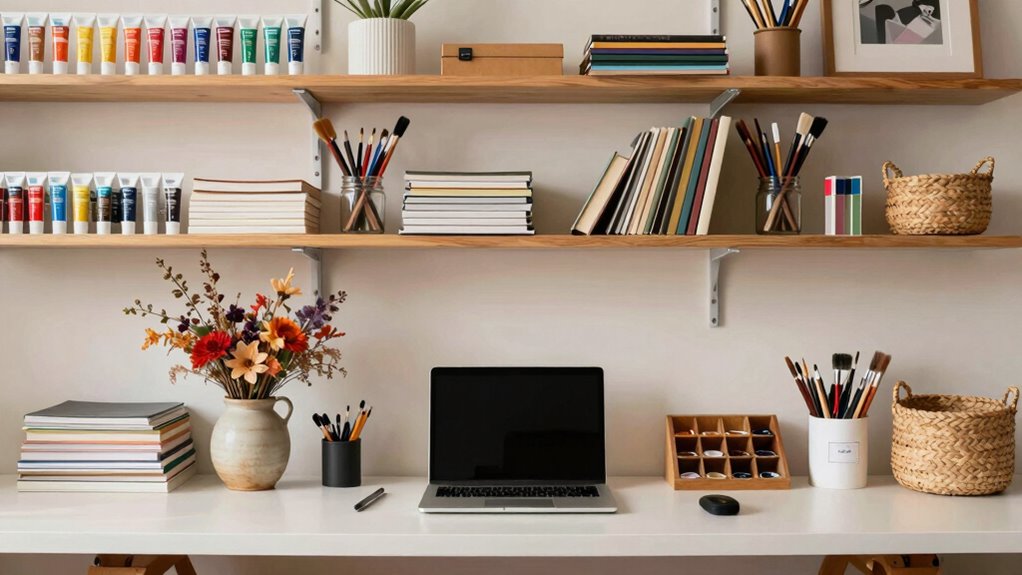
Build Stylish Wall Shelves for Art and Craft Supplies
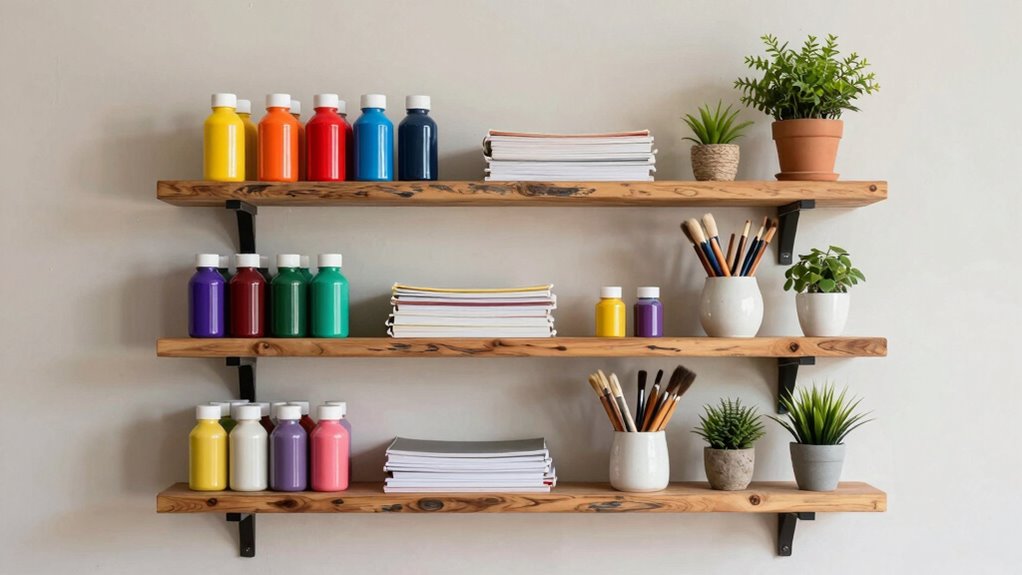
Adding stylish wall shelves is a smart way to organize your art and craft supplies while enhancing your space’s decor. When designing your shelves, consider color coordination to create visual harmony, making it easier to find what you need. Think about establishing a storage hierarchy—place frequently used items at eye level and less-used supplies higher or lower. Use different shelf sizes to accommodate various tools and materials efficiently. Incorporate decorative elements to make the shelves inspiring and personalized. Keep the layout simple, functional, and aesthetically pleasing to motivate your creativity.
- Organize by color to boost inspiration
- Use different shelf heights for hierarchy
- Group similar supplies together
- Select durable, stylish materials
- Keep the design balanced and accessible
Create Custom Labels to Keep Everything in Place
To keep your art and craft supplies organized and easily accessible, custom labels are a simple yet effective solution. By designing labels with clear, bold fonts and attractive layouts, you make it easy to identify each container at a glance. Incorporate color coding into your label design to quickly differentiate categories, such as paints, brushes, or paper. Use contrasting colors for text and backgrounds to enhance readability. You can create labels with printable labels, hand lettering, or even washi tape for a decorative touch. Custom labels not only streamline your workspace but also add a personal touch to your organization system. With a little creativity, your supplies will stay in their designated spots, making your creative process smoother and more enjoyable.
Fabric Pocket Organizers for Easy Access
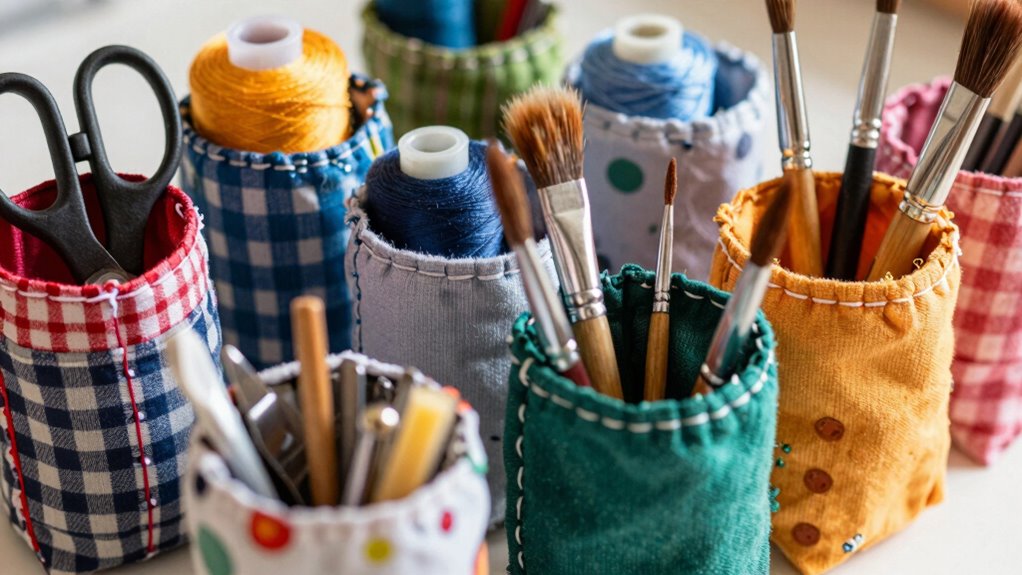
Fabric pocket organizers are a fantastic way to keep your craft supplies within easy reach while maintaining a tidy workspace. They’re perfect for fiber arts and textile crafts, allowing you to store tools, needles, and small materials efficiently. With visible pockets, you can quickly grab what you need without digging through clutter. Personalize your organizer with fabric that matches your style or project theme, making it both functional and inspiring.
Keep craft supplies organized and within reach with personalized fabric pocket organizers for a tidy, inspiring workspace.
- Streamlines your workflow, reducing time spent searching
- Keeps fragile items protected and organized
- Encourages neatness in your creative space
- Adds a decorative touch to your craft area
- Reinforces the importance of organized fiber arts and textile crafts
A fabric pocket organizer transforms chaos into order, boosting your creative productivity.
Stackable Storage Bins for Simple Organization

Stackable storage bins offer a straightforward solution for organizing your craft supplies and keeping your workspace clutter-free. By using bins that nest securely, you create a clear storage hierarchy that makes finding supplies quick and easy. Incorporate color coordination by assigning specific colors to different types of materials—like red for paints, blue for brushes—so you can visually identify items at a glance. This system streamlines your workflow and reduces time spent searching. Stackable bins also maximize vertical space, making your area more efficient. Label each bin clearly to reinforce organization and prevent rummaging through multiple containers. With this simple setup, your creative chaos transforms into an orderly, inspiring space where everything has its place.
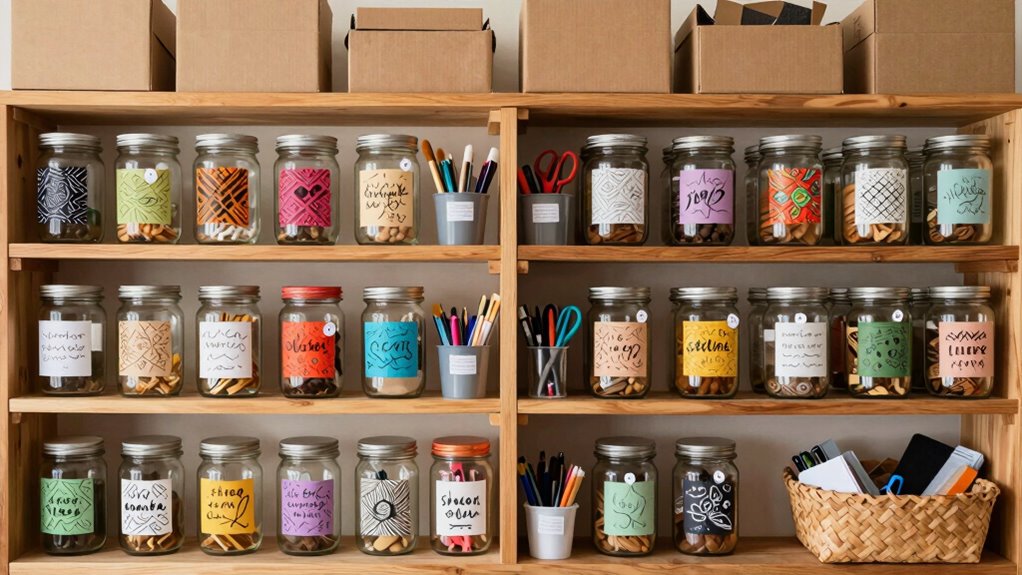
Use Mason Jars and Bottles for Loose Items
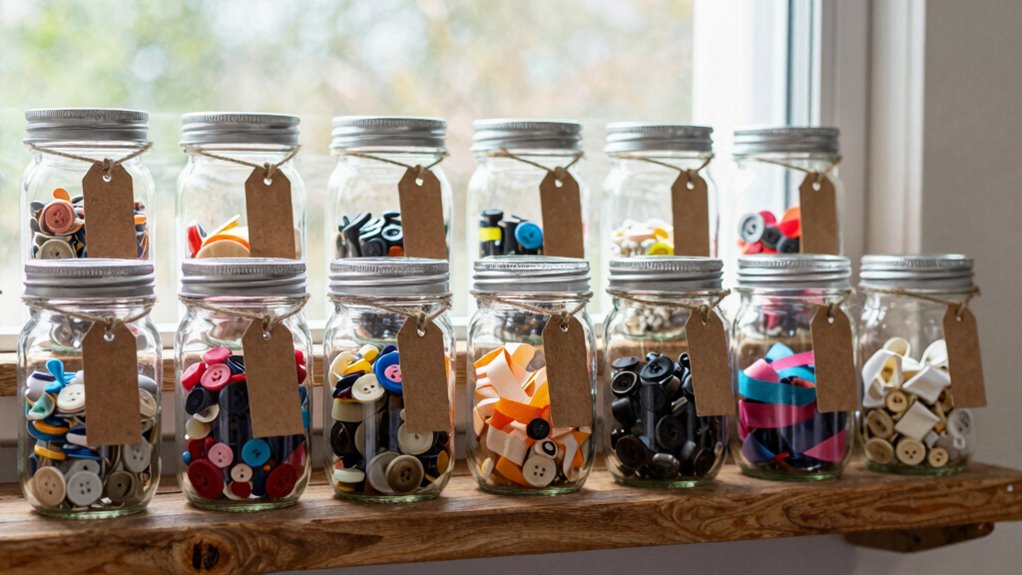
Mason jars and bottles make it easy to access loose items quickly and neatly. You can add labels to customize and organize your collection, making everything easy to find. Plus, repurposing these containers adds a charming touch to your decor while reducing clutter.
Easy Access Storage
Using Mason jars and bottles for loose items makes organizing quick and convenient. They’re perfect for easy access, whether you’re storing vintage finds or everyday supplies. Mason jars can hold buttons, beads, or small tools, while bottles keep loose items visible and within reach. Magnetic solutions, like attaching magnets to lids or jars, turn your storage into a functional display. This method simplifies finding what you need without digging through clutter. It’s especially useful in craft rooms or kitchens. Plus, repurposing vintage bottles adds charm to your space. By choosing transparent containers, you can see everything at a glance, saving time. Mason jars and bottles create a practical, stylish system that keeps your creative chaos organized and accessible, so you can focus on what matters most.
- Promotes quick, easy access to supplies
- Showcases vintage finds with style
- Uses magnetic solutions to maximize space
- Keeps clutter out of sight but in reach
- Encourages repurposing and sustainability
Decorate With Labels
Labels not only help keep your organized space tidy but also add a decorative touch to your jars and bottles. They serve as a quick visual cue, making it easy to find what you need at a glance. For a creative inspiration boost, choose labels that match your color coordination scheme—bright colors for a lively vibe, or neutral tones for a minimalist look. Use handwritten tags for a personal touch or printed labels for a polished appearance. You can also experiment with different fonts or patterns to enhance the aesthetic. Clear, well-designed labels turn functional storage into charming decor, turning your cluttered shelves into a cohesive, visually appealing display. This simple step makes organization both practical and visually satisfying.
Repurpose for Decor
Ever considered turning everyday jars and bottles into charming decor accents? You can transform them into stylish organizers by adding vintage textiles or botanical motifs. Wrap the jars with lace or fabric for a cozy touch, or paint them with botanical patterns to evoke nature’s beauty. These repurposed containers serve as eye-catching displays for loose items like buttons, spices, or craft supplies. Incorporating vintage textiles adds texture and nostalgia, while botanical motifs bring freshness and life. This approach encourages sustainability and creativity, giving new purpose to items you might otherwise discard.
- Reuse jars to showcase preserved flowers or herbs, blending utility with natural beauty
- Use painted or decorated bottles as focal points in your shelves or tables
- Combine vintage textiles with jars for a cozy, eclectic aesthetic
- Create themed displays with botanical motifs to inspire your space
- Elevate everyday storage into meaningful, decorative accents
Portable Craft Caddies for On-the-Go Projects
Looking for a way to keep your craft supplies organized while on the move? Portable craft caddies are perfect for this. Think of them as travel accessories tailored for crafters, making it easy to carry paints, brushes, scissors, and small embellishments. Whether you’re heading to a craft class, a friend’s house, or just working outdoors, these caddies keep everything accessible. You can also convert a caddy into an emergency kit, stocked with essentials like glue, spare batteries, and quick-dry products. Using sturdy containers with compartments ensures your supplies stay sorted and protected. With a portable craft caddy, you’ll enjoy the freedom to create anywhere without the hassle of rummaging through clutter. It’s a simple, smart solution for organized, on-the-go crafting.
Build Pegboards With Labels for Tools and Embellishments
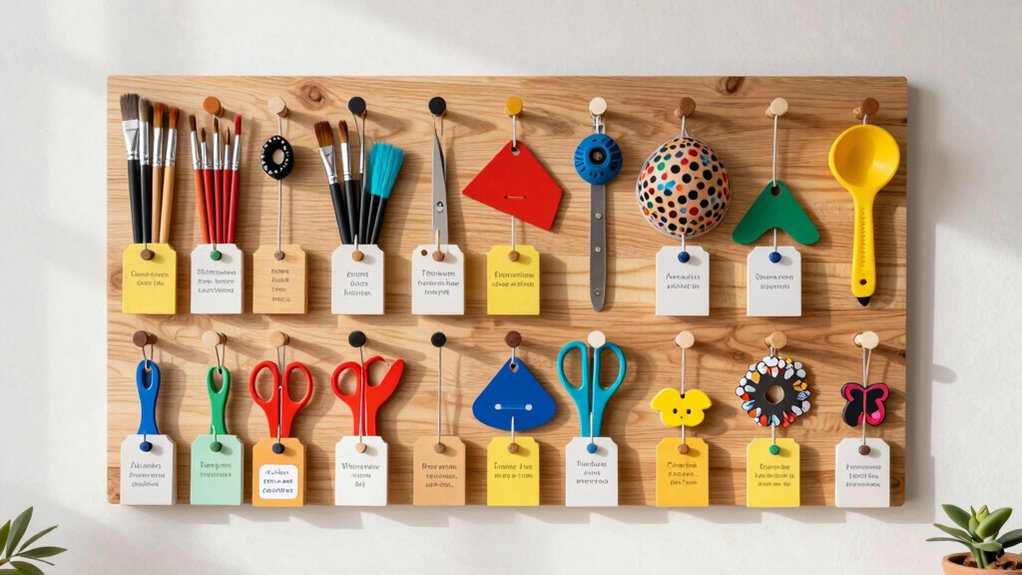
Creating custom labels for your pegboard helps you quickly identify tools and embellishments at a glance. Arranging items thoughtfully guarantees everything has a dedicated spot, making your workspace more efficient. With clever labeling ideas and strategic placement, you’ll keep your creative chaos neatly organized.
Custom Labeling Ideas
Using labels on your pegboards can transform your workspace into a well-organized haven, making it easy to find and return tools and embellishments quickly. Custom labeling ideas enhance efficiency through thoughtful color coding and label design. You can assign specific colors to categories, such as blue for brushes or red for scissors, to streamline your process. Consider using clear, bold fonts for readability or decorative labels for a personal touch. Incorporate symbols or icons to quickly identify contents at a glance.
- Use color coding to differentiate tool groups effortlessly
- Design labels with contrasting colors for visibility
- Incorporate icons for quick identification
- Choose durable, waterproof materials for longevity
- Personalize with hand-drawn or decorative elements
Optimal Pegboard Arrangement
Arranging your pegboard for maximum efficiency involves thoughtful placement of tools and embellishments so everything is accessible and organized. Start by grouping similar items together, using color coordination to create visual harmony and quick identification. Place frequently used tools at eye level for ergonomic design, reducing strain and saving time. Use labels to clearly identify each section, making it easy to find and return items. Heavier tools should hang on sturdier hooks at the bottom, while lighter or decorative embellishments go higher. Consider customizing your layout based on your workflow, ensuring that each tool’s position minimizes movement. This strategic arrangement boosts productivity, keeps your workspace tidy, and transforms your pegboard into a functional, visually appealing organizer.
Hidden Storage Ideas for a Clutter-Free Desk
Ever wonder how to keep your desk tidy without sacrificing style? Hidden storage ideas can transform chaos into calm, all while inspiring your artistic side. Use color schemes that match your workspace to create a cohesive, inviting environment. Consider installing shallow drawers beneath your desk or adding a small, decorative box for supplies out of sight but within reach. Incorporate multi-functional pieces like a hollowed-out book or a secret compartment in your desk accessories. These clever solutions keep clutter hidden, maintaining a clean look. Remember, the right storage doesn’t just organize — it can boost your creativity and mood.
Hidden storage transforms chaos into calm, inspiring creativity and maintaining a stylish, clutter-free workspace.
- Use color-coordinated containers for visual harmony
- Hide essentials in decorative false-bottom drawers
- Repurpose everyday objects for secret compartments
- Integrate storage into existing decor for seamlessness
- Choose artistic inspiration with stylish, functional pieces
Repurpose Cardboard and Wood for Unique Storage Solutions
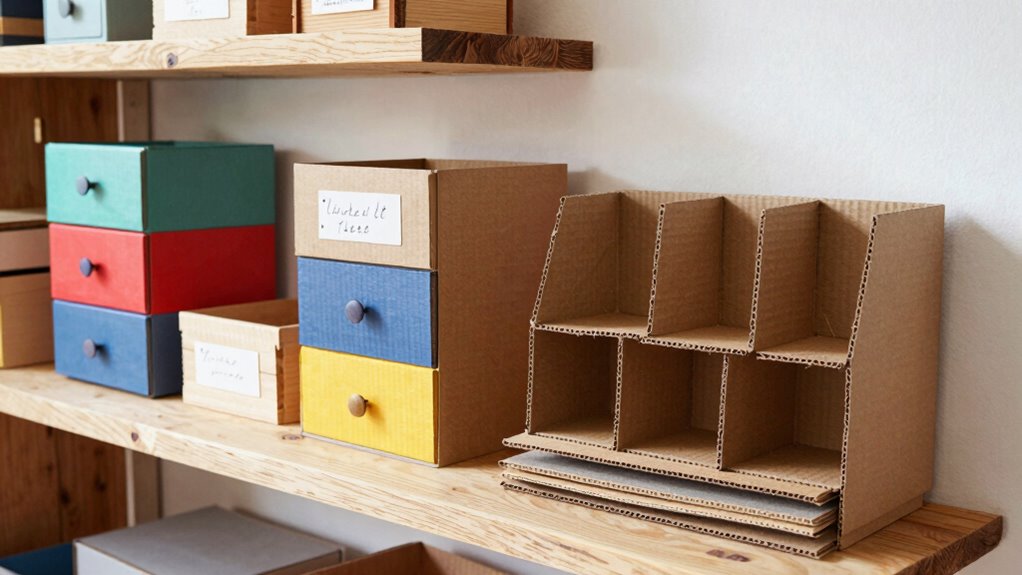
You can transform everyday cardboard and wood into one-of-a-kind storage pieces that suit your space. Creative cardboard projects can add color and personality, while rustic wooden organizers bring warmth and durability. Both options let you customize your organization solutions with simple, budget-friendly materials.
Creative Cardboard Creations
Transforming everyday cardboard and wood into practical storage solutions offers a creative way to organize your space without spending much money. Use color theory to choose vibrant or calming shades, making your creations both functional and visually appealing. Incorporate photography tips by arranging your storage pieces for ideal lighting and clarity, highlighting their uniqueness. Craft boxes, organizers, or wall-mounted shelves by repurposing cardboard, then decorate with paint or paper for a personalized touch. This approach encourages sustainable living and sparks your creativity. Keep in mind:
- Embrace bold colors for energy
- Use neutral tones for calmness
- Play with contrasts to highlight features
- Focus on lighting for photography
- Combine textures for visual interest
These principles help your cardboard projects stand out and stay organized.
Rustic Wooden Organizers
Have you considered combining the warmth of rustic wood with the versatility of repurposed cardboard to create unique storage solutions? Rustic wooden organizers bring natural charm to your space, blending functionality with aesthetic appeal. Using wooden craftsmanship, you can craft bins, trays, or shelves that showcase rustic charm and sturdy design. Repurposing cardboard as a base or filler adds an eco-friendly touch, making each piece one-of-a-kind. Sand rough edges, stain or paint for a personalized finish, and assemble with nails or glue. These organizers not only help manage clutter but also add a handcrafted, rustic vibe to your environment. By blending repurposed materials with rustic wood, you create practical storage solutions that are both stylish and sustainable—perfect for organizing your creative chaos with charm.
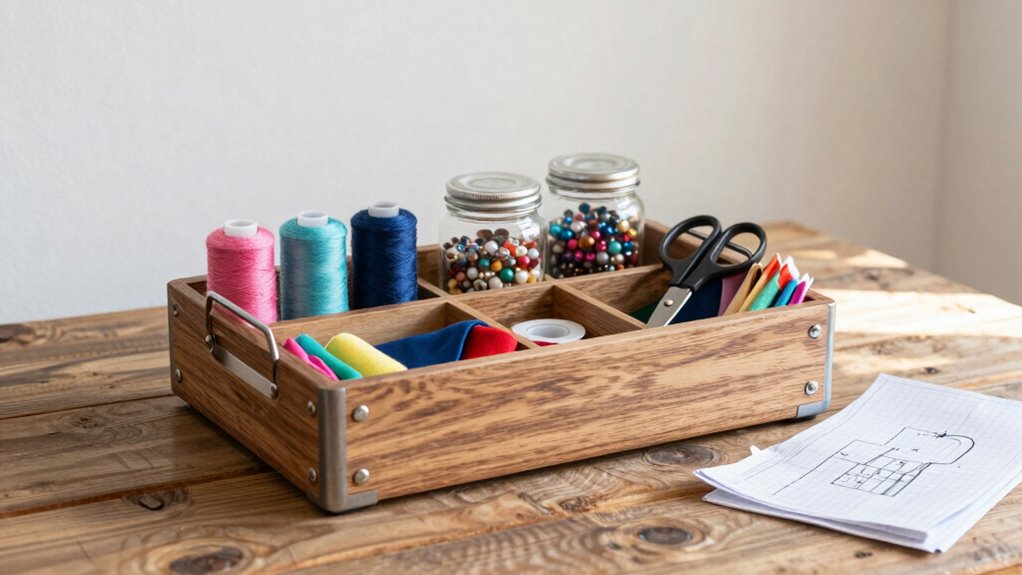
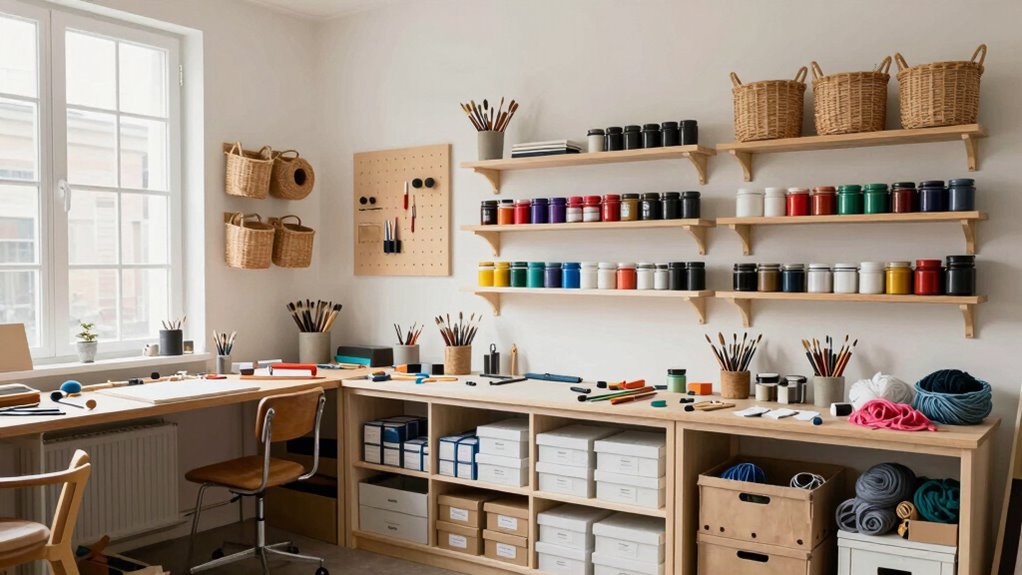
Set up a Creative Corner With DIY Desk Organizers

Creating a dedicated creative corner can especially boost your productivity and inspire new ideas. DIY desk organizers help keep your space tidy and stimulate your creativity through thoughtful design. Focus on color theory to select hues that energize or calm you, enhancing focus. Prioritize ergonomic design to prevent strain during long creative sessions. Use simple materials like repurposed jars, cardboard, or wood to craft personalized solutions. Incorporate storage for tools, paints, and papers, keeping everything accessible. Keep your workspace visually appealing and functional to foster inspiration. Remember, a well-organized corner reduces chaos, making room for fresh ideas. Your DIY organizers can reflect your unique style while supporting practical needs, transforming your creative space into a motivating hub.
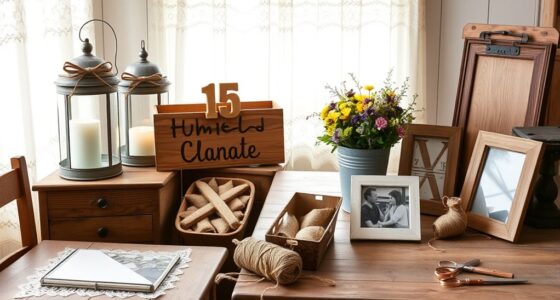
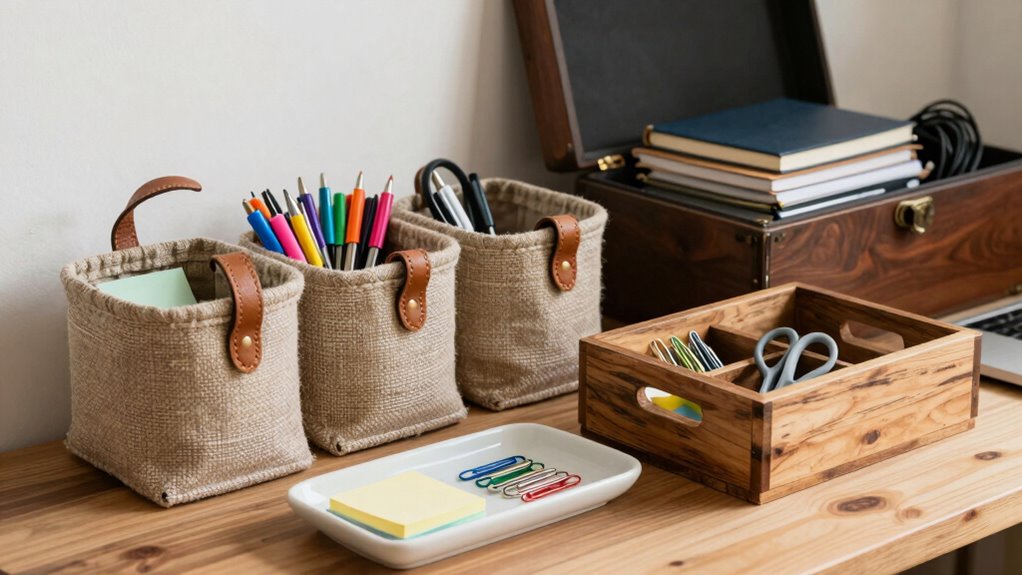
Make Decorative Baskets and Bins From Natural Materials

Building on your organized creative corner, adding decorative baskets and bins made from natural materials brings both style and functionality. Natural fibers like jute, seagrass, and rattan create a warm, earthy vibe that complements any space. Handwoven baskets are not only attractive but durable, making them perfect for storing supplies, craft tools, or even finished projects. You can customize their size and shape to fit your specific needs, giving your workspace a cohesive, natural look. These baskets easily blend into different decor styles, from rustic to modern. Plus, their breathable material helps keep your supplies fresh and accessible. With a little effort, you’ll craft beautiful storage options that keep your creative chaos neatly contained and visually appealing.
Build Multi-Functional Storage Ottomans or Stools
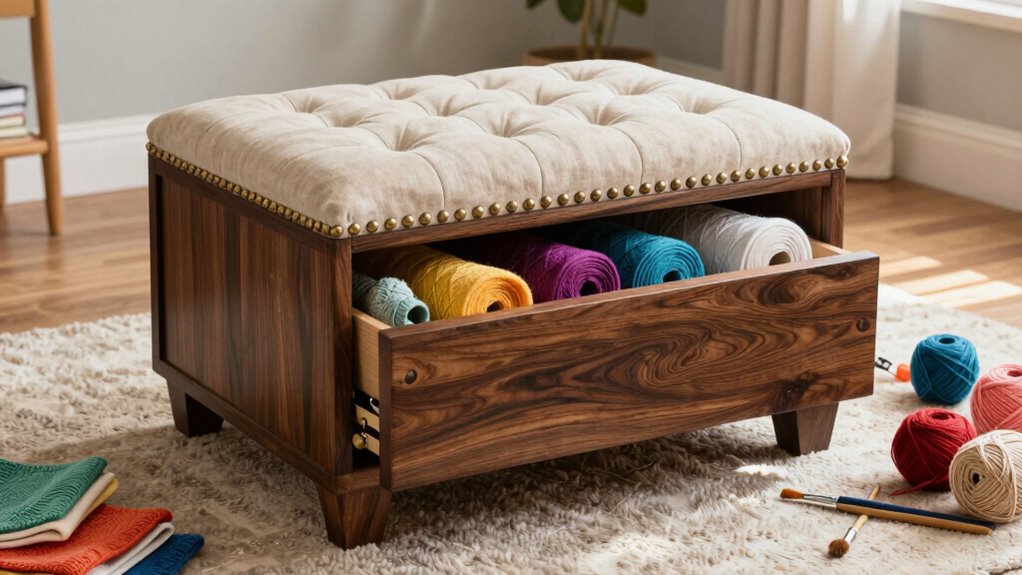
To maximize both seating and storage in your creative space, multi-functional storage ottomans or stools are a smart addition. They help keep clutter at bay while offering a comfortable place to sit. When building these, focus on color coordination to match your décor and enhance the room’s aesthetic. Choose materials with durability in mind—think sturdy wood or reinforced fabric—that can withstand daily use. Consider adding a soft cushion for comfort and a lid that doubles as a table or footrest. These versatile pieces can store art supplies, fabrics, or tools hidden from view, making your space more organized.
- Enhance room harmony through thoughtful color choices
- Prioritize material durability for long-lasting use
- Incorporate hidden compartments for efficiency
- Use cushioned tops for added comfort
- Create versatile pieces for multiple functions
Create Personalized Jewelry and Tool Racks
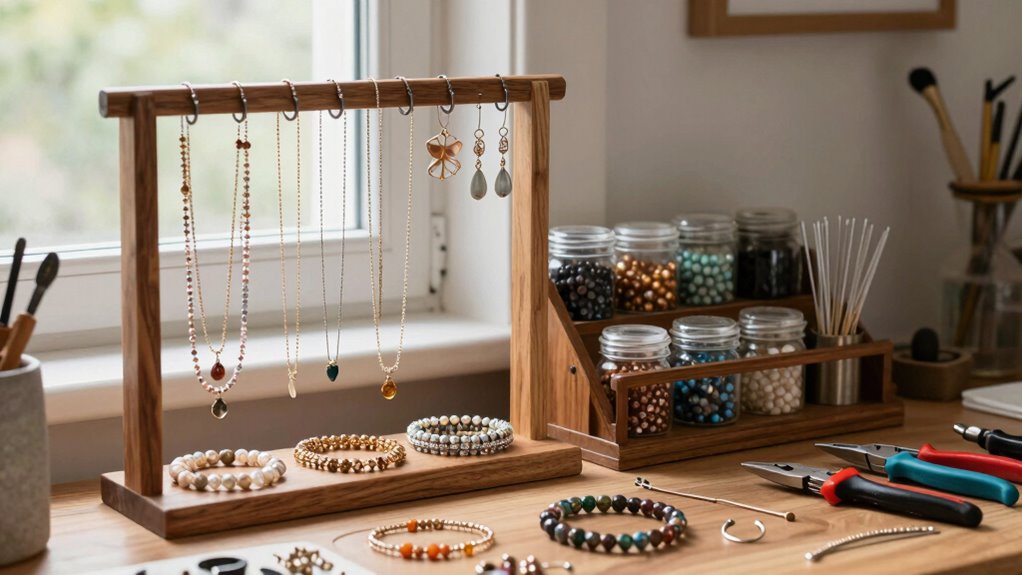
You can make personalized jewelry and tool racks using your choice of materials to match your space and style. These projects are straightforward, with simple steps that don’t require advanced skills. By selecting the right materials, you’ll create functional storage that’s both unique and easy to assemble.
Custom Material Choices
Choosing the right materials is essential when creating personalized jewelry and tool racks, as it allows you to customize both function and style. Material trends today favor sustainable sourcing, so you can craft eco-friendly pieces that align with your values. Selecting durable, lightweight, or decorative materials helps your projects stand out and last longer. By prioritizing sustainable options, you reduce environmental impact and support responsible resource use. Consider these deeper insights when choosing your materials:
- Prioritize eco-friendly, recycled, or reclaimed materials
- Balance aesthetics with durability for long-term use
- Stay updated on current material trends for fresh designs
- Confirm sourcing practices are transparent and ethical
- Mix different textures and finishes for a personalized touch
These choices empower you to craft unique, meaningful, and environmentally conscious organizers.
Easy DIY Assembly
Getting your DIY jewelry and tool racks assembled is straightforward when you follow simple steps and use basic tools. Start by gathering materials like wood, hooks, and screws, and plan your design inspired by your creative journaling. This process encourages artistic inspiration, allowing you to personalize each rack to fit your space and style. Measure carefully, then assemble the pieces with a screwdriver, ensuring everything is secure. These racks not only organize your supplies but also serve as a visual reminder of your creativity. As you build, you’ll find satisfaction in transforming raw materials into functional art. This easy DIY assembly makes organizing enjoyable, motivating you to keep your creative chaos tidy while inspiring new projects.
Use Color-Coded Storage Systems for Easy Sorting

Color-coded storage systems make sorting and locating supplies effortless. By using color coding, you create visual cues that simplify your sorting techniques, saving time and reducing frustration. Assign each color to a specific supply type or project stage, making it easy to identify what you need at a glance. This system not only streamlines your workspace but also keeps everything organized and accessible. To enhance your system, consider these deeper insights:
- Use consistent colors for similar items across different containers
- Incorporate labels that match the color scheme for clarity
- Group related supplies by color to foster intuitive organization
- Regularly review and update your color assignments as projects evolve
- Keep a color key visible to maintain consistency and ease of use
This approach turns chaos into order, boosting your creative productivity.
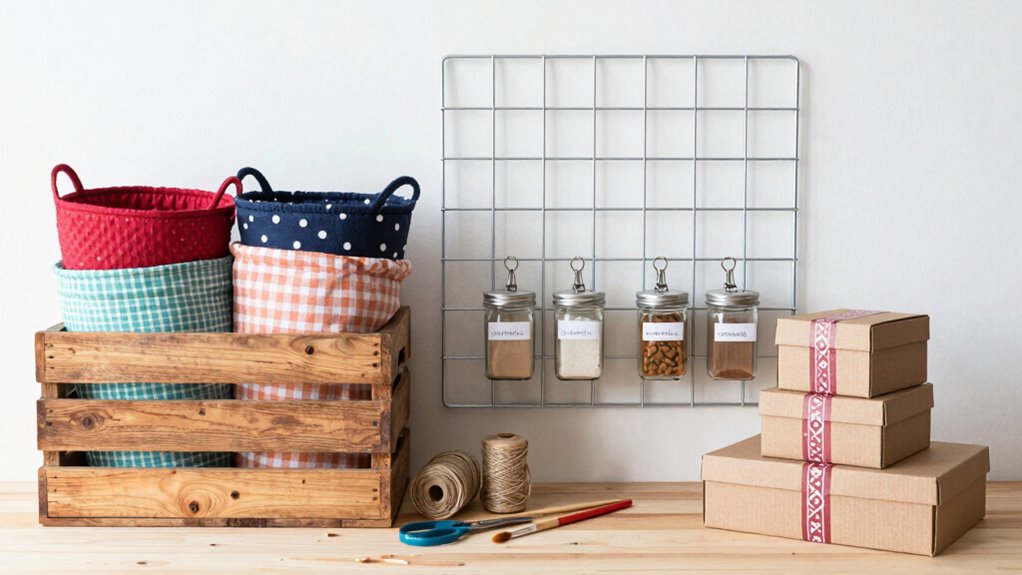
Hang Fabric or Paper Storage Solutions
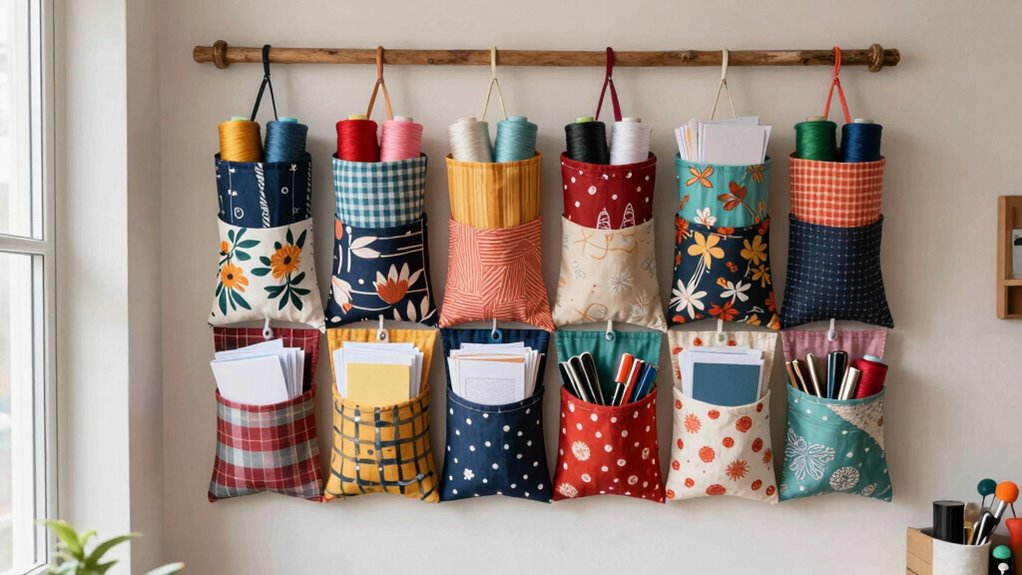
Hanging fabric or paper storage solutions can transform a cluttered workspace into an organized haven. By installing simple hooks, rods, or wire baskets, you create easy access to your supplies while saving valuable surface space. Use fabric storage such as hanging pockets or pouches to keep different textiles neatly separated, making it quick to find what you need. For paper, consider wall-mounted paper organizers or clipboards that hold sketches, patterns, or sheets upright and visible. These solutions not only keep your workspace tidy but also streamline your workflow, reducing frustration. You’ll appreciate how quickly you can grab the right material without rummaging through piles. Hanging storage keeps your creative chaos contained, so your space stays inspiring and clutter-free.
Set Up Recycling and Disposal Stations for Supplies
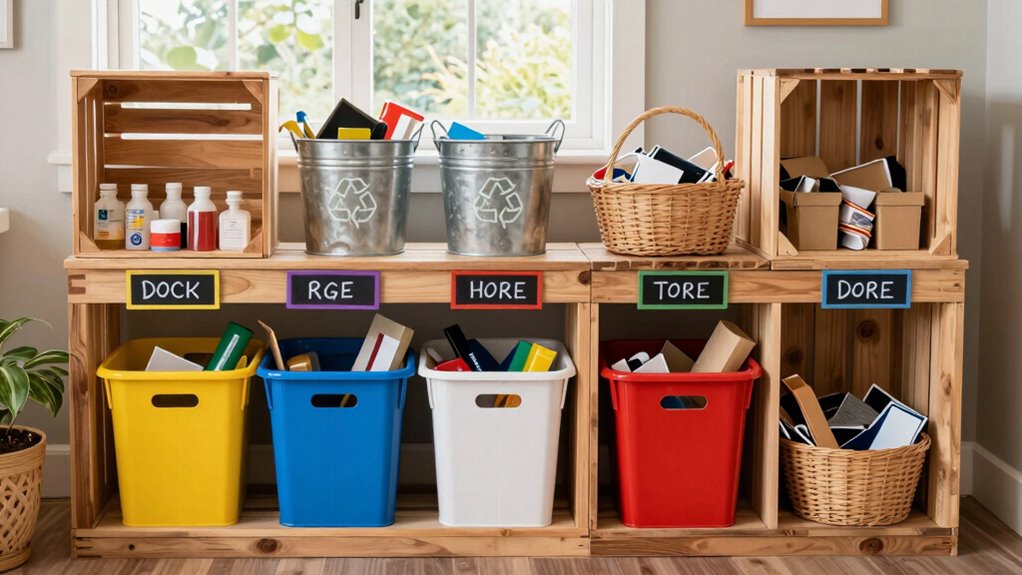
To keep your creative space tidy and efficient, setting up designated recycling and disposal stations for your supplies is essential. Clear recycling stations and disposal areas help you manage waste quickly and prevent clutter buildup. Position your recycling stations near your work area for easy access, and label each station clearly. Use separate containers for paper, plastic, and scraps to streamline cleanup. Regularly empty and clean these stations to maintain hygiene and efficiency. Properly organized disposal areas reduce mess and encourage responsible waste management. Remember, the goal is to create a seamless workflow where waste is dealt with immediately, keeping your creative chaos under control.
- Encourage mindful disposal to reduce waste
- Use labeled containers for clarity
- Place stations within arm’s reach
- Separate recyclables from trash
- Maintain cleanliness for a tidy space
Tips for Maintaining Your Handmade Storage Over Time

Maintaining your handmade storage solutions over time requires regular attention and proactive care. To keep your system functional, stay updated on storage innovations that can enhance your setup. Incorporate simple organizational habits like labeling containers, rotating supplies, and decluttering periodically. This prevents buildup of unnecessary items and keeps everything accessible. Check for wear and tear on your handmade solutions, repairing or replacing parts as needed. Consistency is key—dedicate a few minutes weekly to tidy and reorganize. By staying mindful of evolving needs and adjusting your storage accordingly, you guarantee your creative chaos remains manageable. Thoughtful maintenance not only prolongs the life of your storage but also keeps your workspace inspiring and efficient.
Troubleshoot Common DIY Organization Challenges

Even with well-maintained storage, organizing your creative space can still present unexpected challenges. Clutter management often requires constant adjustments, and storage solutions might not fit every project or tool. To troubleshoot common issues, consider these points:
Regular reassessment and adaptable storage keep your creative space organized and clutter-free.
- Reassess your storage layout regularly to accommodate new materials
- Use labeled containers to prevent clutter from spreading
- Invest in versatile storage solutions that adapt to your evolving needs
- Create designated zones for different craft supplies to streamline workflow
- Set aside time weekly for decluttering and reorganizing
Before-and-After Transformations of Creative Spaces
Transforming a cluttered, chaotic craft space into an organized haven showcases just how much a thoughtful redesign can boost your creativity and efficiency. Start by improving your creative workspace lighting—adding task lamps or adjustable fixtures can make a big difference. Clear, bright lighting keeps you energized and helps you see details clearly. Next, consider incorporating inspiration board ideas—pin your favorite color palettes, finished projects, or motivational quotes to spark ideas and keep your space lively. An effective before-and-after transformation highlights the power of simple changes, like reorganizing supplies and dedicating zones for different tasks. With strategic lighting and inspiring visuals, your creative space becomes a functional, energizing environment that fuels your passion and keeps chaos at bay.
Frequently Asked Questions
How Can I Personalize My Handmade Storage Solutions?
You can personalize your handmade storage solutions through creative customization techniques like painting, adding decorative labels, or using fabric coverings that reflect your style. Incorporate your favorite colors, patterns, or even monograms to make each piece unique. Personalization techniques such as attaching meaningful charms or using stencils for intricate designs add a special touch. This way, your storage not only organizes but also expresses your personality and creativity.
What Are Eco-Friendly Materials for DIY Organizers?
You can choose eco-friendly materials like reclaimed wood, recycled cardboard, or organic fabrics for your DIY organizers. These materials are incredibly sustainable, often made through recycling techniques that reduce waste. Look for items sourced from sustainable sourcing practices, ensuring minimal environmental impact. By selecting environmentally conscious materials, you’ll create organizers that are not only functional but also kind to the planet, making your creative chaos beautifully eco-friendly.
How Do I Ensure Durability in Handmade Storage Projects?
To guarantee durability in your handmade storage projects, focus on smart material selection and upcycling techniques. Choose sturdy, high-quality materials like reclaimed wood or thick fabrics, and reinforce joints or seams for added strength. Incorporate upcycling techniques, such as repurposing sturdy containers or furniture parts, to boost durability without sacrificing eco-friendliness. By carefully selecting your materials and applying effective upcycling methods, your storage solutions will last and keep your creative chaos organized.
Can These Projects Be Adapted for Small Spaces?
Yes, you can adapt these projects for small spaces by using vertical stacking to maximize height without taking up much floor area. Opt for multi-purpose designs that serve several functions, like a storage bench with compartments or wall-mounted shelves with hooks. These clever modifications help you stay organized while making the most of limited space, ensuring your creative chaos remains manageable without overcrowding your environment.
How Often Should I Update or Refresh My Organization System?
You should refresh your organization system every few months to maintain storage efficiency and prevent clutter buildup. Regularly applying decluttering techniques helps you identify what’s no longer needed, making space for new projects. Pay attention to how well your system works; if you find it difficult to locate supplies or feel overwhelmed, it’s time for an update. Consistent maintenance keeps your creative chaos under control and guarantees your space stays functional.
Conclusion
When you organize your creative space, you’re planting seeds for inspiration to flourish. With a little effort and some crafty upcycling, your chaos transforms into a well-tended garden of ideas. Keep nurturing your DIY storage solutions, and your workspace will bloom with productivity. Remember, a clutter-free environment isn’t just tidy—it’s the fertile ground where your creative dreams can grow wild and free. So, roll up your sleeves and let your organization journey blossom.