
To properly store your DIY craft supplies, start by organizing items into categories like paints, brushes, and paper, then keep similar supplies together for easy access. Use clear containers, labeled jars, and stackable baskets to maximize space and visibility. Maintain your supplies by regularly checking for damage or dryness, and keep everything in airtight containers to prevent deterioration. Staying consistent with labeling and routine upkeep will help you maintain a tidy workspace—if you keep going, you’ll find even more helpful tips.
Key Takeaways
- Use clear, labeled containers and organize supplies by type for easy identification and access.
- Choose appropriately sized storage bins, jars, and drawers that protect supplies and maximize space.
- Implement vertical storage solutions like shelves and wall organizers to optimize workspace and reduce clutter.
- Regularly inspect and clean supplies, discarding damaged or expired items to maintain quality and longevity.
- Schedule routine organization and maintenance to keep supplies orderly, prevent clutter, and ensure supplies are in good condition.
Categorize Your Supplies for Easy Access
Organizing your craft supplies begins with categorizing them into clear groups. Sort items by type, such as paints, brushes, markers, paper, and embellishments. This step helps you see what you have and prevents clutter from piling up. Understanding the Vortex can help you approach organization with a mindful attitude, making the process more harmonious. As you go, set aside duplicates or unused supplies to donate or discard. Keep similar items together so you can find them quickly when needed. For example, all your paintbrushes should stay in one spot, while washi tapes and stickers go in another. Label your categories if it helps you remember where everything belongs. Proper grouping saves you time and frustration, making your crafting sessions more enjoyable. Additionally, implementing payment security measures like secure storage or digital management tools can help safeguard your supplies from theft or loss. Recognizing the importance of breed traits can also help you organize your supplies based on specific project needs, such as using certain materials for particular breeds or themes. When choosing storage solutions, consider organized storage options that keep your supplies accessible and protected, ensuring your workspace remains efficient and safe. Once everything is sorted, you’ll find it easier to decide which storage solutions to use later, especially when considering skincare patches or other specialized materials.
Choose Suitable Storage Containers and Solutions
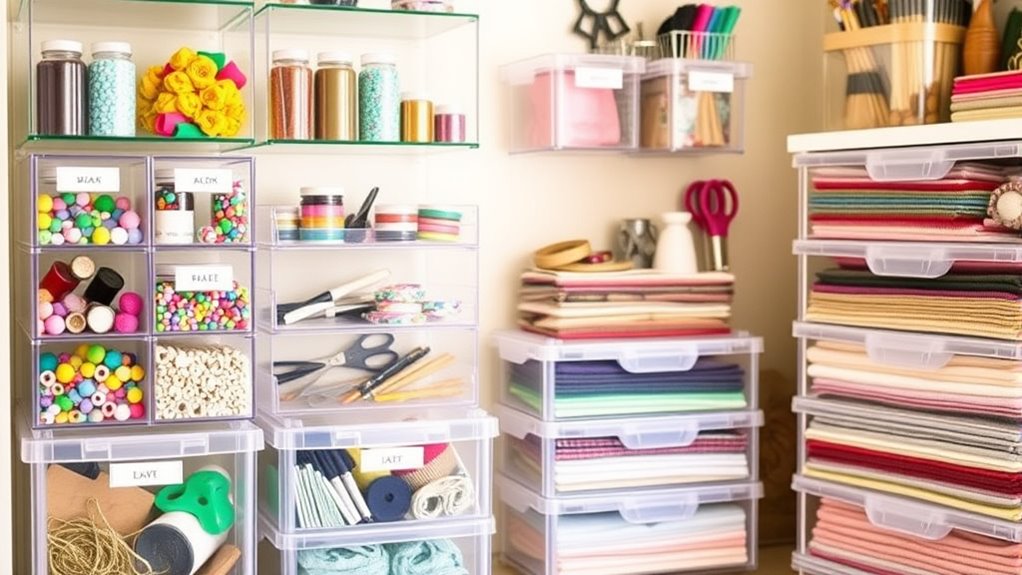
Selecting the right storage containers is essential to keeping your craft supplies organized and accessible. You want containers that fit your space, protect your supplies, and make it easy to find what you need. Clear bins are great for quick visibility, while stackable options save space. Small drawers or divided containers work well for tiny items like beads or buttons. Consider durability and ease of access when choosing solutions. Here’s a quick comparison:
| Container Type | Ideal For |
|---|---|
| Clear Plastic Bins | Large supplies, bulk storage |
| Small Drawer Units | Beads, buttons, small items |
| Stackable Baskets | Flexible, versatile storage |
| Labelled Jars | Spools, ribbons, small tools |
| Modular Storage Cubes | Customizable, expandable |
Choosing wisely keeps your craft space clutter-free and inspires your creativity. Incorporating sound healing science concepts, such as organizing in a calm and harmonious way, can further enhance your crafting environment. Paying attention to electric dirt bike storage tips can help ensure your supplies stay in good condition and easily accessible. Additionally, using color-coded containers can help quickly identify different types of supplies, making your organization even more efficient. Properly labeled and organized supplies can also improve your productivity during creative projects.
Optimize Your Workspace With Smart Storage Ideas
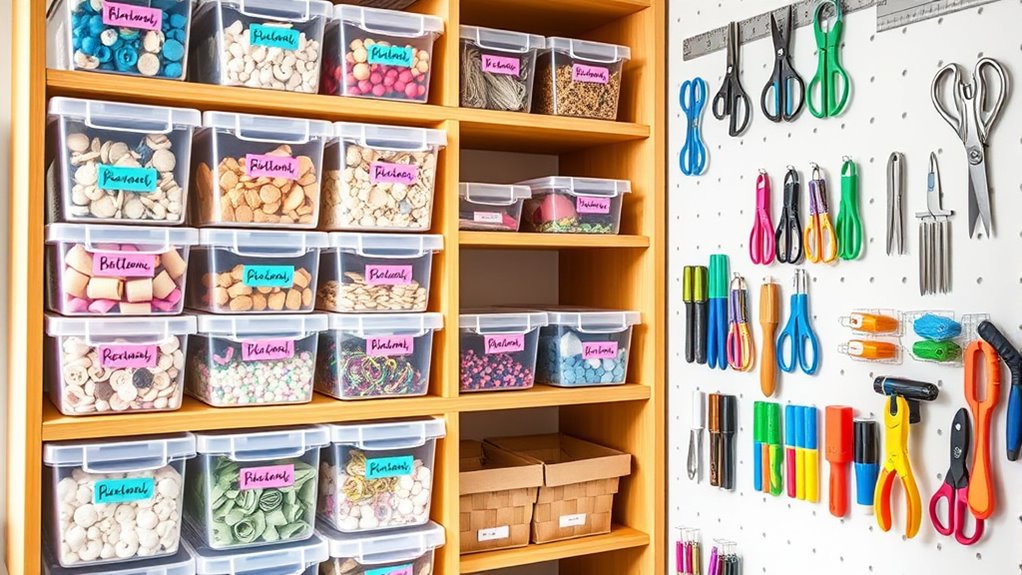
Using clear containers lets you see your supplies at a glance, saving time and reducing clutter. Incorporating storage containers made from durable, transparent materials helps keep your supplies organized and accessible. Choosing containers with secure lids prevents spills and keeps supplies clean. Maximizing vertical space with shelves or wall-mounted organizers keeps your workspace open and efficient. These smart storage ideas make your crafting area more functional and enjoyable to use. Additionally, incorporating organized storage can boost focus and creativity during your projects.
Use Clear Containers
Have you ever struggled to find the craft supplies you need quickly? Using clear containers makes it easy to see what’s inside at a glance, saving you time and frustration. Choose storage bins or jars made of transparent plastic or glass, so you don’t have to open each one to check. Additionally, incorporating organized storage strategies can further improve your workspace efficiency. Label each container with the contents, which keeps everything organized and accessible. Clear containers also help you spot when supplies are running low, so you can restock promptly. Incorporating visual cues can enhance your ability to quickly identify supplies and maintain order. Incorporating specialized storage solutions like stackable bins or compartmentalized trays can maximize space and keep smaller items neatly separated. They’re versatile and work well for beads, buttons, ribbons, paints, and brushes. Regular maintenance and filter replacement ensure your storage area stays fresh and free from dust or odors, maintaining a pleasant workspace environment. Properly managing airflow and ventilation can also help prevent mold and deterioration of your supplies, ensuring longevity. Plus, they look tidy and inviting, encouraging you to keep your workspace organized.
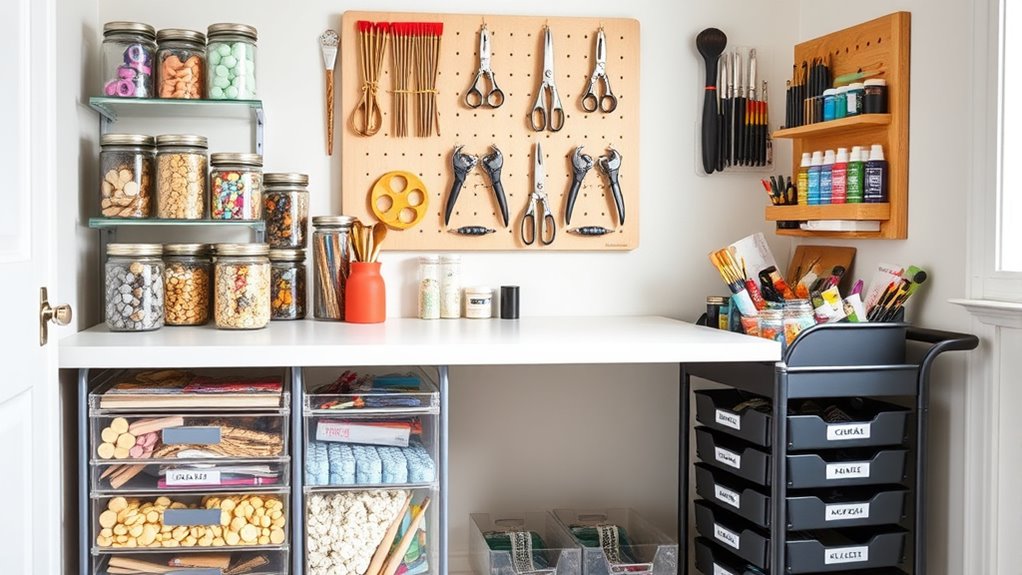
Maximize Vertical Space
Maximizing vertical space is a smart way to keep your craft area organized and clutter-free. Use wall-mounted shelves or pegboards to store tools, paints, and supplies within easy reach. Hanging baskets or clear pocket organizers can hold smaller items like beads, ribbons, or glue sticks. Consider installing tall, narrow storage units or stacking bins to utilize every inch of wall space. Vertical storage not only frees up your workspace but also keeps items visible and accessible. Use hooks to hang scissors, rulers, and other tools, preventing clutter on your desk. Incorporating organized storage methods can further enhance efficiency and reduce stress during your crafting sessions. Additionally, choosing multi-purpose furniture can help maximize your storage potential while maintaining a clean look. Using self watering plant pots as creative storage containers for small supplies is also an innovative idea to repurpose items effectively. Implementing storage organization strategies can help you categorize and access your supplies more efficiently, saving you time and effort. Embracing data-driven strategies can help you analyze your storage needs and optimize your setup for maximum efficiency.
Maintain Your Supplies to Ensure Longevity
To guarantee your craft supplies last longer, regular maintenance is essential. Always inspect your items for signs of damage or deterioration, such as dried-out glue or cracked paints.
Clean your tools after each use to prevent buildup that can compromise their effectiveness. Store supplies in their original containers or airtight jars to prevent exposure to air, moisture, or dust.
Keep lids tightly sealed and avoid leaving supplies open for extended periods. If you notice any changes in texture, color, or smell, consider replacing or safely discarding those items.
Properly organized and well-maintained supplies stay functional longer, saving you money and frustration. Regular upkeep ensures your craft materials remain in good condition, ready for your next creative project.
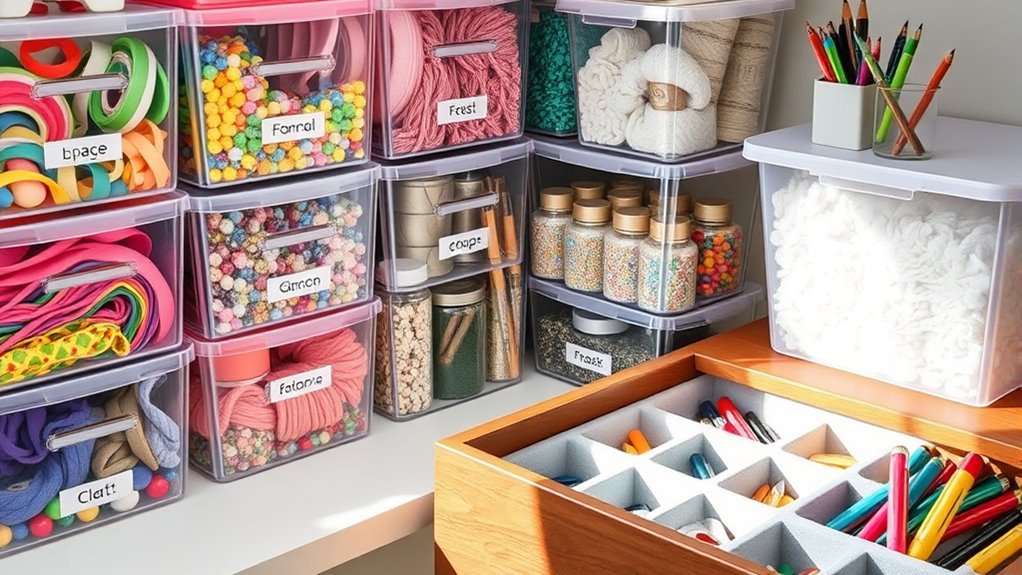
Label Everything for Quick Identification
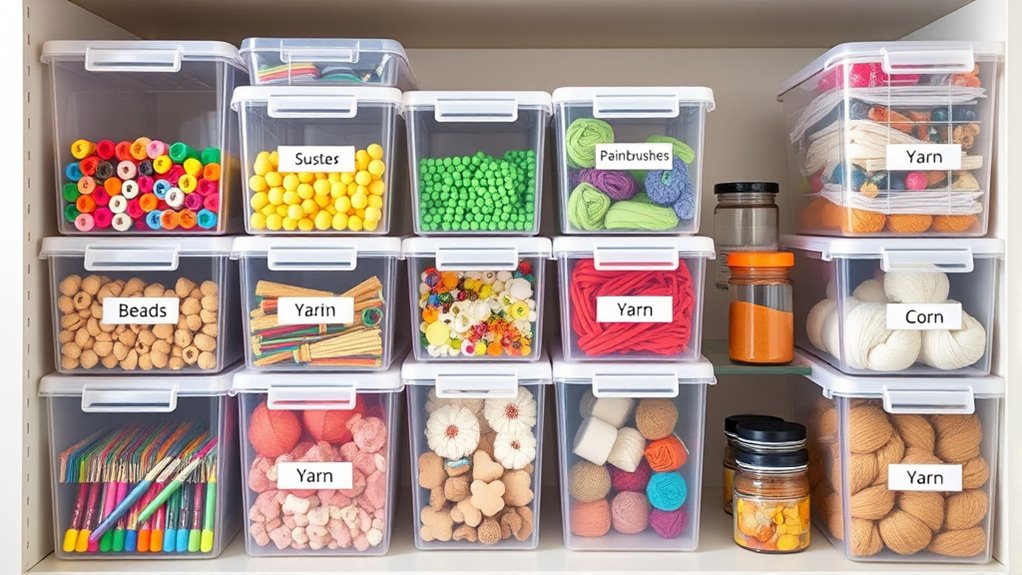
Ever noticed how much time you spend searching for the right craft supplies? Labeling everything can save you that frustration. Use clear, legible labels on bins, jars, and containers so you know exactly what’s inside at a glance. You can create labels with a label maker, sticky notes, or printable labels, depending on what’s convenient.
Be specific—write out contents like “Red Yarn,” “Beads,” or “Paintbrushes” rather than vague titles. For smaller items, consider subdividing containers and labeling each one. This system speeds up your workflow and keeps your workspace tidy.
Plus, when you’re working on a project, you won’t waste time rummaging through multiple boxes. Proper labeling transforms your storage from chaos into an organized, efficient craft space.
Create a System for Regular Organization and Upkeep

To keep your craft supplies organized, set up regular scheduling for tidying sessions.
Use clear labeling systems to make it easy to find and put away items quickly.
Don’t forget to perform routine maintenance checks to prevent clutter from building up again.
Schedule Organizing Sessions
Establishing a regular schedule for organizing your craft supplies guarantees your space stays tidy and functional. Set aside specific times weekly or monthly to review your supplies, discard outdated items, and reorganize as needed.
Consistency helps prevent clutter from piling up and makes organizing feel less overwhelming. Use a calendar or reminder app to stay on track. During each session, focus on a particular area or type of supply to keep things manageable.
Make it a routine—whether it’s every Sunday afternoon or the first Saturday of each month—so it becomes a habit. This ongoing effort ensures your supplies remain accessible and your workspace stays inspiring.
Regular organizing sessions save you time and frustration in the long run, keeping your creative flow uninterrupted.
Use Labeling Systems
Implementing a labeling system builds on your routine of regular organizing sessions by making it easier to maintain order. Clear labels help you quickly identify supplies and prevent clutter from piling up. Use labels on storage bins, jars, and drawers to specify contents, such as “Ribbon,” “Beads,” or “Paints.”
Consider using color-coded labels for different categories to enhance visual organization. Keep labels consistent in style and placement for easy recognition. Regularly update labels if you change your storage setup or add new supplies.
This system saves time searching and keeps your craft space tidy, encouraging ongoing organization.
- Use waterproof labels for durability
- Incorporate icons or symbols for quick recognition
- Keep labels at eye level for easy reading
- Use a label maker or printable labels for neatness
- Review and relabel as needed to stay current
Regular Maintenance Checks
Scheduling regular maintenance checks keeps your craft supplies organized and prevents clutter from accumulating. Set aside time weekly or monthly to review your storage system. During these checks, tidy up supplies, discard expired or unused items, and ensure everything remains accessible. This habit helps you spot damaged tools or low-stock items early, so you can restock or replace them promptly. To stay consistent, create a simple schedule or checklist. Use the table below to track your maintenance tasks:
| Task | Frequency | Notes |
|---|---|---|
| Sort and declutter | Weekly | Remove unused supplies |
| Check labels | Monthly | Update as needed |
| Inspect containers | Monthly | Repair or replace |
| Restock supplies | As needed | Keep essentials stocked |
Regular checks keep your craft space functional and inspiring.
Frequently Asked Questions
How Often Should I Reorganize My Craft Supplies?
You should reorganize your craft supplies whenever they start to feel cluttered or hard to find what you need. Regularly, every few months, is a good rule of thumb to keep everything tidy and accessible.
If you notice supplies overflowing or items missing, it’s time to take a moment to sort through everything. Staying consistent with reorganizing helps you stay inspired and makes your crafting sessions more enjoyable.
What Are the Best Materials for Storing Delicate Craft Items?
Think of delicate craft items as fragile butterflies that need gentle handling. For storing them, use soft, acid-free tissue paper or bubble wrap to cushion each piece.
Clear plastic containers with soft linings help you see and protect your treasures without damage. Avoid harsh materials like cardboard or rough plastics, which can scratch or stain.
Your goal is to create a safe haven where your delicate crafts can rest and flourish.
How Can I Prevent Mold and Pests in My Craft Storage?
To prevent mold and pests in your craft storage, you should keep the area dry, well-ventilated, and clean.
Use airtight containers for your supplies and add silica gel packets to absorb moisture.
Regularly inspect for signs of pests or mold, and clean spills immediately.
Avoid storing craft items in damp or dark areas, and consider natural repellents like cedar or lavender to deter pests effectively.
What’S the Ideal Temperature and Humidity for Storing Craft Supplies?
Perfectly preserving your supplies requires precise parameters. Aim for a temperature of around 65-70°F to prevent spoilage and warping.
Keep humidity low, ideally between 30-50%, to thwart mold and mildew.
Consistent climate control is essential; sudden shifts can damage delicate supplies.
How Do I Safely Store Hazardous or Toxic Craft Materials?
You need to keep hazardous or toxic craft materials in a secure, well-ventilated area away from children and pets.
Use airtight containers to prevent leaks or fumes, and clearly label them with warning signs.
Store these supplies separately from other craft items, ideally in a locked cabinet or a high shelf.
Regularly check for leaks or deterioration, and dispose of any expired or damaged materials following local hazardous waste guidelines.
Conclusion
Think of your craft supplies as a lush garden that needs regular tending. When you categorize, choose the right containers, and label everything, you create a vibrant, organized space that blooms with creativity. Keep up with maintenance like watering your plants, and your supplies will thrive for years to come. With a little effort, your workspace becomes a well-tended oasis—an inspiring haven where your imagination can flourish without chaos clouding the way.