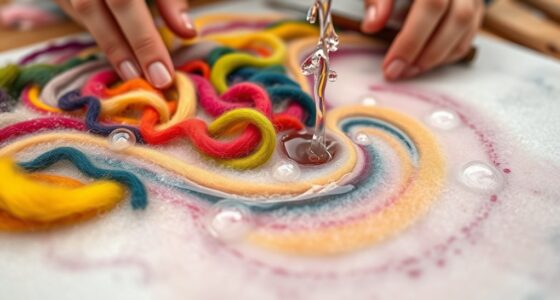

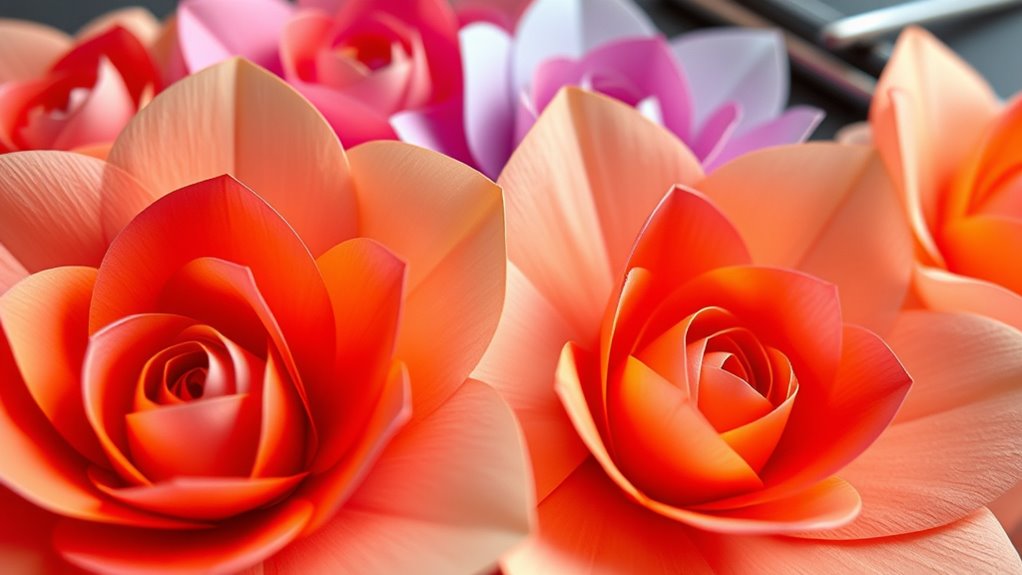
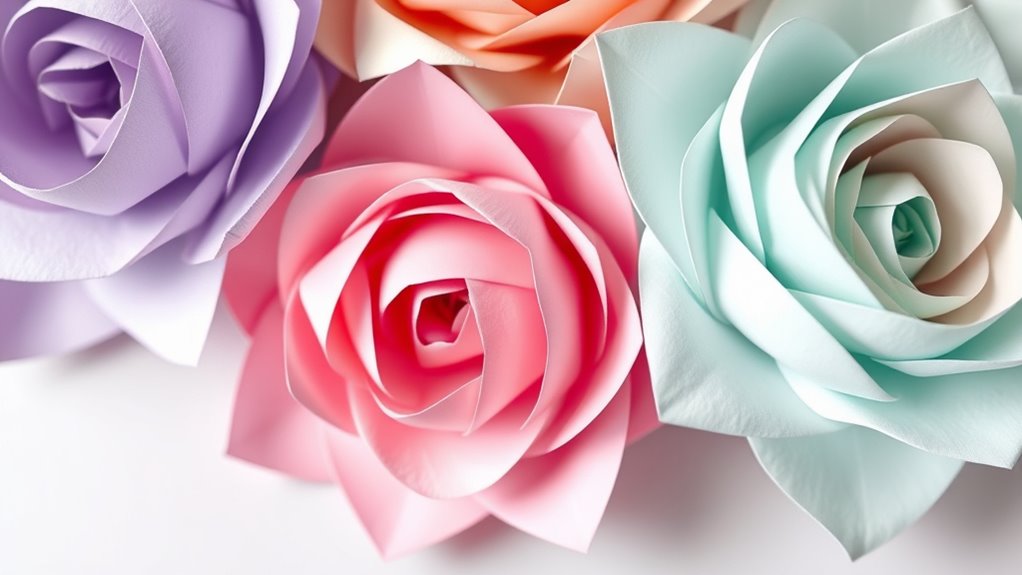
To shape and curl paper flowers like a pro, start with the right tools such as scissors, tweezers, and a bone folder, then choose suitable paper that matches your desired texture and thickness. Gently curl petals and leaves using tools like a toothpick or scallop scissors, and shape them with precision to mimic natural movement. Applying a bit of heat can add softness and realism. With consistent technique and practice, you’ll master flawless, professional-looking blooms, and more tips await to elevate your craft further.
Key Takeaways
- Use appropriate tools like tweezers, bone folders, and curling tools for precise shaping and curling.
- Choose softer, thinner papers such as tissue or crepe for natural, delicate curves.
- Test heat or curling techniques on scrap paper to prevent damage and achieve authentic curls.
- Layer and fold petals at various angles to add depth and realistic flow to your flowers.
- Incorporate subtle details like veins or color washes for enhanced realism and professional finish.
Essential Tools for Shaping and Curling
To achieve beautifully shaped and curled paper flowers, you need the right tools. The first essential tools are scissors and craft knives, which help you cut paper to the desired flower shape. Tweezers are invaluable for handling delicate petals without tearing them. A bone folder or scoring tool smooths and creases paper edges for a professional finish. When choosing paper, consider its texture; smoother paper like cardstock or specialized crepe paper holds curls better and enhances the flower’s appearance. The paper’s texture also influences how well it holds shape and the vibrancy of the flower color. Additionally, headphone compatibility ensures you can listen to music or instructions clearly while working on your craft project. Having these tools at hand guarantees you can manipulate your paper with precision, creating natural-looking flowers that showcase the depth of color and texture you want to highlight. Incorporating a variety of crafting tools can further improve your ability to shape flowers more intricately and efficiently. Using proper tools also helps prevent damage to delicate petals and allows for more detailed, refined designs. Moreover, understanding the resources and tools available can help you select the best equipment for your skill level and project complexity. For example, selecting the right specialized tools can significantly streamline your workflow and improve the overall quality of your finished flowers.
Preparing Your Paper for Perfect Curves
Before you start shaping your paper flowers, it’s essential to prepare the paper properly. Choose a paper that complements your flower color; lighter shades work well for delicate petals, while bold hues add vibrancy. Select quality paper with the right thickness—too thin, and it may tear; too thick, and curling becomes difficult. To ensure your paper curls smoothly, handle each sheet gently and avoid creases. Use this table to guide your paper selection:
| Flower Color | Suitable Paper Type |
|---|---|
| Soft pastels | Thin crepe or tissue paper |
| Brights & reds | Thicker craft paper |
| Whites & neutrals | Lightweight cardstock |
| Dark hues | Textured or patterned paper |
Proper preparation guarantees flawless curves, making your paper flowers look professional. Additionally, understanding automation in business can help you streamline your crafting process, saving time and increasing efficiency. Recognizing creative techniques can further elevate your flower-making skills and help you achieve more intricate designs. Developing an awareness of material properties ensures you select the best supplies for each project, leading to more consistent and beautiful results. Incorporating technological advancements in crafting tools can also enhance precision and ease of work, leading to more refined floral designs.
Techniques for Curling Petals and Leaves
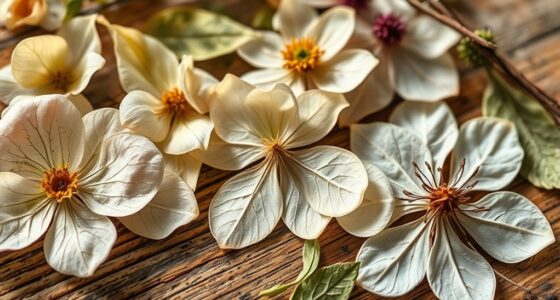
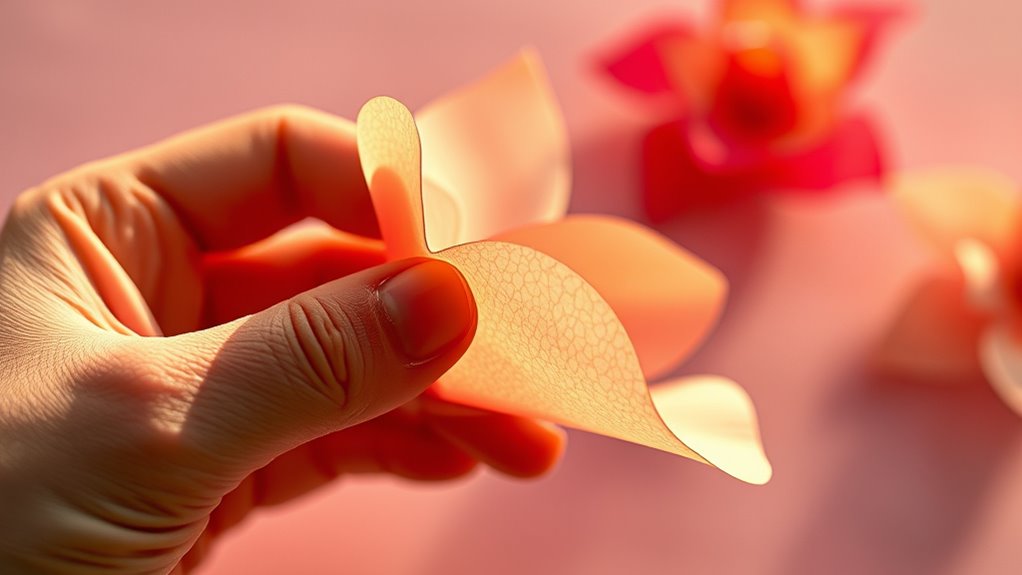
Have you ever wondered how to give your paper petals and leaves a realistic, natural curl? The key is mastering your curling techniques. Start by selecting the right flower color and paper texture options—softer papers like tissue or crepe create more natural curves, while stiffer papers hold shape better. Use a pencil, scissors, or a toothpick to gently curl the edges, applying light pressure for a delicate bend. For leaves, curl from the base to create a gentle upward or downward twist, mimicking real foliage. Always test on scrap paper first to avoid damaging your project. Consistent curling adds depth and realism, making your flowers look lifelike. Additionally, choosing the appropriate paper texture can significantly influence the overall appearance of your curls. With practice, your petals and leaves will achieve professional-quality curls that bring your paper flowers to life.
Creating Realistic Flower Shapes With Folding
To make your paper flowers look realistic, focus on precise folding techniques that shape each petal naturally. Layering different folds adds depth, giving your flowers a three-dimensional appearance. Mimic natural curves by carefully shaping and folding the paper to replicate how real petals bend and flow. Additionally, understanding security vulnerabilities in payment technologies can inspire you to incorporate more secure and authentic-looking details into your floral designs. Recognizing skin benefits of certain acids can also help in selecting the right materials and finishes for your craft project, ensuring a polished and professional look.
Precise Folding Techniques
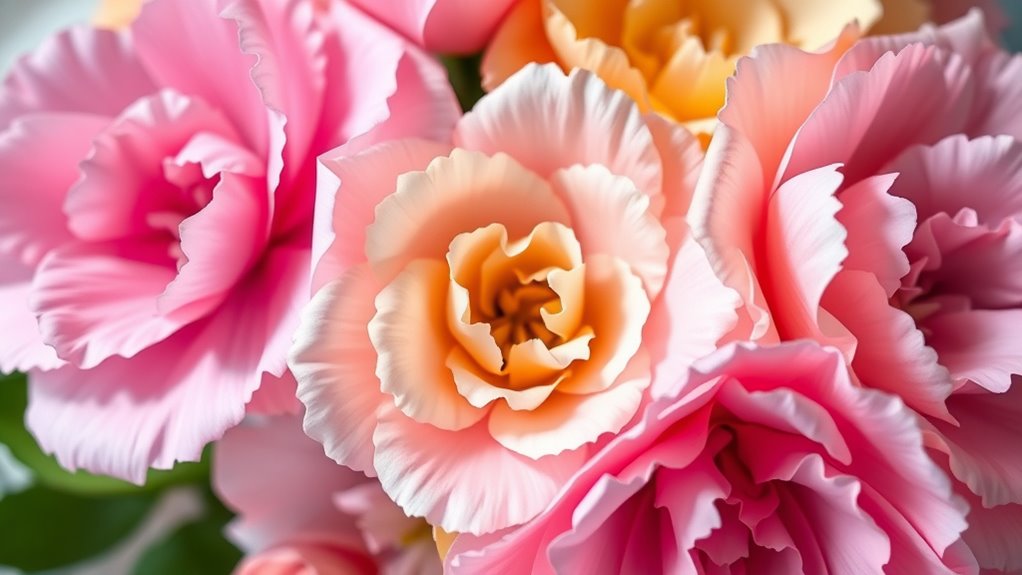
Mastering precise folding techniques is essential for creating realistic paper flowers that mimic their natural counterparts. Your choice of paper selection directly impacts your results; thinner papers like tissue or crepe give delicate, lifelike petals, while sturdier cardstock provides structure. When folding, pay attention to symmetry and sharp creases to shape petals accurately. For realistic flower color, select paper that matches your desired hue or use color gradients to add depth. Consistent folds ensure uniformity, making your flowers appear more authentic. Use precise measurements and a steady hand to craft each element, avoiding uneven edges or misaligned folds. This attention to detail enhances the overall realism, guaranteeing your paper flowers look as natural as possible through careful folding.
Layering for Depth
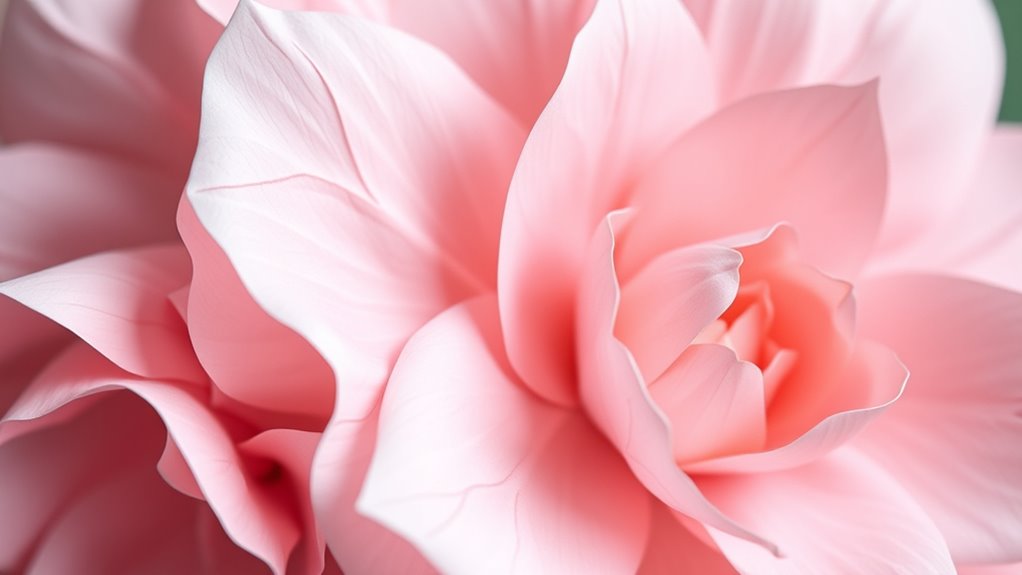
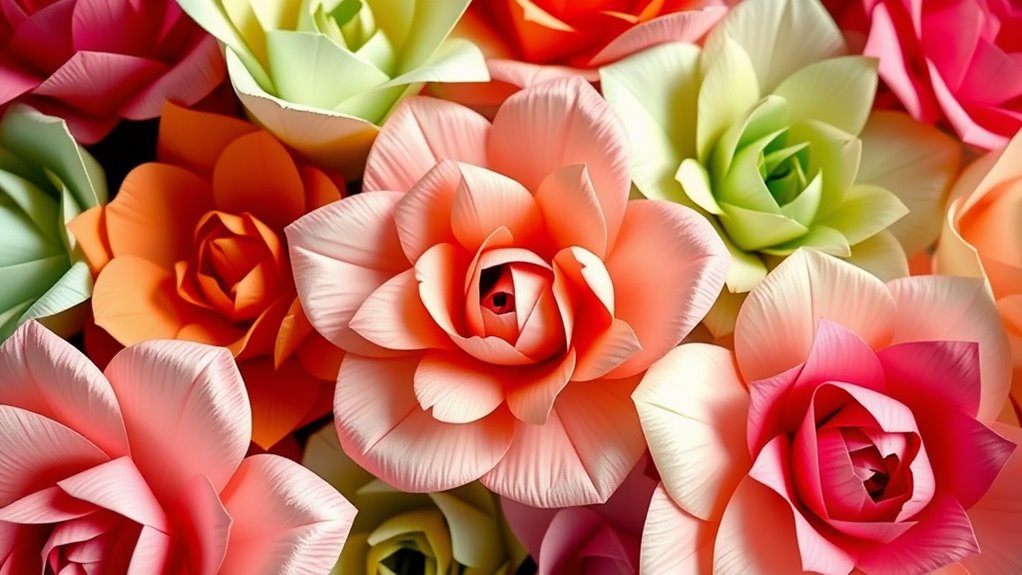
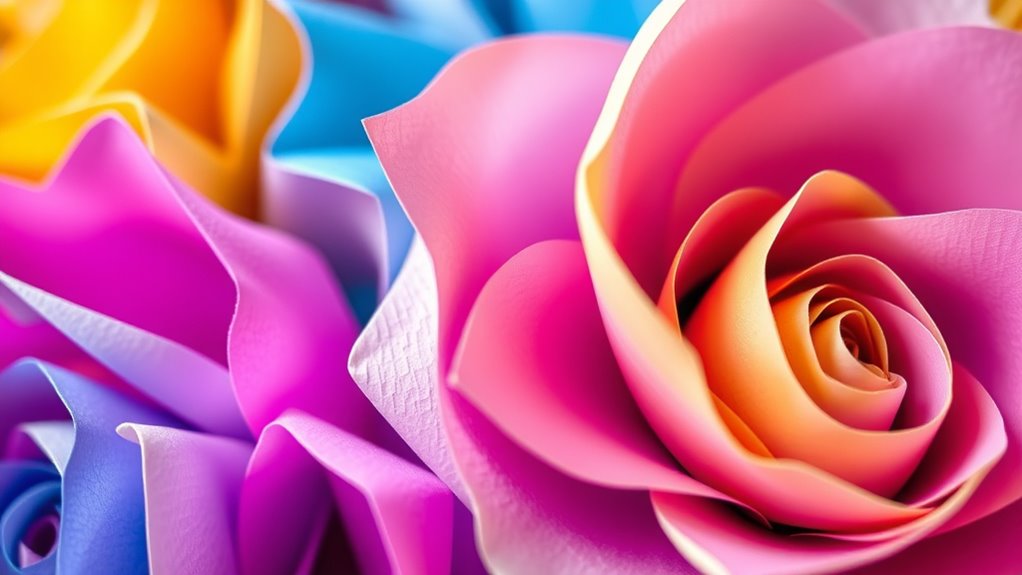
Layering for depth brings your paper flowers to life by adding realistic dimension and complexity. To achieve this, focus on careful color coordination, selecting shades that complement each other within your floral color schemes. Use multiple layers of paper to mimic the natural layers found in real flowers, folding each piece to create varying heights and textures. This technique gives your blooms a more three-dimensional appearance, making them appear fuller and more lifelike. Experiment with overlapping different shades and textures to enhance depth and visual interest. Remember, strategic layering not only enriches the flower’s realism but also allows you to play with color combinations that highlight your design’s vibrancy and harmony.
Mimicking Natural Curves
Creating realistic flower shapes with folding involves carefully shaping your paper to mimic the natural curves found in real blooms. Focus on gentle bends and soft folds that reflect how petals naturally arch and curl. Pay attention to floral symbolism—certain shapes and curves convey specific meanings, so shape your flowers accordingly. Use color coordination to enhance realism; softer shades can emphasize delicate curves, while bold colors highlight structural features. Experiment with folding techniques like curling edges or creating slight ripples to replicate the organic flow of petals. The goal is to evoke the life and movement of real flowers through subtle shaping. By mastering these curves, your paper flowers will look authentic, expressive, and full of natural elegance.
Adding Depth and Dimension Through Shaping

To give your paper flowers a more realistic and eye-catching appearance, shaping techniques are essential. By carefully manipulating the paper, you add depth and dimension that make each bloom stand out. Start by curling or bending petal edges to create natural curves, which enhances the flower’s overall shape. Pay attention to the paper texture, as thicker or textured paper responds differently to shaping—sometimes requiring more pressure or gentle handling. Adjusting the shape also influences how the flower reflects light, highlighting the richness of the flower color. Layering and curling petals at various angles can replicate the intricate details found in real flowers. These shaping methods not only improve visual realism but also give your handmade blooms a professional, polished look. Additionally, understanding materials needed for candle making can help you better customize your crafting experience by tracking how you interact with shaping tutorials online. Incorporating shaping techniques can further elevate your craft, making each flower uniquely lifelike and professional-looking. To ensure your flowers maintain their shape over time, proper drying and setting methods are also important to consider. Furthermore, experimenting with different shaping tools can help achieve a variety of textures and effects to enhance your floral designs.
Tips for Smooth and Uniform Curls
Achieving smooth and uniform curls begins with selecting the right tools, such as a bone folder, a small dowel, or the tip of a pen. These tools help shape each petal evenly, creating professional-looking curls. To enhance your technique, consider these tips:
Choose the right tools like a bone folder or small dowel for perfect, uniform paper flower curls.
- Maintain consistent pressure on each curl to ensure uniformity.
- Match your flower color combinations to the style or theme you’re creating, blending hues smoothly.
- Use light, even strokes inspired by the paper flower history, which emphasizes delicate craftsmanship.
- Practice curling different petal sizes to develop a steady hand and attain consistency across your designs.
- Incorporating crochet techniques can also improve your ability to create precise, uniform curls in your paper flowers.
- Paying attention to craftsmanship ensures that each detail contributes to a refined and cohesive overall appearance.
- Developing empathy through careful craftsmanship can help you better understand and meet the aesthetic expectations of your projects.
- Additionally, understanding the importance of finishing techniques can elevate the quality of your paper flower creations.
Using Heat to Achieve Professional Results

Using heat can considerably enhance the shape and curl of your paper flowers, giving them a more polished and professional appearance. To achieve this, carefully apply heat using a heat gun, curling iron, or warm cloth. Monitor the paper temperature closely; too much heat can cause scorching or warping, while too little won’t achieve the desired curl. Test the heat on a scrap piece first to find the ideal paper temperature. Gently apply heat to the areas you want to shape, holding briefly until the paper softens and molds easily. Consistent heat application helps you create smooth, natural-looking curls and bends. Remember, patience and precision are key—quick, uneven heating can damage your delicate paper flowers.
Finishing Touches: Detailing and Texturing

Adding finishing touches like detailing and texturing can truly bring your paper flowers to life. These subtle enhancements deepen color combinations and emphasize flower symbolism, making each piece more meaningful. To add depth and realism, consider:
- Using fine tools like needles or toothpicks to create veins and subtle ridges in petals.
- Applying light ink or watercolor washes to enhance color gradations and highlight details.
- Curling petal edges with scissors or tweezers for natural softness and movement.
- Incorporating textured elements like glitter or embossing to add visual interest and dimension.
Troubleshooting Common Shaping Challenges
Even with careful detailing and texturing, shaping paper flowers can present challenges that disrupt their natural appearance. One common issue is struggling to achieve the desired flower color, especially if the paper isn’t curling or shaping evenly. Thicker paper can be harder to manipulate, causing uneven edges or stiff petals that don’t curl smoothly. To troubleshoot, consider adjusting your paper thickness—using thinner paper for delicate, rounded shapes and thicker paper for sturdy petals. If your flower color appears dull or uneven, try gently curling the edges to add dimension. Also, test different curling tools and techniques, ensuring you’re not applying too much pressure on thicker paper. With patience and the right adjustments, you’ll be able to shape flowers that look vibrant and realistic.
Frequently Asked Questions
How Do I Choose the Best Paper Type for Flower Shaping?
When choosing the best paper type for flower shaping, consider how it impacts flower durability and paper texture. You want a sturdy paper that can hold shape without tearing, like cardstock or floral paper. Softer papers, like tissue or crepe, provide realistic textures but may be less durable. Balance your needs by selecting a paper that offers the right combination of strength and texture for your project and desired flower look.
Can I Use Household Tools Instead of Specialized Shaping Tools?
You can definitely try DIY alternatives with household items for shaping paper flowers. Use things like scissors, pens, or pencils to curl edges or add texture, and a small brush handle or toothpick can help shape petals. Household item tips include using foam or sponge for gentle pressing and tweezers for precision. Just be careful not to tear the paper, and experiment to find what works best for your project.
What’s the Safest Way to Use Heat for Curling Paper?
When using heat for curling paper, prioritize heat safety by keeping the temperature low and avoiding direct contact with flames or hot surfaces. Always use a heat tool with a controlled setting, like a hairdryer or warm iron, and test on scrap paper first. Keep your workspace clear, and never leave heat unattended. These curling techniques help prevent paper damage while ensuring your project stays safe and successful.
How Do I Prevent Tears When Curling Delicate Petals?
To prevent tears when curling delicate petals, you should use gentle curling techniques and consider petal reinforcement. Lightly dampen the paper before curling to make it more pliable, and use a thin tool like a skewer or toothpick to shape the edges carefully. Applying a small amount of glue or floral tape at the base can also reinforce the petal, reducing tear risk and ensuring a smooth, professional finish.
How Long Do Curled Paper Flowers Typically Last?
Curled paper flowers can last weeks to months if you follow proper flower preservation and maintenance tips. Keep them away from moisture, direct sunlight, and extreme temperatures to prevent fading or damage. Gently dust them regularly and avoid handling too much to maintain their shape. With proper care, your paper flowers stay vibrant and beautiful longer, making them a lasting keepsake or decorative piece for your space.
Conclusion
Now that you’ve mastered these techniques, your paper flowers will look so realistic, they might just fool a bee! With your newfound skills, you’ll create stunning, pro-level blooms that could make even a florist jealous. Keep practicing, experiment with different curves, and watch your flowers transform into breathtaking masterpieces. No matter the challenge, you’ve got the tools and talent — your paper flowers will be the envy of everyone who sees them!