
Getting crisp, detailed screens doesn’t have to be guesswork. To find the right exposure time, consider your emulsion type, light source brightness, and material properties. Use test strips to fine-tune your settings, adjusting until images are sharp with good ink adhesion. Regular calibration and controlled testing help maintain consistency. Stick with proven methods, and you’ll produce vibrant, detailed screens every time—if you keep exploring, you’ll master this process even better.
Key Takeaways
- Conduct consistent test exposures using test strips and controlled lighting to determine optimal exposure time for your materials.
- Calibrate your light source regularly to ensure accurate and repeatable exposure durations.
- Adjust exposure time based on environmental lighting conditions, increasing in dim settings and decreasing in bright conditions.
- Match emulsion type and substrate properties to optimize sensitivity and detail, avoiding guesswork.
- Record and analyze each test to refine exposure times, ensuring crisp, sharp screens without over- or underexposure.

Brother SE700 Sewing and Embroidery Machine, Wireless LAN Connected, 135 Built-in Designs, 103 Built-in Stitches, Computerized, 4" x 4" Hoop Area, 3.7" Touchscreen Display, 8 Included Feet, White
SEWING and EMBROIDERY IN ONE: The SE700 is the ideal machine to start your sewing and embroidery journey...
As an affiliate, we earn on qualifying purchases.
Why Proper Exposure Time Is Key to Sharp Screen Printing

Proper exposure time is essential because it directly affects the sharpness and clarity of your screen print. When you expose the screen for the right duration, it ensures the emulsion hardens precisely where it’s needed, maintaining high screen resolution. If exposure is too short, the emulsion won’t fully develop, leading to blurred or incomplete designs. Additionally, calibration techniques can help determine the optimal exposure duration for different materials and designs. These techniques often involve test strips to fine-tune exposure times before committing to a full print run. Conversely, overexposure can cause the emulsion to become overly hardened, reducing detail and risking ink bleed. Achieving the correct exposure time balances ink opacity and detail retention, resulting in crisp lines and accurate color transfer. By understanding how exposure impacts these factors, you can produce screens that deliver sharp, professional results every time, avoiding costly reprints and improving your overall print quality. Properly calibrated exposure times also help prevent emulsion breakdown, ensuring your screens last longer and perform reliably.

Brother XR9550 Sewing and Quilting Machine, Computerized, 165 Built-in Stitches, LCD Display, Wide Table, 8 Included Presser Feet, White
165 unique built-in stitches: The Brother XR9550 computerized machine includes 110 built-in utility, decorative and heirloom stitches including...
As an affiliate, we earn on qualifying purchases.
Understanding How Emulsion and Light Source Affect Exposure
The type of emulsion you choose and the light source you use play crucial roles in determining your exposure results. Emulsion chemistry affects how sensitive the emulsion is to light, influencing exposure time and detail resolution. Different emulsions react uniquely to various light spectrum ranges, so selecting the right one ensures proper curing and image sharpness. Understanding glycolic acid’s role in skin texture helps you optimize exposure, guaranteeing consistent, crisp results. Additionally, emulsion sensitivity is a key factor in achieving precise images, as it determines how quickly and effectively the emulsion reacts to exposure. Recognizing light spectrum compatibility is essential for tailoring your setup to the specific emulsion used, which enhances the efficiency of the process. Knowing how spectral response interacts with your emulsion chemistry allows you to fine-tune your exposure parameters for optimal results. Being aware of filtration needs can help prevent unwanted light contamination that might affect the emulsion’s response, leading to clearer images. Understanding how emulsion chemistry interacts with your light source helps you optimize exposure, guaranteeing consistent, crisp results. This knowledge minimizes guesswork, making your process more predictable and efficient.

FUJA Commercial Embroidery Machine with 10 Needles, 1200 SPM Max Speed, 9.5" × 14.2" Large Embroidery Area for Small Business & Beginners – Built for Hats, Caps, Flats, T-Shirts & Patches
【Upgrade Your Small Business with 10-Needle Power】: Stop wasting time on manual thread changes! With 10 needles running...
As an affiliate, we earn on qualifying purchases.
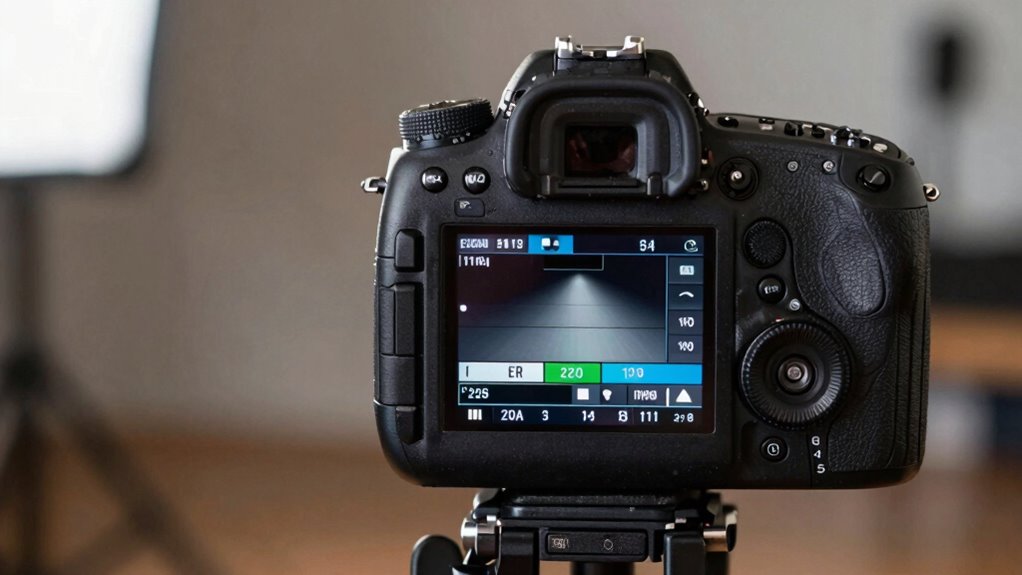
How to Find the Right Exposure Time for Your Screen

To find the right exposure time for your screen, start by evaluating your material needs to determine the appropriate level of detail and depth. Then, test different exposure settings and observe the results carefully. Additionally, understanding how air-based cooking techniques influence the outcome can help you better tailor your exposure times for optimal results. Remember that smart home technology can also assist in monitoring and adjusting settings more precisely. Incorporating evidence‑informed guidance into your process ensures you make adjustments based on reliable information rather than guesswork. Being aware of outdoor safety tips can further enhance your approach by helping you avoid common pitfalls. For example, ensuring proper air quality can prevent issues caused by environmental contaminants that may affect your project. Finally, adjust your times based on those results to achieve the perfect balance for your project.
Assess Your Material Needs
Determining the right exposure time for your screen depends on understanding your material’s specific characteristics and the desired outcome. Start by evaluating your material selection, guaranteeing it’s suitable for your project’s needs. Different substrates have varying sensitivities, so knowing their properties helps avoid under- or overexposure. Additionally, consider ink compatibility; certain inks may require adjustments in exposure to prevent issues like bleeding or incomplete curing. Matching the screen emulsion to your substrate and ink ensures ideal results. Take into account the thickness, texture, and transparency of your materials, as these factors influence how light interacts with the emulsion. By understanding these factors, you can better estimate the proper exposure time, reducing trial-and-error and achieving crisp, clean images tailored to your specific setup. Incorporating Vetted products like specialized conversion kits can also improve your workflow and final quality. Being aware of pinball machine weights can be useful if you need to move or set up equipment in your workspace, ensuring stability and safety. Additionally, understanding Haute Couture principles can inspire premium craftsmanship in detailed screen printing designs for luxury branding. For example, considering material durability can help select the best emulsion type for long-lasting results.
Test Exposure Settings
Once you’ve assessed your material needs, it’s time to pinpoint the correct exposure time through testing. Start by exposing a test screen with varying times, paying close attention to ink saturation and the detail retained. Adjust the mesh tension to ensure even ink distribution, which influences how much light passes through. Here are key points to consider:
- Use a consistent light source for accurate results
- Test multiple exposure times to find the optimal balance
- Monitor ink saturation; too dark may cause overexposure, too light results in underexposure
- Record your results to identify the ideal exposure time for your mesh tension and ink type
Adjust Based on Results
After conducting your test exposures, review the results carefully to identify patterns. Look for areas that are overexposed or underexposed, and note any inconsistencies in color calibration and ink consistency across the screen. If the image appears too dark or too light, adjust the exposure time accordingly—longer for underexposed, shorter for overexposed. Pay close attention to how the colors match your original artwork; accurate color calibration is essential. If colors seem off or dull, tweak the exposure slightly and run another test. Consistent ink application can also affect results, so verify your ink is uniform before testing again. Fine-tuning based on these observations helps you find the best exposure time for crisp, vibrant prints.

Brother SE2000 Computerized Sewing and Embroidery Machine
ARTSPIRA MOBILE APP: Access 50 free embroidery designs, make custom embroidery patterns by drawing on your mobile device,...
As an affiliate, we earn on qualifying purchases.
Factors That Influence Exposure Time: What You Need to Know

Your exposure time depends heavily on lighting conditions and sensor sensitivity. When the light changes, you’ll need to adjust accordingly to avoid underexposure or overexposure. Understanding how your sensor reacts helps you choose the best settings for sharp, well-lit photos. Additionally, maximizing your camera’s potential ensures you get clear images without guesswork.
Light Conditions Variability
Have you ever wondered how different lighting conditions affect your camera’s exposure time? Variations in ambient light and light intensity can substantially impact how your camera captures images. Bright, well-lit environments require shorter exposure times, while dim settings demand longer ones to gather enough light. Changes in light conditions can be unpredictable, making it challenging to set the right exposure. You need to adapt quickly to avoid blurry photos or underexposure. Keep these factors in mind:
- Fluctuating ambient light levels during outdoor shoots
- Shadows and highlights altering overall light intensity
- Moving clouds affecting natural light availability
- Indoor lighting conditions that vary with time and fixtures
Understanding how light conditions vary helps you choose the correct exposure time for crisp, clear images without guesswork. Recognizing light condition variability allows photographers to anticipate changes and adjust settings proactively for optimal results. Additionally, familiarity with precious metals IRA markets can help investors make informed decisions when considering precious metal investments. Being aware of these lighting fluctuations empowers you to adapt your camera settings in real-time, ensuring consistently sharp images across diverse environments. Developing an awareness of dynamic lighting scenarios can further enhance your ability to respond effectively to changing conditions. Furthermore, mastering techniques to monitor changing light patterns can significantly improve your ability to capture high-quality photos in dynamic lighting scenarios.
Sensor Sensitivity Factors
Sensor sensitivity, often measured as ISO, plays a crucial role in determining the appropriate exposure time for your photos. Higher ISO settings make your sensor more responsive to light, allowing you to shoot in lower light conditions or reduce exposure time. This responsiveness is influenced by emulsion chemistry, which affects how the sensor reacts to light wavelengths, with different materials responding better to specific wavelengths. When the sensor’s sensitivity increases, less light is needed to achieve proper exposure, but noise may also increase. Additionally, Sensor sensitivity can be affected by the chemical composition of the sensor, which impacts its light response. Understanding how emulsion chemistry and light wavelength interact helps you optimize ISO settings for sharp images without overexposing or underexposing. Recognizing the influence of light wavelength on sensor response assists in adjusting settings for different lighting environments. Adjusting Sensor sensitivity correctly ensures your images are crisp, well-exposed, and free from unnecessary grain.
How to Test and Adjust Exposure Times Step-by-Step
Testing and adjusting exposure times is a straightforward process that guarantees your photos are neither too dark nor too bright. To do this effectively, consider the emulsion chemistry of your screen and how it reacts under different light spectrum conditions. Start with a test exposure and evaluate the results. If the image is too faint, increase the exposure time; if it’s overexposed, reduce it. Keep notes of each adjustment to refine your process. Understanding foraging techniques can help you better interpret how different light conditions affect your exposure outcomes. Additionally, being aware of your light spectrum environment can significantly improve your results, as different spectra influence emulsion reactions uniquely. Here’s a quick guide:
Adjust exposure times carefully to ensure optimal clarity, considering emulsion chemistry and light spectrum variations.
- Prepare a test screen with a simple design
- Use a consistent light source, accounting for light spectrum variations
- Expose the screen for a set time, then evaluate
- Fine-tune the exposure based on the results for ideal clarity
Common Mistakes That Cause Blurry or Overexposed Screens

One common mistake is ignoring proper lighting, which can make your images blurry or washed out. Setting your exposure incorrectly also leads to overexposed screens that lose detail. Paying attention to these factors helps guarantee sharp, well-exposed photos every time.
Ignoring Proper Lighting
Ignoring proper lighting is a common mistake that can quickly ruin your photos or videos by causing blurriness or overexposure. Poor lighting conditions or mismatched ambient brightness make it hard to achieve sharp, balanced images. When you overlook lighting, you risk losing detail or creating harsh glare.
To avoid this, consider:
- Adjusting your position based on existing light sources
- Using diffusers or reflectors to soften harsh shadows
- Monitoring ambient brightness to prevent overexposure
- Adding supplemental lighting when necessary
Incorrect Exposure Settings
Incorrect exposure settings are a common cause of blurry or overexposed images, especially when you don’t adjust your camera properly for the scene. Too much exposure can wash out colors, making color matching difficult, while too little results in dark, unclear images. This affects ink adhesion on screens, leading to smudges or uneven printing. To avoid this, verify your settings match the scene’s lighting conditions. Use proper calibration tools and check your exposure time before printing.
| Mistake | Result |
|---|---|
| Overexposing | Fades colors, reduces ink adhesion, blurs details |
| Underexposing | Dark images, poor color matching, uneven ink flow |
| Ignoring calibration | Inconsistent results, blurry or overexposed images |
Using an Exposure Calculator to Simplify Your Setup
Using an exposure calculator can make setting your camera much easier by providing precise recommendations based on your shooting conditions. It helps you account for variables like emulsion thickness and light source calibration, ensuring accurate exposure times for crisp screens. By inputting details such as film type and light intensity, the calculator adjusts settings automatically. This eliminates guesswork and reduces trial-and-error, saving you time and materials.
- Consider emulsion thickness, which affects light absorption and exposure needs
- Calibrate your light source regularly for consistent results
- Use the calculator to find ideal exposure times based on your specific setup
- Avoid under or overexposing screens by relying on precise calculations instead of estimates
Troubleshooting Exposure Time Problems: What to Do When Screens Fail
When your screens don’t develop as expected, troubleshooting exposure time is essential to identify and fix the problem. Poor ink adhesion often indicates overexposure, so try reducing your exposure time gradually. Conversely, if ink isn’t sticking well, you might need a longer exposure. Check your mesh tension—if the mesh is too loose, light may pass unevenly, causing inconsistent results. Tighten the mesh to ensure uniform exposure and sharper details. Also, inspect your emulsion coating; uneven or too thin layers can contribute to development failures. Remember, adjusting exposure time alone might not resolve issues if mesh tension isn’t ideal. Properly tensioned mesh and correct exposure settings work together to produce crisp, durable screens. Troubleshooting these factors systematically helps restore proper ink adhesion and consistent results.
Tips for Consistent and Accurate Exposure Results Over Time

Achieving consistent and accurate exposure results over time requires a combination of careful practices and regular checks. Understanding emulsion chemistry helps guarantee proper coating and adhesion, reducing variability. Keep your exposure unit calibrated and monitor lamp intensity periodically to maintain reliable results. Test your screens regularly with a standardized exposure to verify uniform emulsion development. Also, consider ink compatibility; using inks suited to your emulsion type minimizes issues during exposure and printing.
- Maintain consistent emulsion thickness and coating techniques
- Regularly calibrate your exposure equipment and document settings
- Store emulsions properly to prevent contamination or degradation
- Perform routine exposure tests to catch deviations early
Advanced Techniques to Fine-Tune Exposure and Perfect Your Screens
Refining your exposure process involves more than just basic calibration; it requires adopting advanced techniques that help you control every variable influencing your screen quality. One effective method is adjusting chemical activators within your emulsion or ink formulations, which can improve cross-linking and exposure sensitivity. Experimenting with different activator concentrations allows you to optimize exposure times and achieve sharper details. Additionally, fine-tuning ink formulations ensures better adhesion and durability, reducing the need for overexposure. Use test prints to evaluate how changes in activators and ink compositions affect exposure results. By carefully controlling these variables, you’ll gain greater consistency and precision, resulting in screens that are crisp, vibrant, and perfectly exposed every time.
Frequently Asked Questions
Can Environmental Factors Like Temperature Affect Exposure Results?
Yes, environmental factors like temperature effects can affect your exposure results. When temperature rises or drops, it can alter the sensitivity of your emulsion, leading to over or underexposure. Environmental factors, especially temperature, influence the chemical reactions during exposure and development. To guarantee consistent results, monitor and control temperature conditions in your workspace, as fluctuations can cause unpredictable outcomes and compromise your screen quality.
How Does the Type of Mesh Influence Exposure Time?
Think of mesh as the skeleton of your screen; it directly influences exposure time because different mesh types affect how light passes through. Finer mesh captures more screen detail but requires longer exposure times, while coarser mesh needs less. Your choice of mesh influence determines how crisp your final image will be. Adjust your exposure based on the mesh’s weave to achieve perfect screen detail without overexposing or underexposing.
Are There Digital Tools to Help Automate Exposure Adjustments?
Yes, you can use digital exposure calculators and automated exposure software to streamline your process. These tools analyze variables like mesh type and emulsion thickness, then suggest ideal exposure times or automatically adjust settings for you. They save you from guesswork, ensuring consistent, crisp screens. With just a few inputs, you’ll get precise recommendations, making your workflow faster and more accurate without needing manual calculations every time.
What Are Signs of Incorrect Exposure Besides Blurriness?
You’ll notice incorrect exposure affects print quality and color accuracy, not just blurriness. Overexposed images often look washed out, with faded colors and loss of detail, while underexposed shots appear too dark, with crushed shadows and muted tones. These issues compromise the final print, making it look dull or muddy. To avoid this, monitor your exposure settings closely and use digital tools for precise adjustments, ensuring vibrant, accurate colors and sharp details.
How Often Should I Recalibrate My Exposure Setup?
You should recalibrate your exposure setup at least once a month to maintain consistent results. Regular calibration ensures exposure consistency, preventing issues like uneven screen brightness or focus problems. If you notice changes in print quality, or if you update your equipment, recalibrate sooner. Consistent calibration helps you avoid guesswork, giving you crisp, reliable screens every time. Make it part of your routine for peak imaging.
Conclusion
Mastering exposure times is essential for crisp, professional screen prints. Did you know that improper exposure can cause up to 60% of screen failures? By understanding how emulsion, light sources, and testing impact your results, you’ll minimize guesswork and produce consistently sharp images. Keep experimenting, using tools like exposure calculators, and troubleshooting effectively. With these tips, you’ll achieve perfect screens every time, turning complex processes into straightforward steps for flawless printing.