Choosing the right mesh count is key to making your screen-printed details pop. A higher mesh count (220-400) lets you capture fine lines, sharp edges, and vibrant colors, perfect for detailed images. Lower counts (110-160) give bold coverage and thick ink layers, ideal for solid colors and big designs. To get perfect results, consider your design’s intricacy, fabric, and ink type. Keep exploring to discover how to select the ideal mesh for your next project.
Key Takeaways
- Higher mesh counts (220+) enhance fine detail, sharp edges, and vibrant colors for intricate designs.
- Lower mesh counts (110-160) allow thicker ink deposits, ideal for bold, solid coverage.
- Selecting the right mesh depends on artwork complexity, ink viscosity, and fabric type.
- Proper tension and mesh material improve print clarity, durability, and prevent issues like ink bleed.
- Testing sample prints ensures optimal mesh choice for detailed, high-quality screen printing results.

3 Yards 1.27 Meters Silk Screen Printing Fabric Mesh Screen Printing Mesh Wide High Tension Mesh Making Ink Supplies 110 Mesh(43T)
Products using high-quality polyester filaments as raw materials, using sophisticated machines to produce monofilament screen printing mesh yarn
As an affiliate, we earn on qualifying purchases.
As an affiliate, we earn on qualifying purchases.
Understanding Mesh Count and Its Role in Screen Printing
Understanding mesh count is essential because it directly affects the quality and detail of your printed designs. When selecting a mesh, consider how mesh tension impacts your results; higher tension provides a smoother surface, improving ink transfer and clarity. Mesh count determines how many threads per inch are woven into the mesh, influencing how much ink passes through. A higher mesh count produces finer details, but it also requires adjustments in ink viscosity—thinner inks work better with finer meshes to prevent clogging. Conversely, lower mesh counts allow more ink to pass through, ideal for bold designs. Balancing mesh tension and ink viscosity is vital to achieving crisp, clean prints. Additionally, understanding the role of European cloud servers can enhance your workflow by providing secure and energy-efficient data management solutions. Properly managing mesh tension ensures consistent results, especially when working with intricate designs. Mastering these factors helps you control detail, ink coverage, and overall print quality, making careful attention to print preparation a crucial step. Furthermore, integrating connected equipment can streamline your printing process and improve overall efficiency. Paying attention to material compatibility can also prevent common issues and ensure the best possible outcome.

Caydo 23 Pieces Screen Printing Starter kit Include 3 Different Size of Wood Silk Screen Printing Frame with Mesh, Screen Printing Squeegees, Inkjet Transparency Film, Ink Knife, and Mask Tape
Screen Printing Frames: 3 different sizes of screen printing frames(10 x 14 inch, 8 x 12 inch, 6…
As an affiliate, we earn on qualifying purchases.
As an affiliate, we earn on qualifying purchases.
How Mesh Count Affects Detail and Ink Coverage
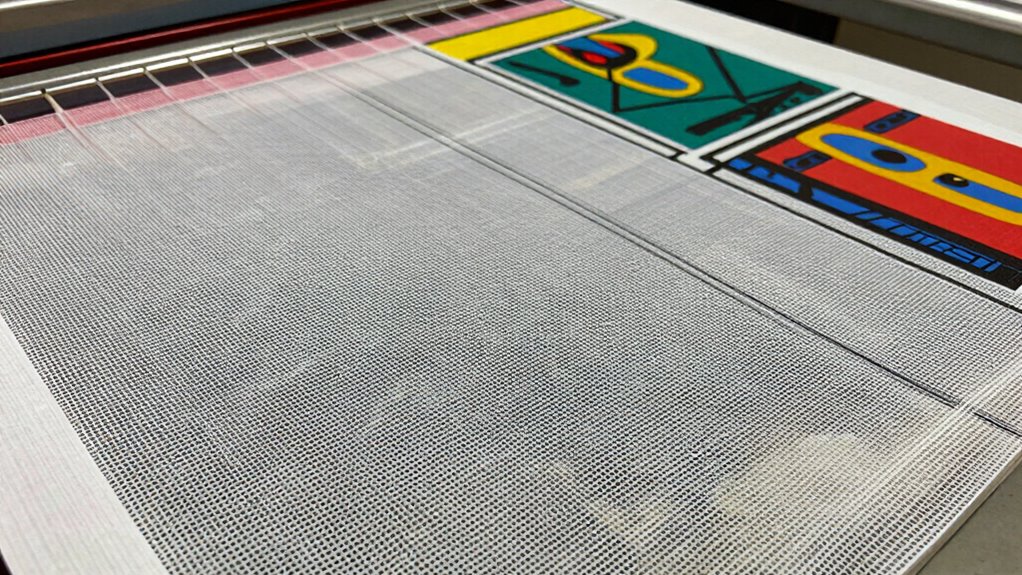
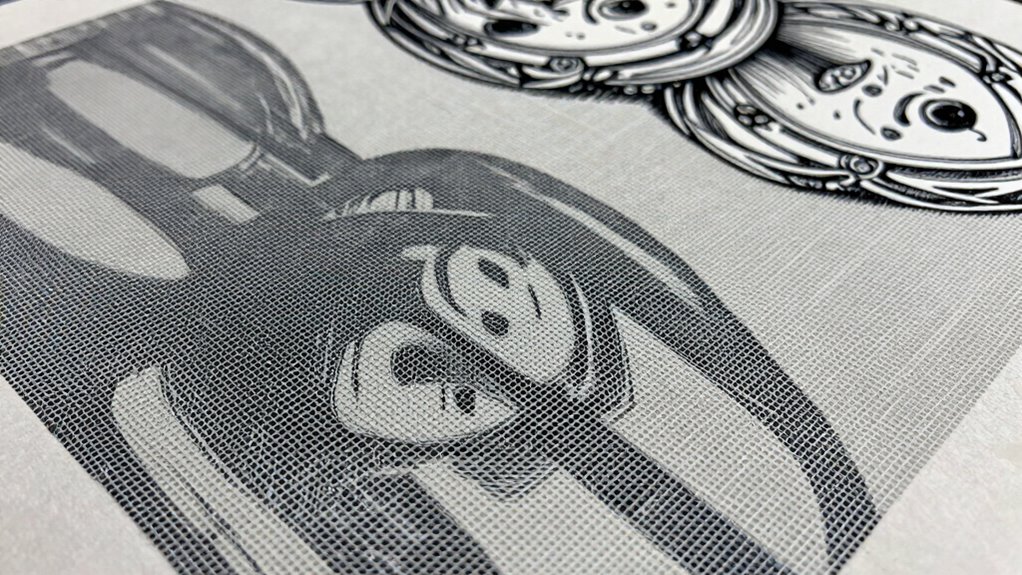
The mesh count you choose directly impacts the level of detail and ink coverage in your print. A higher mesh count produces finer details, allowing you to capture intricate designs with sharp edges and precise lines. This enhances color saturation, making your colors appear more vibrant and true to your original artwork. Conversely, a lower mesh count allows more ink to pass through, resulting in thicker ink deposits that improve coverage on textured or uneven surfaces. This also affects texture blending, helping to create smoother gradients and softer progressions. If you want crisp, detailed images, opt for a higher mesh count. For more solid, bold colors with full coverage, a lower mesh count works better. Balancing these factors guarantees your prints achieve the desired visual impact. Understanding mesh variations helps you choose the best option for your specific project.

VEVOR Screen Printing Kit, 2 Pieces Aluminum Silk Screen Printing Frames, 20x24inch Silk Screen Printing Frame with 230 Count Mesh, High Tension Nylon Mesh and Sealing Tape for T-Shirts DIY Printing
Streamlined Printing: Take your screen printing to the next level with our silk screen frame kit! Featuring 2…
As an affiliate, we earn on qualifying purchases.
As an affiliate, we earn on qualifying purchases.
Choosing the Best Mesh Count for Your Design Type
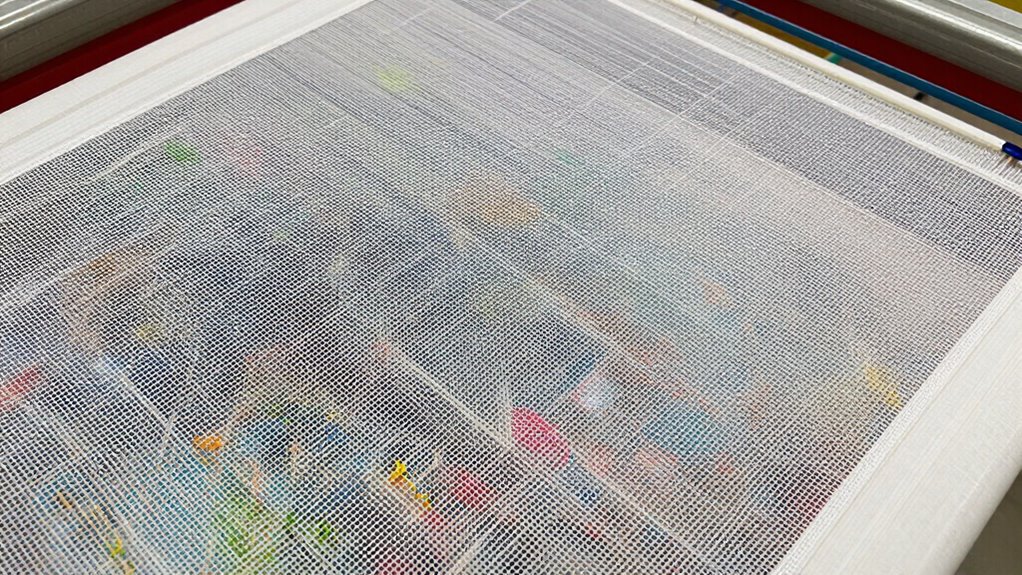
Selecting the right mesh count depends on your specific design type and the desired outcome. To achieve ideal results, consider both mesh tension and mesh material. Higher mesh counts are ideal for fine details and thin ink layers, but they require consistent mesh tension to avoid print defects. If your design demands bold colors and thicker ink, lower mesh counts are better, as they allow more ink to pass through easily. The mesh material also impacts performance; polyester mesh offers durability and consistent tension, while nylon may be more flexible but less durable. Adequately mesh tension is essential for achieving sharp, clean prints. Adjusting mesh tension properly ensures even ink transfer and sharp details. By understanding your design’s needs and selecting appropriate mesh tension and material, you’ll produce sharper, cleaner prints tailored to your project.
3 Yards 1.27 Meters Silk Screen Printing Fabric Mesh Screen Printing Mesh Wide High Tension Mesh Making Ink Supplies 110 Mesh(43T)
Products using high-quality polyester filaments as raw materials, using sophisticated machines to produce monofilament screen printing mesh yarn
As an affiliate, we earn on qualifying purchases.
As an affiliate, we earn on qualifying purchases.
Common Mistakes When Picking Mesh Count and How to Avoid Them
One common mistake is choosing a mesh count that doesn’t match your design’s detail level or ink requirements. Using too low a mesh can cause ink bleed, while too high a mesh might block details. Additionally, neglecting proper mesh tension and selecting incompatible mesh material can lead to inconsistent prints. For example, high tension improves precision but risks tearing softer mesh materials. Proper mesh tension not only enhances print quality but also extends the lifespan of your screen. Paying attention to mesh material compatibility can prevent premature tearing and ensure consistent results over time. Understanding print detail requirements helps in selecting the right mesh for your specific project needs, especially considering the water-based inks often used in environmentally friendly screen printing. Being aware of the mesh count options available allows you to tailor your choice to different design complexities and ink viscosities.
Tips for Testing and Adjusting Mesh Count for Perfect Prints

To achieve perfect prints, testing and adjusting your mesh count is essential. Begin by printing sample designs with different mesh counts to evaluate ink consistency. If the ink appears too thick or uneven, consider lowering the mesh count for better flow; if it’s too thin or faint, a higher count might be necessary. Keep an eye on screen durability—using a mesh that’s too fine can cause premature wear, while too coarse may lead to poor detail. Regularly inspect your screens during tests to ensure they hold up under repeated use. Adjust your mesh count based on the results, aiming for a balance between ink flow and screen longevity. Proper testing helps you identify the ideal mesh count for sharp, consistent prints every time. Understanding clean-home systems and maintenance schedules can also help extend your screen’s lifespan and ensure consistent quality. Incorporating proper cleaning techniques between prints can further prevent ink buildup and screen damage, maintaining optimal print clarity and durability. Additionally, considering the material type of your mesh can influence the durability and quality of your prints, making it an important factor to evaluate. Being mindful of screen tension can also improve print precision and consistency over time.
When to Upgrade or Change Your Mesh Count for Professional Results

You should consider upgrading or changing your mesh count when your artwork requires more detail or sharper lines. If your current mesh isn’t capturing the fine ink details or is incompatible with your material, it’s time to switch. Matching your mesh to your artwork and material needs guarantees professional, high-quality results. Additionally, understanding mesh count can help you select the appropriate screen for your specific project. Recognizing how color accuracy impacts visual detail can influence your choice of mesh for intricate designs. Being aware of pinball machine weights can also be relevant when setting up or transporting your equipment to ensure stability and safety. When selecting equipment, considering reliable backup power options can help prevent project delays due to technical issues, ensuring consistent results.
Artwork Complexity Requirements
When designing artwork with intricate details or fine lines, choosing the right mesh count becomes essential for achieving professional results. If your design includes delicate features or small text, a higher mesh count helps prevent color fading and ensures sharp edges. Conversely, if your artwork involves bold shapes or large areas, a lower mesh count allows more ink to pass through, reducing the risk of fabric stretching and uneven coverage. As your artwork’s complexity increases, you may need to upgrade your mesh count to maintain clarity and avoid blurry lines. Monitoring how well your print holds detail without sacrificing ink opacity is key. Adjusting mesh count based on artwork complexity helps you achieve crisp, vibrant results while minimizing issues like color fading or fabric stretching. Additionally, selecting the appropriate mesh count can influence the performance of the print and other related factors impacting overall quality and durability.
Ink Detail Precision Needs
Achieving sharp, detailed prints requires paying close attention to your mesh count choices. When your design demands fine ink layer and stencil precision, upgrading to a higher mesh count becomes essential. A finer mesh allows less ink to pass through, resulting in crisper details and cleaner lines. Conversely, for bolder, less intricate designs, a lower mesh count provides more ink coverage. Additionally, selecting the appropriate mesh can help prevent issues like excessive ink buildup, ensuring a more professional finish. Here’s a quick guide:
| Mesh Count | Best Use |
|---|---|
| 110-160 | Bold designs, thick ink layers |
| 180-200 | Moderate detail, medium ink coverage |
| 220+ | Fine details, high stencil precision |
| 300+ | Ultra-fine lines, photo-quality images |
| 400+ | Extremely detailed, delicate designs |
Choose your mesh based on the ink layer and stencil precision your project requires.
Material Compatibility Factors
Selecting the right mesh count isn’t just about design detail; it also depends on the material you’re printing on. Different materials, like textiles, plastics, or ceramics, require specific mesh materials to guarantee proper ink adhesion and durability. For instance, smooth, non-porous surfaces may need a finer mesh with higher mesh tension to prevent ink bleed, while rougher textiles might benefit from a coarser mesh that allows better ink flow. Adjusting mesh tension is vital—too loose, and ink may smudge; too tight, and it can cause mesh deformation or breakage. When materials are challenging, upgrading your mesh material or increasing tension can improve print quality and longevity. Additionally, understanding material compatibility factors can help you select the optimal mesh count and tension settings for consistent, high-quality prints. Paying attention to material surface texture can further inform your choice of mesh and tension to ensure optimal results, and considering mesh durability can help maintain print precision over multiple uses. Moreover, considering mesh material properties can assist in choosing the right type of mesh for specific applications, enhancing overall print performance.
Frequently Asked Questions
How Does Mesh Tension Influence Print Quality Alongside Mesh Count?
Mesh tension plays a vital role in print quality alongside mesh count. When you increase mesh tension, the mesh becomes more rigid, leading to sharper, more precise details and better print clarity. Conversely, low tension can cause blurriness or uneven ink deposition. Balancing tension with mesh count guarantees your prints are crisp and vibrant, giving you professional results every time.
Can Different Mesh Counts Be Combined in a Single Design?
Yes, you can combine different mesh counts in a single design by using mesh layering or hybrid screens. This technique allows you to attain varying levels of detail and opacity within the same print, making certain areas sharper while others are softer. When you incorporate multiple mesh counts, guarantee proper registration and tension control to maintain quality. Hybrid screens are especially useful for complex designs with intricate details and bold sections.
What Environmental Factors Affect Mesh Durability Over Time?
A stitch in time saves nine, and protecting your mesh from environmental damage is essential. UV resistance and chemical exposure directly impact mesh durability over time. Sunlight can weaken fibers, while harsh chemicals cause deterioration. To keep your mesh in top shape, minimize prolonged UV exposure and clean it with gentle, compatible solutions. Proper care ensures your mesh remains resilient, letting your prints stay sharp and vibrant longer.
Are There Specific Mesh Types Recommended for Certain Inks?
You should choose mesh types based on ink compatibility to guarantee ideal results. For water-based inks, opt for polyester mesh, which handles moisture well. Solvent or plastisol inks work better with nylon or polyester meshes designed for chemical resistance. The mesh material directly influences ink adhesion and detail quality, so selecting the right mesh for your specific ink type helps produce sharp, vibrant images and extends your mesh’s durability over time.
How Does Mesh Weave Pattern Impact Print Sharpness and Longevity?
You’ll find that the mesh weave pattern directly impacts print sharpness and longevity. A tight, uniform weave enhances detail clarity, making your prints crisp and precise. It also boosts mesh durability, so your screen lasts longer without losing tension or becoming damaged. Conversely, inconsistent weave patterns can cause blurring and reduce the screen’s lifespan. Choosing a mesh with a consistent weave guarantees sharp prints and a durable, long-lasting screen.
Conclusion
Choosing the right mesh count is like fine-tuning your craft—small adjustments can open up big results. By paying attention to your design’s details and experimenting thoughtfully, you’ll find the perfect balance that makes your prints stand out. Remember, a little patience goes a long way in mastering this art, and with each subtle tweak, you’ll get closer to flawless results. Trust your instincts, and enjoy the journey to printing perfection.