To solder stained glass with clean beads and no burnt flux, start by applying a thin, even layer of flux to prevent excess residue and burning. Keep your soldering iron at a steady, appropriate temperature and work with controlled, steady movements to form smooth, consistent beads. Regularly clean your tip and rehearse proper surface prep. If burnt flux occurs, reheat and carefully smooth the area. Focus on technique, and you’ll master flawless joints—more tips follow to perfect your process.
Key Takeaways
- Use a clean, well-maintained soldering iron tip to ensure smooth, shiny solder beads and prevent burnt flux.
- Apply a thin, even layer of flux to avoid excess residue that can burn and cause blackened surfaces.
- Maintain consistent temperature control to prevent overheating, which can burn flux and damage solder joints.
- Remove burnt flux residue with flux remover or scraper after cooling for a clean, professional finish.
- Inspect and rework uneven or burnt solder beads by reheating and smoothing with a properly heated, clean soldering iron.

Hakko FX601-02 – Soldering Iron with High Heat Capacity
Dial controlled temperature selection
As an affiliate, we earn on qualifying purchases.
As an affiliate, we earn on qualifying purchases.
How to Solder Stained Glass Without Burnt Flux
Soldering stained glass without burning flux requires careful technique and attention to detail. Proper flux application is essential; you want just enough to cover the joint without excess that can burn or smoke. Apply a thin, even layer of flux to guarantee ideal solder flow. If too much flux is used, it may burn, creating a blackened surface and hindering solder adhesion. As you heat the joint, watch the solder flow smoothly along the seam. Consistent, gentle heat helps prevent flux from burning and ensures a clean, shiny bead. Remember, the key is to control your heat source and use the right amount of flux, so you achieve seamless solder joints without damaging your stained glass piece. Additionally, using air purifiers in your workspace can help reduce smoke and fumes generated during soldering, contributing to a cleaner and safer environment. Proper ventilation and fume extraction are also crucial for a safe soldering experience, especially when working with flux and other chemicals.

Cj's Flux Remover – 8 Oz
As an affiliate, we earn on qualifying purchases.
As an affiliate, we earn on qualifying purchases.
Preparing Your Workspace for Flawless Soldering
Setting up your workspace properly guarantees you can solder stained glass efficiently and safely. Start by choosing a well-ventilated area to minimize fumes and protect your health. Clear your work surface of clutter to prevent accidents and accidental damage. Organize your tools—pliers, solder, flux, and cleanup supplies—within easy reach for smooth workflow. Use a heat-resistant mat or surface to safeguard your workspace. Incorporate safety precautions such as wearing protective glasses and gloves to prevent burns or injuries. Make sure your soldering iron is placed on a stable stand when not in use. Good workspace setup not only enhances your precision but also keeps hazards at bay, making your stained glass soldering process safer and more enjoyable. Additionally, proper ventilation helps remove fumes and creates a safer environment for your project. Ensuring proper tool organization minimizes the risk of accidents and streamlines your workflow, making your soldering sessions more effective. Paying attention to workspace ergonomics can also reduce fatigue and improve your overall soldering accuracy. Incorporating proper lighting can further enhance your visibility and precision during detailed work, and considering soldering temperature control can help prevent burnt flux and ensure cleaner joints.

Weller Soldering Brass Sponge Tip Cleaner with Silicone Holder | WLACCBSH-02
Reduce Residue on Tip: Weller's Soldering Brass Sponge effectively remove residual solder from your soldering tools without damaging…
As an affiliate, we earn on qualifying purchases.
As an affiliate, we earn on qualifying purchases.
Choosing the Right Flux and Solder for Stained Glass Projects
Selecting the right flux and solder is vital for a strong, clean stained glass piece. You need to guarantee compatibility between the flux and solder to avoid issues down the line. Understanding the different types of flux and the best solder materials helps you achieve professional results. Unearthing the Secrets of the Supernatural Realm can be a metaphor for mastering the hidden techniques and knowledge behind successful stained glass soldering, ensuring your work remains durable and visually stunning. Additionally, being aware of affiliate relationships and their influence on product recommendations can help you make more informed purchasing decisions. Proper cleaning and preparation are essential steps in free floating techniques to achieve a flawless finish and prevent corrosion over time.
Compatibility Between Flux and Solder
Choosing the right flux and solder is essential for achieving strong, clean joints in stained glass projects. You need to verify flux compatibility with your solder to prevent issues like poor solder adhesion or weak joints. When selecting solder, look for those formulated for stained glass work, typically with a rosin core or flux coating that complements your flux type. Compatibility matters because incompatible flux and solder can cause oxidation, dull beads, or incomplete bonding. Always check manufacturer recommendations to confirm they work well together. Proper pairing ensures the solder flows smoothly and bonds securely, resulting in neat, durable joints. Additionally, understanding the chemical interactions between flux and solder can help prevent corrosion and ensure long-lasting results. By paying attention to flux compatibility, you enhance solder adhesion and create a professional finish in your stained glass pieces.
Types of Flux for Glasswork
When working on stained glass, using the right type of flux is essential for ensuring clean, strong solder joints. Different flux types suit various glasswork needs, depending on their glass compatibility and application. Here’s a quick comparison:
| Flux Type | Best For | Key Feature |
|---|---|---|
| Rosin Flux | General stained glass | Mild, easy to clean |
| Zinc Chloride | Copper foil projects | Stronger, suitable for metal |
| Borax Flux | High-temperature soldering | High heat resistance |
| Acid Flux | Leaded glass | Excellent glass compatibility |
| Organic Flux | Fine detail work | Less corrosive, easy cleanup |
Choose your flux based on your project’s glass compatibility and the type of solder used. Proper flux selection can also prevent flux residue buildup, which is important for maintaining the integrity and appearance of your stained glass work. Additionally, understanding flux chemistry helps in selecting the most effective flux for specific applications. Being aware of flux application techniques can further improve the quality of your solder joints and reduce cleanup time. Mastering flux application methods can also help in minimizing excess flux and ensuring a neat finish. Knowing the proper cleaning methods after soldering can help preserve the clarity and durability of your stained glass piece.
Best Solder Materials for Stained Glass
To achieve strong, clean solder joints in stained glass projects, you need to pick the right combination of flux and solder. Solder alloy selection is vital; most stained glass work uses 60/40 or 50/50 tin-lead solder for easy melting and good flow. Lead-free options like silver or copper-based solders are available but require higher temperatures and may be more challenging to work with. Flux application techniques are equally important—apply a thin, even layer to prevent oxidation and guarantee smooth flow. Proper flux use reduces beading issues and minimizes residue. Selecting the appropriate high-quality flux can greatly improve the appearance and durability of your solder joints. Choosing the right solder and mastering flux application helps you create durable, clear joints while avoiding common problems like burnt flux or poor adhesion. Incorporating connected equipment and proper techniques can further enhance your soldering results and ensure long-term project success.

Soldering Iron Kit, 100W LED Digital Solder Gun kits with Ceramic Heater, Adjustable Temperature Welding Tools with Tips, Wick Braid, Stand, Solders Wire, Sponge, Flux Paste
【UPGRADE SOLDERING IRON】The 100W soldering iron uses a high-power, advanced plug-in ceramic heating core that heats up quickly…
As an affiliate, we earn on qualifying purchases.
As an affiliate, we earn on qualifying purchases.
How to Keep a Consistent Soldering Temperature
Maintaining a consistent soldering temperature is essential for achieving smooth, reliable joints in stained glass projects. To guarantee temperature control, keep your soldering iron at a steady heat level and avoid fluctuations. Use a quality temperature-controlled soldering iron that allows precise adjustments, and regularly check the tip’s temperature with an infrared thermometer if possible. Consistent heat ensures that the solder flows smoothly without burning the flux or damaging the glass. Practice steady hand movements and avoid applying excessive pressure, which can cause uneven heat distribution. Keep the work area clean and free of drafts, as sudden temperature changes can impact heat consistency. By controlling the temperature carefully, you’ll produce cleaner beads and stronger joints, making your stained glass projects look professional.
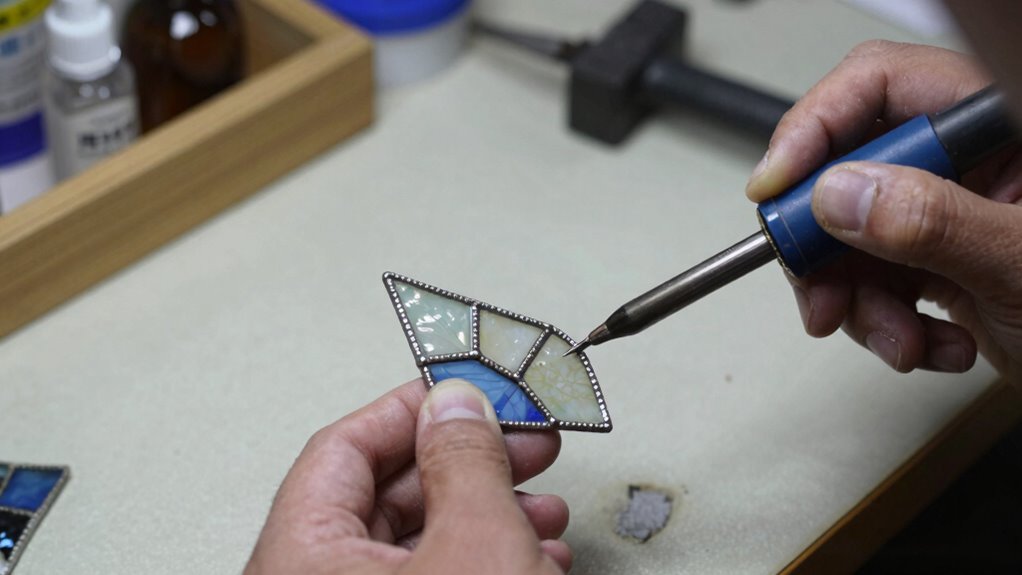
Applying Solder for Smooth, Neat Joints
Applying solder carefully is key to creating smooth, neat joints in stained glass. Use your soldering tools precisely, maintaining steady movement to avoid uneven beads. Always prioritize flux safety by working in a well-ventilated area and wearing gloves if needed, as flux fumes can be irritating. When applying solder, keep the tip clean and hot enough to melt solder smoothly, but not so hot that it burns or causes flux to burn. Focus on creating even, thin beads that smoothly bridge the glass pieces without gaps or excess. Consistent pressure and steady hand movements help achieve professional-looking joints. Proper technique reduces cleanup later and ensures your stained glass piece looks polished and durable. Additionally, understanding the importance of temperature control can help prevent damaging the glass or flux during soldering. Monitoring your soldering temperature with an accurate tool can improve the quality of your joints and prevent accidents. Maintaining the correct temperature also helps prevent flux burn-off, ensuring a cleaner finish and fewer impurities in your solder joints. Incorporating proper ventilation is essential to safely dissipate flux fumes and maintain a healthy workspace.
Fixing Burnt Flux and Uneven Solder Beads
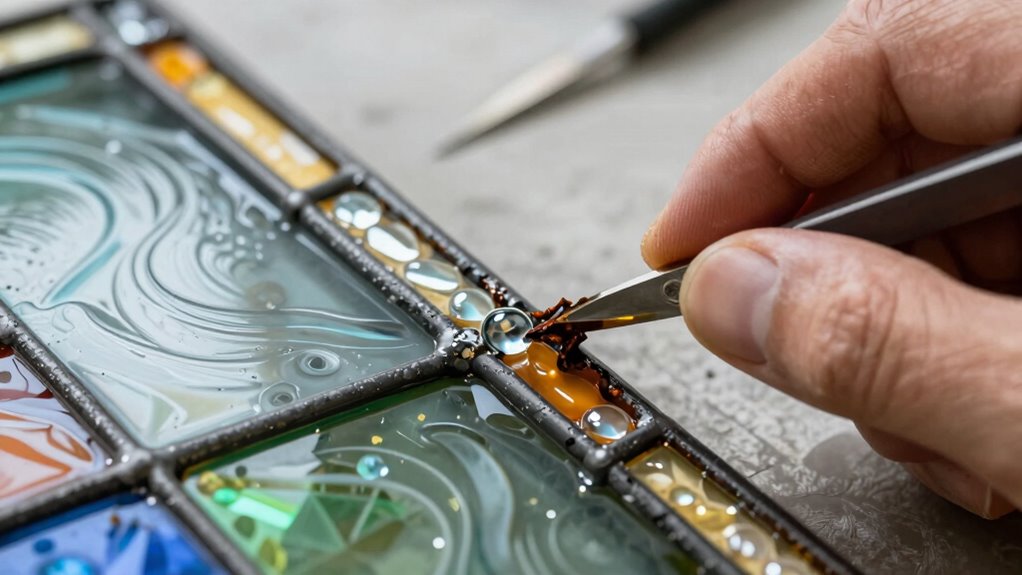
Even with careful soldering, issues like burnt flux and uneven beads can crop up, affecting the final look of your stained glass piece. To fix burnt flux, gently scrape away the residue with a craft knife or flux remover. Proper flux removal techniques are essential for a clean finish and to prevent corrosion or discoloration over time. For solder bead control, reheat and carefully smooth out uneven beads with your soldering iron, ensuring consistent flow. Use the following table to visualize common problems and solutions:
| Problem | Solution |
|---|---|
| Burnt flux residue | Remove with flux remover or scraper |
| Uneven solder beads | Reheat and smooth with soldering iron |
| Solder beads that are too thick | Control heat and flow rate during soldering |
| Solder beads that are too thin | Reapply solder with steady movement |
| Flux residue left behind | Clean with a damp brush after cooling |
Proper flux removal and solder bead control are key to a smooth, professional finish. Additionally, understanding the properties of essential oils can help you maintain better control over your soldering environment by reducing stress and promoting focus during intricate work. Using proper ventilation is also important to ensure safety and clear visibility during soldering sessions. Being aware of soldering techniques can further improve your results and prevent common issues. Incorporating relaxation methods such as mindful breathing can also enhance your concentration and precision while working.
Cleaning and Finishing Your Soldered Glass Pieces

Once you’ve completed soldering your stained glass piece, proper cleaning and finishing are essential to achieve a polished look. Start by removing excess flux and oxidation with a gentle scrub using fine steel wool or a polishing pad. Next, apply polishing techniques such as buffing with a soft cloth or a polishing wheel to smooth the solder beads and enhance their shine. If you want to add depth or color, consider patina application, which involves applying a chemical solution to darken or color the solder. Be sure to follow the manufacturer’s instructions carefully. After patina, clean the piece again to remove any residue, then buff it to a beautiful, even finish. This process guarantees your stained glass piece looks professional and visually appealing. Proper finishing techniques help ensure your work is durable and maintains its aesthetic appeal over time.
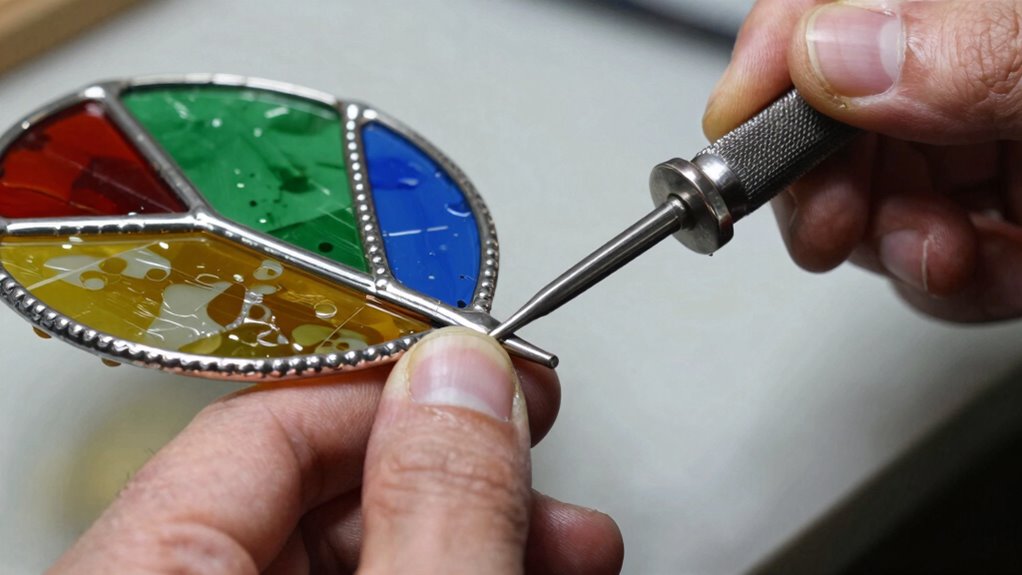
Advanced Techniques for Perfect Solder Beads
To achieve perfect solder beads, you need to focus on proper surface preparation so the solder flows smoothly. Applying solder correctly and managing heat efficiently are essential to prevent gaps and uneven beads. Mastering these techniques will give your stained glass projects a professional, polished look.
Proper Surface Preparation
Achieving smooth, clean solder beads on stained glass requires meticulous surface preparation, especially when aiming for professional results. Proper surface preparation ensures the glass and copper foil are free of oils, dirt, and oxidation that can cause imperfections. Start with thorough cleaning using appropriate cleaning techniques, such as rubbing alcohol or a specialized glass cleaner, to remove any residue. Make sure the copper foil edges are smooth and free of oxidation by gently sanding or burnishing. Wipe the surface with a lint-free cloth to eliminate fingerprints and dust. Avoid skipping these steps, as contaminants can lead to uneven solder flow and weak joints. Consistent surface preparation creates a clean, even surface, promoting better solder adhesion and ultimately achieving those perfect, smooth solder beads you desire.
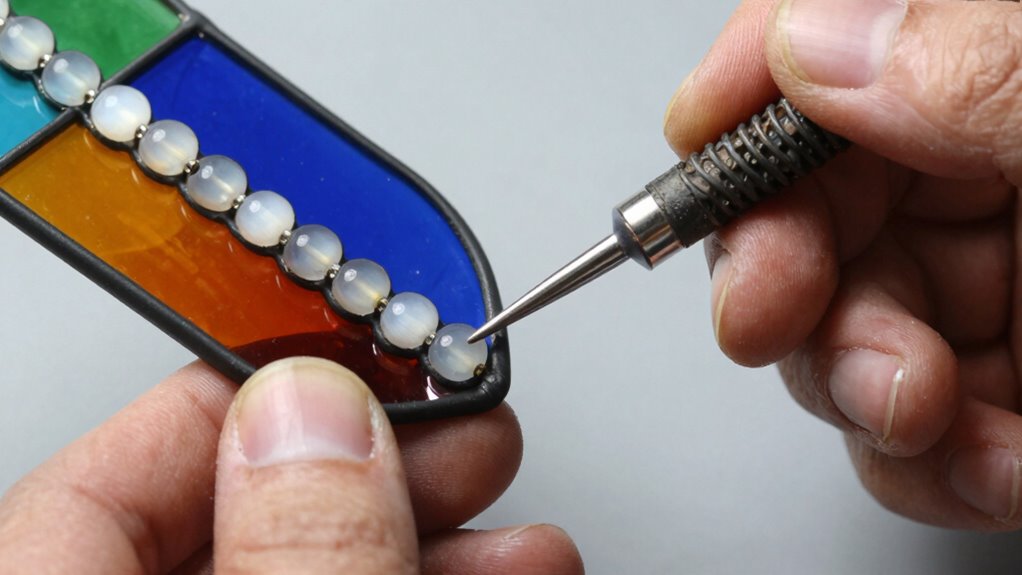
Correct Solder Application
How you apply the solder can make all the difference in creating flawless, smooth beads on stained glass. To do this, focus on proper soldering techniques, starting with consistent heat and steady movement. Confirm your flux application is even; too much flux can cause excess solder, while too little may lead to poor adhesion. Before applying solder, clean the joint thoroughly, and use just enough flux to coat the surface. When soldering, hold the iron at a slight angle and feed solder at the tip’s edge, letting it melt smoothly into the joint. Keep the heat steady, avoiding overheating or under-heating. Proper solder application results in clean, rounded beads that enhance both the strength and appearance of your stained glass project.
Optimal Heat Management
Mastering ideal heat management is essential for creating smooth, professional-looking solder beads in stained glass. You need to focus on thermal regulation to prevent overheating or under-heating the solder. Consistent temperature ensures the solder flows evenly, forming clean, shiny beads without gaps or blobs. Maintain a steady hand and avoid rapid movements that can cause temperature fluctuations. Use a well-calibrated soldering iron with adjustable temperature control, and regularly check its heat. Applying the right amount of heat for the right amount of time ensures the beads melt properly without damaging the glass or flux. Practicing consistent thermal regulation helps you develop precision, resulting in beautifully soldered stained glass panels with flawless, durable joints.
Frequently Asked Questions
What Safety Gear Is Recommended for Soldering Stained Glass?
When soldering stained glass, you should wear protective gloves to prevent burns and cuts, and always use eye protection to shield your eyes from sparks and flux fumes. Safety goggles or glasses are essential, especially since flux can splatter. Additionally, work in a well-ventilated area to avoid inhaling fumes. Prioritizing these safety measures keeps you safeguarded and ensures a safe, enjoyable soldering experience.
How Can I Prevent Solder Splatter During the Process?
To prevent solder splatter, focus on flux application techniques and soldering your beads carefully. Keep the flux layer thin and even to reduce excess heat and splatter risk. Use a steady hand and maintain a consistent temperature on your soldering iron. Additionally, work in a well-ventilated area, and consider using a heat shield or shielding materials to contain splatters. Proper flux application and controlled heat help keep your project clean and safe.
What Are Common Mistakes to Avoid When Soldering Stained Glass?
Did you know that 85% of stained glass failures are due to poor solder joint consistency? To avoid common mistakes, focus on proper flux application techniques—use just enough to prevent oxidation, but not too much. Make certain your soldering iron is at the right temperature and work steadily. Rushing can create uneven beads, so take your time to achieve clean, smooth joints, ultimately enhancing your stained glass project’s durability.
How Do Environmental Factors Affect Soldering Quality?
Environmental impact, especially humidity, greatly affects your soldering quality. High humidity can cause solder to form uneven beads or create solder bridges, while low humidity might lead to static charges that disrupt your work. To guarantee consistent results, you should control humidity levels and work in a dry environment. Proper humidity control minimizes the risk of contamination and oxidation, helping you achieve clean, professional-looking solder joints every time.
Can I Reuse or Recycle Leftover Flux?
You can absolutely recycle leftover flux, but don’t just toss it in the trash—think of flux disposal as a treasure hunt. Use recycling techniques like filtering or collecting excess flux for future projects, saving money and reducing waste. Proper recycling not only keeps your workspace eco-friendly but also preserves the quality of your soldering. Reusing flux helps you avoid unnecessary costs and minimizes environmental impact—making your craft sustainable and efficient.
Conclusion
Now that you know the secrets to flawless soldering, you’ll wonder how you ever struggled with burnt flux and messy beads. Just remember, patience and attention matter more than magic. So go ahead, wield that soldering iron like a pro—your stained glass masterpiece is just a few perfect joints away. And if all else fails, blame the flux; after all, it’s the villain in every good story!