To make DIY lip balm at home, gather natural ingredients like beeswax, shea butter, and coconut oil, along with essential oils for scent and flavor. Melt the wax and oils in a double boiler or microwave, stirring until smooth. Then, add any colors, flavors, or essential oils you like, and pour the mixture into small containers. Let it cool and set for a few hours before use. If you continue, you’ll discover tips for customizing and perfecting your balm.
Key Takeaways
- Gather clean, natural ingredients like beeswax, shea butter, coconut oil, and essential oils, and prepare melting tools and containers.
- Melt beeswax first, then add shea butter and coconut oil, stirring until smooth and fully combined.
- Customize your lip balm with flavorings, essential oils, and natural colorants, adjusting amounts for desired scent and appearance.
- Pour the mixture into containers, allowing it to cool and set for 1-2 hours to achieve a firm, smooth texture.
- Store the finished lip balm in airtight containers in a cool, dry place, and use with clean fingers or applicators.

Bumobum 12 Pcs 5 Grams Glass Cosmetic Jars with Plastic Wood-Grain Lids, 5 ml Lip Balm Containers Empty Tiny Sample Jars for Lip Scrub Makeup Eye Cream Travel
Multi-Use Small Jars – Versatile tiny glass jars with durable plastic wood-style lids, perfect for DIY lip balms,…
As an affiliate, we earn on qualifying purchases.
As an affiliate, we earn on qualifying purchases.
Gather Your Materials and Ingredients

Before you begin making your own lip balm, gather all the necessary materials and ingredients. You’ll need simple items like a small mixing bowl, a spoon or spatula, and containers to store your balm.
For ingredients, pick natural oils such as coconut oil, shea butter, or almond oil for moisturizing benefits. Add beeswax or a plant-based wax to give your balm structure and stability. Don’t forget flavorings like essential oils or a touch of honey for taste.
Confirm you have clean, dry utensils and containers to keep everything hygienic. Once you have everything ready, you can proceed smoothly with the next steps.
Preparing your materials beforehand makes the process more efficient and helps you focus on creating a quality, homemade lip balm.

Earth's Daughter USDA Organic Lip Balm 6-Pack – Fruit Flavors, Beeswax, Coconut Oil, Vitamin E – Best Lip Repair Chapstick for Dry Cracked Lips – Moisturizing Lip Care
6 USDA ORGANIC FLAVORS – PERFECT EVERYWHERE YOU GO. Soothe your lips with six nourishing organic lip balms….
As an affiliate, we earn on qualifying purchases.
As an affiliate, we earn on qualifying purchases.
Prepare a Double Boiler or Melting Method
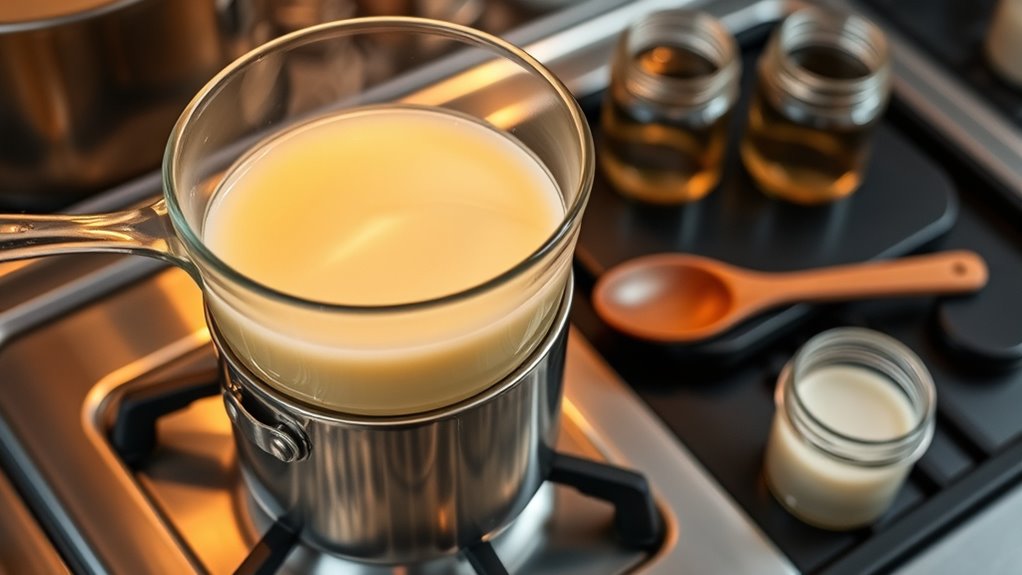
To melt your ingredients safely, you need the right equipment, like a double boiler or a makeshift method. Make sure you choose a suitable vessel that can handle gentle heat without direct contact with the flame. Keep the heat steady to prevent burning or overheating your mixture, ensuring a smooth, even melt. Using an airless paint sprayer with adjustable pressure can help achieve a more uniform heat distribution during melting. Additionally, selecting appropriate heating tools designed for delicate processes can provide better control and safety during melting. Proper temperature control is essential for precise melting points, which helps preserve the beneficial properties of your ingredients. Monitoring the temperature with a reliable thermometer is recommended to avoid overheating. Incorporating AI-driven temperature regulation can further optimize the melting process for consistent results.
Subheading 1: Choose Suitable Equipment
Choosing the right equipment is essential for safely melting your lip balm ingredients. A double boiler is ideal because it provides gentle, even heat, preventing your ingredients from burning or overheating.
If you don’t have a double boiler, you can create one using a heatproof bowl placed over a pot filled with a few inches of water. Make sure the bowl fits snugly over the pot without touching the water, and avoid letting water seep into your ingredients.
Alternatively, you can melt ingredients in a microwave-safe container using short bursts, stirring in between.
Regardless of the method, always use heat-resistant tools, and monitor the process closely to prevent overheating.
Proper equipment ensures safe, effective melting and helps you achieve the perfect lip balm consistency.
Subheading 2: Maintain Proper Heat
Maintaining proper heat during the melting process is essential to prevent your ingredients from scorching or becoming uneven. To do this effectively, set up your double boiler or melting method carefully.
First, fill a pot with a few inches of water and bring it to a gentle simmer. Place a heatproof bowl on top, ensuring it doesn’t touch the water.
Second, add your wax, oils, or butters to the bowl, stirring occasionally. This gentle, controlled heat is crucial for preserving the quality of sensitive ingredients.
Third, keep the heat low and steady; avoid boiling or overheating. This gentle heat ensures a smooth melt without burning sensitive ingredients.
Constantly monitor the temperature, and remove the bowl once everything is melted and well combined. Using a candy thermometer can help you maintain the ideal temperature range for melting your ingredients safely and effectively. Incorporating temperature regulation techniques can further enhance the consistency of your homemade lip balm. Additionally, choosing heat-resistant tools and materials ensures safety and prevents accidents during the melting process. Being aware of a safe melting environment can also help prevent accidents and ensure consistent results. Remember, curiosity about proper techniques can improve your overall results and safety.

FROKO White Natural Beeswax Pellets 1LB, Organic Beeswax, Beeswax for Candle Making, Body, Skin Care DIY, Lip Balm, Soap and Lotion Making Supplies
Organic Beeswax:Our beeswax pellets come from bee farms.Natural beeswax contains propolis and bee pollen, and has the sweetness…
As an affiliate, we earn on qualifying purchases.
As an affiliate, we earn on qualifying purchases.
Mix and Melt Your Base Ingredients
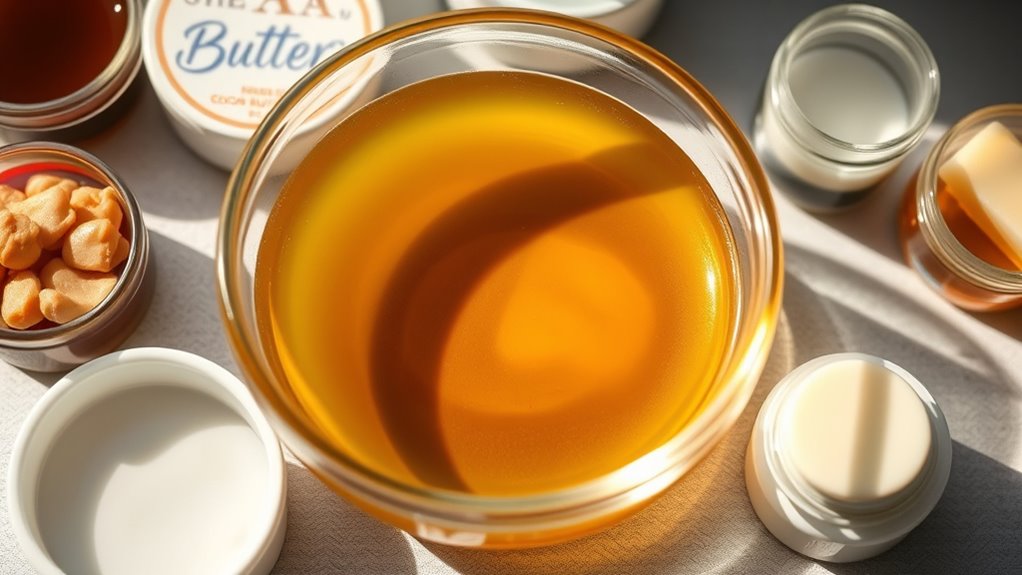
Before you start mixing, gather your base ingredients—such as beeswax, shea butter, and coconut oil—and prepare a heat-safe container. Place the beeswax in the container and melt it gently using a double boiler or microwave in short bursts. Once the beeswax begins to liquefy, add the shea butter and coconut oil. Stir continuously to combine everything evenly. Keep the heat low to prevent overheating or burning the ingredients. Continue melting and stirring until all components are fully liquid and smooth. This process guarantees your base is well-mixed and ready for the next steps. Take your time to achieve a consistent, melted mixture, which will give your lip balm a smooth texture and good consistency. Proper melting ensures your ingredients blend seamlessly, resulting in a more effective and enjoyable final product. Incorporating proper preparation techniques can help ensure optimal blending and stability of your lip balm.
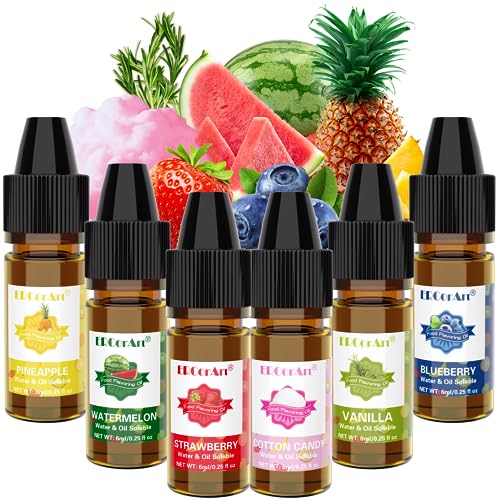
Food Flavoring Oil – Concentrated Candy Flavors, 6 Liquid Lip Gloss Flavoring Oil, Cotton Candy Pineapple Flavor Oil for Baking, Cooking, Drinks, Water & Oil Soluble – 0.25 Fl Oz
WHAT YOU GET- Food flavoring oil set is water & oil soluble flavor. 6 different popular flavors: Pineapple,…
As an affiliate, we earn on qualifying purchases.
As an affiliate, we earn on qualifying purchases.
Add Flavorings, Colors, and Essential Oils
Now that your base is melted, it’s time to customize your lip balm with flavorings, colors, and essential oils. You can choose from a variety of flavors to suit your taste. Adding natural flavorings like vanilla or peppermint can enhance the overall experience, and choosing high-quality essential oils can provide additional benefits for your skin. Incorporating aromatherapy benefits with essential oils can elevate your homemade balm to a soothing, spa-like experience. When selecting ingredients, considering natural preservatives can help extend the shelf life of your lip balm. Adding color accents for a fun look, or incorporating essential oils for added scent and benefits, allows for creative customization. Just be sure to add small amounts carefully to achieve the perfect balance. Incorporating whole food ingredients that complement your flavor and color choices can also make your lip balm more natural and nourishing. Paying attention to AI safety measures when selecting ingredients ensures your product remains safe for use.
Choosing Flavor Options
Are you wondering how to personalize your homemade lip balm? Choosing the right flavor options helps make it uniquely yours.
First, consider natural flavorings like vanilla extract or peppermint oil for a subtle taste.
Second, think about adding fruit-inspired flavors such as strawberry or citrus essential oils to brighten your balm.
Third, select essential oils not only for scent but also for their soothing properties, like lavender or chamomile. Incorporating essential oils for skin can help ensure your lip balm remains gentle and suitable for sensitive skin. Keep in mind, a little goes a long way—start with a few drops and adjust to taste.
Remember, the flavorings should complement any added colors or scents. Additionally, incorporating certified ingredients in your skincare routine can help improve overall skin texture, which may enhance the appearance of your lips over time.
Adding Color Accents
Adding color accents to your homemade lip balm is a fun way to personalize it further. You can achieve this by mixing in cosmetic-grade pigments, mica powders, or natural colorants like beetroot or cocoa powder. Start with a small amount, and add more gradually until you reach your desired shade. Be sure to stir thoroughly so the color distributes evenly.
Remember, a little goes a long way—over-coloring can cause clumping or uneven spots. If you want a subtle tint, use just a pinch. For bolder hues, increase the amount carefully. Keep in mind that some colorants may slightly alter the texture, so test small batches first.
Adding color accents allows you to create unique, eye-catching lip balms tailored to your style.
Incorporating Essential Oils
Incorporating essential oils into your homemade lip balm not only adds delightful flavor but also provides a natural aroma that enhances the overall experience. To do this effectively, start with a few drops—usually 3 to 5—depending on the strength you desire.
Choose oils like peppermint for a cooling effect, vanilla for sweetness, or citrus for invigorating. Always opt for high-quality, skin-safe essential oils.
Here are some ideas to inspire you:
- Add 2 drops of peppermint oil for an invigorating, cooling sensation.
- Mix in 3 drops of lavender for a calming scent.
- Incorporate 2 drops of sweet orange for a bright, citrus aroma.
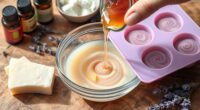
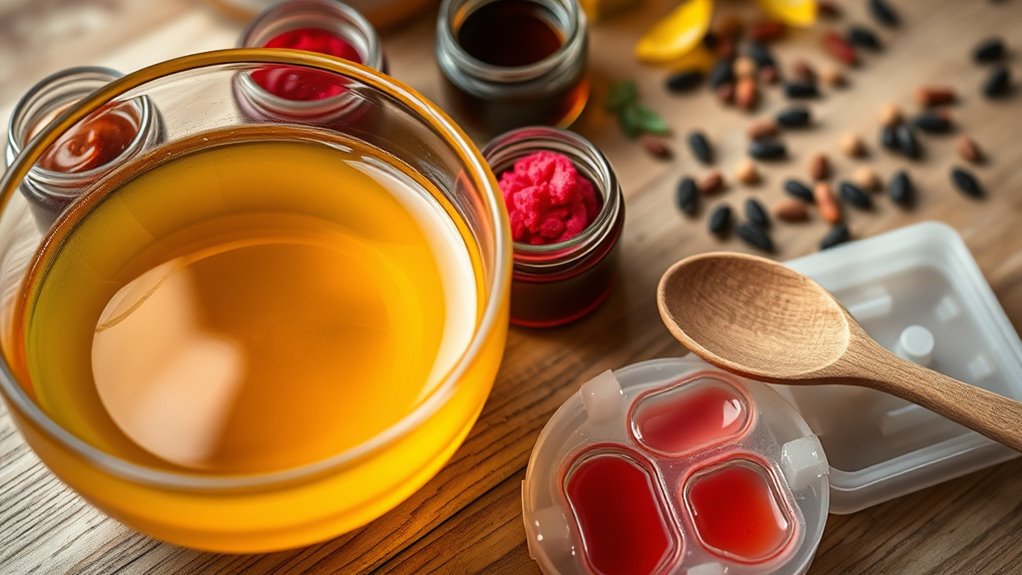
Pour the Mixture Into Containers and Let Set

Once your lip balm mixture is ready, carefully pour it into your chosen containers. Use a small funnel or a dropper to help prevent spills and guarantee a clean transfer. Fill each container to just below the rim to avoid overflow when you put the lids on.
Pour the mixture into containers carefully, leaving a small space at the top for lids.
Be mindful of the temperature; if the mixture is still hot, let it cool slightly so you don’t melt or deform your containers. Place the filled containers on a flat surface and set them aside in a cool, dry area.
Allow the balm to cool and solidify completely, which typically takes about 1-2 hours. Avoid moving or disturbing them during this time to ensure a smooth, even texture.
Once set, your DIY lip balm is ready for the next step.
Store and Enjoy Your Personalized Lip Balm
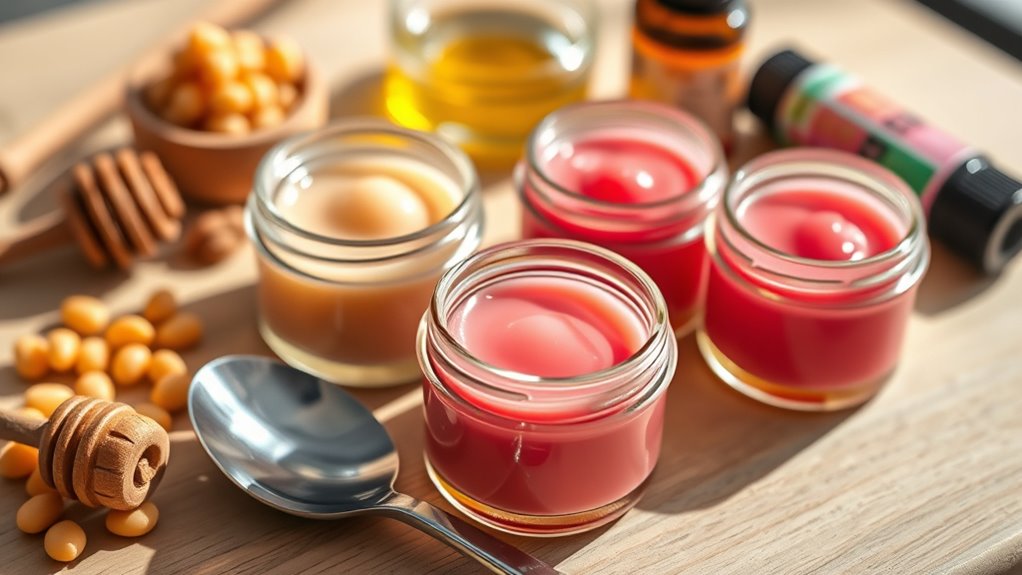
After your lip balm has fully cooled and set, it’s time to store it properly to keep it fresh and effective. Proper storage prevents contamination and extends its shelf life.
First, choose a clean, airtight container, such as a small tin or tube, to prevent exposure to air and bacteria.
Second, keep your lip balm in a cool, dry place away from direct sunlight, which can cause melting or degradation of ingredients.
Third, label your container with the date you made it so you can track its freshness.
When you’re ready to use it, simply open your container, apply a small amount with your finger or a clean applicator, and enjoy your personalized creation.
Proper storage ensures your lip balm stays effective and safe for daily use.
Frequently Asked Questions
Can I Use Natural Ingredients Exclusively for My Lip Balm?
Yes, you can definitely use natural ingredients exclusively for your lip balm. Opt for nourishing options like beeswax, coconut oil, shea butter, and essential oils to create a safe, effective product.
Natural ingredients often provide better hydration and healing properties. Just guarantee all ingredients are pure and high-quality, and test for allergies before applying generously.
This way, you make a wholesome, chemical-free lip balm tailored to your needs.
How Long Does Homemade Lip Balm Typically Last?
Homemade lip balm usually lasts about 6 to 12 months, depending on ingredients and storage.
You should look for signs of spoilage, like a change in smell, color, or texture.
To keep it fresh longer, store your balm in a cool, dry place and use clean utensils each time.
If it develops an off smell or mold, it’s time to toss it out for safety.
Are There Any Safety Tips for Allergic Reactions?
You should always prioritize safety when making your own lip balm. Before applying, do a patch test by dabbing a small amount on your skin to check for allergic reactions.
Use fresh, high-quality ingredients and avoid common allergens like nuts or fragrances if you have sensitivities.
If you notice itching, swelling, or irritation, wash it off immediately and consult a healthcare professional.
Staying cautious helps prevent adverse reactions.
Can I Make Lip Balm Without a Double Boiler?
Yes, you can make lip balm without a double boiler. Instead, melt your ingredients in a microwave-safe bowl, heating in short bursts and stirring in between to prevent overheating.
Alternatively, use a heatproof glass bowl over a pot of simmering water for indirect heat. Just be careful not to overheat the oils, and always test the temperature before applying to your lips.
What Are Some Eco-Friendly Packaging Options?
When choosing eco-friendly packaging for your lip balm, you can opt for biodegradable tubes, glass jars, or metal tins. These options reduce plastic waste and are reusable or recyclable.
You might also consider packaging made from recycled materials or those that support zero-waste lifestyles.
Conclusion
Now that you’ve mastered making your own lip balm, remember that creating comfort and confidence starts with care. By blending basic ingredients with a bit of bravery and a touch of creativity, you craft more than just lip balm—you craft your confidence. Keep experimenting, embracing your unique style and spirit. With each batch, you’re building a beautiful bond between beauty and bravery, turning simple supplies into a stunning symbol of self-care and self-expression.