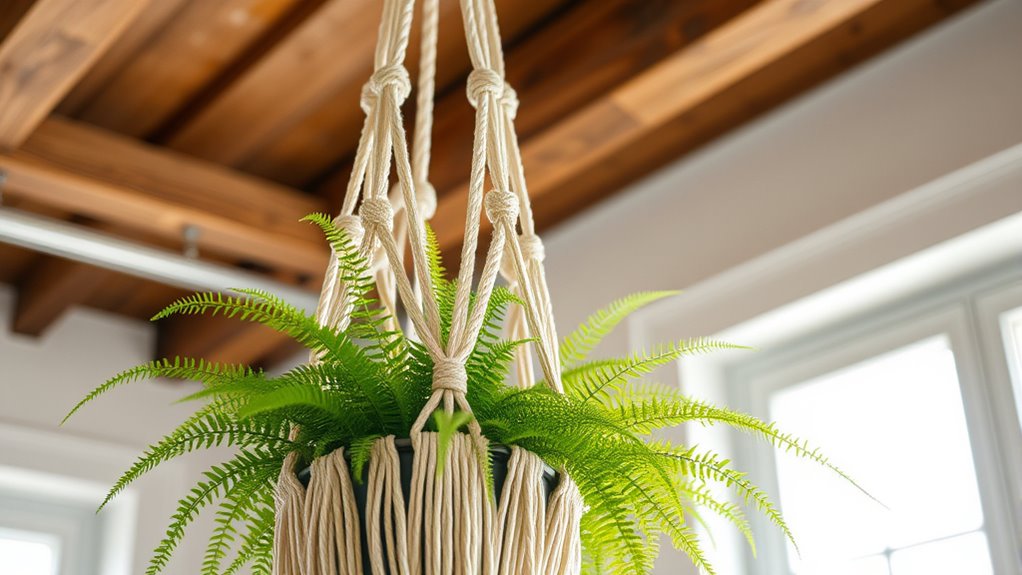

To create your own macramé plant holder, gather sturdy cords in colors and textures that match your style, and measure and cut them to the desired length. Start with a top knot and loop for hanging, then tie square knots for the base and bottom support, adding decorative touches or beads if you like. Secure your plant in the holder and find a great spot to display it. Continue, and you’ll master the steps for a beautiful, custom piece.
Key Takeaways
- Gather sturdy cords, measuring tapes, scissors, clips, and a stable surface for knotting and assembly.
- Choose cord materials, colors, and thicknesses suitable for your plant size and desired aesthetic.
- Tie the top knot and loop for hanging, then create a sturdy base using square knots with evenly spaced cords.
- Form the midsection with vertical dividers and secure the plant with bottom knots for stability.
- Add decorative touches like beads or charms, trim excess cords, and hang in an appropriate location.
Gathering Your Supplies and Tools
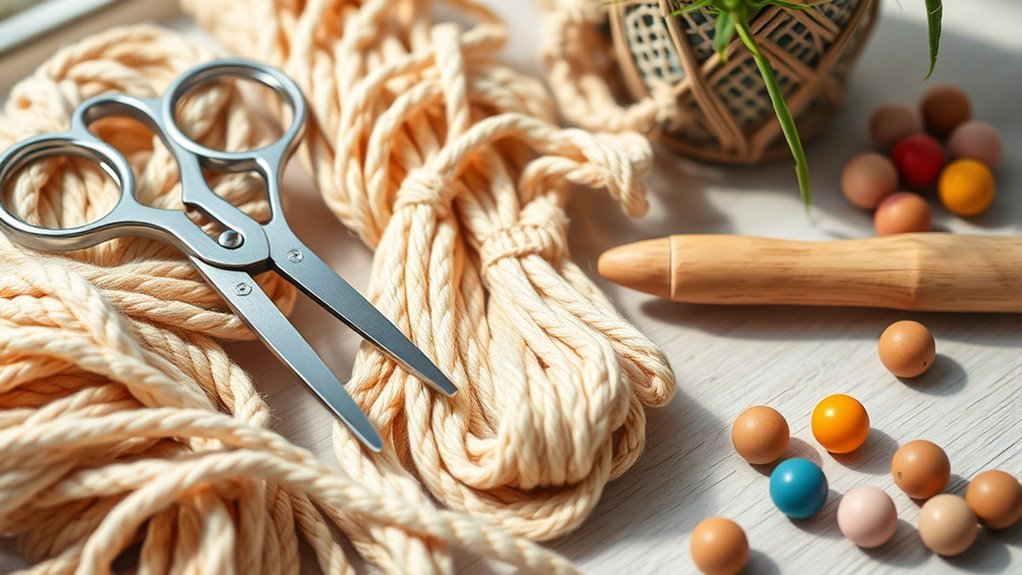
Before you begin your DIY macramé plant holder, it’s important to gather all the necessary supplies and tools. First, pick up some sturdy cord or rope, preferably cotton or jute, in the length you need for your design. You’ll also want a pair of sharp scissors to cut the cords cleanly. A measuring tape or ruler helps ensure your cords are the right length, and a small clip or clothespin can hold cords in place while you work. It’s helpful to have a surface or board to pin your work to, keeping it steady as you knot. Finally, consider wearing gloves if you want extra grip or to avoid splinters. Understanding the self watering system can also inspire how you incorporate functional design elements into your project. Having everything ready beforehand makes the process smoother and more enjoyable, especially if you want your plant holder to be compatible with smart home integration features for added convenience. Additionally, familiarizing yourself with AI software engineer jobs can give you ideas for integrating smart technology into your home decor projects.
Choosing the Right Cord and Materials

When choosing cords and materials, consider how resilient they need to be for your plant’s weight and environment. You’ll also want to select colors and textures that match your style and complement your space. Additionally, consider incorporating natural materials like jute or hemp, which are both durable and authentic for a farmhouse-inspired look. These materials also align with AI in Business efforts to promote sustainable and eco-friendly options. Using eco-conscious sustainable materials can also ensure the longevity of your DIY holder. Finally, pick the right thickness to ensure your knotting is secure and the holder is sturdy.
Material Durability Considerations
Choosing the right cord and materials is essential for making certain your macramé plant holder holds up over time. You want materials that can handle the weight of your plant without stretching or fraying. Natural fibers like jute and cotton are popular, but they can weaken when exposed to moisture or sunlight. Synthetic cords, such as nylon or polyester, offer greater durability and resistance to environmental factors. Consider the environment where you’ll hang your holder; if it’s outdoors, opt for weather-resistant options. Strength is key—check the cord’s tensile strength and ensure it’s thick enough to support your plant’s weight comfortably. Investing in sturdy, high-quality materials guarantees your creation stays beautiful and functional for years. Additionally, selecting materials with weather resistance can help ensure longevity even in challenging conditions. It’s also beneficial to consider the environmental impact of your chosen materials to create an eco-friendly project. Using durable materials is particularly important for outdoor setups, as these can withstand various weather elements and prolong the life of your macramé holder. Being aware of the Material properties can guide you toward the most suitable options for your specific needs.
Color and Texture Options
Selecting the right cord and materials involves more than just durability; it also shapes the overall look of your plant holder. Consider color choices that complement your space—neutral tones create a minimalist vibe, while vibrant shades add energy. Think about texture as well: smooth cords lend a sleek, modern feel, whereas twisted or braided options bring visual interest and a tactile element. If you want a boho look, opt for natural fibers like jute or hemp with rustic textures. For added stability and strength, choosing appropriate tension in your cords can make a noticeable difference in the final product’s durability. When selecting cords, it’s helpful to be aware of textile art techniques that influence how your materials will behave and appear. Additionally, understanding fiber properties can help you select the best materials for longevity and style. For a more polished appearance, cotton cords in solid colors work well. Mixing textures or layering different shades can add depth and personality to your design. Incorporating color theory principles can also guide you in selecting harmonious color combinations that enhance your overall aesthetic. Ultimately, your choice of color and texture should reflect your style and enhance the aesthetic of your plant display. Using community support features from popular apps can inspire creative ideas and help you stay motivated in your DIY projects.
Cord Thickness Recommendations
The thickness of your cord plays a crucial role in both the strength and aesthetic of your plant holder. Thicker cords, like 3/8 inch or more, provide durability and support larger plants, creating a bold, statement look. Using the right cord thickness ensures your plant remains secure and visually appealing.
Thinner cords, such as 1/8 inch or ¼ inch, work well for small, delicate plants and give a more intricate, dainty appearance. When choosing your cord, consider the weight of your plant and the overall style you want to achieve.
Heavier cords can handle larger pots without sagging, while lighter cords are easier to work with for detailed knots. Always opt for high-quality materials like cotton or jute for durability and a natural look. Additionally, selecting appropriate material qualities can influence the strength and aesthetic appeal of your project.
Choosing cords made from sustainable and eco-friendly materials can also contribute to environmentally conscious crafting practices. Matching cord thickness to your project ensures a secure, attractive, and functional plant holder. For breeds such as Labradoodles and Pugs, matching the dog’s size to your project can help ensure the holder’s stability and style. Proper selection of material quality also influences the longevity and appearance of your finished piece.
Measuring and Cutting the Cords

Before you start measuring and cutting, gather all your cords and a ruler or measuring tape. Decide on the length you want for your plant holder, typically around 3 to 4 feet. Use the table below to guide your measurements based on your design:
| Cord Length | Number of Cords | Purpose |
|---|---|---|
| 3-4 feet | 4-6 | Main support cords |
| 3-4 feet | 4-6 | Decorative knots |
| 3-4 feet | 2-4 | Base cords |
| 3-4 feet | 1-2 | Loop or hanging cord |
Cut each cord to the measured length, adding a few extra inches for finishing. This precision guarantees your plant holder is sturdy and balanced.
Creating the Top Knot and Loop
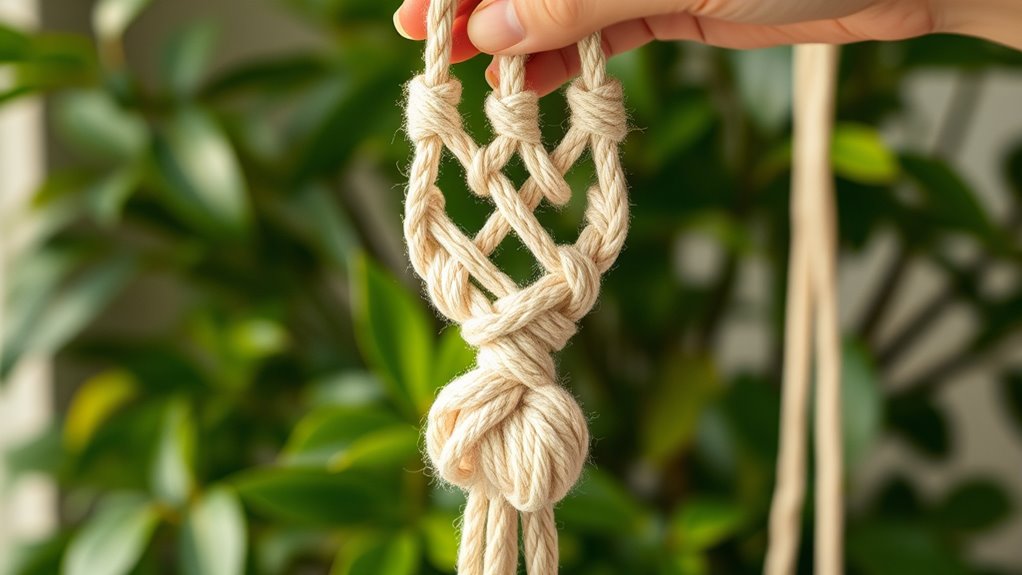
Start by tying a secure top knot to hold your cords together. Then, form a loop below the knot that will support your plant pot. Make sure both the knot and loop are tight and even for a balanced hanger. Ensuring your knot is properly tied helps prevent toilet leaks and maintains the overall integrity of your DIY holder. Additionally, selecting correct materials ensures your plant holder remains durable over time.
Tying the Top Knot
Ever wondered how to create a secure and tidy top knot for your macramé plant holder? First, gather all the cords and align their ends evenly.
Gather the cords together, then fold them in half to find the midpoint. Position the folded loop at the top of your work, leaving enough length for the hanging loop.
Wrap the loose ends around the gathered cords, creating a tight coil around the top. Pull the loose ends through the folded loop, forming a knot.
Tighten the knot firmly to guarantee it holds securely. Adjust the cords so they sit evenly, and trim any excess if needed.
This top knot anchors your design and provides a clean, professional finish to your plant holder.
Forming the Loop
How do you create a neat and secure loop for your macramé plant holder? First, gather your cords and fold them to form a loop at the top. Wrap the working cord around the gathered cords several times, then pull the end through the loop to tighten. This creates a sturdy top knot and loop for hanging. Ensuring the knot is tight keeps your plant secure. Remember, a well-formed loop balances aesthetics and function.
| Purpose | Technique | Tip |
|---|---|---|
| Secure hold | Wrap and pull through | Keep knots tight |
| Aesthetic | Symmetrical wrapping | Maintain even tension |
| Function | Reinforce with multiple wraps | Test before hanging |
Making the Square Knots for the Base

To create a sturdy base for your macramé plant holder, you’ll need to make several square knots.
Begin by dividing your cords into groups of four.
Divide your cords into groups of four to start your sturdy macramé base.
Take the leftmost cord and place it over the two middle cords, forming a “C” shape.
Then, take the rightmost cord and bring it over the left cord, under the two middle cords, and through the loop created on the left side.
Tighten the knot gently.
Repeat this process in reverse—start with the right cord over the middle, then bring the left cord over and through the loop—to complete the square knot.
Continue making these knots, alternating sides, until you’ve formed a row of square knots of your desired length.
This creates a strong, even base for your plant holder.
Forming the Midsection and Dividers
Once you’ve completed the base, it’s time to shape the midsection and add dividers to create a supportive framework for your plant.
Begin by measuring and attaching additional cords to the sides of the base, working upward to form the midsection. Use square knots or double half hitch knots to create a consistent pattern that lifts the structure.
To add dividers, incorporate vertical cords at regular intervals, tying them securely to the main framework. These dividers help keep the plant centered and prevent it from shifting.
Keep tension even to ensure the holder maintains its shape. As you work, periodically check the spacing and adjust as needed for a balanced, sturdy design.
This step builds the essential support for your plant’s roots and overall stability.
Crafting the Bottom Knots for Support

With the midsection and dividers in place, it’s time to focus on crafting the bottom knots that will secure your plant and provide stability.
Gather the strands together, ensuring they’re even in length. To create the support knots, take all the strands and tie a series of square knots just above where the plant’s pot will sit. Keep the knots snug but not too tight, so there’s room for adjustment. Space the knots evenly around the bundle to distribute weight evenly.
Once secured, gather the strands above the knots and create a gathering knot to hold everything together. This bottom section will anchor your plant securely and prevent slipping.
Double-check that all knots are tight and even before proceeding to the next step.
Adding Decorative Touches and Finishing Edges

Now it’s time to add some decorative touches to personalize your plant holder. You can embellish it with beads or other charms to make it stand out.
Don’t forget to secure your finishing knots tightly for a polished, professional look.
Embellishing With Beads
Have you considered adding beads to your macramé plant holder to give it a unique, decorative touch? Beads can elevate your design, making it more personalized and eye-catching.
To do this, you can:
- Thread beads onto the cords before knotting, creating a consistent pattern throughout your holder.
- Use beads as accents at the end of knot groups to add visual interest and texture.
- Incorporate beads into the fringe or finishing edges for a polished, professional look.
Choose beads that complement your style and plant pot. Remember to secure them well so they don’t slip out over time.
Beads are a simple way to add charm and character to your DIY macramé project.
Securing Finishing Knots
Securing finishing knots is essential to guarantee your macramé plant holder stays sturdy while adding a polished, decorative touch. After completing your knots, tie a secure square knot or double knot at the end of your cords to prevent unraveling.
This not only guarantees durability but also creates a clean, professional look. You can also add decorative touches by wrapping a piece of cord around the knot and tying it off, or incorporating beads or charms for extra flair.
Trim the excess cords close to the knot, but leave a small tail if you plan to add embellishments. For a neater finish, use a lighter to gently singe the ends, preventing fraying.
Properly secured knots keep your plant holder looking neat and ensure it holds up over time.
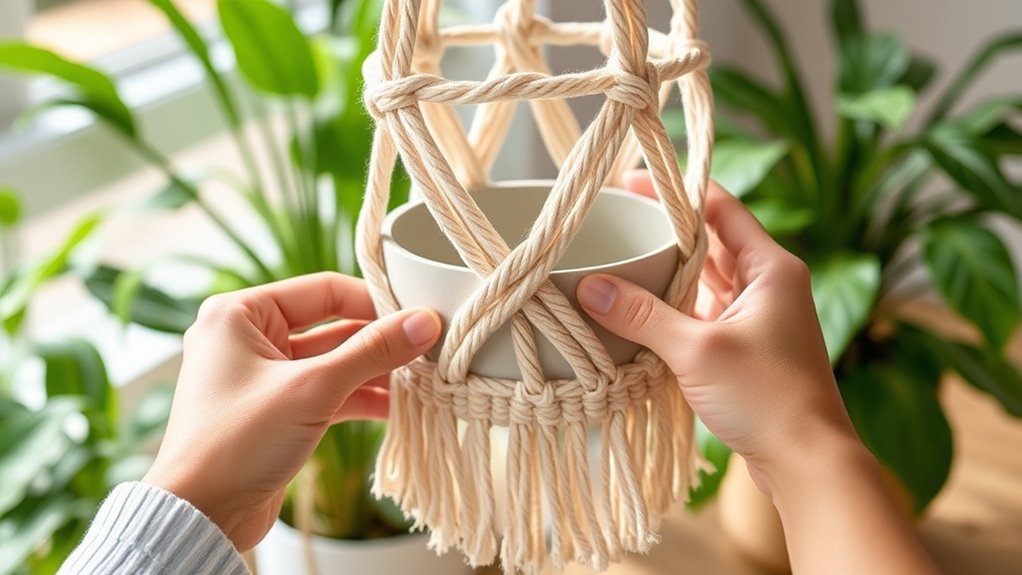
Inserting and Securing Your Plant

Once you’ve prepared your plant and the hanger, it’s time to carefully insert the plant into the holder. Gently open the top of the macramé and slide the plant’s root ball into the center.
Gently insert the plant’s root ball into the open top of the macramé holder.
To secure it, follow these steps:
- Position the plant so it sits evenly, with the roots nestled comfortably.
- Adjust the cords to ensure they cradle the plant securely without squeezing too tight.
- Tie a knot just below the roots to hold the plant in place, making sure it’s stable but not constricting.
Double-check that the plant is balanced and snug. This way, your plant stays secure and looks great in your custom-made holder.
Hanging and Displaying Your Macramé Plant Holder
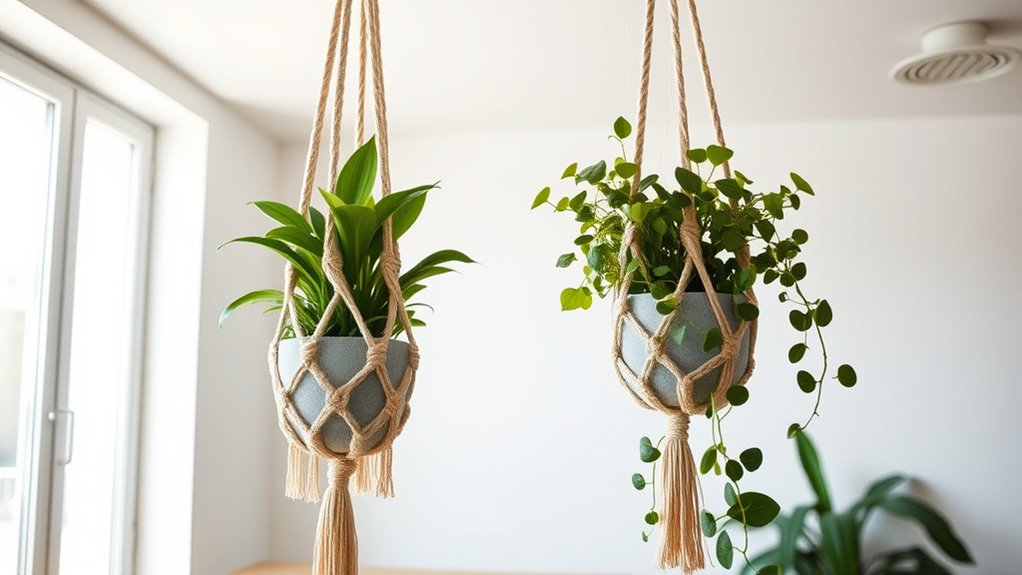
After securing your plant in the holder, it’s time to hang and display it to showcase your handiwork. Choose a spot with adequate light and space, like a balcony, window, or ceiling hook. Confirm the hook is sturdy enough to support the weight. When hanging, adjust the length of your cords to achieve your desired height and aesthetic. To add visual interest, vary the heights of multiple holders or cluster them for a stunning display. Keep the holder steady to prevent swinging or tipping. Use this table to explore placement ideas:
| Location | Light Conditions | Style Tips |
|---|---|---|
| Near a window | Bright, indirect light | Use colorful cords for vibrancy |
| Balcony | Full sun | Combine with other plants |
| Living room | Ambient light | Mix with modern decor |
| Kitchen | Partial sunlight | Hang at eye level |
| Bedroom | Soft lighting | Create a cozy corner |
Frequently Asked Questions
What Are Some Alternative Materials for Eco-Friendly Macramé Plant Holders?
You’re exploring eco-friendly options for macramé plant holders, and there are great alternatives to traditional materials. Consider using organic cotton, hemp, jute, or recycled fabrics, which are sustainable and biodegradable.
These materials are durable, natural, and add a rustic charm to your plant displays. By choosing eco-friendly fibers, you help reduce environmental impact and create beautiful, sustainable decor that complements your love for nature.
How Do I Choose the Right Plant Size for My Holder?
When selecting a plant size for your holder, consider the plant’s mature size and weight. You want it to fit comfortably without causing strain on the cords. Measure the plant’s pot, and choose a holder that provides enough room for growth while remaining balanced.
If you’re unsure, opt for a slightly larger holder to accommodate future growth and guarantee stability. This way, your plant stays secure and looks great.
Can I Customize the Length for Different Ceiling Heights?
Yes, you can definitely customize the length of your macramé plant holder for different ceiling heights. Measure the distance from your anchor point to where you want the plant to hang, then add extra length for knots and fringe.
Adjust the cord length accordingly before you start knotting. This way, your holder fits perfectly, no matter how high or low your ceiling is, giving you a tailored, stylish look.
What Are Common Mistakes to Avoid in Knotting Techniques?
When knotting your macramé plant holder, you should avoid common mistakes like pulling knots too tight, which can distort the design, or leaving them too loose, causing instability.
Make sure your tension is even throughout and double-check your knots for consistency. Also, don’t rush—taking your time helps guarantee neatness and durability.
Practice makes perfect, so keep experimenting until you master the technique.
How Do I Maintain and Clean My Macramé Plant Holder?
Think of your macramé plant holder as a delicate piece of art that needs gentle care. To maintain it, dust regularly with a soft cloth or brush to keep dust and dirt away.
For cleaning, spot clean with mild soap and water, avoiding harsh chemicals.
If it gets tangled, carefully undo knots.
With proper upkeep, your holder stays beautiful and functional, just like a treasured masterpiece.
Conclusion
Now that you’ve crafted your own macramé plant holder, you’re ready to display your green friend with pride. Remember, a stitch in time saves nine, so take your time to perfect each knot. With patience and creativity, your DIY project becomes a unique piece of art. Hang it up, enjoy the greenery, and celebrate your handmade masterpiece—because when you nurture it, beauty and growth flourish together.