
To stitch an embroidered monogram hoop, start by selecting the right fabric and hoop size. Transfer your design onto the fabric using a marker or transfer paper. Secure the fabric tightly in the hoop, then use basic stitches like satin, backstitch, and French knots to fill and outline your monogram with even tension. Focus on neat, consistent stitches for a polished look. Continue exploring these steps to craft a beautiful, handcrafted piece that truly stands out.
Key Takeaways
- Select an appropriate hoop size and material, ensuring it holds the fabric taut and prevents distortion.
- Transfer the monogram design onto fabric using a fabric marker or transfer paper for accuracy.
- Use basic stitches like satin stitch, backstitch, and French knots to fill, outline, and add texture to the monogram.
- Keep stitches even and tight, maintaining consistent tension for a polished, professional look.
- Finish by securing loose threads, removing the hoop carefully, and presenting the embroidered monogram neatly.
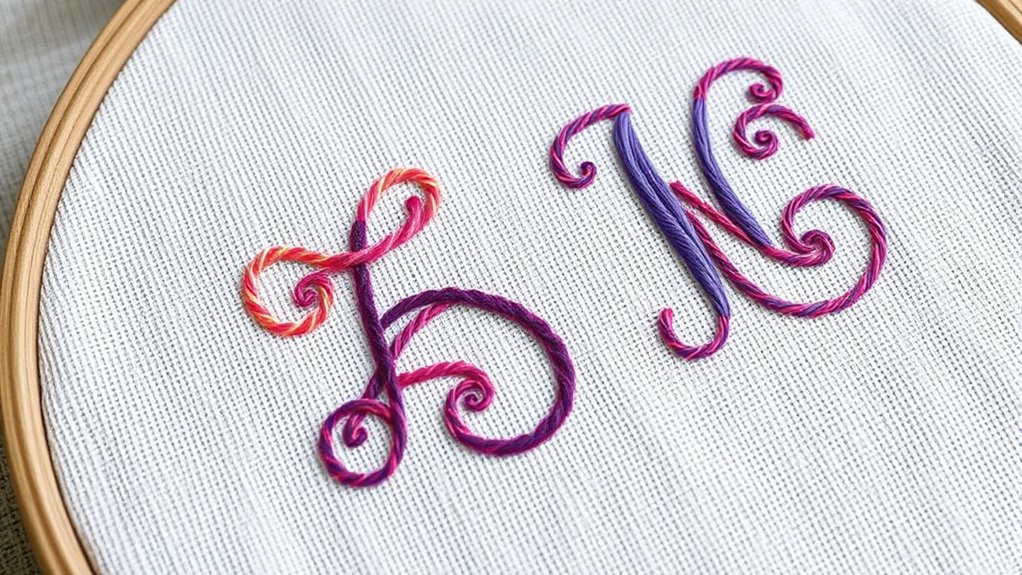
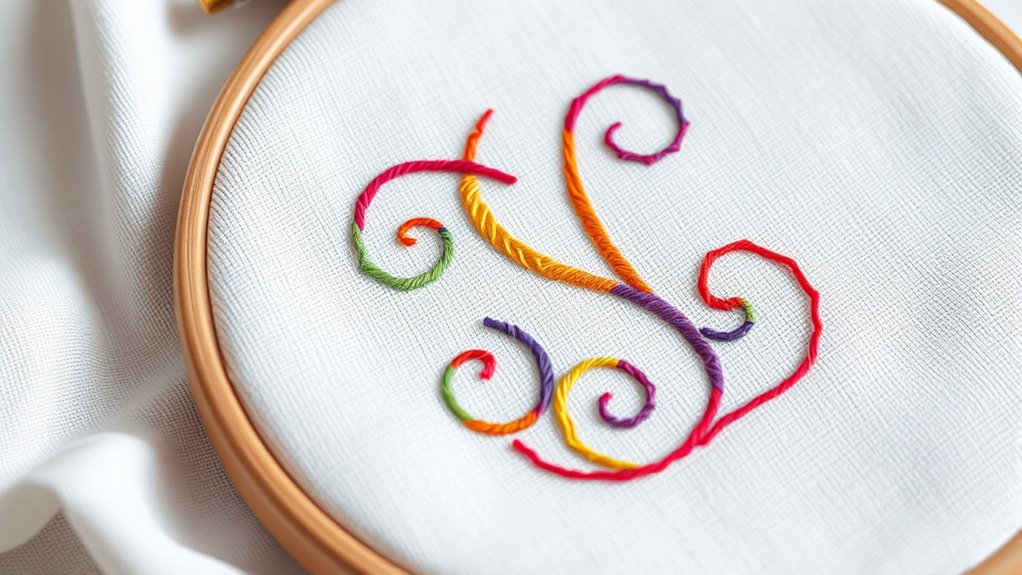
Have you ever wondered how a simple hoop can become a personalized piece of art? It’s fascinating how a plain embroidery hoop transforms into a stunning decorative item with just a few stitches and some creative flair. The key to achieving a beautiful embroidered monogram hoop starts with understanding embroidery techniques and selecting the right hoop. These foundational choices set the stage for your project’s success and help you create something truly unique.
When it comes to embroidery techniques, mastering basic stitches like satin stitch, backstitch, and French knots is essential. Satin stitch, for example, allows you to fill in the monogram with smooth, even lines that give your design a polished look. Backstitch works well for outlining or adding fine details, giving your monogram definition and clarity. French knots add texture and dimension, making certain parts of your design pop. Practice these techniques on scrap fabric before working on your final piece to guarantee smooth, even stitches. This preparation helps you gain confidence and control, resulting in a clean, professional-looking monogram. Additionally, exploring different embroidery platforms can introduce you to new stitches and creative ideas to enhance your design.
Choosing the right hoop selection is equally important. The size of your hoop will depend on the scale of your monogram and the space available for your design. A larger hoop provides plenty of room for intricate details and gives you a comfortable area to work within, while a smaller hoop helps create a more compact, neat finish. Make sure the hoop has a secure grip, with a tight screw or latch to prevent shifting during stitching. The material of the hoop also matters; wooden hoops are traditional and sturdy, but plastic options can be lightweight and easier to handle. Whichever you choose, ensure it’s smooth and free of splinters or rough edges that could snag your fabric or damage your stitches.
Once you’ve picked your hoop and familiarized yourself with embroidery techniques, it’s time to plan your monogram. Use a fabric marker or transfer paper to trace your design lightly onto the fabric. Secure your fabric tightly in the hoop, making sure it’s taut but not stretched too tightly, which could distort your design later. As you stitch, keep an even tension in your thread to avoid puckering or uneven lines. Take your time, follow your pattern carefully, and don’t rush through the process. The beauty of embroidery lies in the detail and care you put into each stitch. Before long, you’ll have a personalized monogram hoop that reflects your style and craftsmanship—an elegant, handcrafted piece ready to display or gift.
Frequently Asked Questions
What Types of Fabric Are Best for Embroidery Hoops?
You should choose fabric types like cotton, linen, or muslin for embroidery hoops, as they provide a smooth, stable surface. Avoid stretchy or slippery fabrics, which can make stitching difficult. Opt for natural, tightly woven materials that hold stitches well. Also, consider hoop materials like wood or plastic—both work effectively—but make certain the hoop is sturdy enough to keep your fabric taut during embroidery.
How Do I Choose the Right Thread Color?
Choosing thread color can feel like selecting the perfect star in a galaxy of options. For thread color selection, consider contrast and harmony—bright colors pop against dark fabrics, while subtle shades blend seamlessly. Think about the mood you want to convey; bold hues energize, soft tones soothe. Trust your instincts, and don’t be afraid to experiment with color combinations to create stunning, eye-catching embroidery that truly shines.
Can I Reuse the Embroidery Hoop for Different Projects?
Yes, you can reuse the embroidery hoop for different projects. Just make sure to choose the right hoop size to fit each project and check material compatibility to avoid damaging delicate fabrics. Remove the fabric gently, clean the hoop if needed, and adjust the tension for your new design. Reusing hoops saves money and keeps your workspace organized, making it easier to switch between projects seamlessly.
What Tools Are Essential for Hoop Embroidery?
Did you know that 85% of embroidery enthusiasts find the right tools boost their success? For hoop embroidery, essential tools include sharp embroidery scissors, a water-soluble fabric marker, and different hoop sizes to match your project. Using the correct hoop sizing helps maintain even tension, which is crucial for smooth embroidery techniques. Keep these tools handy, and you’ll make your embroidery projects easier and more professional-looking.
How Do I Clean and Maintain My Embroidered Hoop?
To keep your embroidered hoop in top shape, regularly clean it with a damp cloth to remove dust and fabric care residues. Avoid harsh chemicals that could damage the material. For hoop maintenance, check for any loosened screws or parts and tighten them gently. Store your hoop in a dry, cool place to prevent rust or warping. Proper cleaning and maintenance make certain your embroidery stays pristine and your hoop lasts longer.
Conclusion
So, there you have it—your grand masterpiece of embroidery, ready to dazzle or at least make your laundry room look more sophisticated. Who knew stitching tiny initials could be so life-changing? Now, every time someone notices your monogrammed hoop, you can smugly say, “Yes, I stitched this myself. Clearly, I’m a fiber artist of the highest caliber.” Or just smile and pretend you’re the reigning monarch of embroidery. Either way, enjoy your cleverly monogrammed triumph!