To make felt flower hair clips, start by choosing colorful felt sheets and cutting out petal shapes with templates or freehand. Layer and glue the petals together to form flowers, adding small centers for realism and leaves for variety. Attach your finished flowers to hair clips using hot glue, arranging them for the desired style. Experiment with different colors and shapes to create a stunning collection of unique accessories—learn more to perfect your design skills.
Key Takeaways
- Select felt colors based on the desired style, using complementary or analogous palettes for visual harmony or contrast.
- Cut out petal shapes from felt using templates or freehand, layering them to create realistic or abstract flowers.
- Glue petals together securely, adding centers and embellishments like beads or glitter for added detail.
- Attach flowers to hair clips with hot glue, ensuring they are firmly secured and positioned for your preferred style.
- Style with various hairstyles and combine different flowers and embellishments to personalize and enhance your look.
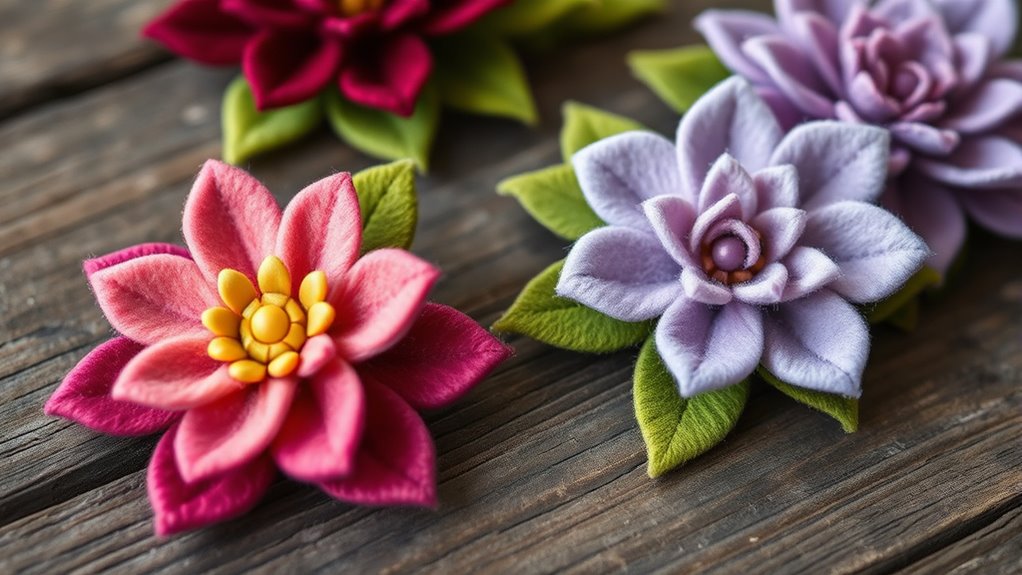
Have you ever wanted to add a charming, handmade touch to your hairstyle? Making felt flower hair clips is a perfect way to do just that. These accessories allow you to showcase your creativity and style while adding a unique flair to any look. The process is simple, fun, and highly customizable, especially when it comes to choosing flower color combinations. With a little bit of fabric, some basic tools, and your imagination, you can craft beautiful hair clip accessories that stand out.
Start by selecting your felt colors. Think about the overall vibe you want to achieve—soft pastels for a delicate, romantic feel, or bold, vibrant hues for a lively, energetic look. You can mix and match colors, creating a variety of flower styles and combinations that suit your wardrobe or mood. When choosing flower color combinations, consider contrast and harmony; pairing complementary shades can make your flowers pop, while analogous colors provide a more subtle, cohesive appearance. Experimenting with different palettes helps you create a collection of hair clips that can match any outfit or occasion. Additionally, using keto diet apps can inspire you to find new ways to stay energized during crafting sessions, ensuring you enjoy the process fully.
Once you’ve picked your felt colors, cut out your flower shapes. Use a template or freehand the design if you’re feeling adventurous. Common flower shapes include roses, daisies, and peonies, but don’t be afraid to try more abstract or exotic designs. After cutting out the petals, layer and glue them together to form your flowers. For added dimension, you can layer different sizes of petals or add small felt centers to mimic the flower’s core. Once you’re happy with your flowers, attach them to hair clip bases using hot glue. Make sure the glue is secure and the flowers are firmly affixed before handling.
The fun part is assembling your hair clip accessories. Mix and match flowers, combining different colors and sizes for a more dynamic look. Attach small leaves or additional embellishments like beads or glitter for extra flair. These details can enhance the overall aesthetic and make your hair clips truly one-of-a-kind. When finished, try out your new felt flower hair clips with various hairstyles—ponytails, buns, or loose waves—and see how they instantly elevate your style.
Frequently Asked Questions
What Safety Precautions Should I Take When Crafting Felt Flowers?
When crafting felt flowers, you should prioritize safety by carefully handling fabric cutting tools to avoid injuries and always using sharp scissors with caution. Keep glue away from your skin and use it in a well-ventilated area to prevent inhaling fumes. Avoid ingesting small pieces or glue, and wash your hands afterward. Following these precautions guarantees a safe and enjoyable crafting experience.
Can Felt Flower Hair Clips Be Made Waterproof?
Yes, you can make felt flower hair clips waterproof by applying a waterproof coating. Imagine delicate, water-resistant fabric guarding your beautiful flowers against splashes and rain. This coating creates a barrier, preventing water from seeping in while keeping the flowers looking fresh. Be sure to choose a safe, flexible waterproof spray that adheres well to felt, ensuring your clips stay lovely and protected during everyday wear or outdoor adventures.
What Are Alternative Materials for Those Allergic to Felt?
If you’re allergic to felt, consider fabric alternatives like silicone, which is flexible and waterproof, or organic cotton, which is soft and hypoallergenic. You might also try bamboo fabric or hemp, both of which are natural, breathable, and less likely to cause irritation. These hypoallergenic materials can be shaped into beautiful hair clips, offering safe, stylish options without triggering allergic reactions.
How Do I Store Felt Flower Hair Clips to Prevent Damage?
To prevent damage, store your felt flower hair clips in a soft, padded container or a jewelry box with compartments. Use tissue paper or fabric to wrap each clip individually, which helps avoid scratches and deformation. Keep them in a cool, dry place away from direct sunlight and moisture. Regularly check for any loose parts, and handle with care during storage to maintain their vibrant appearance and durability.
Are There Eco-Friendly Options for Felt and Adhesives?
Are you searching for eco-friendly options for felt and adhesives? You’ll be pleased to discover recycling options for felt, such as repurposing old garments or scrap fabric. For adhesives, biodegradable adhesives provide a sustainable solution that’s gentle on the environment. These choices help you create beautiful felt flower hair clips without guilt, ensuring your craft remains eco-conscious while maintaining durability. Immerse yourself in sustainable crafting today and make a positive impact!
Conclusion
Now that you’ve crafted your own felt flower hair clips, you’re like an artist creating delicate blooms in a garden of your own making. With a little imagination and effort, you’ve brought a touch of spring’s beauty to your accessories, much like Van Gogh’s vibrant strokes brought life to his paintings. Wear your clips proudly, knowing you’ve added a personal, charming flourish—an enduring reminder that with creativity, you can turn simple materials into something truly special.