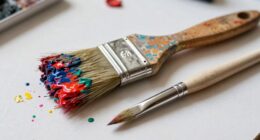

To start needle felting, gather essential tools like a barbed felting needle, foam pad, and small scissors. Choose soft wool roving such as merino, and prepare your fibers by aligning and separating them. Begin with simple projects like small animals or ornaments, poking steadily and safely while building your skills. Focus on technique, safety, and patience. If you continue exploring these basics, you’ll discover even more tips to improve your creations.
Key Takeaways
- Choose soft, high-quality wool like merino and prepare fibers by separating and aligning for easier felting.
- Use a sharp, barbed felting needle and a foam pad to safely shape and build your project gradually.
- Start with simple projects such as small animals or ornaments to build confidence and practice basic techniques.
- Test colors on scrap wool, stick to a limited palette, and incorporate shading for more realistic results.
- Maintain safety by working carefully, keeping fingers clear of the needle, and taking breaks to prevent hand fatigue.

Mayboos Needle Felting Starter Kit,Wool Roving 40 Colors Set, Wool Felt Tools with Instruction Included for Felted Animal Needle Felting Supplies
40 Assorted Colorful Color Needle Felting Wool: Our felt wool kit includes 40 color wool roving, packaged in…
As an affiliate, we earn on qualifying purchases.
As an affiliate, we earn on qualifying purchases.
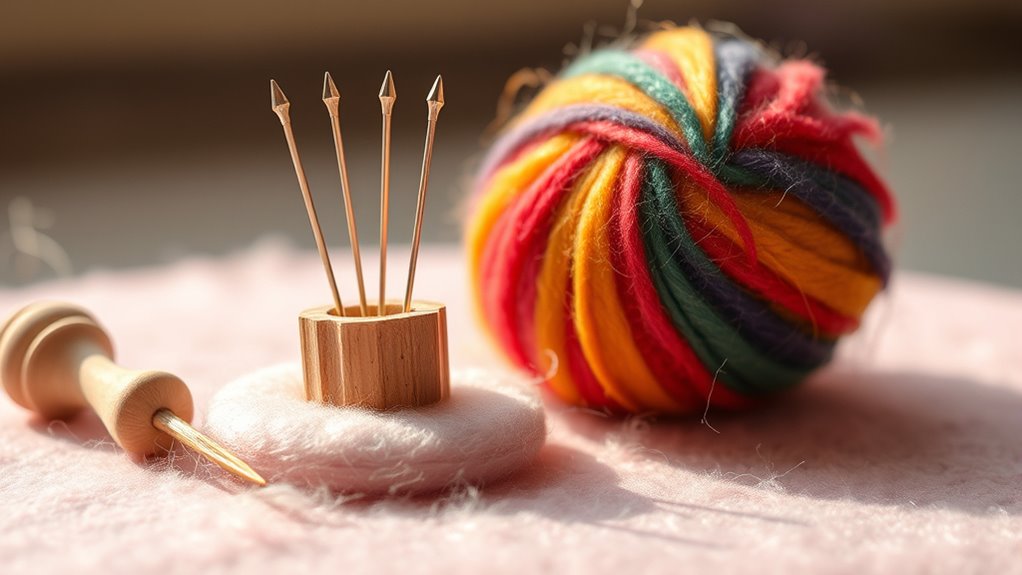
Gathering the Essential Needle Felting Tools
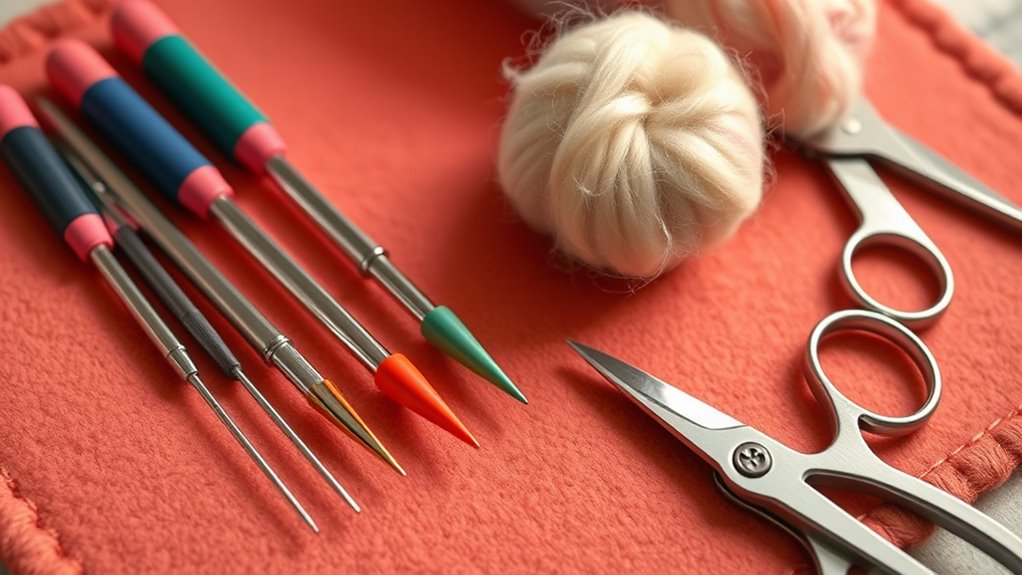
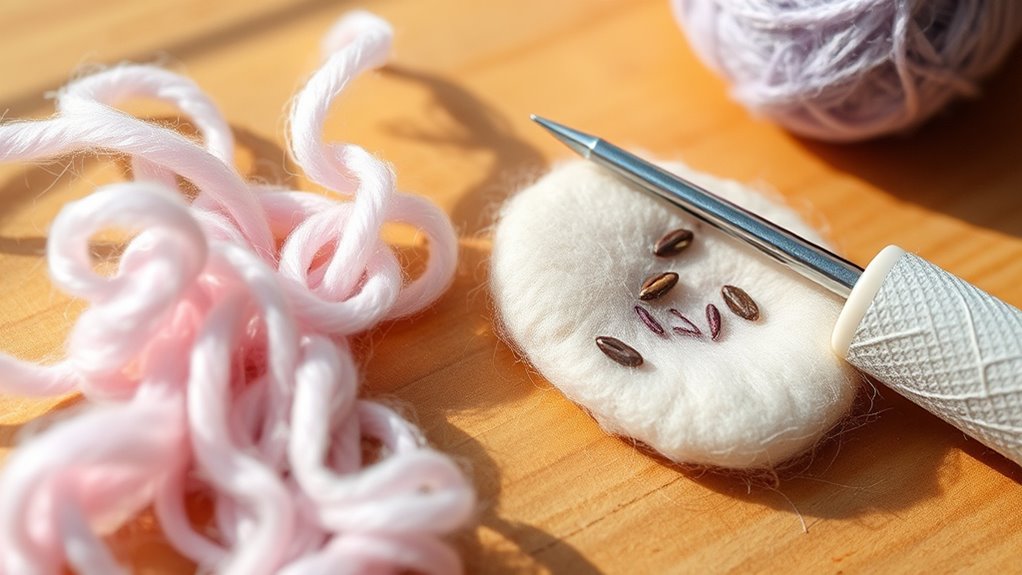
Before you begin needle felting, it’s important to gather the right tools. First, you’ll need a felting needle, which is a barbed needle designed to tangle wool fibers. Make sure to choose a sharp, sturdy needle, as it’s essential for shaping and details.
Next, get a foam felting mat or pad to work on; this protects your needles and surfaces. You might also want a pair of small scissors for trimming excess fibers and a needle holder for safety and control. Keep some tweezers handy to handle tiny fibers or fix small mistakes. Consulting asset division laws can help you understand how to manage your supplies and materials responsibly.
Having these basic tools ready guarantees a smoother start to your needle felting projects. Additionally, understanding fiber types can help you select the best wool for your projects, ensuring better results. Once you’ve gathered everything, you’ll be set to begin creating your felted masterpiece. Felted artwork can be a relaxing and rewarding craft, especially with proper tools.

Needle Felting Kit with 8-Needle Tool & 3 Single-Needle Handles | 30 Barbed Felting Needles in 3 Sizes | Includes Finger Guards & Storage Case | Essential DIY Wool Felting Supplies for Crafters
Complete Felting Kit for Every Stage: This comprehensive set includes one efficient 8-needle wooden tool for fast shaping…
As an affiliate, we earn on qualifying purchases.
As an affiliate, we earn on qualifying purchases.
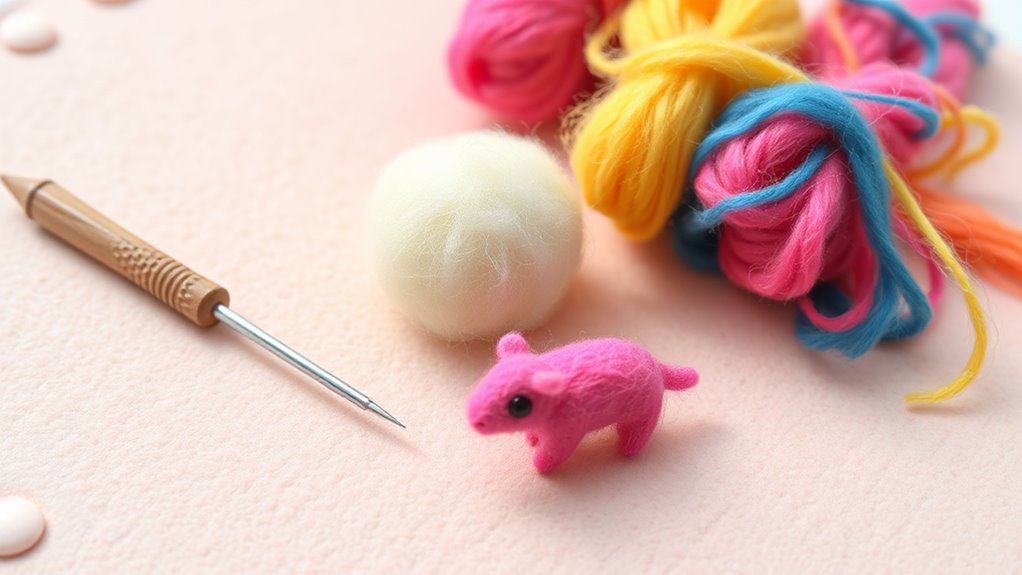
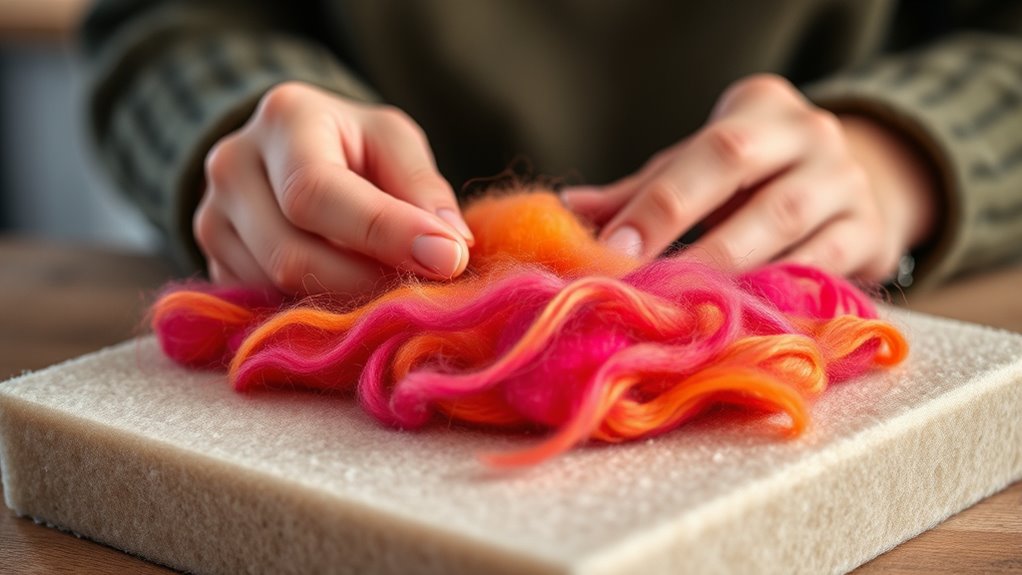
Choosing the Right Wool Roving for Beginners
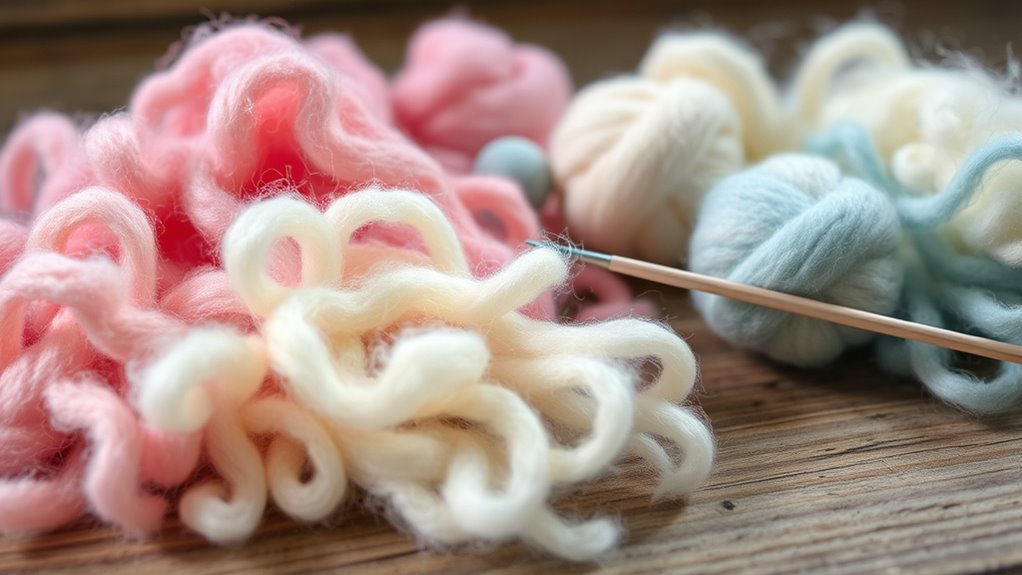
When choosing wool roving for beginners, focus on soft, lightweight fibers that are easy to work with. Pay attention to color choices that inspire your creativity. Make sure to prepare your fibers by gently separating and aligning them. This will help you achieve smoother felting and better results as you start your projects. Additionally, selecting safe, durable wool roving ensures a positive and secure crafting experience. Being aware of industry standards and certifications can also help you choose high-quality materials that are safe and reliable for your projects. Considering vetted dog accessory options can inspire creative and safe choices for your crafting supplies. Furthermore, understanding the importance of quality fibers can greatly influence the final appearance and durability of your felted creations.
Wool Types and Qualities
Choosing the right wool roving is essential for beginners because not all wool is created equal. You want soft, manageable wool that’s easy to work with, especially when starting out. Wool types like merino are popular because they’re fine, smooth, and less itchy, making them ideal for beginners.
Coarser wools, like Romney or Corriedale, are sturdier but can be more challenging to shape and may cause irritation. Look for high-quality, fresh wool with minimal VM (vegetable matter), which can clog your needle and make felting frustrating.
The wool’s moisture content also affects felting—drier wool tends to be easier to control. By choosing the right wool type and quality, you’ll find needle felting more enjoyable and achieve better results faster. Additionally, selecting wool with consistent fiber length can help create more uniform and professional-looking felted projects.
Color Selection Tips
How do you pick the right wool roving colors for your first projects? Start by choosing colors that inspire you or match your intended design. Keep it simple—pick a few shades to avoid feeling overwhelmed. Think about color harmony; complementary or analogous colors work well together. Incorporating natural materials like wool in your color choices can enhance the authenticity of your felting projects. Additionally, considering the remote work environment you may be in can influence your color preferences, as a comfortable and inspiring workspace can boost your creativity. Using insights from family photoshoot fails can remind you to keep your color choices fun and spontaneous rather than overly planned. Understanding the types of headphone jacks available can also help if you’re listening to music or tutorials while felting. Creating a color palette that reflects your personal style can make your projects more meaningful. – Stick to a small palette to build confidence – Use color schemes to create harmony – Test color combinations on scrap pieces – Choose contrasting colors for highlights – Avoid overly bright or neon shades initially
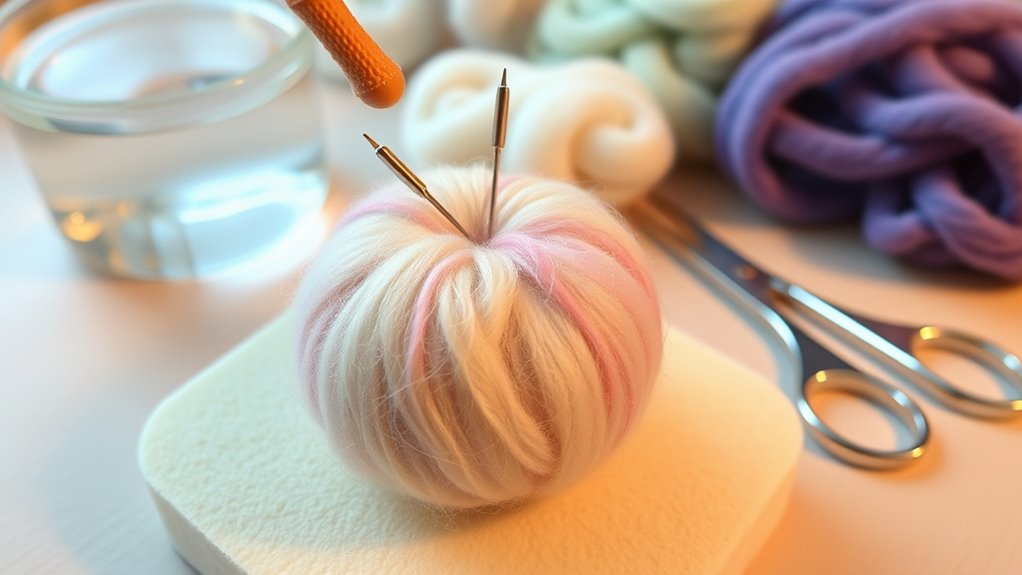
Fiber Preparation Basics
Selecting the right wool roving is a crucial first step for beginners to guarantee smooth and enjoyable felting. You want wool that’s soft, clean, and easy to work with. Look for high-quality merino wool, as it’s gentle and easy to shape. Avoid wool with too much lanolin or debris, which can make felting messy. Consider the fiber’s color; natural shades help you see your stitches clearly. To help you choose, here’s a quick guide:
| Wool Type | Texture | Best Use |
|---|---|---|
| Merino | Soft, fine | General felting |
| Corriedale | Slightly coarser | Sculpting |
| Romney | Woolly, sturdy | Larger projects |
| Shetland | Lustrous, dense | Fine detailing |
| Bluefaced Leicester | Silky, strong | Delicate designs |
Picking the right wool sets the foundation for successful felting. Additionally, understanding fiber properties can help you select the most suitable wool for your specific projects, especially when considering fiber strength and how it impacts your work.

Mybecca Dense Foam Polyurethane Pad – 12" X 12" X 2", Charcoal
Size: 2" (Th) X 12" (W) X 12" (L) Flat Paneling Tile
As an affiliate, we earn on qualifying purchases.
As an affiliate, we earn on qualifying purchases.
Understanding Basic Needle Felting Techniques
To master needle felting, understanding the fundamental techniques is essential. You need to control your needle and fiber carefully to shape and detail your project. Practice these core skills:
- Poking steadily: Repeatedly jab the fiber to felt it together, but avoid forcing the needle.
- Maintaining even pressure: Keep your strokes consistent for smooth, uniform surfaces.
- Using the right needle: Different needles have various barbs; choose based on the task.
- Building up layers gradually: Add fiber in small amounts and felt each layer thoroughly.
- Maintaining safety: Always keep fingers clear of the needle’s path and work with patience.
- Understanding felting techniques can help improve your control and achieve more professional results. Developing a good technique is crucial for consistent felting quality. Incorporating proper form can also help you work more efficiently and reduce fatigue during your projects. Additionally, practicing technique variation can enhance your flexibility and creativity in felting designs.
Careful technique can also help prevent injury risks, ensuring a safer and more enjoyable felting experience. Mastery comes with practice, so don’t rush. Focus on precision, and your skills will improve over time.

Revolution Fibers Merino Wool Roving 1 lb (16 Ounces) for Spinning | Soft Chunky Jumbo Yarn for Arm Knitting Blanket |100% Natural Undyed (Off-White) Wool Yarn, Felting Core, Carded Stuffing
NEEDLE & WET FELTING: The perfect roving wool for felting. Merino wool has soft fibers that are excellent…
As an affiliate, we earn on qualifying purchases.
As an affiliate, we earn on qualifying purchases.
Getting Started With Simple Projects
Once you’ve mastered the basic techniques of needle felting, it’s time to put those skills into practice with simple projects. Start small by creating basic shapes like balls, hearts, or stars. These allow you to get comfortable with controlling your needle and applying even pressure.
Use colorful wool roving to add variety and experiment with layering different shades. Focus on shaping and smoothing your pieces, practicing even felting throughout. Simple projects like tiny animals, keychains, or ornaments help build confidence and refine your technique. Incorporating basic tools can make the process easier and more enjoyable, especially for beginners.
Don’t worry about perfection—errors are part of learning. As you progress, you can combine shapes or add details. These beginner-friendly projects give you a solid foundation for more complex creations down the line. Exploring portable camping gear can also inspire creative projects that incorporate fun or functional elements in your felting adventures. Additionally, understanding AI-powered virtual reality in e-learning can offer innovative ideas for creating immersive felting tutorials or virtual workshops.
Tips for Safe and Effective Needle Felting
While needle felting is a rewarding craft, it’s important to prioritize safety to prevent injuries. Always handle your felting needles with care, as they’re sharp and can easily puncture your skin. Keep your work area clean and organized to avoid accidental pokes or misplaced needles. Use a foam pad or felting mat to stabilize your project and reduce the risk of slipping. Take breaks frequently to prevent hand fatigue, which can lead to mistakes. Finally, wear protective gloves if you’re working on complex pieces or applying excessive force.
Prioritize safety in needle felting by handling needles carefully and using protective gear.
- Always work on a sturdy, padded surface
- Store needles safely when not in use
- Keep fingers clear of the needle’s path
- Use gentle, controlled motions
- Don’t force the needle through dense wool
Troubleshooting Common Challenges
Even experienced needle felters encounter common challenges that can hinder progress. One frequent issue is poking too hard, which can damage the fibers or cause the needle to break. To prevent this, use gentle, controlled pushes rather than forceful stabbing.
If your project isn’t holding together, it might need more felting or denser wool. Sometimes, the needle slips out of the fibers, making it hard to shape your piece. Keep your needle perpendicular to the work and steady your hand.
If you notice holes or uneven areas, carefully add more wool and continue felting until smooth. Patience is key—taking your time prevents mistakes and ensures your project turns out well.
Troubleshooting these challenges helps you improve your technique and enjoy the process.
Exploring Creative Ideas for Your First Creations
Start by thinking about animal-inspired figures, like cute cats or playful foxes, to bring your skills to life.
You can also create decorative accents for your home, such as flowers or ornaments, to add a personal touch.
Don’t forget to experiment with making your own jewelry designs, turning tiny felted pieces into wearable art.
Animal-inspired Felted Figures
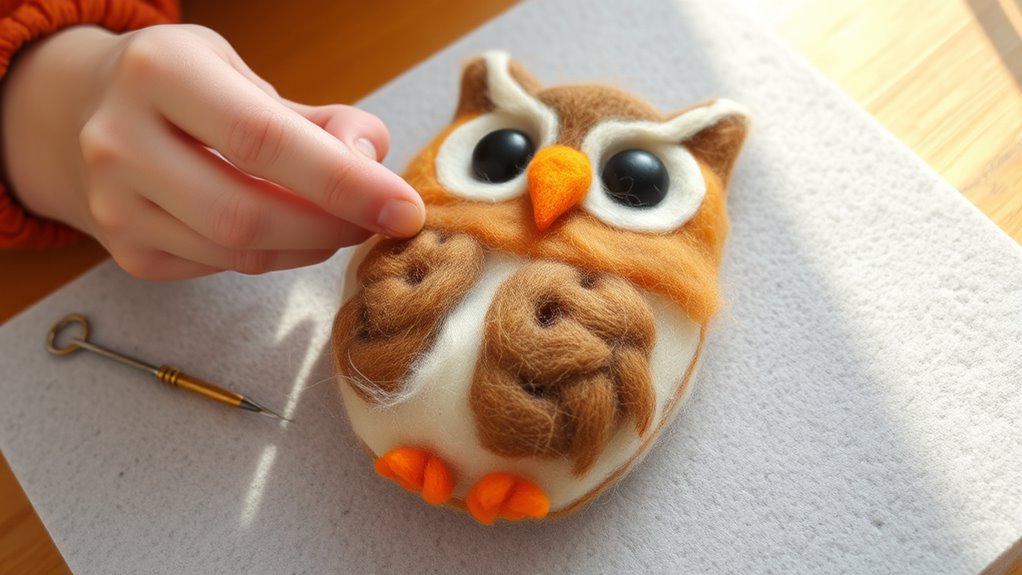
Animal-inspired felted figures are a fantastic way to bring your creativity to life and practice your needle felting skills. They allow you to experiment with shapes, colors, and textures while creating charming, recognizable characters. Start with simple animals like cats, dogs, or birds to build confidence. Focus on capturing their basic features before adding details. Using reference images helps improve accuracy and realism.
Remember, each figure is unique, so don’t worry about perfection. As you progress, you can add accessories or different poses to make your creations more dynamic.
- Use bright colors to make your figures stand out
- Practice shaping different animal parts like ears and tails
- Experiment with layering wool for texture
- Incorporate small details for personality
- Keep your tools clean for better results
Decorative Home Accents
Once you’ve gained confidence creating animal figures, it’s easy to expand your skills by making decorative home accents. These pieces add personality to your space and showcase your creativity. You can craft miniature fruits, flowers, or abstract shapes to complement your decor. Experimenting with different colors and textures makes each piece unique. To inspire you, here’s a quick look at some ideas:
| Item | Tips |
|---|---|
| Felted Wall Art | Use vibrant colors for a striking focal point. |
| Small Sculptures | Combine shapes for a whimsical display. |
| Decorative Balls | Vary sizes and colors for visual interest. |
| Fridge Magnets | Attach a magnet to the back for functional art. |
Personal Jewelry Designs
Creating your first personal jewelry pieces with needle felting is an exciting way to express your unique style. You can craft eye-catching pendants, rings, earrings, or brooches that showcase your creativity. Start with simple shapes like hearts, stars, or abstract designs, then add colorful wool for a vibrant look.
Experiment with different textures and sizes to find what resonates with you. Personal jewelry allows you to wear your art and makes thoughtful gifts for friends. Remember to keep your designs lightweight and comfortable for everyday wear.
With practice, you can develop your signature style.
- Use contrasting colors for visual impact
- Incorporate small beads or charms for detail
- Focus on lightweight, wearable designs
- Mix textures for unique effects
- Keep designs simple for quick projects
Frequently Asked Questions
How Do I Choose the Best Needle Felting Needles?
When choosing the best needle felting needles, you should consider the project you’re working on and your skill level.
For beginners, start with a multi-needle tool for easier shaping.
Look for needles with sturdy, sharp tips to prevent bending.
Different needle types, like fine or coarse, suit various fibers and details.
Always opt for high-quality needles to guarantee durability and smooth felting, making your crafting experience enjoyable and successful.
Can I Use Synthetic Wool for Needle Felting?
Yes, you can use synthetic wool for needle felting. It’s a popular alternative to natural wool, especially if you have allergies or prefer synthetic materials.
Synthetic fibers are often easier to work with and come in vibrant colors. However, keep in mind that they may not felt as tightly as natural wool, so your finished project might have a different texture.
Experiment to see if it meets your crafting needs.
How Long Does a Typical Needle Felting Project Take?
Wondering how long your needle felting project will take? It depends on the complexity and size, but you might find yourself engrossed for hours or finishing in just an afternoon.
Simple shapes can be completed in a couple of hours, while detailed sculptures could take days. As you gain experience, you’ll work faster.
Stay patient, and enjoy each step—mastery comes with time and practice.
What Are Common Mistakes Beginners Make?
When starting needle felting, you often make mistakes like pressing too hard, which can break needles or damage your project. You might also rush, causing uneven shapes or loose fibers.
Not securing your wool properly can lead to unraveling. Beginners sometimes ignore safety, risking injury.
To avoid these issues, use gentle pokes, take your time, and keep your workspace safe. Practice patience and proper technique for better results.
How Do I Fix Mistakes in My Felting Work?
When you notice mistakes in your felting, don’t panic. You can fix them by carefully adding more wool to the affected area and gently felting it in until it blends seamlessly.
If you need to remove felt, use a felting needle to carefully pick out the unwanted fibers. Take your time, and don’t be afraid to undo and redo sections until you achieve the desired look.
Conclusion
Now that you’ve got the basics down, you’re ready to immerse yourself in needle felting with confidence. Remember, every artist starts somewhere—think of it as your own personal Renaissance, where patience and practice turn wool into art. Keep experimenting, don’t fear mistakes, and enjoy the process. Before you know it, you’ll be creating masterpieces that even Leonardo da Vinci would admire. So, get your tools ready and start felting your way to creativity!