
To fold an origami crane garland, start by making multiple traditional origami cranes, ensuring each fold is precise for a uniform look. Punch small holes near the top of each crane’s wings or body, then thread a thin string or fishing line through these holes, spacing the cranes evenly or clustering them for your preferred style. If you’d like, add decorative touches with colors or embellishments. Keep going to discover all the tips for creating a beautiful, handcrafted garland.
Key Takeaways
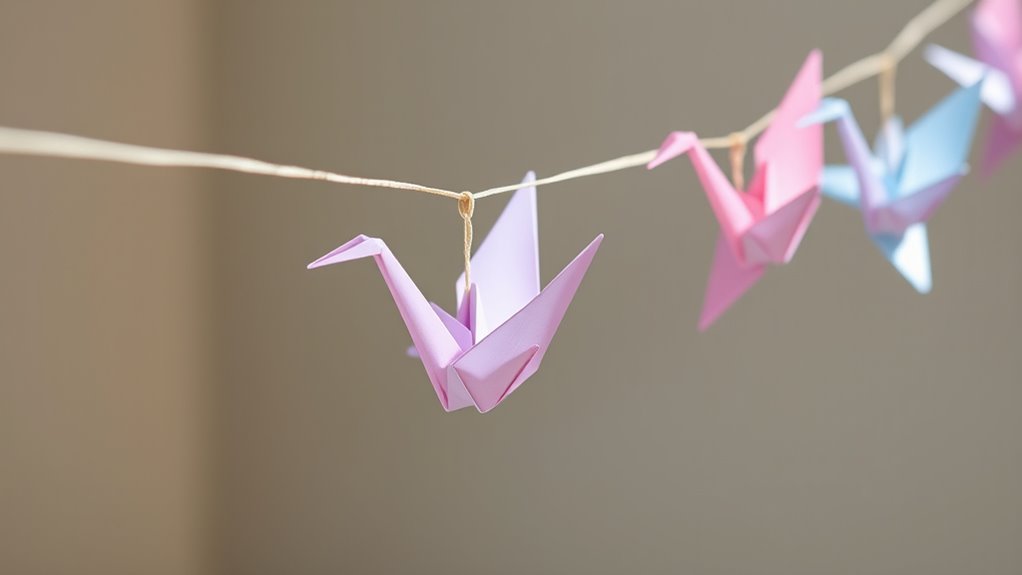
- Fold individual origami cranes following basic techniques: creasing, valley/mountain folds, and shaping the wings and beak.
- Ensure each crane is symmetrical with sharp creases for a uniform and elegant appearance.
- Punch small holes near the top of each crane’s wings or body for threading.
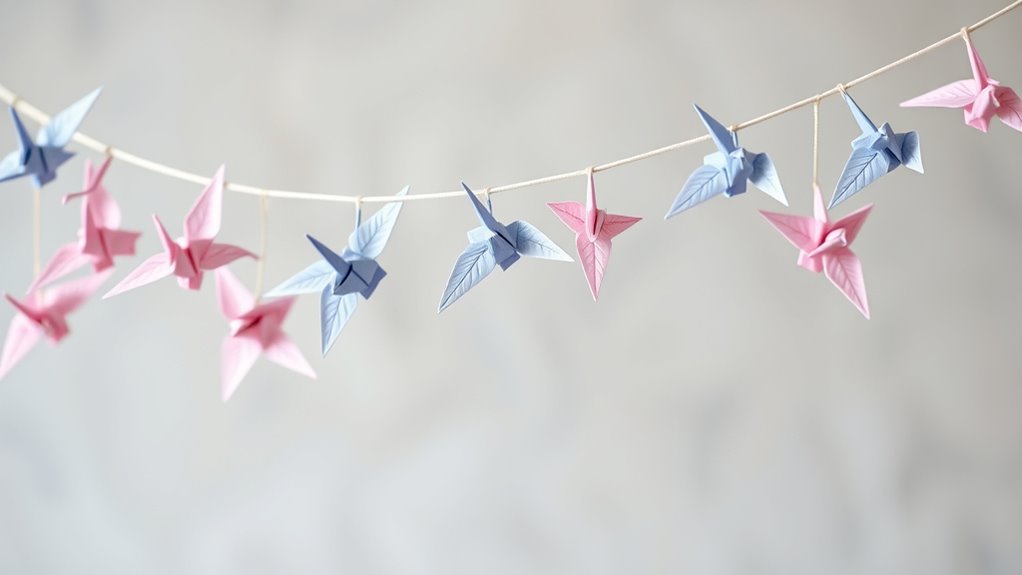
- Thread a thin string or fishing line through the holes to assemble the garland, spacing cranes evenly or clustering.
- Hang or drape the completed garland in desired settings, such as weddings or celebrations, for decorative and symbolic impact.
Have you ever wanted to create a beautiful, handcrafted decoration that adds both elegance and meaning to any space? If so, folding an origami crane garland might be just the project you’re looking for. This craft combines the delicate art of origami techniques with creative garland decoration ideas, allowing you to personalize your decor for parties, home accents, or even as thoughtful gifts. The process is straightforward once you get the hang of the basic folds, and the end result is a stunning string of cranes that exudes charm and cultural significance.
Begin by mastering the fundamental origami techniques needed to fold a crane. You’ll start with a square piece of paper, carefully creased along the diagonals and sides to create precise folds. The traditional origami crane requires a series of valley and mountain folds, which you’ll repeat to shape the bird’s body, wings, and beak. Practice these steps a few times with scrap paper; once you’re comfortable, you’ll find the actual folding process flows smoothly. The key is to keep your creases sharp and your folds symmetrical, ensuring each crane looks elegant and uniform.
Once you’ve mastered the basic crane, you can start thinking about garland decoration ideas. Stringing together multiple origami cranes is a fantastic way to add visual interest and a touch of sophistication to any setting. You can choose to use colorful or patterned paper to match your theme, or stick to classic white for a minimalist look. To assemble the garland, punch small holes near the top of each crane’s wings or body, then thread a thin string or fishing line through these holes. Space your cranes evenly to create a balanced, airy effect, or cluster some closer together for a more compact style.
This garland can be used in numerous ways—draped across a mantel, hung along a staircase, or suspended from the ceiling for a floating effect. It works beautifully as a wedding or birthday decoration, bringing a sense of grace and tradition to the celebration. You can also incorporate other paper crafts or add embellishments like tiny beads or lanterns to enhance the visual appeal. The beauty of this project lies in its versatility; the cranes symbolize hope and peace, making your decor not just attractive but meaningful.
Creating this garland also offers an opportunity to explore sound healing science by appreciating the calm and focus involved in precise folding, which can promote mindfulness and relaxation. As you create your origami crane garland, you’ll discover the joy of combining traditional craft techniques with modern decor ideas. Each crane you fold adds a personal touch, transforming simple paper into a stunning, handcrafted piece of art. Whether you’re decorating for a special event or simply brightening your home, this project offers a satisfying blend of creativity and cultural symbolism. With patience and a little practice, you’ll soon have a beautiful garland that captures elegance and thoughtful craftsmanship in every fold.
Frequently Asked Questions
What Types of Paper Are Best for Origami Cranes?
You should choose origami paper with good paper quality, as it makes folding easier and results in a crisp, clean crane. Thin yet sturdy papers like washi, kami, or foil-backed paper work best. Avoid thick or rough paper that tears easily. Look for smooth, lightweight origami paper that holds creases well but is flexible enough for intricate folds, ensuring your crane looks neat and professional.
How Long Does It Take to Make a Full Garland?
Creating a full origami crane garland typically takes about 3 to 6 hours, depending on your skill level and the number of cranes you want to include. If you’re a beginner, assembly time might be longer as you perfect your folding technique. More experienced folders can assemble the garland faster, possibly in just a few hours. Keep patience in mind, and enjoy each step of the process!
Can Children Easily Fold Origami Cranes?
Children can easily fold origami cranes with some guidance, but you should prioritize child safety by choosing non-toxic, kid-friendly paper and supervising their activity. For beginner tips, show them simple folds step-by-step and encourage patience. Keep their workspace safe and free of sharp tools. With practice and supervision, kids can enjoy making beautiful origami cranes, building their confidence and fine motor skills while having fun.
Are There Alternative Methods for Stringing the Cranes?
Yes, you can use alternative stringing techniques like threading thin wire or colorful ribbon for your origami cranes. These methods help create a sturdy, visually appealing garland. You might also add decorative embellishments such as beads, charms, or small feathers between the cranes to enhance the display. Experimenting with different materials allows you to customize your garland’s look and feel, making it uniquely yours.
How Can I Make My Garland More Durable?
To make your garland more durable, you should start with a waterproof coating that guards against moisture and damage. Reinforce your stringing by using sturdy, thick string or wire, ensuring it can withstand wear and tear. These steps provide protection and strength, transforming fragile paper cranes into a resilient, radiant decoration that endures. With waterproofing and reinforced stringing, your garland stays gorgeous longer, gracefully hanging and highlighting your handiwork.
Conclusion
Now that you’ve folded your origami crane garland, hang it proudly and enjoy the beauty of your handiwork. Remember, a journey of a thousand miles begins with a single step, so keep creating and sharing your art. Each crane symbolizes hope and peace, reminding us that small acts can make a big difference. Keep folding, dreaming, and spreading joy—your craft has the power to inspire and uplift those around you.