To create a no-sew tie-dye bucket hat, start by choosing a suitable hat made of cotton or canvas, then decide on your color scheme. Use rubber bands or strings to design your pattern, securing the fabric tightly before applying dye with squeeze bottles or brushes. After dyeing, let it set, rinse thoroughly, and dry flat. For more tips on perfecting your design and care, keep exploring this tutorial.
Key Takeaways
- Gather cotton or canvas fabric, suitable dye, gloves, rubber bands, and protective surface coverings for a no-sew tie-dye process.
- Create patterns by securely wrapping the hat with rubber bands in your desired design before dyeing.
- Apply vibrant dye evenly over the wrapped hat, focusing on color blending and pattern contrast.
- Let the dye set undisturbed, then rinse with cold water until excess dye is removed to fix the colors.
- Air dry the hat flat, inspect for touch-ups, and care for it by washing gently and avoiding harsh chemicals.
Gathering Your Supplies and Preparing Your Workspace
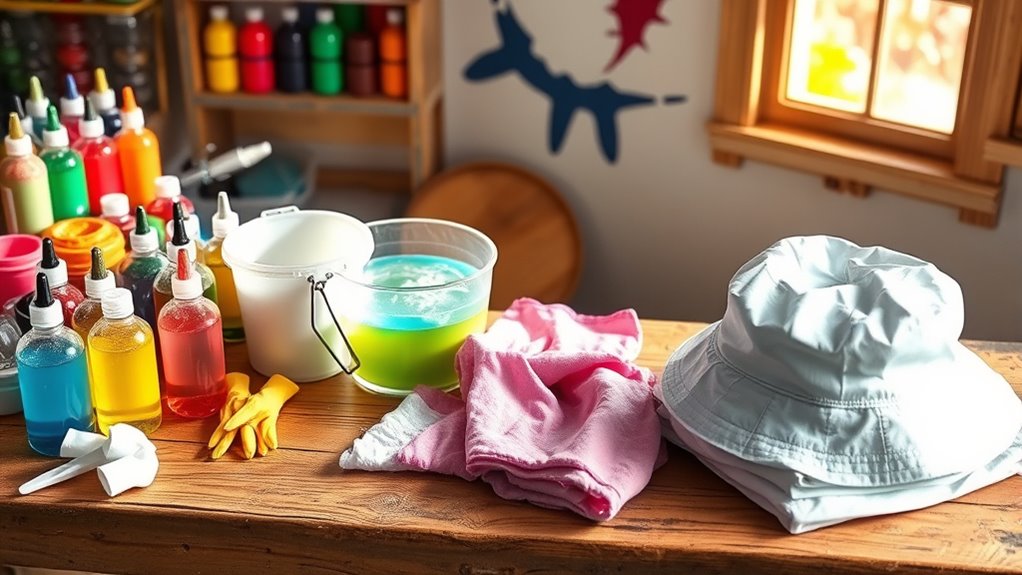
Before you begin your no-sew tie-dye bucket hat project, gather all the supplies you’ll need and set up a clean, well-ventilated workspace. Start with your chosen fabric—consider different fabric patterns like cotton or canvas for vibrant results. Decide on the dye types, such as fiber-reactive or permanent fabric dye, to achieve the desired effect. Make sure to have gloves, rubber bands, and plastic sheets or newspapers to protect your surface. Prepare your workspace by laying down towels or newspapers to catch any spills. Organize your dye bottles and tools nearby for easy access. Ensuring everything is ready will streamline the process and prevent interruptions, so you can focus on creating a unique, colorful bucket hat. Additionally, understanding how fabric types interact with dyes can help you select the best materials for your project. Being aware of dye fixative techniques can also improve color vibrancy and longevity of your tie-dye design. Incorporating knowledge of dye application methods can help you achieve more consistent and appealing patterns. To further enhance your results, researching color blending methods can help you achieve more nuanced and appealing patterns. Consulting color theory principles can guide you in selecting harmonious hues for your design.
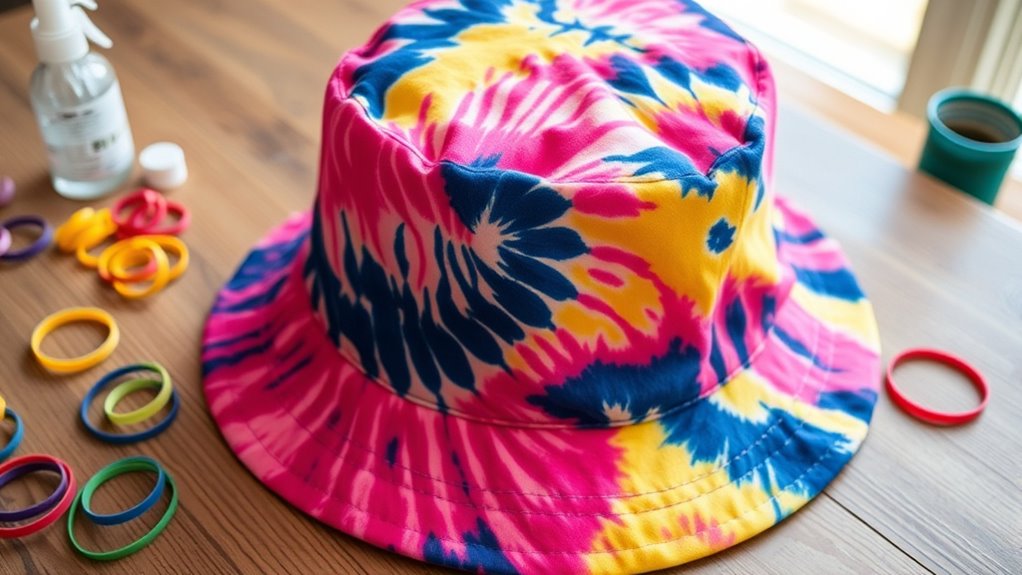
Choosing the Perfect Hat and Tie-Dye Colors

Choose a hat style that fits your look, whether it’s a classic bucket or a wider brim. Then, pick vibrant colors that stand out and match your personality. Combining interesting color combos with the right hat makes your DIY project truly pop. To enhance your style further, consider unique and wicked planters to customize your outdoor space and complement your personalized fashion accessories. Embracing self-awareness can help you select colors and styles that resonate with your personality, making your creation even more meaningful. Paying attention to color coordination can further elevate your overall look and ensure your accessories complement each other seamlessly. Additionally, understanding cultural significance can inspire you to incorporate meaningful symbols or patterns into your tie-dye design, adding depth to your personalized fashion statement. Furthermore, understanding ethical hacking principles can inspire innovative ideas for secure and stylish DIY projects.
Hat Styles to Consider
Selecting the right hat style and tie-dye colors can considerably enhance your overall look. When choosing a hat style, consider your face shape and personal style. For example, a wide-brim hat adds flair, while a bucket hat offers a casual vibe. Pay attention to fabric types, as lightweight cotton or canvas are comfortable and hold dye well. Different styles also suit various occasions, from sporty to trendy. Mixing and matching your hat style with your outfit ensures cohesion. Remember, your choice of tie-dye colors should complement the hat style for a balanced appearance.
- Wide-brim, fedora, bucket, or snapback styles
- Durable, breathable fabric types like cotton or canvas
- Casual or formal looks based on hat style
- Colors that match your wardrobe and personality
Vibrant Color Combinations
Vibrant color combinations can make your tie-dye bucket hat stand out and reflect your personality. When selecting colors, consider how they blend together—smooth color blending creates a seamless, eye-catching effect, while contrasting shades add boldness. To achieve striking pattern contrast, pick colors that differ markedly on the color wheel, such as blues and oranges or reds and greens. Think about your overall look and the mood you want to convey; bright, lively hues express energy, while softer shades create a relaxed vibe. Experiment with color placement to enhance the design, ensuring the combination highlights your chosen pattern. With intentional color blending and sharp pattern contrast, your finished hat will be uniquely vibrant and full of personality.
Prepping the Hat for Dyeing
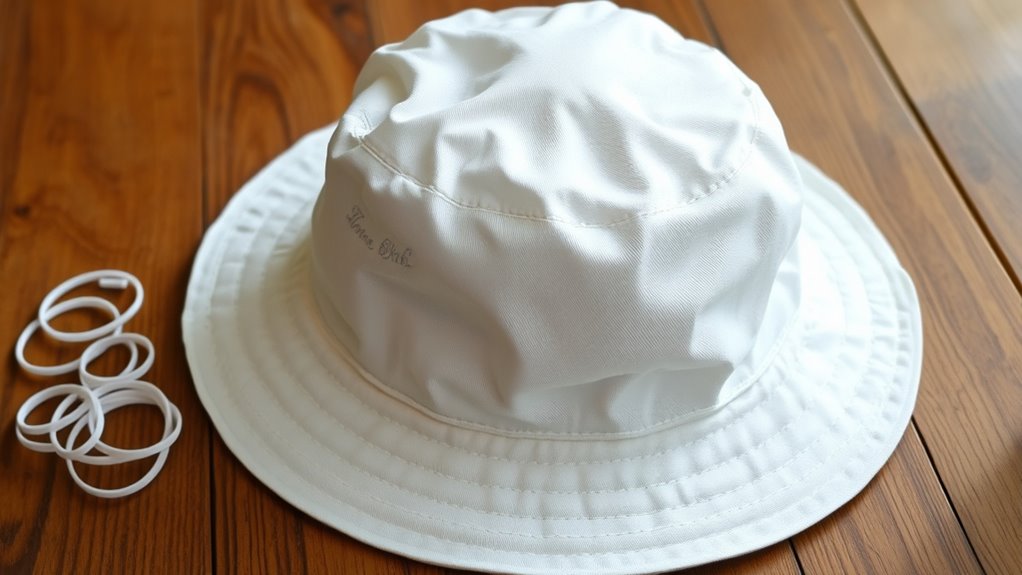
Before you start dyeing, it’s important to prepare the hat properly to guarantee even color absorption. Start by dampening the fabric slightly; this helps the dye penetrate evenly. Check the fabric pattern of your hat—smooth or textured—since it affects how the dye interacts. Choose the appropriate dye types, such as fiber-reactive or all-purpose dyes, based on the material. Additionally, understanding retirement planning techniques can help you stay focused and present during your creative process, ensuring better results. Proper prepping ensures consistent color and vibrant results, making your tie-dye project more successful. Incorporating noise reduction technology in your workspace can create a more comfortable environment, minimizing distractions during your crafting session.
Creating Your Design With Rubber Bands or Strings
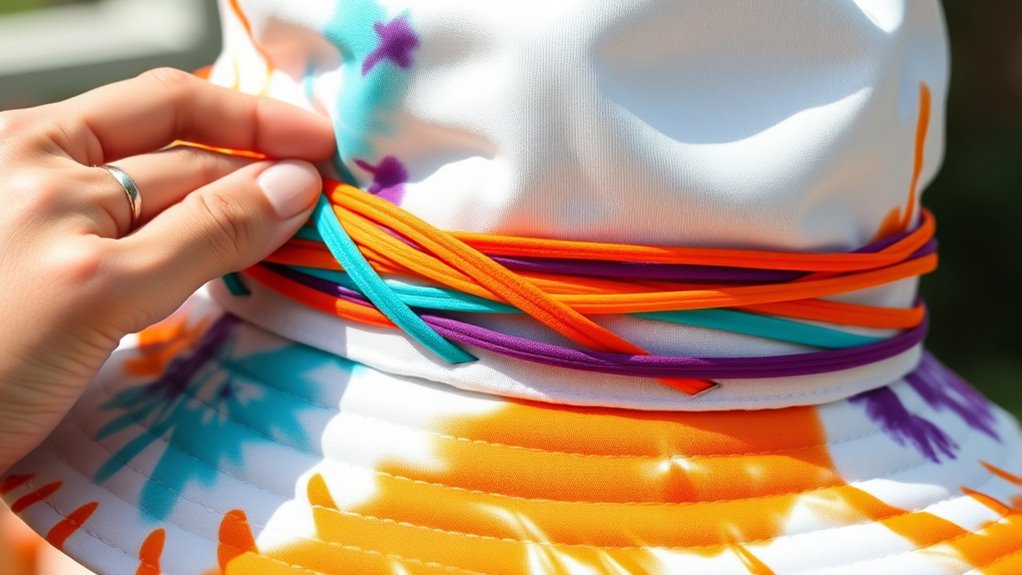
Start by selecting rubber bands or strings that suit your design, whether tight or loose. Secure the bands firmly around the hat to create the patterns you want. Make sure everything stays in place before moving on to the dyeing process. Incorporating creative self-expression through your patterns can make your hat more unique and personal.
Choosing Rubber Band Styles
Choosing the right rubber band styles is essential to creating your desired tie-dye pattern. Your choice impacts color blending and the overall design. Different rubber band techniques can produce a variety of effects, from sharp lines to softer gradations. Consider how tight or loose you wrap the bands, as this influences the pattern’s contrast. Using varied widths and shapes of bands can add depth and interest. For intricate designs, crisscross or spiral methods work well. For bolder lines, stretch bands firmly. Experiment with overlapping bands for unique textures. Remember, your rubber band style determines how colors blend or stay separate, so select your techniques based on the look you’re after. Play around to discover which styles best suit your creative vision.
Securing Your Design
Securing your design with rubber bands or strings is the essential step that holds your pattern in place during the dyeing process. Proper tension ensures your fabric patterns stay sharp and don’t bleed into each other. Wrap the rubber bands tightly around the fabric, focusing on areas where you want colors to separate. This creates distinct sections that will resist dye penetration. When working with dye color mixing, it’s important to keep your design safe so colors don’t blend unintentionally. Use enough bands to prevent shifting, but avoid over-tightening, which can distort the fabric. Carefully position your bands to form the desired pattern, ensuring each section is well-secured. This step guarantees a clean, vibrant final look with well-defined fabric patterns.
Applying the Tie-Dye: Techniques and Tips
Once you’ve prepared your tie-dye solution, applying it evenly and creatively is key to achieving vibrant, eye-catching designs. Focus on color blending to create smooth progressions or bold contrasts, depending on your style. To maintain pattern symmetry, plan your design in advance, especially if aiming for geometric or mirrored effects. Use squeeze bottles or gloves to control where the dye goes, ensuring precise application. Remember, layering colors can add depth, but avoid over-saturating to prevent bleeding. Keep your movements deliberate to preserve the pattern. Experiment with different techniques to see what works best for your desired look. Additionally, understanding color psychology can help you choose hues that evoke specific moods or themes in your design, and paying attention to dye fixation techniques ensures your colors stay vibrant after setting. Proper material selection and vibrational energy are also crucial for consistent results and long-lasting colors. Incorporating essential oils into your process, such as adding a few drops to the dye or setting solution, can enhance the scent and overall experience of your project. With patience and practice, you’ll craft a stunning, professional-looking tie-dye bucket hat.
Setting and Rinsing Your Tie-Dye Bucket Hat

After applying the dye, it’s essential to let your bucket hat set properly to guarantee the colors stay vibrant and the pattern is fixed. During this time, avoid disturbing the dye to allow ideal color blending and consistent dye saturation. Cover your hat with plastic or place it in a sealed bag to prevent drying out and to enhance dye absorption. Rinsing is the next critical step: use cold water to gently wash away excess dye until the water runs clear. This helps lock in the colors and prevents bleeding. Be patient during this process; thorough rinsing ensures your design remains sharp and vibrant. Proper setting and rinsing preserve your hat’s pattern, ensuring it looks great and lasts.
Drying and Final Touches for Your Unique Accessory
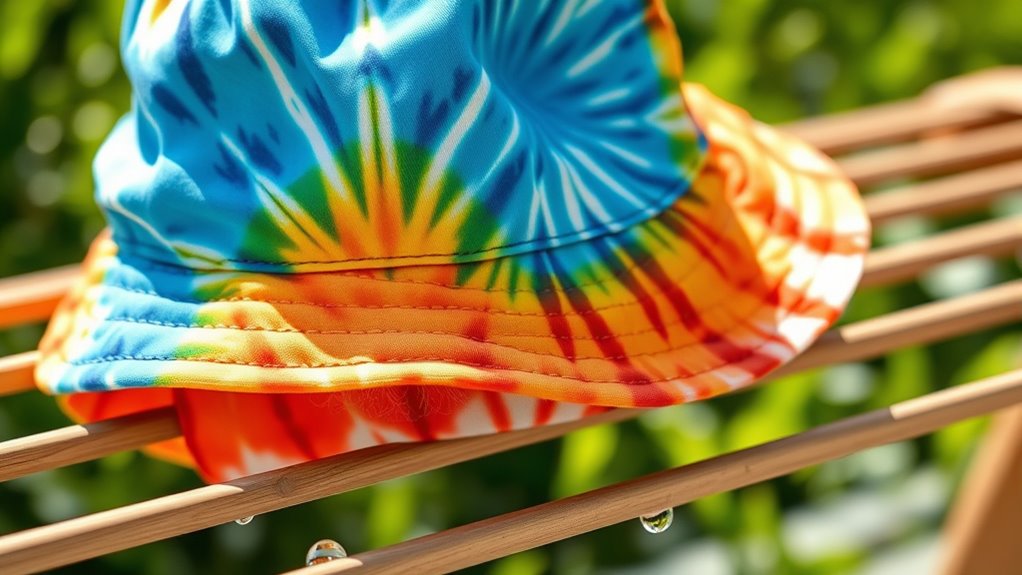
Now that your bucket hat has been rinsed and the dye has set, it’s time to carefully dry it to preserve your design. To maintain pattern symmetry and enhance color blending, lay the hat flat on a clean towel, avoiding hanging it. Gently pat it dry to prevent smudging colors or distorting patterns. As it dries, check for any uneven spots in the dye, which can be touched up with a bit more dye if needed. Once dry, inspect the pattern symmetry; some areas may benefit from slight adjustments or additional dye applications. Be patient—air drying is best to keep your design vibrant and intact. Proper drying ensures your unique accessory looks polished and colorful, ready to showcase your creativity.
Tips for Maintaining and Caring for Your Tie-Dye Hat

To keep your tie-dye bucket hat looking vibrant and fresh, it’s essential to follow proper maintenance practices. Ensuring fabric durability involves washing your hat gently in cold water and avoiding harsh detergents that can weaken the fibers. Turn it inside out before washing to protect the dye and preserve colorfastness. When drying, air-dry your hat in a shaded area to prevent fading caused by direct sunlight. Applying colorfastness tips, like avoiding bleach and high heat, helps maintain the brightness of your tie-dye design. Store your hat in a cool, dry place and avoid crushing it to keep its shape. Regularly inspecting for loose threads or fading spots allows you to address issues early, ensuring your hat stays looking vibrant and lasts longer.
Frequently Asked Questions
Can I Use Synthetic or Natural Fibers for the Hat?
You can use both synthetic and natural fibers for your hat, but fiber compatibility affects dye absorption. Natural fibers like cotton, linen, or hemp absorb dye better, giving vibrant colors. Synthetic fibers like polyester resist dye, resulting in less vivid or uneven coloration. For best results, choose natural fibers or blends with high natural fiber content, ensuring the dye bonds well and your hat turns out bright and colorful.
What Safety Precautions Should I Take During the Dyeing Process?
Precautionary precautions prevent pointless problems. Protect your person with proper gear—wear gloves, an apron, and eye protection. Prioritize ventilation considerations by working in a well-ventilated space to avoid inhaling fumes. Keep your workspace clean and clear of spills, and always follow dye manufacturer instructions. By taking these simple safety steps, you can confidently create your colorful masterpiece without worries or hazards.
How Long Should I Let the Dye Set for Best Results?
You should let the dye set for at least 6 to 8 hours for the best color fixation. This dye setting time allows the colors to fully develop and bond with the fabric, resulting in vibrant, long-lasting hues. Keep the hat in a warm, undisturbed place during this period, and avoid rinsing too early. Patience guarantees your tie-dye project achieves maximum color intensity and durability.
Can I Reuse the Dye for Multiple Projects?
Think of dye reusability like passing down a cherished story—your color stays alive if you handle it right. You can reuse dye for multiple projects, but beware: color retention diminishes with each use. To get the best results, strain and store leftover dye properly, and don’t reuse it too often. With care, your dye can keep inspiring new creations, much like treasured memories that grow richer over time.
How Do I Prevent Colors From Bleeding Into Each Other?
To prevent color bleeding during your tie-dye project, focus on proper fabric preparation and controlling dye application. Before starting, wash your fabric to remove any treatments that might cause bleeding. When applying dye, use firm, even strokes and avoid over-saturating the fabric. Let the dye set fully, and rinse in cold water afterward. These steps help keep colors vibrant and separate, ensuring your design stays sharp and colorful.
Conclusion
Your no-sew tie-dye bucket hat is now a one-of-a-kind masterpiece, like a vibrant garden bursting with life. With a little patience and creativity, you’ve turned plain fabric into wearable art. Keep it looking fresh by following proper care tips, and remember, your hat’s colors are a reflection of your personality—bold, bright, and uniquely yours. Wear it proudly, knowing you’ve crafted something as special as your own personal rainbow.