
To craft a spooky front door wreath, start with a foam form and layer it with textured materials like burlap or mesh. Add bold embellishments such as mini pumpkins, spiders, or faux cobwebs, securing everything firmly. Choose a color scheme like black and orange or deep purple for extra impact. Arrange your elements for balance and depth, then hang it confidently on your door. Keep going, and you’ll discover how to turn it into a true Halloween masterpiece.
Key Takeaways
- Start with a foam form as the base, wrapping it with a themed ribbon for a cohesive look.
- Decorate with spooky embellishments like mini pumpkins, paper bats, and appliqué spiders, securing them with hot glue.
- Choose a color scheme that enhances the spooky vibe, such as black, orange, purple, or metallic accents.
- Add texture and depth by layering materials like burlap, tulle, or mesh along with larger focal pieces.
- Hang with a sturdy hook and adjust for balance, ensuring the wreath is weather-resistant and visually striking.
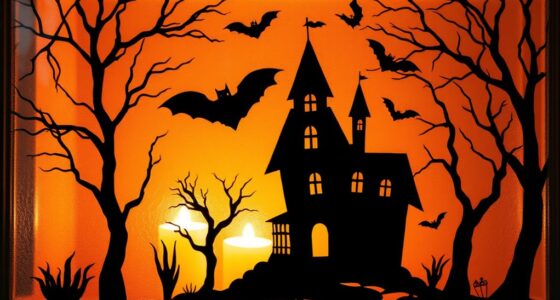
As Halloween approaches, nothing sets the tone for your spooky season quite like a festive front door wreath. It’s the first thing guests see and the perfect way to showcase your holiday spirit. To make yours stand out, start with a foam form as your base. From there, you can craft a personalized masterpiece by incorporating DIY embellishments that reflect your style. Think tiny paper bats, mini pumpkins, or appliqué spiders—these small details add a unique touch that can’t be found in store-bought wreaths. Use hot glue or craft wire to attach these embellishments securely, ensuring your wreath stays intact through the season.
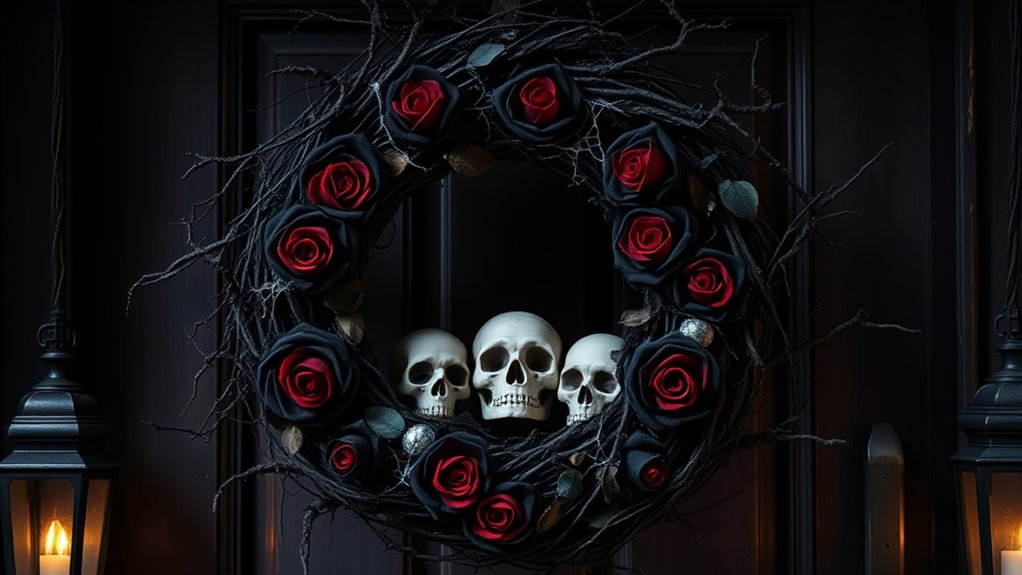
Create a personalized Halloween wreath with DIY embellishments like paper bats, mini pumpkins, and appliqué spiders.
Choosing the right color schemes is vital for creating a cohesive, eye-catching look. Traditional Halloween palettes like black and orange are always popular, but don’t hesitate to experiment with dark purples, deep greens, or even metallic accents like silver or gold. These hues can add a sophisticated or spooky vibe, depending on your preference. When selecting your color scheme, consider your door’s background and surrounding décor, so everything works harmoniously. For a more dramatic effect, you might opt for a monochromatic palette, using varying shades of one color, or mix bold contrasting colors for a vibrant, energetic appearance.
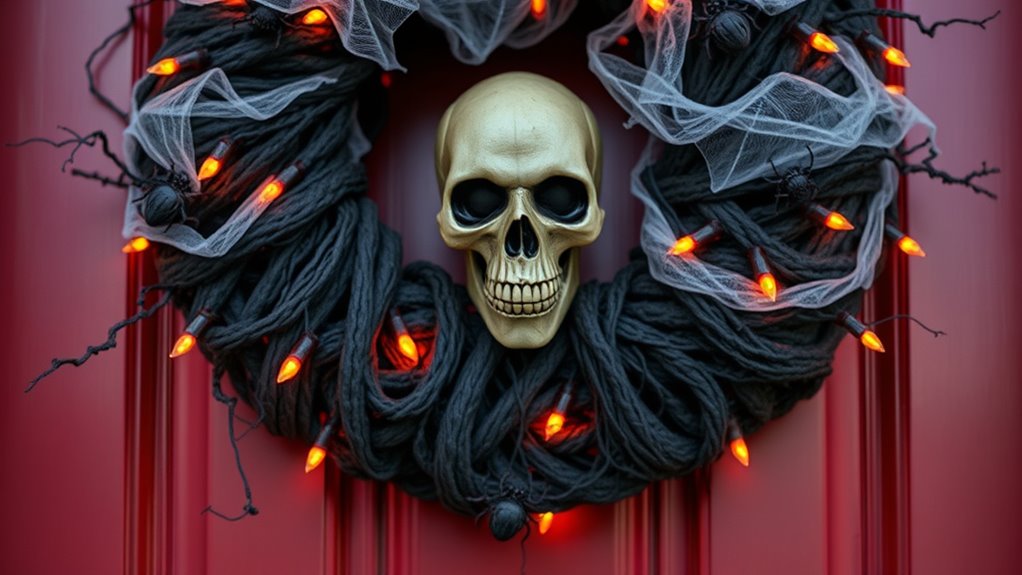
Once you’ve nailed your color scheme, start layering your embellishments onto the foam form. Wrap your wreath with a base ribbon that matches your chosen colors, creating a foundation that ties everything together. You can add texture by incorporating different materials, such as burlap, tulle, or mesh, which bring depth and visual interest. Embellish the wreath with larger, focal pieces—like faux cobwebs, skulls, or glow-in-the-dark accents—that draw the eye. Balance these elements evenly around the wreath to ensure a professional, polished look.
As you assemble, step back periodically to view your wreath from a distance. This helps you spot any gaps or uneven areas that need adjusting. Remember, the key to a striking DIY wreath is layering and contrast. Mix rough textures with smooth ones, matte finishes with shiny accents, and bold pieces with subtle details. Incorporating skilled craftsmanship can elevate your wreath from simple to spectacular, making it truly stand out. When you’re happy with the arrangement, secure everything firmly, so your creation withstands the wind and weather. Finally, hang your spooky front door wreath with a sturdy hook, and enjoy the compliments from trick-or-treaters and neighbors alike. With thoughtful DIY embellishments and a clever color scheme, your foam form will transform into a captivating Halloween focal point.

Halloween Ghost Wreath Decoration Kit (2 Pieces) White Fits 14 Inch Wreath (Not Included) Spooky Halloween Decor Front Door
As an affiliate, we earn on qualifying purchases.
As an affiliate, we earn on qualifying purchases.
Frequently Asked Questions
What Are Some Alternative Materials for the Foam Form?
You can explore eco-friendly alternatives like cardboard, wire frames, or recycled paper for your wreath base. Recycling options include repurposing old cardboard boxes or using scrap fabric wrapped around a wire frame. These materials are sustainable and environmentally friendly, helping you reduce waste. By choosing eco-friendly alternatives, you not only create a unique, spooky wreath but also contribute positively to the environment.
How Long Does a Spooky Wreath Typically Last Outdoors?
A spooky wreath outdoors usually lasts about 2 to 3 weeks, depending on weather durability and seasonal longevity. If you keep it in a sheltered spot, it can stay spooky longer. Harsh weather, like rain or strong sun, can cause colors to fade and decorations to deteriorate faster. To extend its life, consider using weather-resistant materials and bring it inside during storms or extreme weather conditions.
Can I Customize the Design for Different Holidays?
Absolutely, you can customize your spooky wreath for different holidays. Did you know that 78% of crafters enjoy seasonal color schemes and themed embellishments? You can easily swap out elements like skulls for pumpkins or snowflakes, adjusting the colors and decorations to match any celebration. This flexibility makes your wreath versatile and fun, so you can create a festive look year-round that truly reflects each holiday’s spirit.
What Safety Precautions Should I Take During Assembly?
You should wear safety gear like gloves and goggles to protect yourself during assembly. Make sure your workspace is well-ventilated and free of clutter to prevent accidents. Use sharp tools carefully and keep them away from children or pets. Follow manufacturer instructions for any adhesives or tools, and work on a stable surface. Taking these precautions guarantees a safe, enjoyable crafting experience while creating your spooky wreath.
How Do I Store the Wreath to Prevent Damage?
You’ll want to give your spooky wreath a proper send-off, or it’ll haunt your closet forever. Store it in a cool, dry place, ideally in seasonal storage containers that shield it from dust and pests. Weather protection is key—wrap it in plastic or a breathable cover to prevent moisture damage. This way, your haunting masterpiece stays fresh and terrifying for many Halloweens to come, minus the creepy surprises.

Garneck 2pcs Witch Hat Garland Wire Wreath Forms Halloween DIY Wreath Frame Halloween Wire Ring Iron for Garden Holiday DIY Making Craft
DIY iron wreath support– festive atmosphere: suitable for christmas, halloween and other holiday decorations, creating strong festive atmosphere.
As an affiliate, we earn on qualifying purchases.
As an affiliate, we earn on qualifying purchases.
Conclusion
Now that you’ve transformed your foam form into a spooky front door wreath, aren’t you excited to see it greet your Halloween visitors? With a little creativity and some simple supplies, you’ve created a festive, eye-catching decoration that sets the perfect haunting tone. So, why not step back and admire your handiwork? After all, isn’t it fun to craft your own spooky decor and make your home uniquely yours this Halloween?

"yueton 20PCS Witch Hat Castle Ghost Pumpkin Monster Broom Cat Flatback Resin Charms Slime Charms Halloween Flatback Embellishments for Wreath, Dress, Earrings, Hair Clips, Photo Frames, Phone Cases"
Package includes: 20pcs Halloween flatback resin embellishments
As an affiliate, we earn on qualifying purchases.
As an affiliate, we earn on qualifying purchases.

Crafare 11.8 Inch Foam Wreath Forms 4 Pack Round Foam Rings for Crafts Making DIY Projects Christmas Holiday Holiday Decorations
Material:These craft foam wreath forms 11.8in are made of solid foam of high density,soft smooth and lightweight not…
As an affiliate, we earn on qualifying purchases.
As an affiliate, we earn on qualifying purchases.