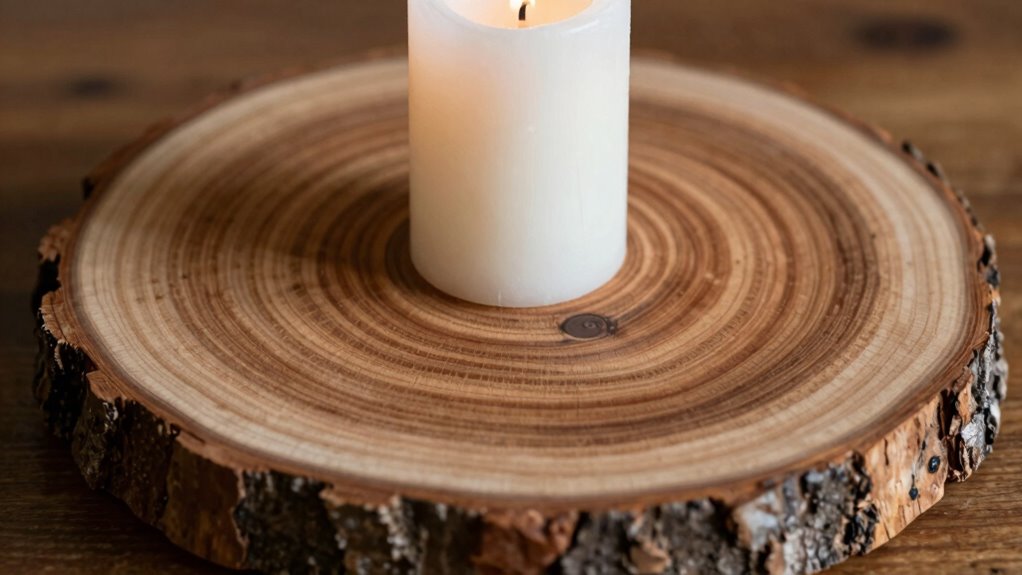

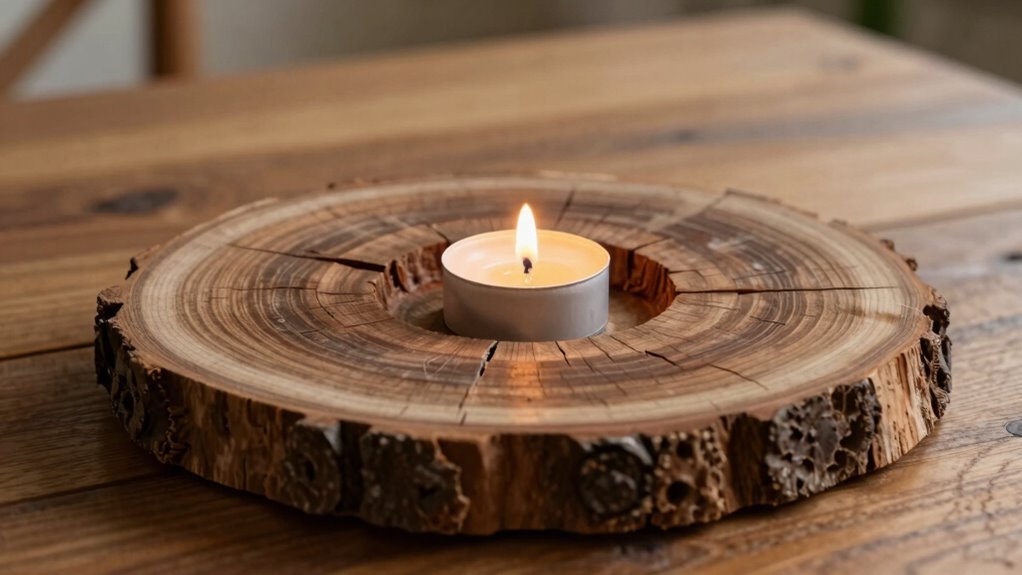
To create a rustic candle plate from wood slices, start by choosing slices around 1-2 inches thick with natural edges, making sure they’re untreated and free of cracks. Sand the surfaces lightly, then drill shallow indentations in the center to hold tealights or small candles securely. Finish by applying a food-safe or mineral oil to enhance color and durability, then buff off excess. For more tips on making your own charming candle plate, keep exploring this guide.

Get business pricing on tools and workshop supplies
- Business-only prices and quantity discounts
- Tax-exempt purchasing
- Multiple users, one account, clear invoices
Key Takeaways
- Select natural, untreated wood slices of similar thickness with bark for an authentic rustic look.
- Drill shallow indentations in the center of each slice to securely hold candles.
- Lightly sand surfaces and edges, preserving natural texture for aesthetic appeal.
- Apply a food-safe or mineral oil finish to enhance durability and natural color.
- Ensure candles are stable, place on heat-resistant surfaces, and follow safety precautions during use.
Creating a rustic candle plate from wood slices is a simple and rewarding DIY project that adds charm to any space. It’s an excellent way to incorporate natural decorative accents into your home décor, whether for everyday use or special occasions. To start, select the right wood slices—look for ones that are roughly the same thickness, preferably between 1 to 2 inches, and choose pieces with appealing natural edges or bark for an authentic rustic look. Make sure the wood is untreated and free of any cracks or splits, as these could compromise safety or stability.
Create charming rustic candle plates using natural wood slices for cozy, decorative accents in your home.
Once you have your slices, clean them thoroughly to remove dust, dirt, and any sap. Lightly sand the surface and edges to smooth out rough areas, but keep some of the natural texture for aesthetic appeal. After prepping the wood, decide on the size and shape of your candle plate. You can go for a simple round or oval shape, or get creative with irregular forms that highlight the natural wood grain. Use a drill with a suitable bit to create a shallow indentation in the center of each slice, just deep enough to hold a tealight or small pillar candle securely. Be careful not to drill too deep; safety tips include wearing goggles and a dust mask during this process. Additionally, choosing untreated wood ensures safety and longevity for your project.
To enhance the durability and appearance of your candle plate, consider applying a food-safe or mineral oil finish. This not only enriches the wood’s natural color but also provides some moisture resistance, extending the life of your decorative accents. Allow the oil to soak in for several hours or overnight, then buff with a clean cloth to remove any excess. Applying a finish that is eco-friendly or biodegradable can further support sustainable living practices and minimize environmental impact. When placing your candles, always make sure they sit firmly in the drilled indentations and are stable. It’s also beneficial to select heat-resistant surfaces for your project to prevent accidental damage or heat transfer. It’s best to use flameless candles if you’re concerned about safety, especially around children or pets. Ensuring proper ventilation during the finishing process is also essential to keep the environment safe from fumes.
Safety tips are vital when creating and using your rustic candle plate. Never leave burning candles unattended, and keep them away from flammable materials, including curtains or paper. Make certain your wood slices are placed on heat-resistant surfaces, and avoid exposing the wood to open flames for extended periods. Regularly inspect your candle plates for any signs of cracking or damage, and replace them if needed. By following these safety tips and paying attention to detail, you’ll create beautiful, rustic decorative accents that bring warmth and charm to your home without compromising safety.
As an affiliate, we earn on qualifying purchases.
Frequently Asked Questions
What Types of Wood Are Best for Making Candle Plates?
You should choose woods with tight, straight grain, like maple, cherry, or birch, for making candle plates. These woods provide a smooth surface, which helps attain a clean, natural finish, and reduce splintering. Avoid softwoods like pine, as they can burn or crack over time. Selecting the right wood guarantees your candle plate is durable, safe, and enhances the rustic aesthetic with its beautiful natural grain.
How Do I Prevent the Wood From Splitting?
Did you know that untreated wood can split up to 50% more during drying? To prevent splitting, you should protect the wood with a sealant or mineral oil before cutting. Proper wood treatment helps stabilize moisture levels, reducing the risk of cracks. Additionally, avoid exposing the slices to extreme temperature changes and use gentle, even pressure when cutting. These steps guarantee your rustic candle plate stays beautiful and intact.
Can I Customize the Shape of the Candle Plate?
Yes, you can customize the shape of your candle plate. You might cut the wood slices into unique shapes or add decorative embellishments for a personalized touch. For a special detail, consider custom engraving to include initials, designs, or patterns that match your style. Just be sure to use proper tools and safety precautions when shaping or engraving the wood, ensuring your finished piece looks exactly how you envision.
How Do I Seal the Wood for Safety?
Think of sealing your wood as giving it a fireproof armor, ensuring your cozy glow stays safe. To do this, apply a waterproof finish designed for wood surfaces, creating a barrier that guards against moisture and heat. This not only enhances fire safety but also preserves your rustic charm. Make sure to follow product instructions for a thorough seal, giving your candle plate a safe, durable, and beautiful finish.
What Size Should the Wood Slices Be?
For your rustic candle plate, choose wood slices that are 4 to 6 inches in diameter. This size provides a sturdy base and highlights the natural wood grain, making it perfect for decorative accents. Smaller slices can work too, but make certain they’re proportionate to your candles. Larger slices add a rustic charm, enhancing the overall aesthetic. Keep in mind, the size should complement your decor and candle size for a cohesive look.
Conclusion
Creating a rustic candle plate from wood slices is a simple and rewarding project that adds natural charm to your home decor. Did you know that incorporating natural elements like wood can boost your mood and reduce stress? By following these easy steps, you not only craft a beautiful piece but also bring a touch of nature indoors. So grab your supplies and enjoy the calming process — your cozy, rustic candle plate awaits!
Columbus Day / Indigenous Peoples' Day Picks
long weekend sales
As an affiliate, we earn on qualifying purchases.