
TL;DR

Get business pricing on tools and workshop supplies
- Business-only prices and quantity discounts
- Tax-exempt purchasing
- Multiple users, one account, clear invoices
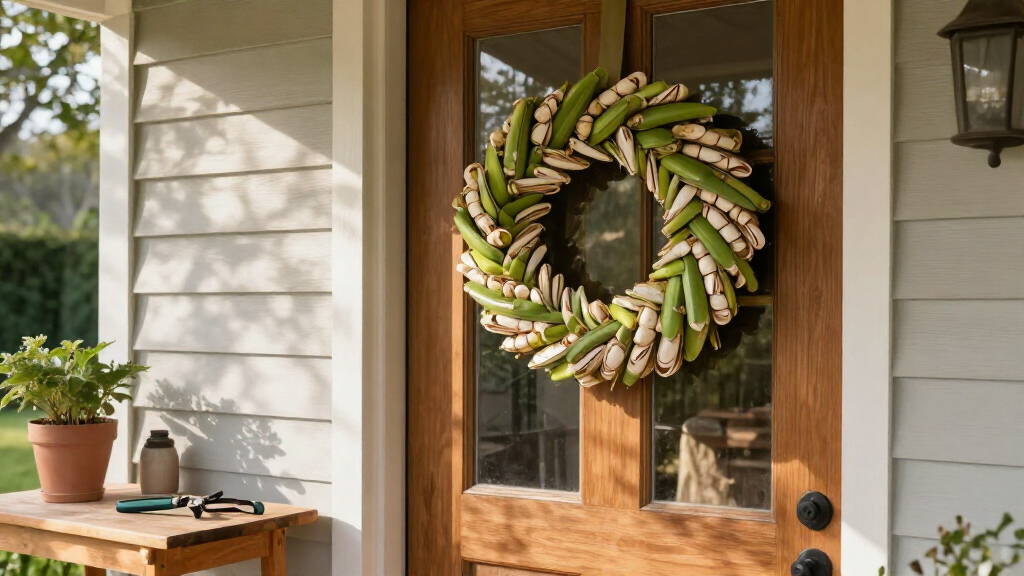
Hunker has outlined a DIY front-door wreath made from cleaned pistachio shells, a wreath form, adhesive and paint. The shells are layered into flower shapes, then attached to the base; the project’s cost, completion time and outdoor durability are not specified.
Hunker has published a do-it-yourself guide for making a front-door wreath from cleaned pistachio shells, using overlapping layers to form flower shapes. The project offers a way to reuse shells and customize a seasonal decoration, though the report does not provide a tested cost, completion time or durability rating.
The materials listed include pistachio shells, a wreath base, adhesive, paint and ribbon or twine. For a base, the guide suggests cutting a ring from cardboard, joining the ends of a pool noodle with duct tape, or reusing an old wreath. A craft knife is also listed for shaping cardboard. The shells should be rinsed in hot water to remove residue, then spread on a baking sheet to dry before painting.
To make each flower, the instructions call for gluing three or four shells upright at the center of a cardboard circle. More shells are added in outward layers, with glue along the lower edge of each shell, until the bloom reaches the desired size. The finished flowers are then glued onto the wreath form. A ribbon can be tied at the top for hanging; the report suggests positioning the wreath about 14 inches below the top of the door.
The guide presents paint color and arrangement as choices for the maker: shells can be painted one color or divided into groups of different shades, and the finished wreath can be adapted for spring, fall or another occasion. It also suggests covering a pool-noodle form with twine or decorative ribbon. The report recommends setting aside plenty of time for the small assembly steps but does not give a specific estimate.
A Reuse Project for Seasonal Decor
The project turns a food byproduct into a decorative item and offers an alternative to buying a finished wreath. Its appeal depends on materials a household already has: saved pistachio shells and a reused base may reduce the need for new supplies, though paint, glue and ribbon may still need to be purchased. Hunker describes the idea as budget-friendly, but provides no price comparison or cost calculation.
Customization is another practical feature. Painting the shells in different colors and changing the ribbon can alter the look without changing the basic method. That gives readers a craft option they can adapt to a season or personal preference. The promised resemblance to flowers is a visual aim of the project, not an independently tested result.
Popular right now

Dreame G10 Pro Wet and Dry Vacuum Mop

Dyson V15 Detect Cordless Vacuum

Bose QuietComfort Wireless Noise Cancelling Headphones, Black
As an affiliate, we earn on qualifying purchases.
How the Shells Become Flowers
Hunker’s instructions build the decoration in two stages: first, create and cover a wreath base; then make individual blooms and attach them. The base can be cut from reused cardboard, formed from a pool noodle, or taken from an existing wreath. For a standard 36-inch-wide door, the report says a 24-inch wreath diameter is suitable. This is the guide’s suggested proportion, not a requirement for every door.
Shell preparation and placement shape the finished look. The shells need to be clean and dry before painting, and the guide recommends coating both sides. Building from a small center cluster outward creates a layered flower form. The source lists hot glue, super glue or B7000 as possible adhesives; it does not compare their performance or specify which is best for different base materials.
““you’ll have to sweat the small details for this DIY.””
— Hunker
Durability and Project Costs
The report says the shell blooms will hold up season after season and withstand everyday handling, but it provides no testing details or outdoor exposure results. How well paint and adhesive perform in direct sun, rain or temperature changes is not established by the supplied material. Readers should not treat the durability claim as a verified product rating.
The exact cost, amount of shell material needed, number of flowers, drying time and total work time are also unspecified. The instructions name several adhesive options without comparing them, and they do not state whether the finished wreath should be brought indoors during severe weather. The final appearance will depend on shell size, arrangement, paint and the wreath base.
Before Making the Wreath
The next steps for anyone following the guide are to save enough shells, choose a base and gather adhesive, paint and a hanging ribbon or twine. The shells should be washed and allowed to dry fully before painting. Makers can test their adhesive and paint on a few shells first, since the report does not specify drying times or compatibility across materials.
Once the flowers are assembled and attached, the maker can decide whether the wreath is suited to the intended location and weather. Hunker’s supplied instructions do not describe a follow-up test, price estimate or further update. Any claims about long-term outdoor performance remain unverified in the available report.
Key Questions
What materials does the pistachio shell wreath require?
The guide lists pistachio shells, a wreath base, adhesive, paint and ribbon or twine. It also names a craft knife for cutting a cardboard base. A pool noodle or an old wreath can be used instead of making a cardboard form.
How are the shells arranged to look like flowers?
Glue three or four shells upright in the center of a small cardboard circle, then add more shells in outward layers. The instructions say to run glue along the lower edge of each shell as the flower grows.
What size wreath does the guide recommend?
For a standard 36-inch-wide door, Hunker suggests a 24-inch-diameter wreath. The report presents this as a suitable size, not a fixed rule for every doorway.
Will the wreath last outdoors season after season?
Hunker says the shell blooms will hold up over time, but the supplied report does not include testing or details about exposure to rain, sun or temperature changes. Outdoor durability is not independently verified in the material provided.
How long does the project take, and what does it cost?
The report advises setting aside plenty of time for the detailed assembly but gives no hour estimate. It describes the project as budget-friendly, yet provides no total cost or comparison with store-bought wreaths.
Source: hunker.com