To master acrylic painting, you can employ techniques like blending, dry brushing, and glazing. Blending helps you create smooth progressions and realistic gradients by merging colors while still wet and controlling brush pressure. Dry brushing adds texture with a scratchy or rough effect by using minimal paint on a dry brush. Glazing involves layering transparent paint over dried areas to enhance depth and luminosity. Exploring these methods will open up new possibilities for adding richness and dimension to your artwork.
Key Takeaways
- Blending involves merging wet acrylics quickly to create smooth gradients and realistic transitions.
- Dry brushing uses a minimal amount of paint on a dry brush for textured, scratchy effects.
- Glazing applies transparent layers over dry paint to deepen colors and add luminous depth.
- Proper blending requires working fast due to acrylics’ quick drying time.
- Combining these techniques enhances texture, color richness, and visual complexity in artwork.
Ever wondered how to create vibrant, textured artwork with acrylic paints? One of the key techniques is mastering how to blend colors seamlessly and build texture that adds depth to your piece. When you focus on color mixing, you’re actively combining different hues directly on your palette or canvas, allowing you to achieve smooth progressions or bold contrasts that make your artwork pop. Proper color mixing is essential because it gives you control over the shades and tones, helping you create a unified composition. As you blend, consider the consistency of your paints—thinner mixtures blend more smoothly, while thicker paints can build texture and add dimension. Texture creation is about more than just applying paint; it’s about intentionally manipulating the surface to add visual interest. You can create texture by layering thick paint, using tools like palette knives, or incorporating mediums that alter consistency. This tactile approach allows you to evoke emotion and realism or abstract expression, depending on your intent. Additionally, understanding vibrational energy in your workspace can influence how your artwork turns out, fostering a more inspired creative process.
When it comes to blending, you want to work quickly before the paint dries, especially with acrylics, which dry fast. Use a soft brush or blending tool to gently merge colors on the canvas, creating gradients that feel natural and fluid. Practice controlling your brush pressure and direction to achieve the desired softness or sharpness in the progression. For texture creation, try applying paint with a dry brush for a scratchy effect or using a palette knife to spread thick strokes across the surface. You can also experiment with building up multiple layers of paint, allowing each to dry partially or fully before adding the next, creating a rich, textured surface that plays with light and shadow.
Another effective technique is glazing, which involves applying transparent layers of color over dry paint to modify or enhance your underlying hues. This method not only helps in achieving complex color effects but also adds a luminous quality to your work. When you glaze, you’re primarily controlling how light interacts with the surface, blending layers subtly and contributing to the overall depth of your piece. Combining these techniques—color mixing, texture creation, blending, and glazing—empowers you to craft artwork that’s vibrant, dynamic, and richly textured. With practice, you’ll develop your own style and learn how to manipulate acrylic paints to produce stunning visual effects that captivate viewers and express your artistic vision.

GACDR Gilding Brush Set, 7 Pieces Versatile Goat Hair Blending Mop Brushes for Acrylic Painting Wartercolor Foil Gold Leaf Flakes Sheets
【High Quality Material 】 Crafted with high-quality natural goat hair bristles and 100% birch wood handle,our gilding brush…
As an affiliate, we earn on qualifying purchases.
As an affiliate, we earn on qualifying purchases.
Frequently Asked Questions
How Can I Prevent Acrylic Paint From Drying Too Quickly?
To prevent acrylic paint from drying too quickly, you should use mixing mediums designed for slowing drying time, which helps with color retention and blending. Keep your palette moist by misting it with water or covering it with plastic wrap when not in use. Working on a wet surface also extends your working time, allowing you to blend colors smoothly without rushing. These tips guarantee vibrant, well-blended results.
What Surfaces Are Best Suited for Acrylic Painting?
Think of your surface as a blank canvas waiting to come alive. You’ll find that primed, smooth surfaces like canvas, primed wood, or acrylic paper are perfect for acrylics. These surfaces act like a stage, letting your colors perform without chaos. Use priming techniques to seal and prepare, ensuring your paint adheres smoothly and stays vibrant. Choosing the right textured or smooth surface makes your artwork pop with clarity and richness.
How Do I Fix Mistakes Made With Acrylic Paint?
If you make a mistake with acrylic paint, don’t worry. You can fix it by using color correction techniques, like adding more paint or blending to hide errors. Try layering techniques—wait for each layer to dry before adding new paint—to smoothly cover mistakes. For small errors, you can scrape or wipe away excess with a damp cloth or palette knife. Patience and layering will help you achieve a polished look.
Can I Mix Acrylics With Other Mediums or Paints?
Yes, you can mix acrylics with other mediums or paints, but you need to take into account paint compatibility. Always check if the mediums are designed for acrylics to avoid issues like cracking or poor adhesion. When mixing mediums, do a small test first. Use products like acrylic mediums, gels, or mediums specifically made for acrylics to achieve different textures and effects. Proper mixing ensures your artwork stays vibrant and durable.
What Tools Are Ideal for Advanced Acrylic Blending Techniques?
For advanced acrylic blending, you’ll want to choose brushes with soft, flexible bristles like fan or flat brushes, which allow smooth shifts. Keep your palette organized with small containers for mixing and clean water to maintain color clarity. Using high-quality brushes helps you achieve seamless blends, while organized palettes prevent color muddiness. Practice with different brush types to master smooth gradients and subtle color shifts in your artwork.
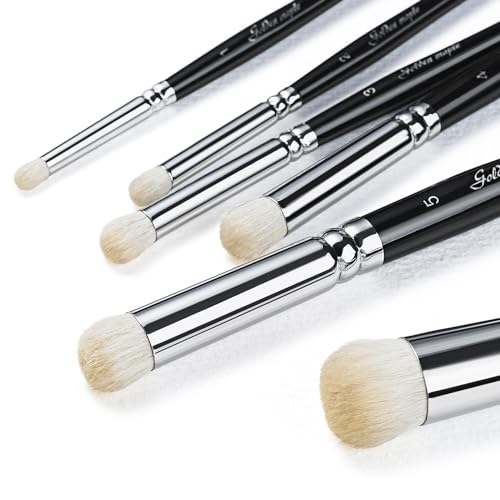
Golden Maple Dry Brush Set for Miniature Painting – 6PC Professional Detail Hobby Brushes for Models | Acrylic, Oil(Black)
【Goat Hair Dry Brushes】Miniature dry brush features rust proof ferrule which encases dense, semi-stiff, and springy goat bristles,…
As an affiliate, we earn on qualifying purchases.
As an affiliate, we earn on qualifying purchases.
Conclusion
Now that you’ve explored blending, dry brushing, and glazing, you’re equipped to unleash your artistic potential. Think of these techniques as the brushes in your toolkit—each adds a unique stroke to bring your vision to life. Practice patience and experiment freely; just like a garden blooms with care, your skills will flourish over time. Embrace these methods as your artistic compass, guiding you through a vibrant world of creativity waiting to be painted.

Liquitex Professional Fluid Medium, 118ml (4-oz), Glazing Medium
For creating brilliant jewel-like glazes with acrylic paint; Excellent brushing and leveling qualities
As an affiliate, we earn on qualifying purchases.
As an affiliate, we earn on qualifying purchases.

10PCS Palette Knife, Stainless Steel Painting Knife Set, Flexible Spatula Pallet Knife, Metal Artist Knives, Oil Painting Accessories Color Mixing Scraper for Oil, Canvas, Acrylic Painting By CUALORK
【RELIABLE QUALITY】This palette knife is sturdy and lightweight, blade made of stainless steel, it is resilience、flexible and anti-resistant;…
As an affiliate, we earn on qualifying purchases.
As an affiliate, we earn on qualifying purchases.