If you notice fuzzy prints, bleeding, or cracking in your screen printing, it’s often due to issues like improper screen mesh, wrong ink viscosity, or poor tensioning. Fuzzy prints usually come from coarse mesh or excess ink, while bleeding results from too much ink or incorrect registration. Cracks happen when screens aren’t tensioned properly or materials aren’t compatible. Troubleshooting these problems involves adjusting your process—continue exploring to learn effective solutions for flawless results.
Key Takeaways
- Fuzzy prints result from coarse mesh or improper ink application, causing ink to spread beyond edges.
- Bleeding occurs due to incorrect ink viscosity, mesh choice, or misalignment, allowing ink to extend beyond design lines.
- Cracking is caused by improper screen tension, unsuitable ink/emulsion, or inadequate curing, leading to ink film fractures.
- Proper mesh selection, consistent ink viscosity, and correct curing techniques help prevent fuzzy prints, bleeding, and cracking.
- Regular maintenance, material quality checks, and accurate registration are essential for durable, high-quality screen prints.

PreAsion Etching Press Machine Etching Printing Press Printmaking Letterpress Machine Printmaking Rubbing Machine Plaster Wood Paper Slab Roller Size: 28 * 10cm (11 * 3.9 ")
The size is moderate, with 4 anti slip feet that can be placed on the table and the...
As an affiliate, we earn on qualifying purchases.
What Are the Most Common Screen Printing Defects and How to Recognize Them
Have you ever noticed flaws in a printed design that ruin its appearance? One common issue stems from improper screen mesh selection. If the mesh is too coarse, ink can bleed or appear blurry; too fine, and ink may not pass through properly, resulting in incomplete prints. Adjusting ink viscosity is equally important—if the ink is too thick, it won’t flow smoothly, causing uneven coverage or cracking. Conversely, if it’s too thin, the print may bleed or blur edges. Recognizing these defects involves inspecting the sharpness of lines and the consistency of color. Ensuring you select the right screen mesh and fine-tuning ink viscosity helps prevent many of these common printing flaws, leading to cleaner, more professional results. Proper screen mesh selection and maintenance are crucial for achieving high-quality prints. Additionally, understanding print curing techniques can help ensure durability and prevent defects over time, especially when combined with proper ink application methods.

Flash Dryer Screen Printing Flash Dryer Silk Screen Printing 110V 16X16 inches Screen Drying Curing
Movable wheel and height adjustable Stand. Foundation is consistent with heating box ,stable, saving-space and overcoming the flaw...
As an affiliate, we earn on qualifying purchases.
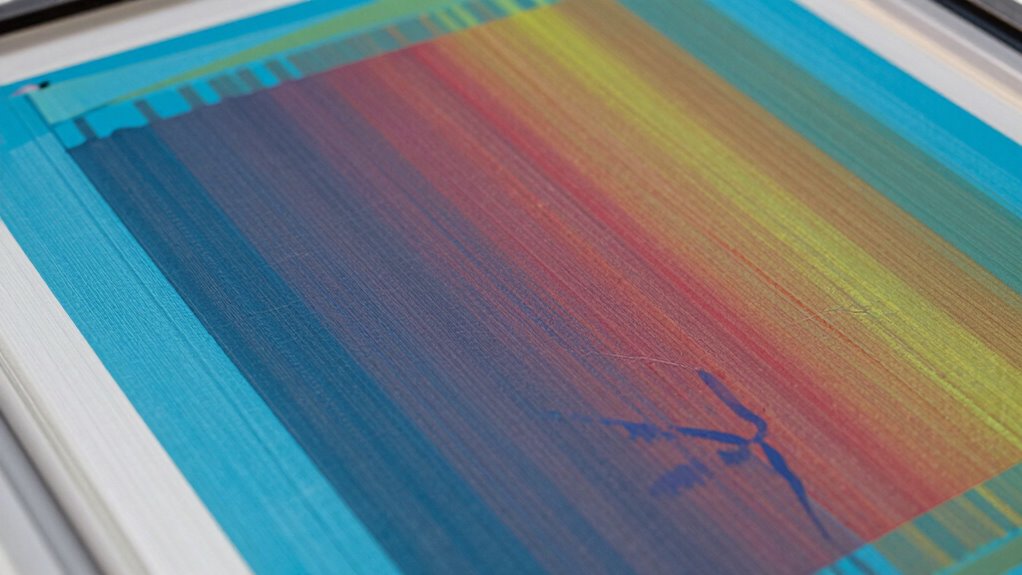
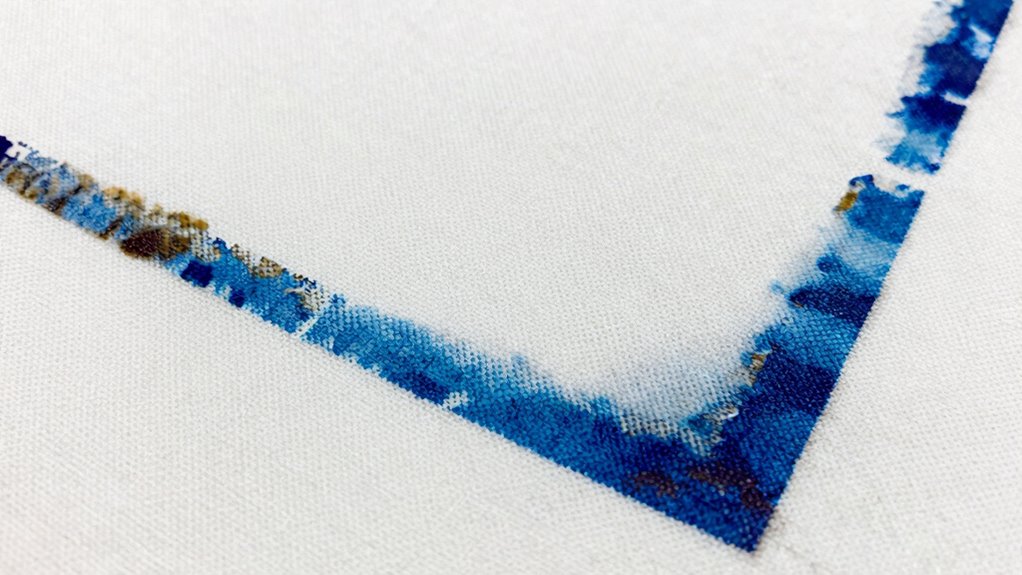
Why Do Fuzzy Prints Occur, and How Can You Fix Them
Fuzzy prints often occur when the screen mesh is too coarse or the ink is improperly applied, allowing ink to spread beyond the intended design edges. This can happen if you rush substrate preparation or don’t verify color matching beforehand. To fix this, consider these steps:
Fuzzy prints result from coarse mesh or improper ink application causing ink spread beyond design edges.
- Use a finer mesh to improve detail and reduce ink spread
- Ensure proper substrate preparation for a clean, smooth surface
- Adjust ink viscosity for better control during printing
- Double-check color matching to prevent excess ink layers
- Incorporate energy-efficient equipment to optimize printing processes and minimize waste, especially when working with coarse mesh screens that can contribute to fuzzy results.

Woodzilla Press for Lino Printing (5.875 inches x 8.25 inches | A5), Mint
MADE IN THE NETHERLANDS - Uniquely engineered presses combine superior craftsmanship and performance at an accessible price
As an affiliate, we earn on qualifying purchases.
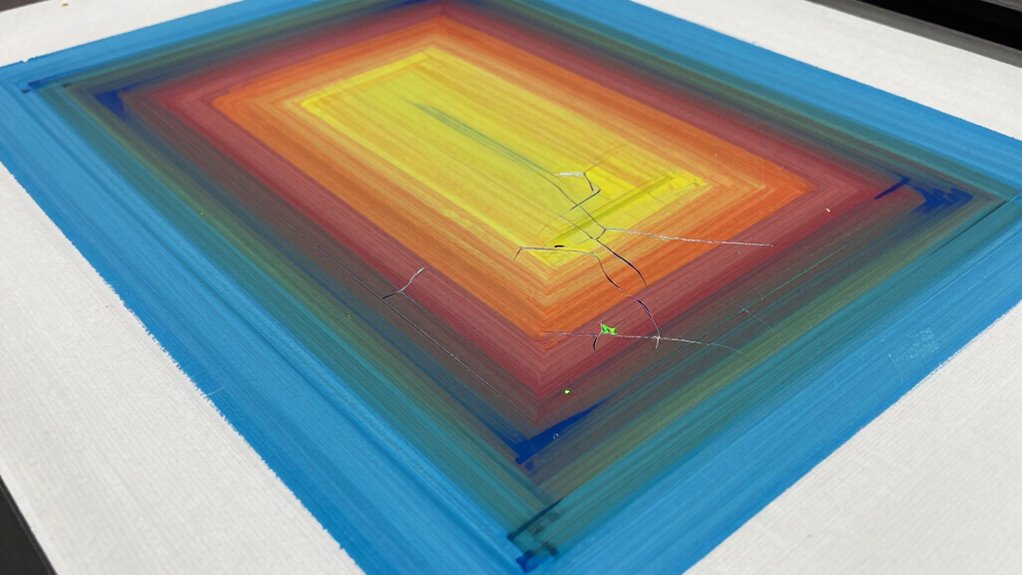
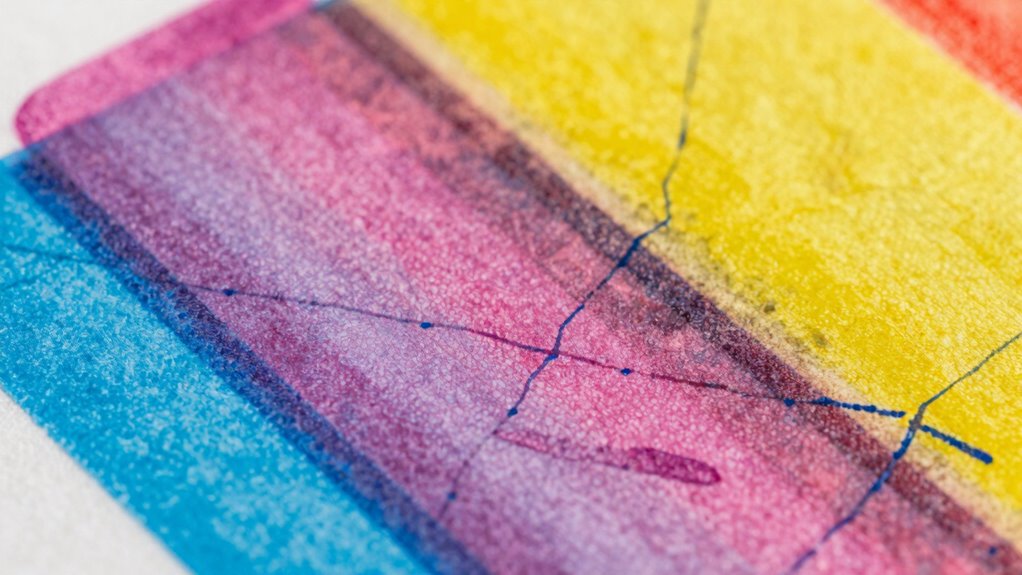
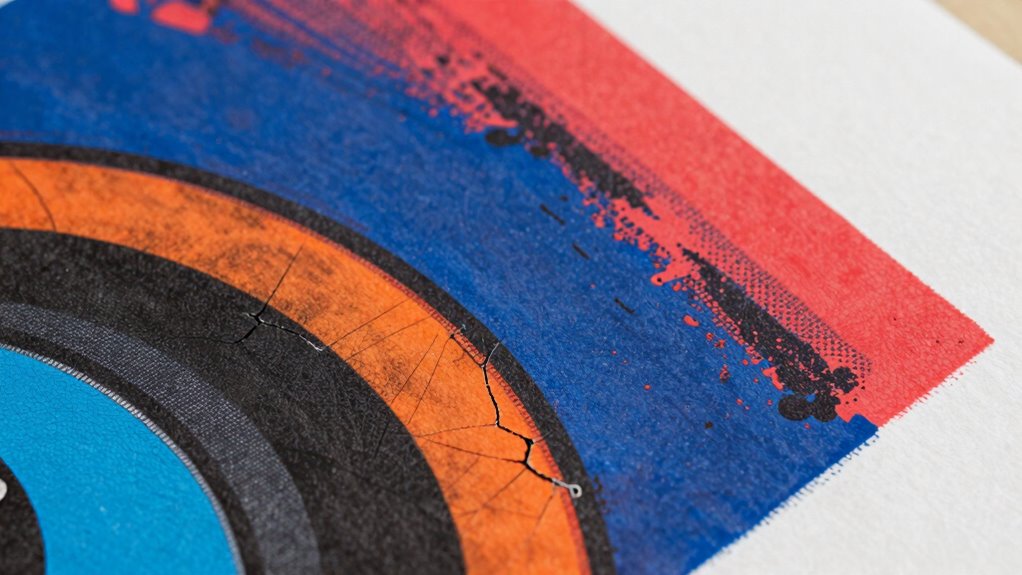
How Does Bleeding Happen in Screen Printing, and How to Prevent It
Bleeding in screen printing often happens when ink spreads beyond the intended design. To prevent this, you need to guarantee the ink has proper consistency, the right mesh is used, and registration techniques are accurate. Mastering these points helps you achieve clean, sharp prints without unwanted spreading. Additionally, controlling the ink flow and ensuring proper curing can further reduce bleeding issues. Using essential oils such as peppermint or lavender may help in reducing residual ink buildup on screens, facilitating cleaner prints. Proper maintenance and cleaning of the screens also play a crucial role in preventing bleeding and ensuring crisp results.
Proper Ink Consistency
Proper ink consistency is essential in screen printing because if the ink is too thick or too thin, it can lead to bleeding beyond the intended design areas. Maintaining proper ink viscosity ensures sharp, clean edges. To achieve this, focus on consistency control by:
- Regularly checking the ink’s thickness with a stir stick or viscosity cup
- Adjusting the ink with appropriate thinners or additives
- Stirring thoroughly to prevent clumps or uneven flow
- Monitoring the ink during printing sessions to catch changes early
- Using calibrated tools to maintain consistent ink viscosity across printing runs as recommended by industry standards.
Use of Proper Mesh
Using the right mesh size is essential in preventing ink from bleeding beyond your design areas. A higher mesh count provides finer detail and reduces ink flow, minimizing bleeding, while a lower count allows more ink, increasing the risk. Ensuring proper mesh tension is equally important; too loose or too tight mesh can cause uneven ink deposition, leading to bleeding or fuzzy edges. Select a mesh that matches your design’s detail level and ink type. Consistent tension during screen preparation helps maintain sharp edges and prevents ink from seeping into unwanted areas. By choosing the correct mesh count and maintaining proper tension, you control ink flow precisely, reducing bleeding and achieving cleaner, more defined prints. Additionally, understanding the solar system and energy insights can help you optimize your printing environment with better temperature regulation and energy efficiency.
Accurate Registration Techniques
Accurate registration is essential in screen printing because misalignment between colors or design elements can cause bleeding and blurred edges. To achieve top registration accuracy, you need reliable alignment techniques that keep your screens perfectly aligned throughout the process. Consistently checking registration marks helps spot misalignments early. Use registration pins or registration guides to maintain precise positioning between screens. Make sure your screens are securely mounted to prevent shifts during printing. Regularly calibrate your equipment to maintain alignment accuracy. By implementing these alignment techniques, you reduce the chances of bleeding, resulting in sharp, professional prints. Consistent registration not only improves quality but also minimizes waste and reprints, saving you time and money in the long run.

Lounsweer Block Printing Press Linocut Hand Letterpress Machine Adjustable Height Model B Steel Press for Printmaking Block Printing Supplies
Ideal for Enthusiasts: perfect for printmaking lovers, this block printing press accommodates prints up to 6 x 8...
As an affiliate, we earn on qualifying purchases.
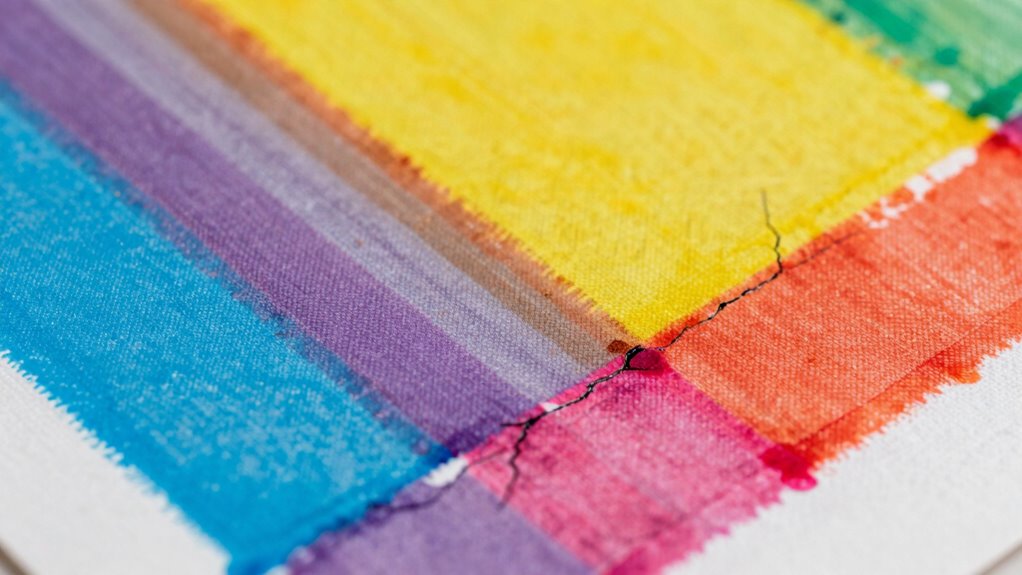
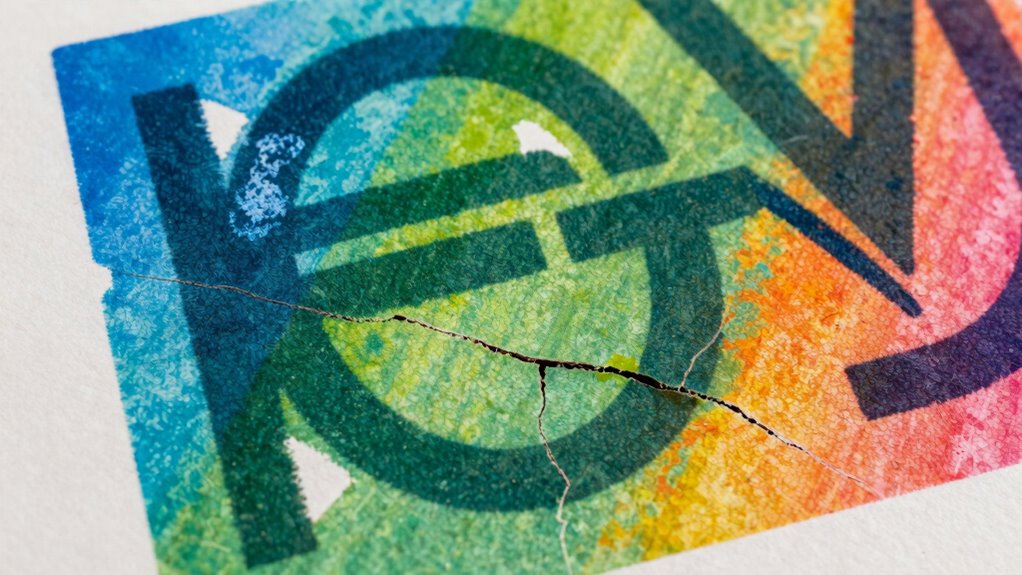
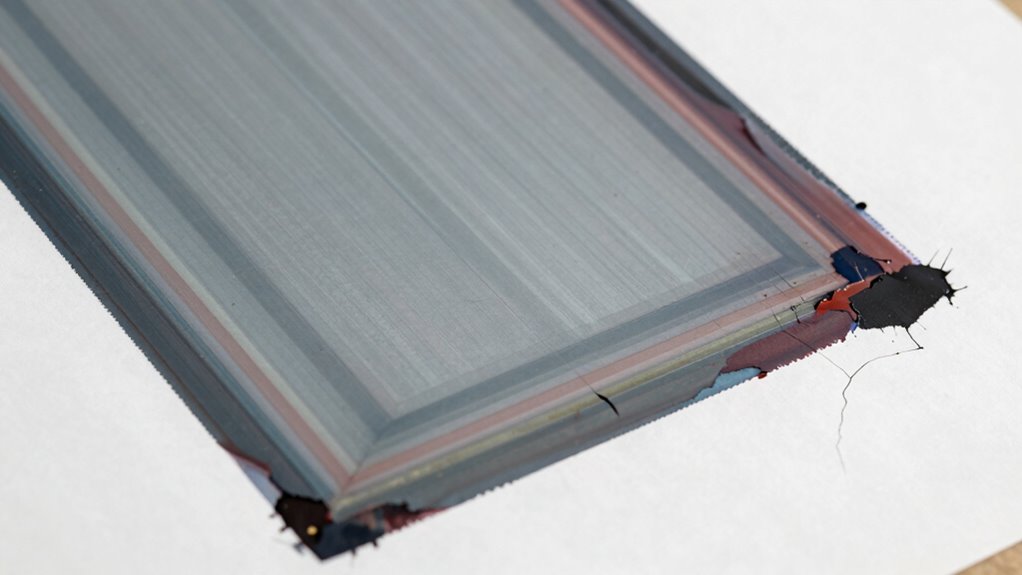
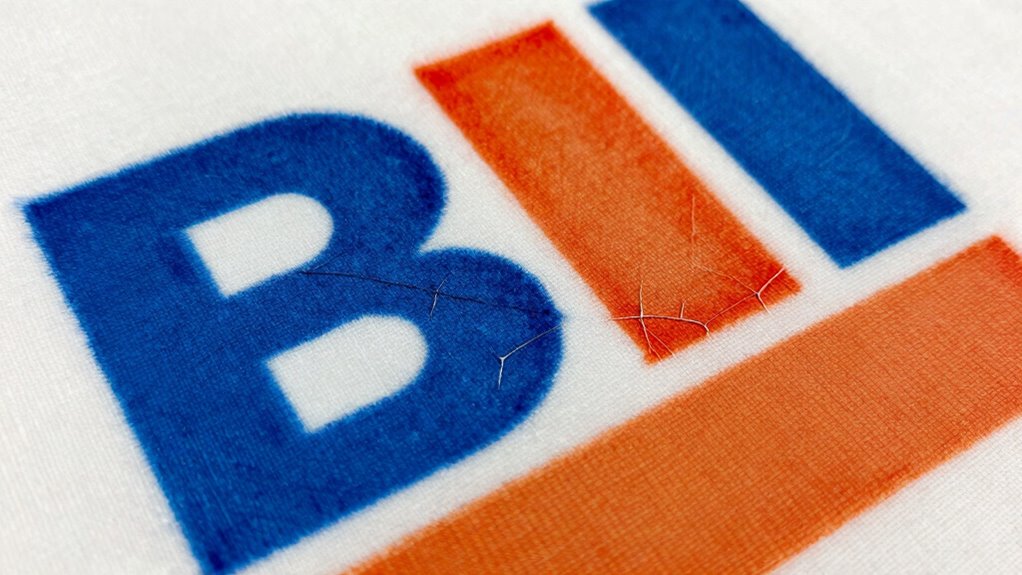
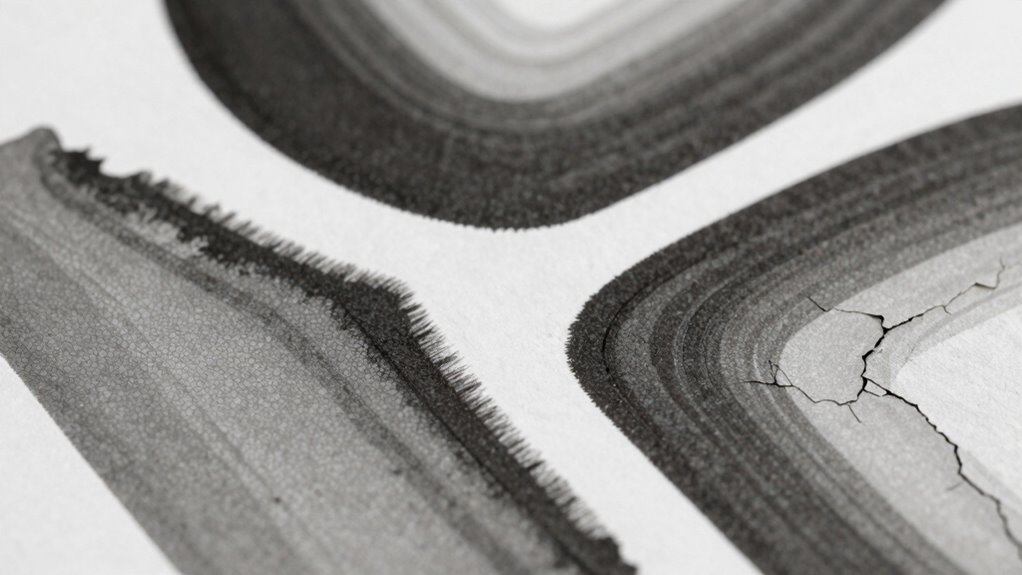
What Causes Cracks in Screen Prints, and How to Avoid Them
Cracks in screen prints often happen when you don’t use proper tensioning, select the right ink and emulsion, or guarantee thorough curing. If your screen isn’t tensioned correctly, it can cause stress and cracking during printing or drying. Choosing suitable materials and drying your prints properly helps prevent cracks and results in a clean, durable finish. Additionally, understanding seasonal maintenance can help you keep your equipment in optimal condition to avoid issues like cracking. Regular equipment upkeep and using appropriate filtration can also reduce the risk of imperfections such as cracks. Maintaining proper screen tension throughout the process is essential to prevent stress buildup that leads to cracking.
Proper Screen Tensioning Techniques
Proper screen tensioning is essential to prevent cracks in your prints, as uneven or insufficient tension puts stress on the mesh and causes it to weaken or break. When you achieve proper screen tension, you ensure consistent mesh stretching, which helps produce sharp, crack-free images. To do this effectively:
- Check tension with a tension meter for accuracy
- Tighten the frame evenly to avoid uneven stress
- Avoid over-tightening, which can cause mesh damage
- Regularly inspect the mesh for signs of slack or wear
- Additionally, understanding the materials of your screen can help you select the best mesh for durability and tension retention. Using the correct mesh count for your project can also improve tension stability and print quality.
Maintaining consistent screen tension minimizes stress points that lead to cracking. Proper tensioning distributes pressure evenly during printing, reducing the risk of damage over time. Remember, well-tensioned screens are key to durable, high-quality prints without cracks.
Correct Ink and Emulsion Selection
Choosing the right ink and emulsion is essential because using incompatible or low-quality materials can lead to cracks in your prints. Make certain your ink has proper consistency; too thick or too thin inks can cause stress and lead to cracking as the print dries. Select an emulsion with high quality and suitable thickness for your mesh and substrate. Poor emulsion quality may result in uneven stencil edges, increasing the risk of cracks. Consistent ink flow and a well-made emulsion help maintain even tension and flexibility during printing and drying. Always test your ink and emulsion combinations before a full run. Proper selection minimizes stress on the print, improves durability, and ensures a clean, crack-free finish.
Adequate Curing and Drying
Inadequate curing and drying can cause your screen prints to develop cracks over time. If the ink doesn’t dry properly, the curing process remains incomplete, leaving the print fragile and prone to cracking. To avoid this, guarantee your prints are fully cured before handling or stacking. Factors that affect ink drying include temperature, humidity, and exposure time. Proper curing is essential to strengthen the ink film, reduce brittleness, and prevent cracks from forming later. Additionally, understanding the technologies available can help optimize the curing process for better results. Utilizing advanced curing equipment can improve consistency and efficiency in the drying process, ensuring durable prints.
Key Factors That Affect Print Clarity and Ink Durability
The clarity of your print and the durability of the ink largely depend on several key factors during the screen printing process. One major factor is screen resolution, which affects how sharp and detailed your design appears. A higher resolution ensures crisp edges and clear images. Another essential element is ink adhesion; proper adhesion guarantees the ink bonds well to the substrate, enhancing durability and preventing cracking or peeling. Additionally, consistent tension during screen preparation and correct ink viscosity influence both clarity and longevity. To visualize, consider this:
| Factor | Effect | Tip |
|---|---|---|
| Screen resolution | Sharpness and detail | Use high mesh counts |
| Ink adhesion | Durability and resistance | Proper surface preparation |
| Ink viscosity | Flow and coverage | Adjust for substrate and ink |
| Tension | Print consistency | Maintain even tension |
Best Practices for Preparing Screens and Choosing Inks for Sharp Results
To achieve sharp, high-quality prints, proper preparation of screens and selecting the right inks are fundamental steps. Start by choosing the appropriate screen mesh types; finer meshes are ideal for detailed images, while coarser meshes suit bold designs. When preparing your screen, guarantee proper tension and clean your mesh thoroughly. Selecting inks with suitable drying methods is essential—water-based inks dry faster with air drying, whereas solvent-based inks may require heat curing. Consider these best practices:
- Use the correct screen mesh type for your design detail
- Guarantee proper screen tension for even ink transfer
- Clean screens thoroughly before printing
- Match ink drying methods to your workflow and design complexity
Following these steps will help you achieve crisp, consistent results and avoid common printing issues.
Troubleshooting Persistent Screen Printing Problems
Persistent screen printing problems can be frustrating, but many stem from underlying issues that can be identified and corrected. Poor ink adhesion often causes prints to fade or peel, so verify your ink is suitable for your substrate and properly applied. Check that your screen is clean and free of residual emulsion, as contaminants weaken ink adhesion. Screen durability also plays a role; a worn or damaged screen can lead to inconsistent prints and defects. Regularly inspect your screens for tears or worn mesh, and replace them when necessary. Proper tension and handling extend screen life and improve print quality. By maintaining your screens and choosing the right inks, you can troubleshoot persistent issues and achieve sharper, more durable prints with fewer defects.
How to Select Materials and Equipment to Minimize Defects
Choosing the right materials and equipment is essential for minimizing screen printing defects. Proper material selection guarantees compatibility with your inks and substrates, reducing issues like bleeding or cracking. Equipment optimization involves setting up your screens, squeegees, and drying stations correctly to improve consistency. Consider these tips:
Selecting quality materials and properly setting up equipment minimizes printing defects and ensures consistent results.
- Use high-quality inks suited for your substrate
- Select mesh screens with appropriate mesh counts for detail and ink coverage
- Adjust squeegee durometer and angle for even ink transfer
- Regularly calibrate and maintain your printing press and drying equipment
- Understanding the printing process and how each component interacts can significantly reduce common issues like fuzziness and bleeding.
Maintenance Tips to Keep Your Screen Printing Setup in Top Shape
Regular maintenance is essential to keep your screen printing setup operating smoothly and to prevent costly defects. Start with regular screen cleaning to remove ink buildup and debris that can cause fuzzy prints or bleeding. Use appropriate cleaning solutions to guarantee screens are thoroughly cleaned without damaging the mesh. Additionally, perform equipment calibration routinely to maintain consistent ink deposit and registration. Proper calibration ensures your squeegee pressure, mesh tension, and exposure times are accurate, reducing the risk of cracking or uneven prints. Keep drying racks, exposure units, and other tools clean and in good condition. Regular inspections for wear and tear help catch issues early. Staying proactive with screen cleaning and equipment calibration maximizes print quality and prolongs your equipment’s lifespan. Also, consider luggage & bags options that facilitate easy transportation and organization of your printing supplies to streamline setup and teardown processes.
Frequently Asked Questions
How Do Environmental Conditions Influence Screen Printing Quality?
Environmental conditions greatly influence your screen printing quality. You need to focus on humidity control and temperature regulation to prevent issues like fuzzy prints or bleeding. High humidity can cause inks to spread, while low humidity might lead to cracking or incomplete drying. Maintaining a stable temperature ensures consistent ink flow and adhesion. By managing these factors, you’ll achieve sharper, cleaner prints and reduce defects, making your process more dependable and professional.
What Are the Best Indicators of a Properly Prepared Screen?
You can tell your screen is properly prepared when the screen tension feels firm and even, ensuring crisp, clear prints. Check that the emulsion thickness is consistent across the mesh, providing a solid stencil. If the tension maintains its strength after stretching and the emulsion is evenly coated, your screen’s ready. These indicators help prevent fuzziness, bleeding, and cracking, leading to high-quality prints every time.
How Does Ink Viscosity Affect Print Sharpness and Durability?
Did you know that ideal ink viscosity can boost print sharpness by up to 30%? When you maintain proper ink consistency, it guarantees your prints are crisp and durable. Too thick, and it causes cracking; too thin, and bleeding occurs. Viscosity adjustment helps you fine-tune ink flow, resulting in sharper images that last longer. Proper ink viscosity directly enhances both the appearance and longevity of your screen-printed designs.
Can Substrate Material Impact the Likelihood of Defects?
Yes, your substrate material can impact defect likelihood. If the substrate isn’t compatible with your ink, issues like bleeding or fuzzy prints can occur. Material porosity plays a key role; highly porous surfaces may absorb ink unevenly, causing cracking or blurry images. To minimize defects, guarantee your substrate matches the ink’s compatibility and consider its porosity level, which helps achieve sharp, durable prints without unwanted bleeding or cracking.
What Role Does Curing Time Play in Preventing Cracking and Bleeding?
Curing time plays a vital role in preventing cracking and bleeding by ensuring proper ink adhesion and maintaining ink flexibility. If you don’t cure long enough, the ink may not bond well, leading to cracking, or remain too soft, causing bleeding. You should follow the recommended curing duration to optimize ink adhesion and flexibility, reducing the chances of these defects. Proper curing results in a durable, high-quality print.
Conclusion
By understanding common defects like fuzziness, bleeding, and cracking, you can improve your screen printing results. Proper preparation, material choice, and maintenance are key to achieving sharp, durable prints. Are you ready to transform your screens into flawless works of art? With the right techniques and attention to detail, you’ll turn printing mishaps into opportunities for mastery. Keep practicing, and watch your prints become clearer and more professional every time.