To prevent bleed when stenciling, use painter’s tape to secure your stencil firmly, ensuring it stays in place during application. Work with a dabbing motion using a small brush or foam applicator, applying minimal paint and tapping off excess to avoid overloading. Before painting, lightly seal the edges with a clear spray sealer or acrylic varnish to create a barrier. Perfecting these steps will help you achieve crisp, clean designs—continue with these tips to master professional results.
Key Takeaways
- Use low-tack painter’s tape or apply a thin layer of stencil adhesive to secure the stencil firmly.
- Employ dabbing or stippling techniques with a small, flat brush to deposit paint gently and prevent bleed.
- Lightly seal edges with a clear spray sealer or acrylic before painting to block seepage.
- Build coverage gradually with multiple thin coats, working from the center outward.
- Carefully lift the stencil while paint is wet or dry, then touch up any bleed with a fine brush.
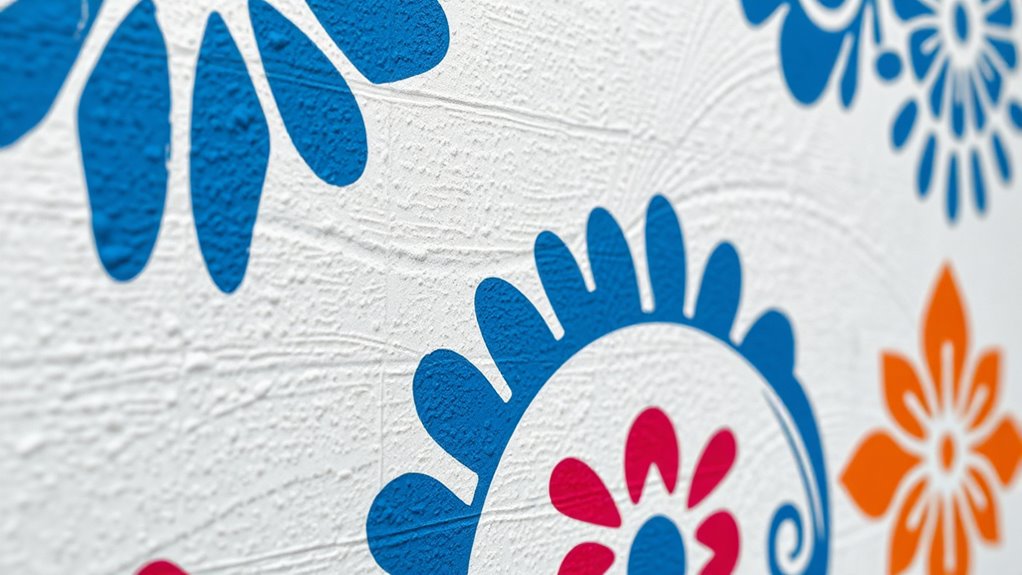
Stenciling can be a fun and creative way to add designs to your walls or crafts, but one common challenge is preventing paint from bleeding under the edges. To achieve sharp, clean lines, you need to master certain techniques, especially when it comes to brush techniques and the use of stencil adhesives. Your goal is to control the paint application so it stays within the stencil borders without seeping underneath.
Start by choosing the right brush. A small, flat brush works best for detailed areas, while a foam or stencil brush can help you dab on paint without overloading. When applying paint, avoid dipping your brush too deep; instead, load only a small amount of paint and tap off excess. This way, you’re less likely to push paint under the stencil edges. Use a dabbing motion rather than brushing back and forth, which can cause paint to bleed and smudge. Light, stippling strokes help deposit just enough paint and keep the edges crisp.
Choose a small, flat or foam brush; dab gently to keep edges sharp and paint from bleeding.
Stencil adhesives play a critical role in keeping your stencil firmly in place. Before you begin, apply a thin layer of stencil adhesive to the back of your stencil, then press it firmly onto the surface. This prevents shifting, which can create gaps where paint can bleed. Make sure to follow the adhesive instructions for drying times; a tacky surface ensures your stencil stays put without slipping. If you prefer a less permanent option, low-tack painter’s tape can also work, but adhesive remains the most reliable for sharp results.
Once your stencil is in place, consider sealing the edges before you start painting. Lightly misting the stencil with a clear spray sealer or applying a thin layer of clear acrylic can help lock the edges down. This creates a barrier that minimizes paint seepage, especially when using thicker paints or sponges. When you start dabbing or brushing, work from the center outward, avoiding heavy layers that might seep under the edges. Use a gentle touch, applying paint gradually—building up coverage in multiple light coats rather than one thick layer.
After finishing, lift the stencil carefully while the paint is still slightly wet or fully dry, depending on your paint type, to prevent smudging. If you notice any bleeding or uneven edges, use a fine brush to touch up those areas. Practicing proper brush techniques and correct adhesive application can significantly improve the crispness of your stenciled patterns. With practice, your brush techniques and proper use of stencil adhesives make it easier to achieve crisp, professional-looking results without bleed. Keep these tips in mind, and your stenciling projects will turn out cleaner and more precise every time.

4 Rolls Premium Painters Tape, Blue Tape, Masking Tape, Paint Tape for Multi-Purpose, Painting, Painter's, DIY Crafts Arts (88yd =0.94IN*22yd*4) Decoration Labeling No Residue, Easy Removal
- Multi-Surface Adhesive Tape: High-quality, UV and moisture resistant blue crepe paper
- Easy to Tear and Use: Hand-tearable 0.94 inch wide tape for precise application
- Residue-Free Removal: Medium adhesion tape leaves no damage or residue
As an affiliate, we earn on qualifying purchases.
As an affiliate, we earn on qualifying purchases.
Frequently Asked Questions
Can I Reuse Stencils Multiple Times Without Bleeding?
Yes, you can reuse stencils multiple times without bleeding if you follow proper stencil maintenance and reuse tips. Clean your stencil thoroughly after each use to prevent paint buildup. Store it flat or in a protective sleeve to avoid warping. When reusing, confirm the paint is completely dry and apply light, even coats. These steps help maintain your stencil’s integrity and keep your designs crisp and bleed-free every time.
What Type of Paint Is Best for Crisp Stenciling?
Think of your paint as a fine mist, delicate yet precise. For crisp stenciling, acrylic or latex paint works best because it has the right consistency—not too thick or thin. Use gentle brush techniques, dabbing rather than brushing, to avoid bleeding. Keep the paint slightly thinned if needed, ensuring it doesn’t pool or seep under the stencil. This approach helps you achieve sharp, clean edges every time.
How Do I Fix Mistakes Without Ruining the Design?
To fix mistakes without ruining your design, start by carefully cleaning stencil edges with a damp cloth to remove excess paint. Use masking tape techniques to gently lift any smudges or unwanted paint without disturbing the surrounding area. If needed, dab lightly with a small brush or sponge to correct small errors. Patience and precision help you maintain crisp lines while fixing mistakes seamlessly.
Is Primer Necessary Before Stenciling?
They say, “Better safe than sorry,” and that’s true when it comes to stenciling. Primer isn’t always necessary, but it greatly improves stencil adhesion, especially on slick or uneven surfaces. Using a primer guarantees your design stays crisp and prevents bleed-through. If your surface is porous or prone to absorbing paint, applying primer is a smart move. It’s a simple step that can save you time and frustration later.
How Long Should I Let Seal Coats Dry?
You should let seal coats dry for at least 24 hours to guarantee proper curing, but this can vary based on humidity and temperature. For the ideal seal coat duration, check the manufacturer’s instructions on the product label. If you notice a matte finish and no tackiness, it’s likely dry. Avoid applying additional coats or starting your project until the seal coat is fully dry to prevent smudges or bleeding.
Conclusion
Now that you know how to prevent bleed with taping, dabbing, and seal coats, you’re ready to create crisp, clean designs. Imagine your stencil edges sharp and flawless, like they were cut with precision. Isn’t it satisfying to see your artwork come to life without smudges or blurs? With these tips, you’ll master clean stenciling every time. So go ahead—what masterpiece will you bring to life today with perfect, bleed-free edges?