
To make DIY paper lanterns, gather lightweight, colorful translucent paper, sturdy wire or string, and your preferred decorating supplies. Measure and cut the paper into your desired shape, then shape it into a cylinder, securing the edges with glue or tape. Decorate your lantern with markers, stickers, or washi tape, and attach a handle or loop for hanging. Finally, insert a safe light source like LED string lights and hang your creation. If you’re interested in detailed steps, keep exploring for more.
Key Takeaways
- Gather colorful, lightweight paper, sturdy wire or string, and basic crafting tools like scissors, glue, and ruler.
- Measure and cut the paper into desired sizes, then shape and secure it into a cylindrical lantern form.
- Decorate the lantern with paint, stickers, or washi tape for visual interest and theme matching.
- Attach a handle or loop for hanging, ensuring strong knots or glue for safety.
- Insert LED or flameless lights inside, secure wiring, and hang at varying heights for an attractive display.
Gathering Your Materials and Tools
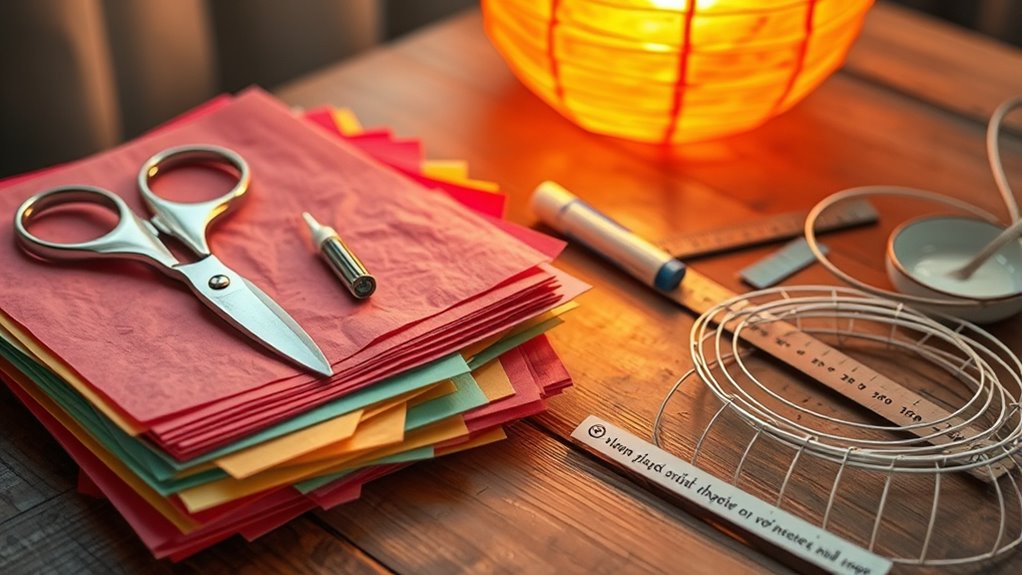
Before you begin crafting your paper lanterns, it’s important to gather all the necessary materials and tools. You’ll need lightweight paper, such as tissue or craft paper, and a sturdy wire or string for hanging. Have scissors ready to cut the paper into your desired shapes, and use glue or double-sided tape to hold everything together. A pencil helps with sketching designs, while a ruler ensures straight lines. You might also want a craft knife for detailed cuts and a hot glue gun for extra stability. Don’t forget to prepare a safe workspace with newspaper or a mat to protect surfaces. Collecting all these items beforehand streamlines the process and keeps your project organized. Additionally, choosing appropriate materials ensures your lanterns are durable and visually appealing. It’s also helpful to consider popular lantern styles to inspire your designs. Being aware of curved or intricate cuts can help you create more detailed and attractive lanterns. Incorporating sustainable materials can enhance eco-friendliness and longevity of your lanterns. Moreover, understanding space optimization tips can help you design larger or more complex lanterns without cluttering your workspace. Once everything’s set, you’re ready to start creating your beautiful paper lanterns.
Choosing the Perfect Paper and Design
Choosing the right paper and design sets the tone for your lantern’s appearance. Opt for lightweight, translucent paper like rice or tissue paper to create a soft, glowing effect. Bright colors can make your lantern stand out, while pastels add a subtle charm. Consider patterns or cut-out designs to add visual interest; intricate cut-outs cast beautiful shadows when lit. If you want a more uniform look, plain paper works best. Think about your event or space—festive themes might call for bold patterns, while elegant gatherings suit simple designs. Remember, your choice of paper and design reflects your style and the mood you want to create. Incorporating sound vibrations into your creative process can also inspire unique patterns and textures for your lanterns. Using keto-friendly ingredients in your crafting supplies, like natural dyes or eco-friendly papers, can add a healthy touch to your project. Additionally, selecting appropriate paper weight can influence the durability and appearance of your lanterns. Understanding the wax types used in candle making can also inspire innovative paper choices that enhance durability and visual appeal.
Measuring and Cutting the Paper
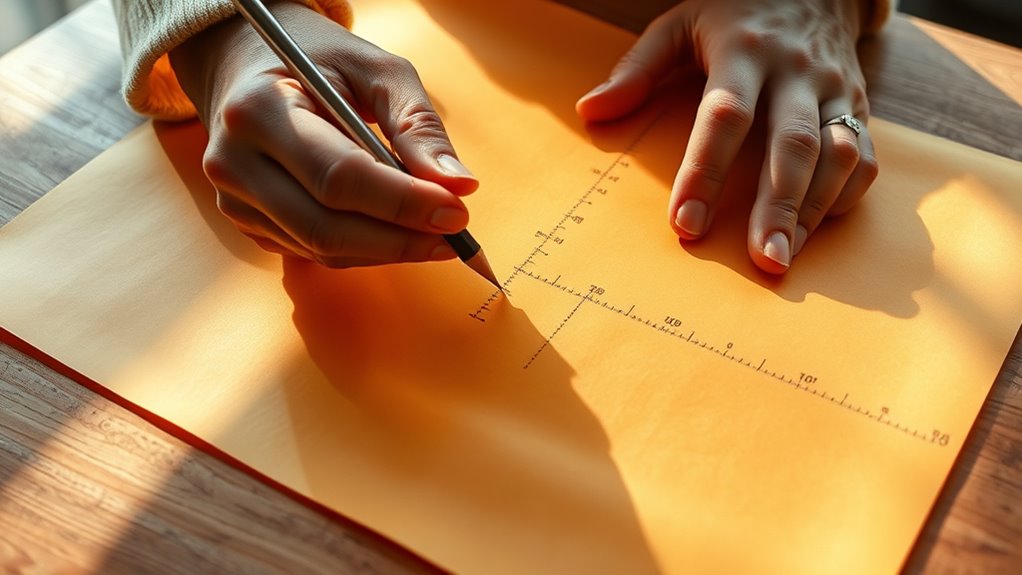
How do you guarantee your paper lantern turns out perfectly shaped? The key is precise measuring and cutting. Start by deciding the size of your lantern, then use a ruler or measuring tape to mark your paper accordingly. Remember to add extra inches for folding and overlap if needed. Use sharp scissors or a craft knife to cut along your marked lines carefully. Keep your cuts straight and smooth to ensure a clean edge. Double-check your measurements before cutting to avoid mistakes. If you’re making multiple lanterns, measure and cut each piece consistently for uniformity. Taking your time with accurate measurements and neat cuts makes assembly easier and results in a professional-looking lantern. Paying attention to exfoliation techniques can also enhance the overall appearance of your paper crafts. Additionally, understanding electric power generation with bike generators can inspire eco-friendly approaches to crafting and lighting your lanterns. Being aware of market trends and insights can help you choose the right materials and designs to make your lanterns more appealing and trendy.
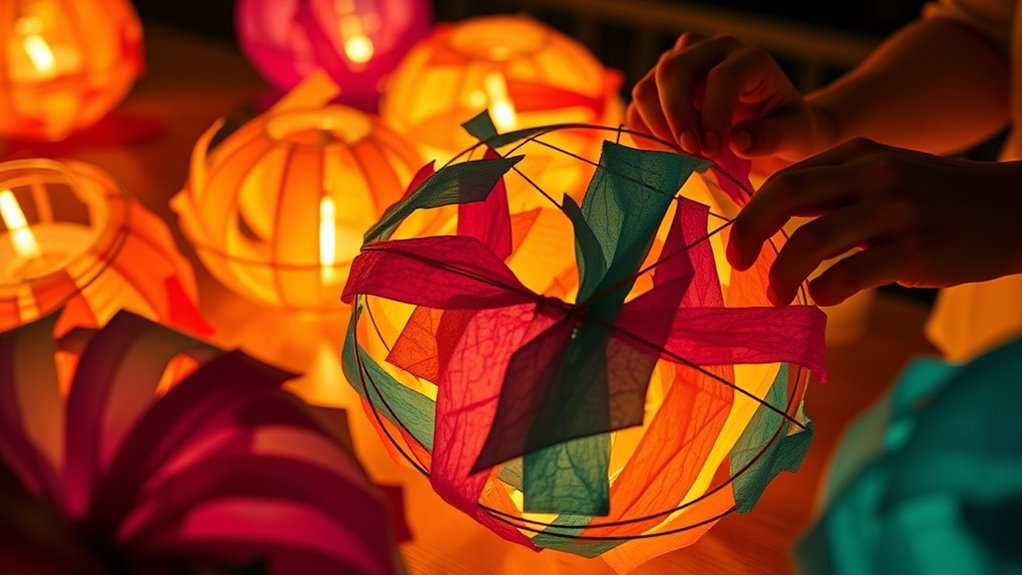
Creating the Lantern Shape
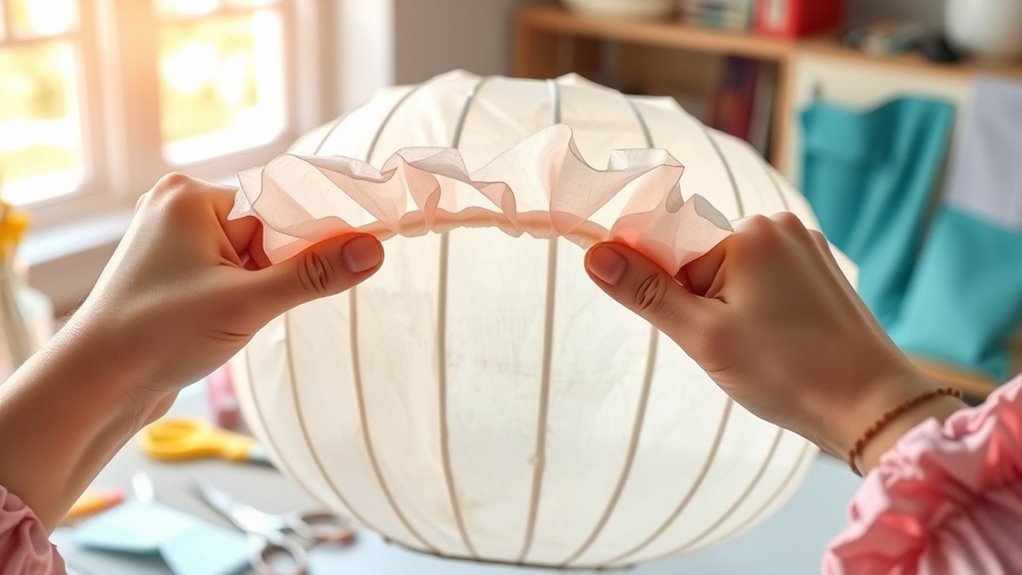
Once you have your paper cut to size, the next step is shaping it into a lantern. Start by gently curling the long edges inward to form a cylinder, ensuring the sides meet evenly. Use a bit of glue or double-sided tape along the seam to secure the shape. For a more uniform curve, you can run a pencil or ruler along the edges before curling. If your design includes a top and bottom rim, fold the edges inward to create a clean, finished look. Be careful to keep the shape symmetrical, as this will make your lantern look polished. Once the cylinder is secure, you can adjust the shape as needed before moving on to decorating or adding a handle. Additionally, considering the tire pressure when preparing your bike can help ensure a smooth ride on different terrains. Incorporating material choices that are lightweight yet sturdy can enhance the durability and appearance of your lantern.
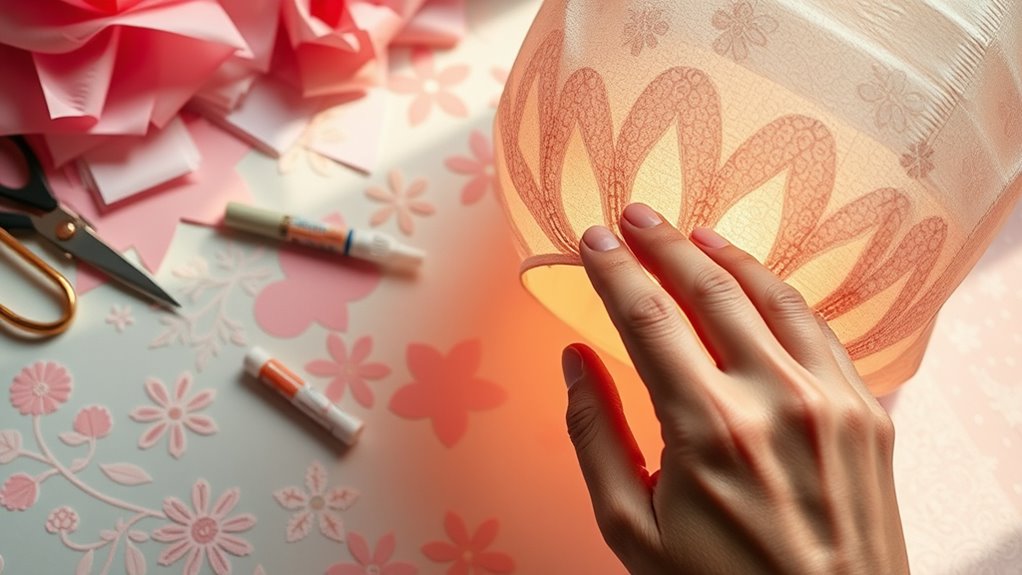
Decorating and Personalizing Your Lantern
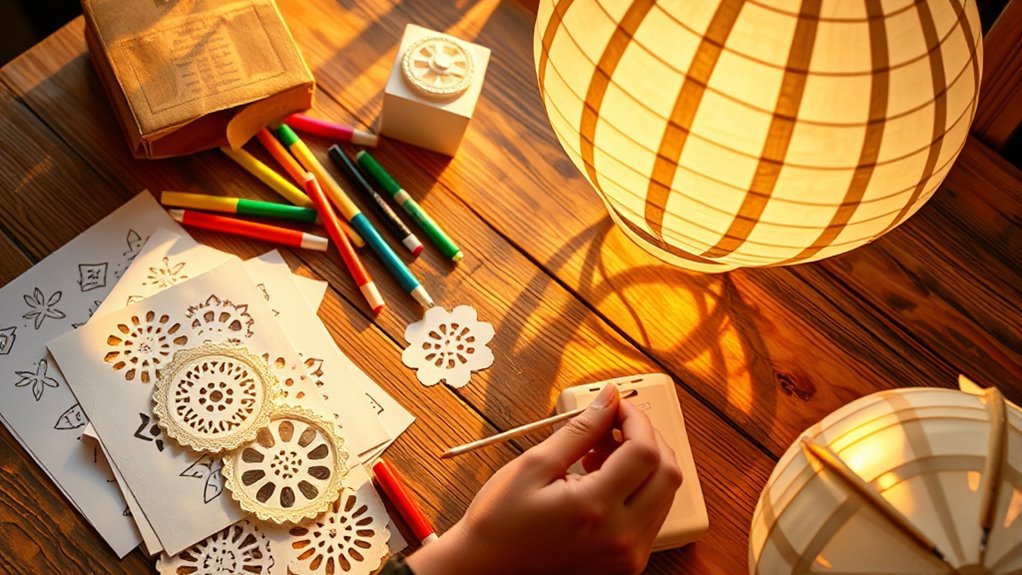
After shaping your lantern, it’s time to get creative with decorations that reflect your style. You can paint, draw, or use markers to add patterns, designs, or personal messages. Stickers, washi tape, or even cut-out paper shapes can create fun accents. If you want a more textured look, add fabric, lace, or ribbon around the edges. Glitter or metallic pens can give your lantern a shimmering effect. For a softer ambiance, consider layering tissue paper or adding translucent overlays. Remember, this is your project, so feel free to experiment with colors and textures. Personal touches make your lantern unique and special, turning a simple craft into a memorable decoration. Enjoy expressing your creativity and making your lantern truly one-of-a-kind.
Assembling the Lantern Frame
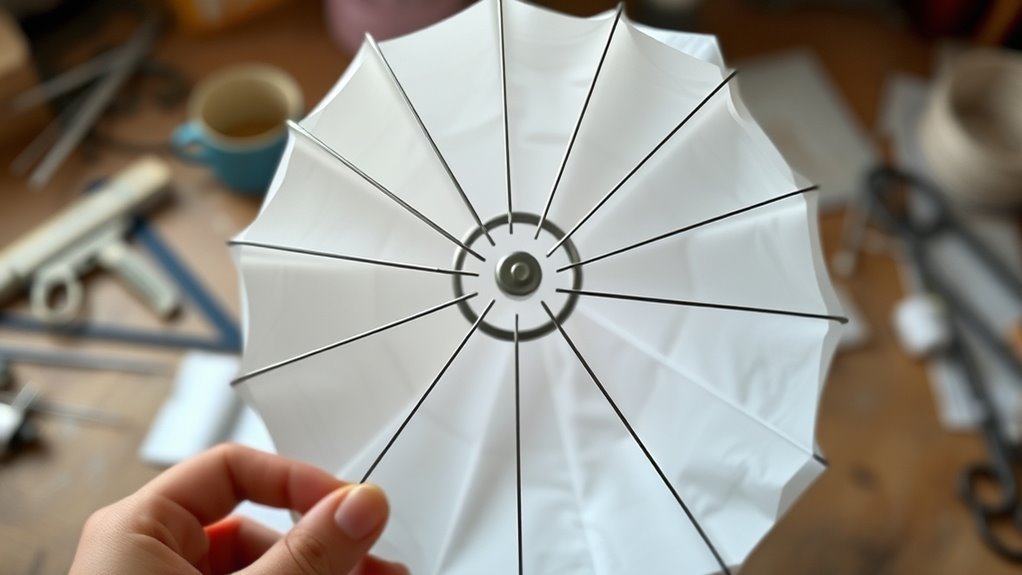
To assemble the lantern frame, start by gathering your pre-cut paper pieces and any supporting materials like wire or dowels. Lay out the pieces to visualize how they’ll fit together. Use a ruler and pencil to mark fold lines or connection points if needed. If your design includes a wire or dowel frame, insert it into the designated slots or create a structure by connecting pieces with glue or tape. Keep the frame sturdy by reinforcing joints with extra glue or small strips of tape. Make sure the frame shape is symmetrical and balanced, which will help your lantern hang evenly. Once assembled, double-check all connections to ensure stability before attaching the paper cover in the next step. Ensuring proper structural integrity at this stage will help your lantern last longer and remain safe during use.
Attaching the Handle or Hanging Loop
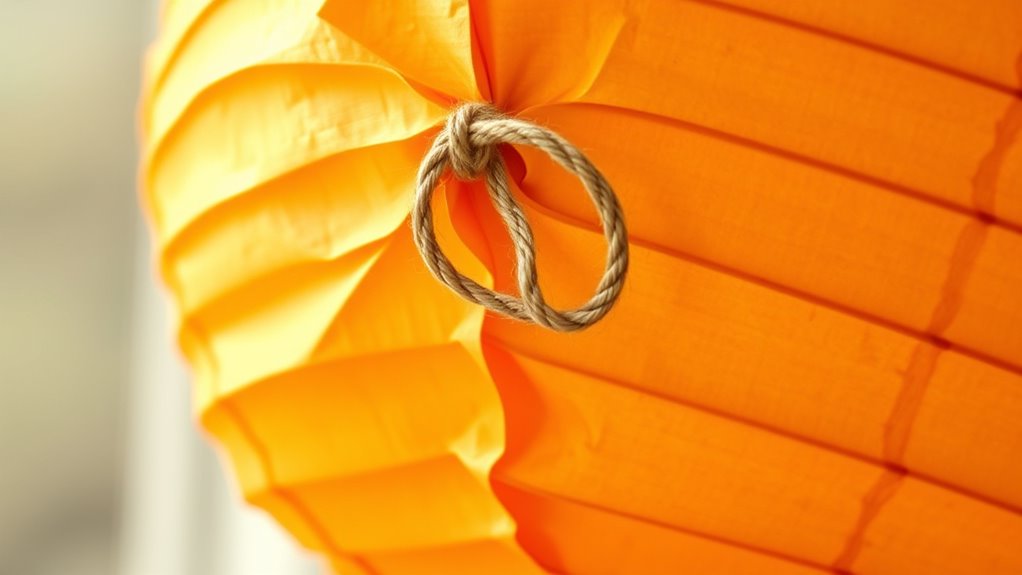
When attaching the handle or hanging loop, start by selecting a sturdy material such as a thick cord, ribbon, or metal wire that can support the weight of the lantern. Next, follow these steps to guarantee a secure attachment:
- Punch or poke two small holes at the top of the lantern, evenly spaced.
- Thread your chosen material through each hole, pulling it tight.
- Tie sturdy knots or secure with adhesive to prevent slipping.
- Ensure the self watering planters are filled with water before hanging to prevent the lantern from becoming too heavy when filled. Using a durable material that aligns with automation in business can help ensure long-term durability and safety.
Make sure the handle or loop is firmly attached, so it can hold the lantern safely when hung. Use strong knots or seamless connections to avoid any risk of detachment. Once secure, test the handle’s strength by gently pulling before hanging your lantern. This ensures your lantern stays safe and looks great.
Installing the Light Source
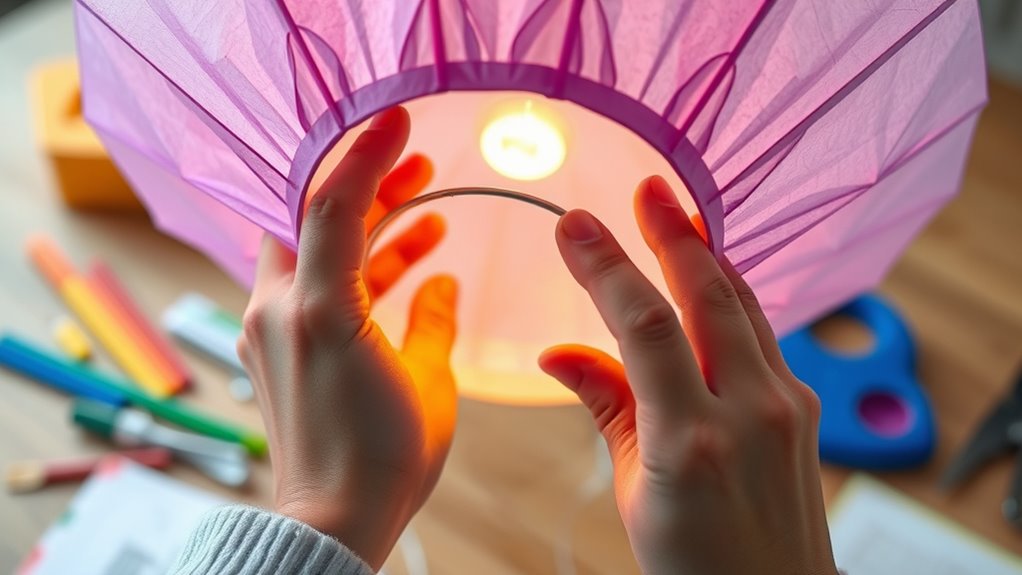
Have you decided on the type of light source for your paper lantern? If so, it’s time to install it carefully. For LED tea lights or flameless candles, simply place them inside the lantern’s base or secure them with double-sided tape if needed. If you’re using a small bulb or string lights, create a small opening at the top or side of the lantern to insert the wiring or bulb socket. Make sure the light source is stable and won’t shift or fall. Use hot glue or tape to secure it in place if necessary. Remember to leave enough room for wiring and ensure the light is easily accessible for turning on and off. Safety and electrical safety are key. Additionally, choosing the right light source can enhance the ambiance and safety of your lantern. Proper ventilation is also important to prevent overheating and ensure safe operation. Ensuring proper installation techniques can help prevent potential fire hazards and improve the durability of your lantern.
Displaying and Enjoying Your DIY Paper Lantern
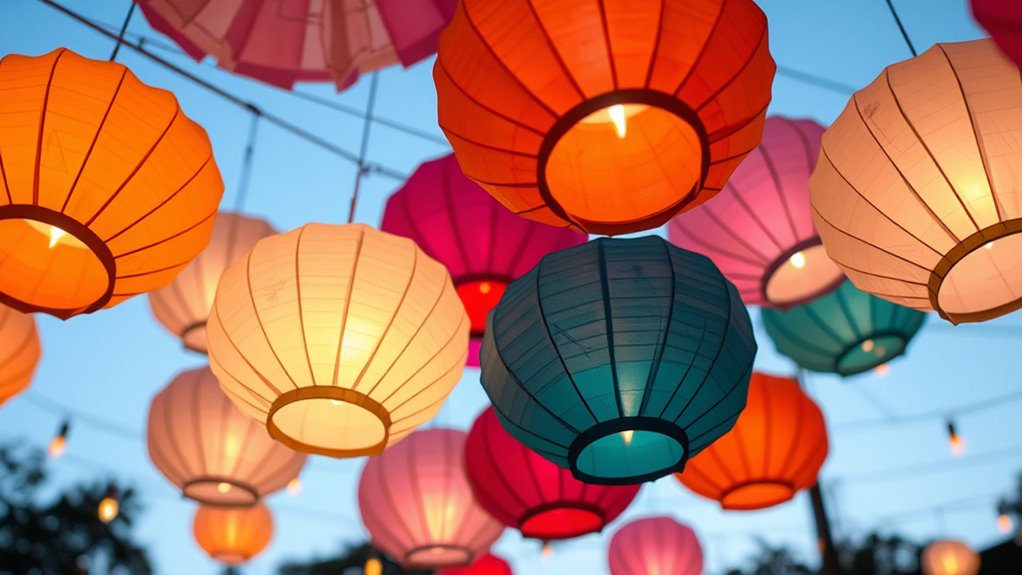
Once your paper lanterns are ready, you can explore different hanging techniques and tips to showcase them beautifully. Consider the best lighting arrangements to create a cozy or festive atmosphere. Get creative with decor ideas to make your space uniquely yours and truly enjoy your handmade lanterns.
Hanging Techniques and Tips
Hanging your DIY paper lanterns effectively can transform any space into a charming atmosphere. To achieve this, follow these tips:
- Use appropriate hooks or adhesive strips that won’t damage the paper or wall. Choose lightweight hooks for ceiling or wall mounting.
- Balance the lanterns evenly to prevent swinging or tilting. Adjust the height for a layered look or to highlight specific areas.
- Secure the strings or wires tightly to avoid accidental falls, especially if hanging outdoors or in high-traffic areas.
Make sure to test the placement before finalizing the hang. Consider the surrounding decor and lighting to maximize visual appeal. With proper hanging techniques, your paper lanterns will look stunning and stay secure.
Ideal Lighting Arrangements
Are you wondering how to best showcase your DIY paper lanterns to create a warm, inviting ambiance? Start by choosing the right placement—hang them at varying heights to add visual interest and depth. Use warm white or soft-colored bulbs inside your lanterns to emit a gentle glow that enhances the cozy atmosphere. Avoid overly bright or harsh lighting, which can detract from the delicate charm of the paper. Consider grouping lanterns together for a more dramatic effect, or spacing them out for a subtle, elegant look. Dimmer switches allow you to adjust brightness for different moods and occasions. Ultimately, focus on creating layers of light that highlight your lanterns’ beauty while making the space feel welcoming and relaxed.
Creative Decor Ideas
Get creative with how you display and enjoy your DIY paper lanterns to truly make them stand out. You can turn your lanterns into eye-catching focal points with simple ideas. Here are some creative decor tips:
- Hang them at different heights along a string or wire for a whimsical canopy effect.
- Place them in clusters on tables or the floor to create cozy, illuminated zones.
- Use LED string lights inside the lanterns to enhance their glow and add sparkle to any space.
Mix and match colors and sizes to personalize your decor. Incorporate them into outdoor parties, cozy indoor corners, or festive celebrations. With a little imagination, your paper lanterns will transform your space into a charming, inviting atmosphere.
Frequently Asked Questions
How Long Does It Take to Make a Paper Lantern?
Making a paper lantern usually takes about 30 minutes to an hour, depending on your skill level and the complexity of the design. If you’re just starting out, it might take a bit longer as you learn the steps. Gather your supplies, follow the instructions carefully, and stay patient. With a little practice, you’ll be able to create beautiful lanterns quickly and enjoyably for your decorations or celebrations.
Can I Make Lanterns in Different Sizes?
Making lanterns in different sizes is like customizing a wardrobe to fit your style—you can easily vary the dimensions. You simply adjust your measurements when cutting the paper, making larger or smaller lanterns as desired. Using different-sized templates or scaling your designs allows you to create a variety of lanterns that suit any space or occasion. Just keep your measurements precise for consistent and beautiful results.
What Safety Precautions Should I Follow?
When making DIY paper lanterns, safety is key. You should always handle scissors and sharp tools carefully to avoid cuts. Use non-flammable materials and keep your workspace clear of clutter. If you’re using glue or tape, guarantee proper ventilation. When working with lights or candles, never leave them unattended and keep them away from flammable decorations. Always supervise children during the process to prevent accidents.
Are There Eco-Friendly Materials I Can Use?
You’re wondering if eco-friendly materials exist for making DIY paper lanterns. Yes, you can use recycled or sustainably sourced papers, like bamboo or hemp paper, which are biodegradable and eco-conscious. Opt for natural dyes instead of synthetic ones to reduce chemical impact. Using LED lights instead of traditional candles also minimizes environmental harm. By choosing these materials, you create beautiful lanterns that are both charming and environmentally responsible.
How Durable Are DIY Paper Lanterns Outdoors?
You might worry that DIY paper lanterns won’t last outdoors, but with proper materials, they can be quite durable. Use weather-resistant paper and reinforce with waterproof coatings or sealants to protect against rain and wind. Keep in mind, they won’t withstand severe storms, but for mild weather, your handmade lanterns can shine beautifully outside for several days. Just guarantee you choose the right materials and handle them with care.
Conclusion
Now that your paper lantern is glowing softly, it’s like capturing a piece of starlight in your hands. With each flicker, your creation transforms any space into a dreamy oasis. Remember, this lantern isn’t just paper and string — it’s a burst of your creativity shining bright. Hang it high or hold it close, and let your handmade glow be a beacon of your imagination’s magic. Light up the night and cherish your beautiful, handmade masterpiece.