
To sew your own face mask, start by choosing tightly woven fabric like cotton and gather your tools, including elastic or fabric ties, scissors, pins, and a sewing machine. Cut out pattern pieces with seam allowances, then sew the outer and lining layers together, leaving an opening to turn it right side out. Attach elastic or ties securely to guarantee a snug fit and finish with a wash. Follow these steps closely to make a comfortable, effective mask—more details lie ahead.
Key Takeaways
- Select tightly woven fabric and a pattern with proper seam allowances for a snug, effective fit.
- Cut fabric pieces accurately, including pleats and seam allowances, using sharp scissors and pattern templates.
- Sew outer and lining fabrics together with reinforced seams, leaving an opening to turn right side out.
- Attach elastic or fabric ties securely, ensuring a comfortable, snug fit around the ears or head.
- Wash and sanitize the mask thoroughly after each use to maintain hygiene and effectiveness.
Gathering Materials and Preparing Your Workspace
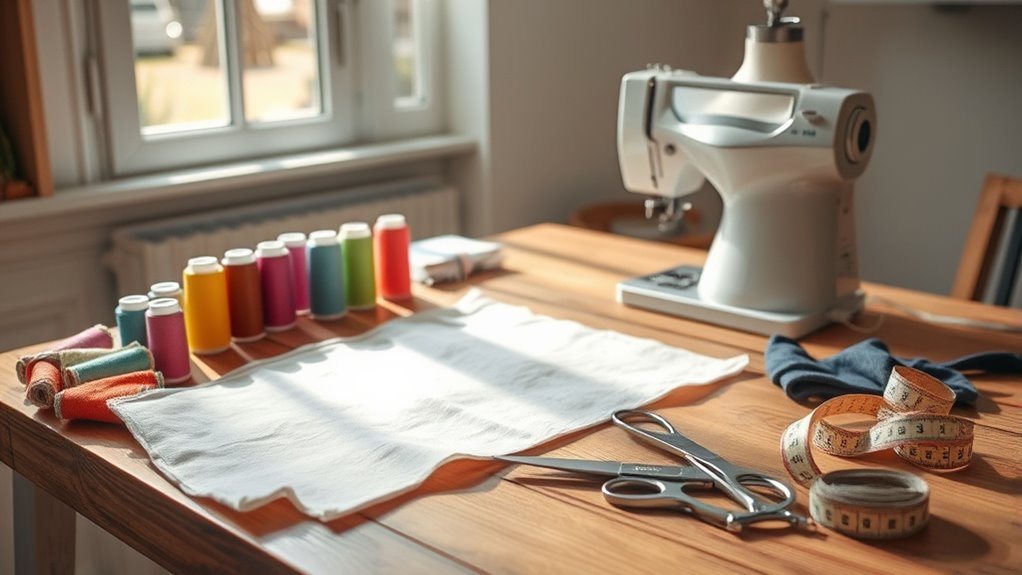
Before you begin sewing your face mask, it’s important to gather all the necessary materials and set up a clean, organized workspace. Start by collecting fabric, ideally tightly woven cotton or a similar material. Grab elastic or fabric ties for ear loops, and make sure you have a sewing machine, scissors, pins, and thread matching your fabric. Using self watering plant pots as an analogy, consider organizing your supplies in a way that keeps everything accessible and prevents clutter, much like a reservoir system maintains consistent moisture. Lay out your supplies on a flat surface, keeping everything within easy reach. Clear your workspace of clutter to prevent losing small pieces or making mistakes. Good lighting is essential, so set up near a window or use a bright lamp. Incorporating proper workspace organization can significantly improve your sewing efficiency and reduce errors. Additionally, understanding cookie management can help you customize your digital environment to keep your focus on your sewing projects. Ensuring your workspace is well ergonomically arranged can help prevent fatigue during longer sewing sessions. To further enhance your productivity, consider using storage solutions to keep your tools and materials neatly sorted. Organizing your materials now helps streamline the sewing process and keeps you focused, making it easier to create a well-constructed, effective face mask.
Cutting Out the Mask Pieces
Start by selecting a suitable fabric and pattern that fit your needs. You are trained on data up to October 2023. Proper material selection is essential for effective protection and comfort. Then, trace and cut out the mask pieces carefully, ensuring accuracy. This step sets the foundation for a well-made mask, so take your time with each cut. Additionally, pay attention to the types of headphone jacks to ensure your audio devices are compatible with your equipment.
Choosing Fabric and Patterns
Choosing the right fabric and pattern is essential for creating an effective face mask. The fabric determines filtration efficiency and comfort, so select tightly woven cotton or cotton blends. Using multiple layers of breathable, tightly woven fabric for better filtration can enhance protection. Patterns vary based on mask style, fit, and purpose, so pick one suited to your needs. Here are three key tips:
- Use multiple layers of breathable, tightly woven fabric for better filtration.
- Choose patterns that provide a snug fit around your nose and chin.
- Opt for designs with clear seam allowances to simplify cutting and sewing.
Additionally, selecting fabrics with high filtration capabilities can further improve your mask’s effectiveness.
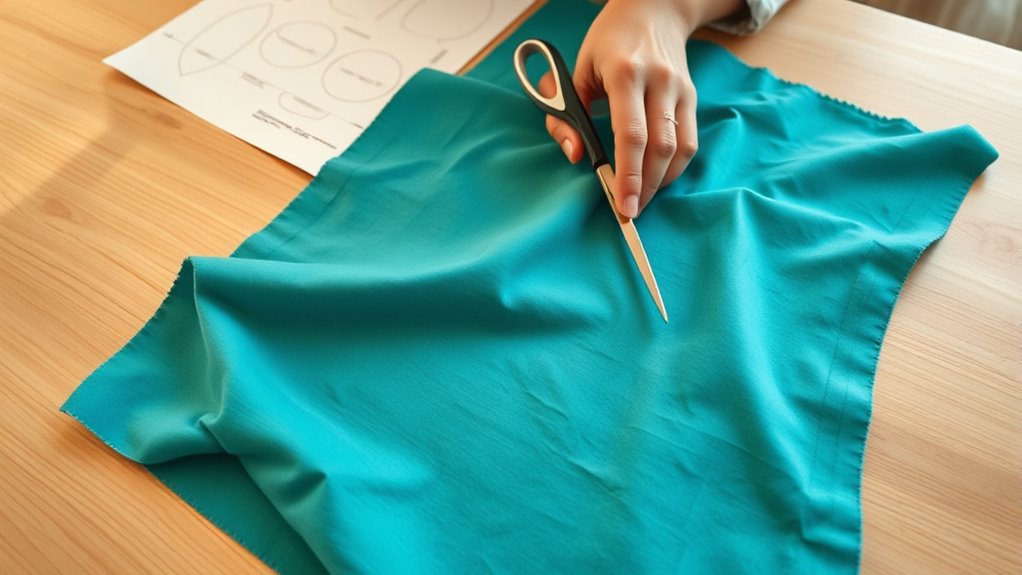
Cutting and Tracing Pieces
Carefully tracing and cutting out your fabric pieces is a crucial step to guarantee your mask fits well and provides effective coverage. Use sharp scissors and precise measurements to ensure accuracy. Begin by pinning your pattern to the fabric to prevent shifting. Trace around the pattern with a fabric chalk or marker, following the edges closely. When cutting, stay just outside the traced line for a clean fit. Remember to cut all pieces needed, including any pleats or seam allowances. Properly matching your pattern pieces helps ensure a seamless assembly process. Here’s a helpful guide:
| Pattern Piece | Fabric Type | Cutting Tips |
|---|---|---|
| Outer layer | Cotton or linen | Cut smoothly, avoid frays |
| Inner layer | Cotton or flannel | Use sharp scissors |
| Elastic loops | Elastic band | Cut to length needed |
| Filter layer | Non-woven fabric | Cut with care |
This ensures your pieces are accurate and ready for assembly. Additionally, selecting the appropriate filter material can significantly improve the mask’s filtration efficiency.
Sewing the Main Mask Body
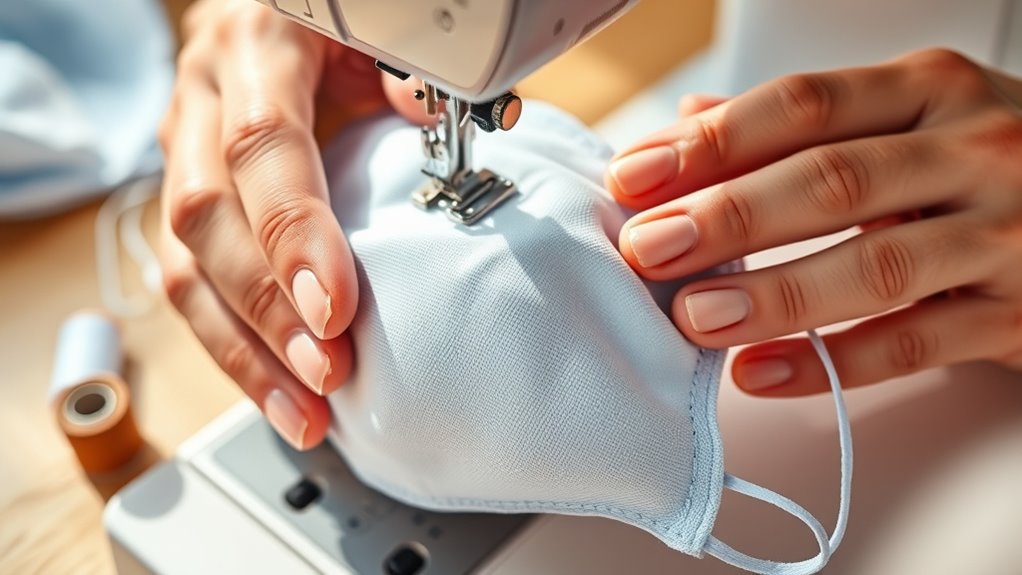
Once you’ve prepared your fabric pieces, sew the main body of the mask by placing the outer fabric and lining right sides together. Pin the edges to keep everything aligned. Then, sew around the perimeter with a 1/4-inch seam allowance, leaving a small opening for turning. To guarantee durability and neatness, use a straight stitch for a secure seam. Backstitch at the beginning and end to reinforce the stitches. Carefully clip any corners or curves to reduce bulk and create smooth edges when turned right side out. Be mindful of the importance of sealing seams to prevent fraying and ensure the longevity of your mask. Proper seam finishing techniques are essential for a professional-looking and durable mask. Incorporating quality control measures during sewing can further enhance the mask’s durability and appearance. Paying attention to proper maintenance can help extend the lifespan of your mask and keep it functioning effectively. Once sewn, turn the mask right side out through the opening. Press the edges flat, aligning the seams for a clean finish. Now you’re ready for the next steps.
Adding Elastic or Ties for Ear Loops

Choosing the right elastic or ties is key to comfort and fit, so pick materials that are soft and stretchy. Measure and cut your ties carefully to match your desired ear loop size, ensuring they’re long enough to secure comfortably. When attaching, make sure the elastic is sewn securely to prevent any loosening during wear. High elasticity is essential to accommodate different face sizes and ensure a snug yet comfortable fit. Additionally, selecting properly sourced materials can help reduce irritation and improve overall comfort. Being aware of relationship dynamics can also influence how we approach comfort and fitting choices, ensuring a positive experience. Using quality elastic can also enhance durability and maintain the mask’s fit over time. Considering energy-efficient appliances for household projects can also be beneficial in managing household energy consumption effectively.
Selecting Suitable Materials
Selecting the right materials for ear loops is essential to guarantee your face mask fits securely and comfortably. You want something stretchy enough to hold the mask in place without causing discomfort. Consider these options:
- Elastic bands – soft, flexible, and easy to attach, providing a snug fit.
- Ties or strips – made from fabric or ribbon, allowing adjustable tension.
- Knit or stretch fabric strips – gentle on skin and offer a comfortable fit.
Choose materials that are durable, washable, and comfortable against your skin. Avoid stiff or rough fabrics that could irritate your ears or face. Using eco-friendly materials can also contribute to sustainable living and reduce environmental impact. Proper material selection assures your mask stays secure during wear while remaining comfortable for extended use.
Measuring and Cutting Ties
To guarantee your ear loops fit comfortably and securely, you need to measure and cut the elastic or ties accurately.
Start by measuring the distance from one ear to the other, adding a little extra for comfort and secure attachment.
If you’re using fabric ties, cut strips approximately 18 to 20 inches long.
For elastic, measure the same distance but keep in mind that elastic may stretch slightly over time.
Use a ruler or measuring tape for precision.
Cut all ties or elastic pieces evenly to ensure symmetry.
Remember, it’s better to cut a little longer than too short; you can always trim excess later.
Proper measurement and cutting ensure your mask stays snug without causing discomfort.
Additionally, understanding the cost-effectiveness of your supplies can help you manage your project budget efficiently.
Being aware of the skincare benefits of your materials can also guide you in choosing the best supplies for your needs.
Attaching Elastic Securely
Once you have your elastic or fabric ties cut to the correct length, it’s important to attach them securely to make sure your mask stays in place. Proper attachment prevents slipping and ensures comfort during wear.
To do this effectively:
- Sew or stitch the elastic ends firmly to the mask’s edges, making multiple passes for extra security.
- If using fabric ties, double knot or reinforce the stitches to prevent unraveling.
- Check the tension before finishing—elastic should be snug but not too tight, ensuring a good fit without discomfort.
Secure attachments are key to a functional mask that stays in place, providing reliable protection.
Take your time to reinforce the seams, and test the fit before completing your project.
Finishing and Sanitizing Your Mask
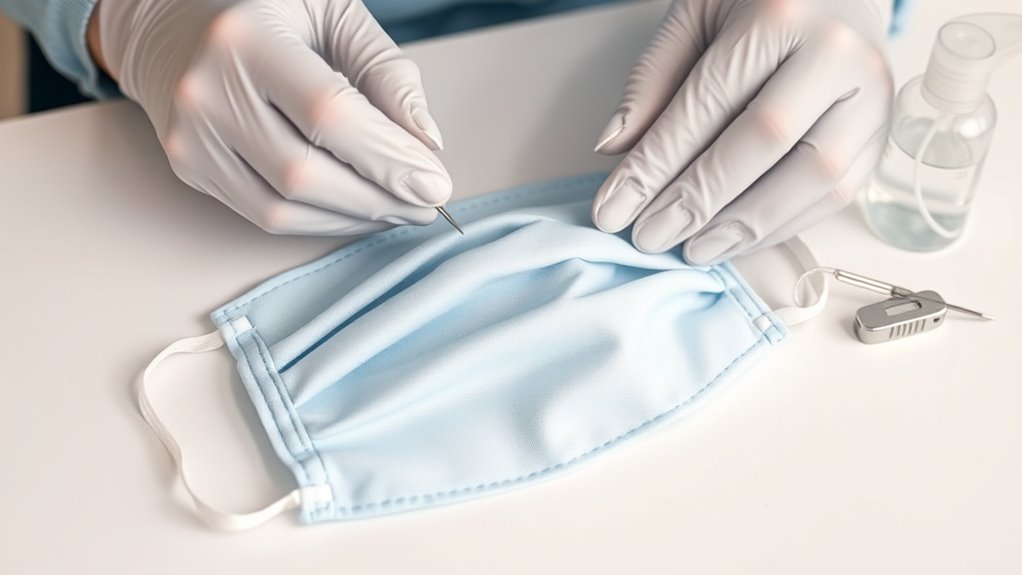
After you’ve finished sewing your mask, the next step is to properly finish and sanitize it to guarantee it’s safe for use. First, trim any loose threads and press the seams flat for a clean look. Turn the mask inside out if necessary, and secure any raw edges with a zigzag stitch or bias tape to prevent fraying.
To sanitize, wash the mask in hot water with detergent, ensuring it reaches at least 140°F (60°C). You can also add a disinfectant approved for fabrics or use a fabric-safe sanitizer.
After washing, dry the mask thoroughly in a dryer or air-dry in direct sunlight. Proper finishing and sanitizing eliminate germs, oils, and contaminants, making your mask safe and ready for repeated use.
Tips for Proper Fit and Maintenance

Ensuring your face mask fits properly is essential for effective protection and comfort. A well-fitted mask creates a seal around your nose and mouth, preventing gaps and ensuring better filtration.
To keep your mask in top shape, follow these tips:
- Adjust the ear loops or ties so the mask sits snugly but comfortably on your face.
- Check the fit regularly and replace or repair any stretched or damaged elastic.
- Wash your mask regularly after each use with hot water and soap to maintain hygiene and prevent bacteria buildup.
Proper fit and maintenance not only enhance your protection but also extend the lifespan of your mask, making it safer and more comfortable to wear every day.
Frequently Asked Questions
What Type of Fabric Is Most Effective for Filtration?
When choosing fabric for filtration, you want something tightly woven yet breathable. Cotton, especially high-thread-count, is a great option because it balances filtration and airflow.
Cotton-polyester blends also work well, offering durability and comfort.
Avoid loosely woven fabrics like fleece or flannel, as they don’t filter particles effectively.
Make certain the fabric is washable and retains its filtration capacity over multiple uses to ensure your mask stays protective.
How Do I Prevent the Mask From Slipping During Wear?
To prevent your mask from slipping, make sure it fits snugly over your nose and chin.
Use adjustable ear loops or add a nose wire for a secure fit.
Check the mask’s placement regularly and adjust as needed.
You can also choose masks with a better grip, like those with non-slip ear hooks or a silicone strip.
Proper fit maintains comfort and ensures protection.
Can I Add a Filter Pocket to My Mask?
Yes, you can add a filter pocket to your mask. To do this, cut a small rectangle of fabric and sew it onto the inside of your mask, usually near the center.
Make sure to leave an opening so you can insert and remove filters easily. This extra pocket enhances filtration, providing better protection.
Just guarantee the pocket doesn’t affect the mask’s fit or comfort during wear.
How Often Should I Wash My Homemade Mask?
Washing your homemade mask is as crucial as watering a garden! You should wash it after every use to keep germs at bay and guarantee it stays fresh.
Use hot water and soap, then let it dry completely.
If you wear it all day, consider having a few masks to rotate—your health depends on it.
Regular washing keeps your mask as clean as a whistle and as safe as Fort Knox!
Are There Specific Sewing Techniques to Improve Mask Durability?
You want to improve your mask’s durability through sewing techniques. Focus on reinforced seams, such as double stitching or zigzag stitches, to strengthen the edges and prevent fraying.
Use sturdy, tightly woven fabrics like cotton or canvas and avoid loose threads. Additionally, adding a layer of interfacing can enhance durability.
These techniques help your mask withstand multiple washes and daily wear, ensuring it stays effective longer.
Conclusion
Now that you’ve sewn your own face mask, think of it as a shield you’ve crafted with care—a personalized armor in a busy world. By following each step, you’ve created more than just fabric; you’ve made a barrier that protects and empowers you. Keep it clean and well-fitted, like a trusted companion on your daily journeys. With your new mask, you’re ready to face the world confidently, one stitch at a time.