Overhead filming instantly boosts your tutorial quality by giving clear, detailed views that improve viewer understanding. It allows you to showcase multiple steps at once, making complex tasks easier to follow. Proper lighting and angles reduce shadows and highlight key details, ensuring your audience stays engaged. By creating a polished, professional look, overhead shots make your tutorials more effective. Keep exploring to discover how perfecting this technique can elevate your content even further.
Key Takeaways
- Overhead filming provides a clear, comprehensive view of all steps, enhancing viewer understanding instantly.
- Optimized camera angles ensure small details are visible, improving the tutorial’s clarity immediately.
- Proper lighting eliminates shadows and glare, making steps easier to see and comprehend right away.
- The combination of angle and lighting creates a professional look, elevating tutorial quality instantly.
- Reduced distractions and improved visibility boost viewer engagement and trust immediately.
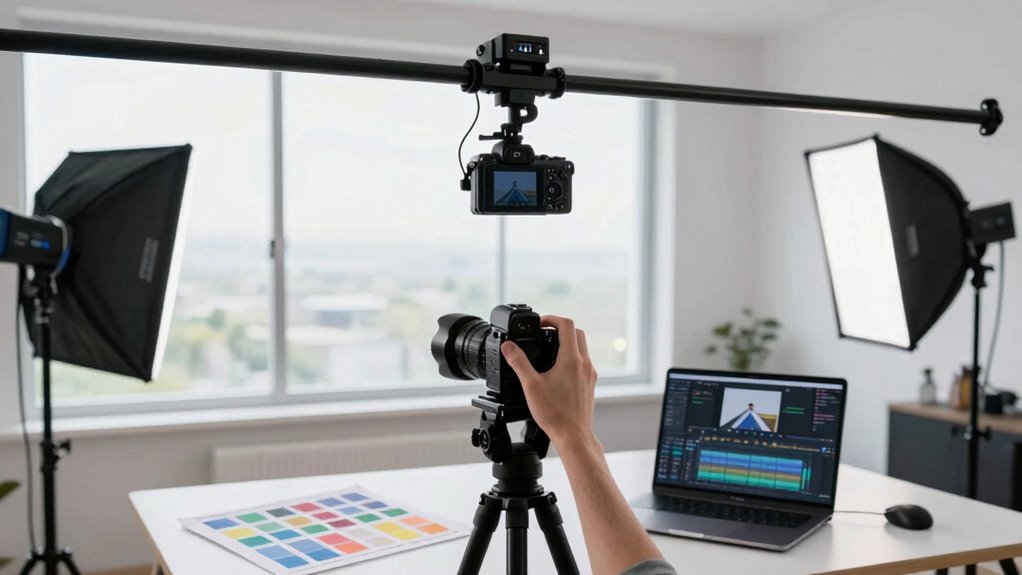
Overhead filming has become a popular technique for creating clear, detailed tutorials, but its effectiveness depends heavily on execution. When you position your camera directly above the subject, you instantly give viewers a thorough view that’s difficult to achieve with traditional angles. This perspective allows your audience to see every step of your process simultaneously, reducing confusion and making instructions easier to follow. The choice of camera angles in overhead filming is essential; it’s not just about pointing the camera down but about optimizing the view so viewers can clearly see the details you want to highlight. A well-planned camera angle ensures that even small, intricate movements are visible, which is critical for crafts, cooking, or technical demonstrations. Additionally, proper lighting techniques can significantly enhance the clarity and professionalism of overhead footage. Proper lighting eliminates shadows that can obscure important details, making it easier for viewers to see each step clearly. Soft, evenly distributed light is typically best for overhead shots, as it minimizes glare and harsh shadows. Using diffused lighting or multiple light sources can help achieve this balance, ensuring that the entire workspace is uniformly lit. When your lighting is well-executed, it enhances the clarity of the footage and directs viewers’ attention exactly where you want it. Poor lighting, on the other hand, can turn an otherwise good tutorial into a frustrating experience, as viewers struggle to see what’s happening. Proper ventilation can also help reduce glare and prevent heat buildup, especially during extended filming sessions, contributing to a better overall filming environment. Moreover, understanding the importance of visual clarity in overhead filming can make a significant difference in how your tutorials are perceived and understood. Consistent visual quality helps maintain viewer interest and trust in your content.
Overhead filming provides a clear, detailed view essential for effective tutorials and technical demonstrations.
The impact of overhead filming on tutorial quality isn’t just about the visuals; it also influences viewer engagement and understanding. When you combine thoughtful camera angles with effective lighting techniques, your tutorials become more intuitive and accessible. Your audience can follow along without repeatedly pausing or rewinding, which keeps them engaged and boosts their confidence to try things themselves. Additionally, quality overhead footage minimizes distractions caused by shaky or poorly lit shots, allowing viewers to focus solely on your instructions. This immediate improvement in clarity and professionalism can elevate your content from basic to polished, making your tutorials stand out. Mastering these filming techniques is a crucial step toward creating content that resonates with viewers and enhances their learning experience. Recognizing the benefits of overhead filming can motivate creators to adopt this approach for more engaging tutorials.
Ultimately, the reason overhead filming changes tutorial quality instantly is because it addresses fundamental issues of visibility and comprehension. By carefully considering camera angles and lighting techniques, you create a more immersive and easy-to-understand experience. When executed correctly, overhead shots transform complex tasks into straightforward, step-by-step guides that viewers appreciate and trust. It’s a simple upgrade that has a powerful impact, turning ordinary tutorials into engaging, professional presentations.
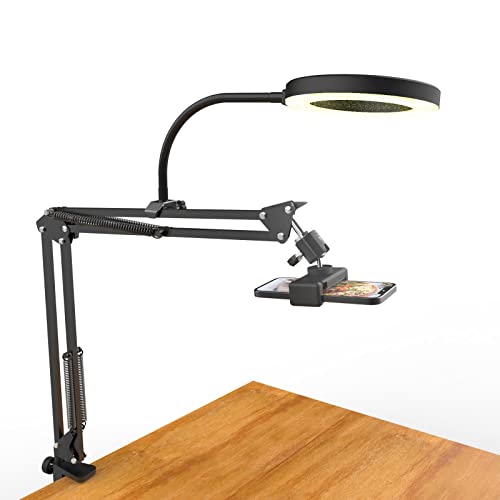
Overhead Camera Mount with Ring Light, Flexible Articulating Phone Arm Stand Compatible with iPhone, Logitech Webcam, Desk Tripod for YouTube Live Stream Cooking Nail Video Recording
[ Dimmable Ring Light ] The 6 inch circle light has 3 lighting mode and each lighting mode…
As an affiliate, we earn on qualifying purchases.
As an affiliate, we earn on qualifying purchases.
Frequently Asked Questions
How Does Camera Angle Affect Viewer Engagement?
Your camera perspective directly influences viewer engagement by guiding their focus and evoking emotion. An overhead shot can offer a unique perspective, making scenes more interesting, but if not used carefully, it might cause viewer distraction or confusion. You need to contemplate how the camera angle complements the story, ensuring it enhances engagement rather than detracts from it. Proper use of camera perspective keeps viewers interested and immersed in your content.
What Equipment Is Best for Overhead Filming?
For overhead filming, you need equipment that offers excellent camera stabilization and versatile lens options. Did you know that 60% of professional videographers prefer gimbals for smooth overhead shots? A sturdy tripod with a boom arm or a specialized overhead rig provides stability, while a wide-angle lens helps capture more detail from above. Combining these tools guarantees your footage remains steady and visually engaging, elevating your tutorial quality instantly.
How Do Lighting Conditions Influence Tutorial Clarity?
Lighting conditions greatly influence your tutorial’s clarity. Natural light provides soft, even illumination, making details easier to see. However, too much sunlight can create harsh shadows, obscuring important parts. To guarantee clarity, control shadows by diffusing natural light or supplementing with soft artificial lighting. Consistent, well-balanced lighting ensures your audience clearly understands each step, improving overall tutorial quality and viewer engagement.
Can Editing Improve the Quality of Overhead Footage?
Yes, editing can drastically transform your overhead footage! With powerful post-production techniques, you can fix shaky shots through footage stabilization and enhance clarity, color, and contrast to make your tutorial pop. Even the most shaky or dull footage can become stunning and professional-looking with clever editing. Don’t underestimate the power of editing—it’s your secret weapon to elevate the quality of your overhead filming instantly!
What Common Mistakes Reduce Tutorial Effectiveness?
You often reduce tutorial effectiveness by neglecting audio clarity and allowing background distractions. Poor audio makes instructions hard to understand, frustrating viewers. Simultaneously, busy backgrounds draw attention away from your message, decreasing engagement. To improve, focus on clear audio equipment and choose a clean, quiet space. Maintain steady framing and minimize movement to keep viewers focused on your tutorial, ensuring your message comes across effectively and professionally.

2-Pack Photography Lighting Kit, NiceVeedi 25W LED Video Light Kit, 2900-7000K Dimmable Studio Light with Tripod Stand, 73" Stream Light for Video Recording
【MULTIPLE COLOR TEMPERATURE & ADJUSTABLE BRIGHTNESS】Provide 3 Color temperatures (2900K, 4800K & 7000K)to create various lighting atmosphere; This…
As an affiliate, we earn on qualifying purchases.
As an affiliate, we earn on qualifying purchases.
Conclusion
By now, you see how overhead filming instantly elevates your tutorial quality, making instructions clearer and more engaging. It’s like giving your audience a bird’s-eye view, so they catch every detail without confusion. Doesn’t that make you wonder how much more professional your tutorials could become just by changing your filming angle? Give it a try—your viewers will thank you for the improved clarity, and you’ll enjoy creating content even more. Ready to take your tutorials to the next level?

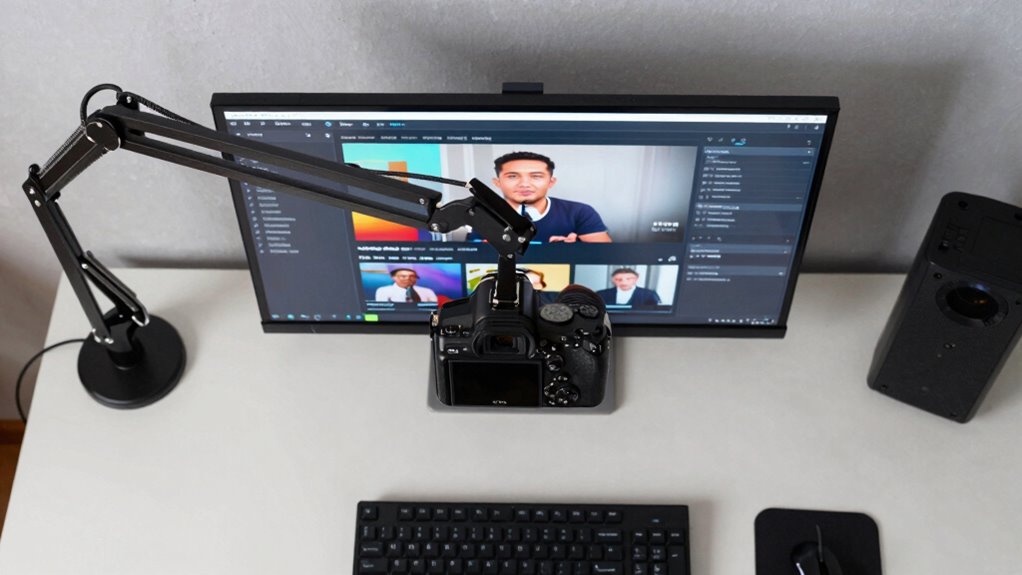
NEEWER 22" Magic Arm w Desk C Clamp, Overhead Camera Mount with Articulating Mic Boom Arm 1/4" 3/8" Threads for ARRI, Desktop Stand Holder for Phone Microphone Webcam Action Camera Video Light, UA057
【Magic Arm with Super Clamp】 Crafted from robust aluminum alloy, the low profile but super grip boom arm…
As an affiliate, we earn on qualifying purchases.
As an affiliate, we earn on qualifying purchases.

Overhead Phone Mount with Rechargeable Light for iPhone, Desk Tripod with Clamp for Content Creator Camera Recording, Top Down Holder Stand for Filming/Live/Cooking/Unboxing/Drawing/YouTube/TikTok
【3 Color LED Light for Clear Shots】This overhead phone mount features a LED selfie light with 3 color…
As an affiliate, we earn on qualifying purchases.
As an affiliate, we earn on qualifying purchases.