
To create custom tie-dye shirts easily, start by preparing a clean, well-ventilated workspace and gather your supplies—cotton shirts, fabric dyes, rubber bands, gloves, and application tools. Fold your shirt into your desired pattern and secure with rubber bands. Mix the dyes per instructions, then apply vivid colors to your folding for eye-catching designs. After dyeing, wrap your shirt, let it set overnight, rinse, and wash carefully. If you follow these steps, you’ll release vibrant, personalized shirts—don’t miss the tips that make your final result truly shine.
Key Takeaways
- Choose a well-ventilated area and gather all necessary supplies, including plain cotton shirts, dyes, and folding tools.
- Decide on a folding pattern (spiral, crumple, pleats) and secure with rubber bands before applying dye.
- Apply dye carefully using squeeze bottles or brushes, focusing on specific sections for desired designs.
- Wrap the dyed shirt in plastic and let it sit for 6–8 hours or overnight to set the colors.
- Rinse in cold water, wash separately, and air dry to preserve vibrant, long-lasting colors.

Brother CS7000X Computerized Sewing and Quilting Machine, 70 Built-in Stitches, LCD Display, Wide Table, 10 Included Feet, White
70 UNIQUE BUILT-IN STITCHES: The Brother CS7000X sewing and quilting machine includes 70 built-in stitches including utility, decorative,...
As an affiliate, we earn on qualifying purchases.
Gathering Your Supplies and Preparing Your Workspace
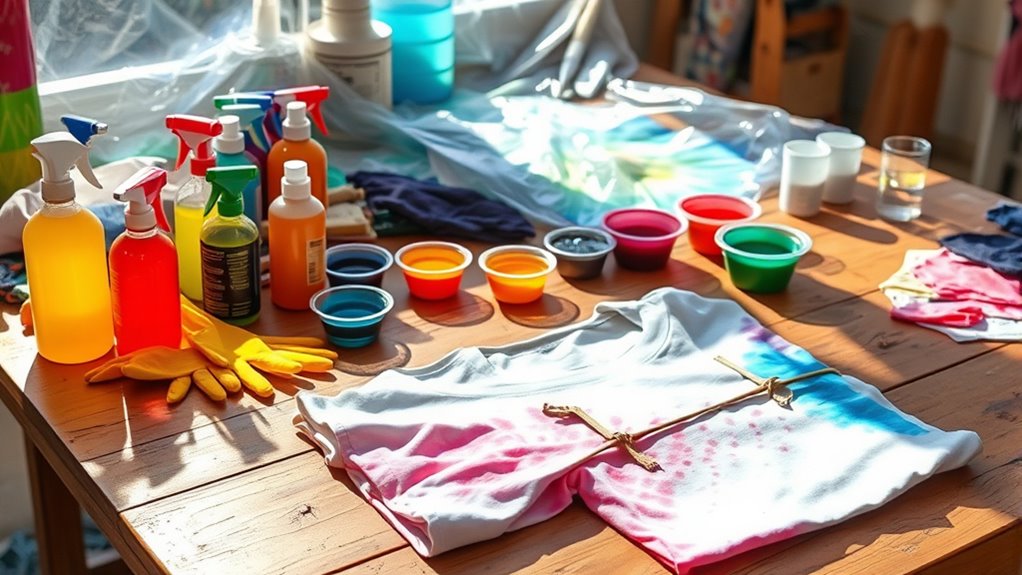
Before you begin your tie-dye project, it’s essential to gather all the necessary supplies and set up a suitable workspace. First, pick a well-ventilated area, preferably outdoors or in a space that’s easy to clean.
You’ll need plain white shirts, fabric dyes, and rubber bands to create your design. Prepare gloves to protect your hands and old newspapers or plastic sheets to cover surfaces.
Gather squeeze bottles or spray bottles for applying dye, along with water for rinsing. Make sure to have a timer or clock nearby to monitor dye setting time. Additionally, understanding self-watering plant pots can inspire you to create a more sustainable and efficient workspace by incorporating self-watering methods into your plant care routine.
Organize all your supplies within reach to keep the process smooth. Setting up a dedicated workspace minimizes mess and makes your tie-dye experience enjoyable and hassle-free. Proper preparation ensures site functionality is maintained throughout your creative process.
Having proper safety precautions in place, such as wearing protective clothing, further ensures a safe and enjoyable tie-dyeing experience. Incorporating workspace organization techniques can also help streamline your process and reduce clutter during your project.

Brother XR9550 Sewing and Quilting Machine, Computerized, 165 Built-in Stitches, LCD Display, Wide Table, 8 Included Presser Feet, White
165 unique built-in stitches: The Brother XR9550 computerized machine includes 110 built-in utility, decorative and heirloom stitches including...
As an affiliate, we earn on qualifying purchases.
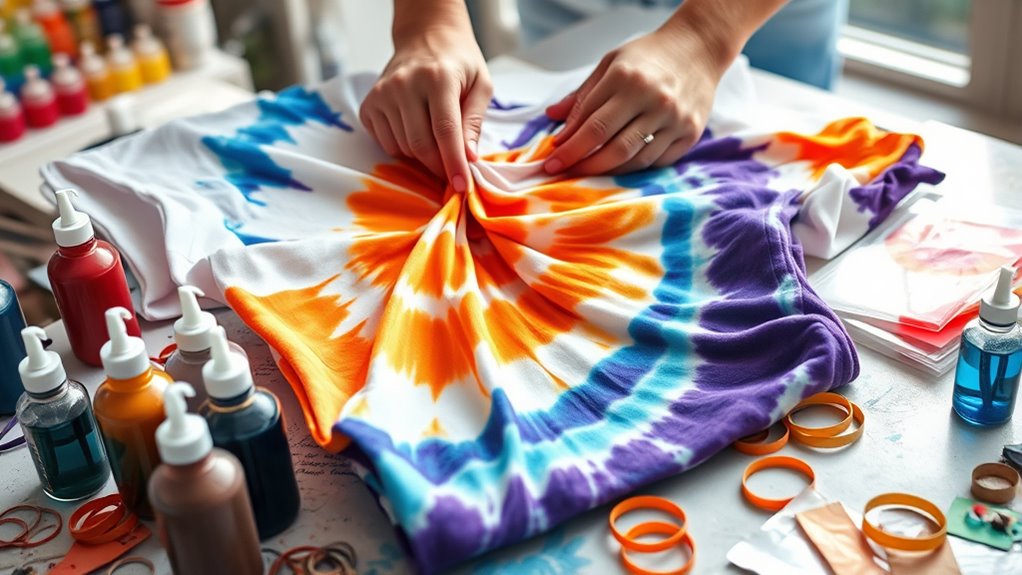
Choosing and Folding Your Shirts for the Design
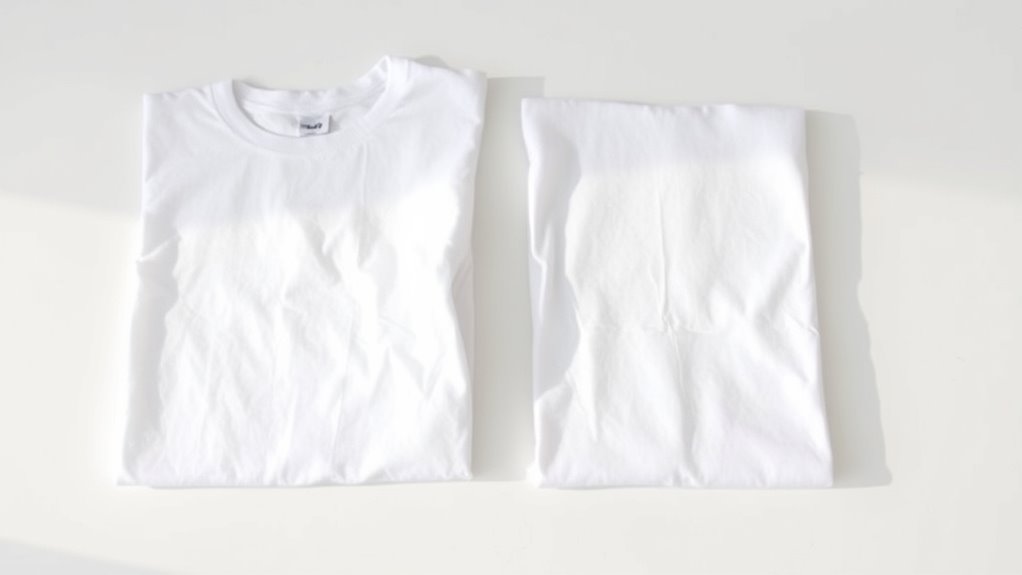
Choosing the right shirt and folding it properly are key steps to achieving your desired tie-dye pattern. Select a 100% cotton shirt, as it absorbs dye best. Avoid stretchy or synthetic fabrics, which won’t produce vibrant results.
Once you have your shirt, think about the pattern you want. Simple folds like spirals, crumples, or accordion pleats create different effects. To fold, start with a damp shirt, then pinch it at the center and twist into a tight coil or fold into sections. Secure with rubber bands to hold the shape.
The way you fold impacts the final design’s look, so experiment with different techniques to find what you like. Proper folding ensures even dye distribution and sharp, clear patterns.

SINGER Quantum Stylist 9960 Computerized Sewing & Quilting Machine – Metal, Plastic, with Extension Table, Hard Case & Accessories, 600 Stitches, Lettering, LED Light, 1-Step Buttonhole
VERSATILE STITCH OPTIONS: The SINGER Quantum Stylist 9960 offers 600 built-in stitches and 1,172 stitch applications, including essential,...
As an affiliate, we earn on qualifying purchases.
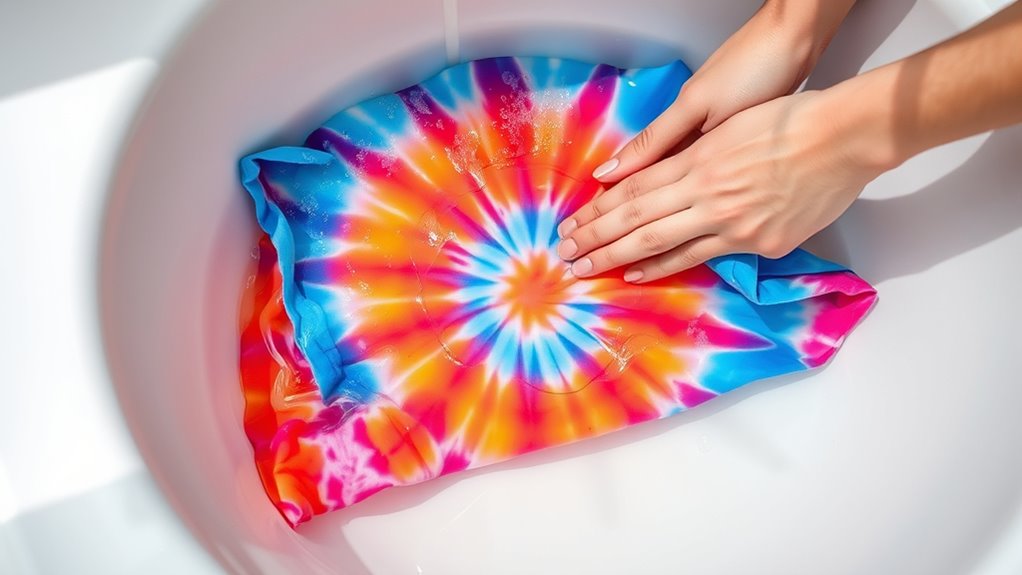
Mixing and Applying the Dye Colors

Once your shirt is folded into the desired pattern, it’s time to prepare your dye colors. Start by diluting your dyes with water according to the instructions—this guarantees vibrant, even color. Choose a variety of hues to create contrast and depth. Using a variety of hues can also help reduce environmental impact and ensure safer handling during your project. When ready, apply the dye using squeeze bottles or brushes, focusing on specific sections to achieve your design. To add more complexity:
- Use different dye concentrations for subtle shading or bold contrasts.
- Layer colors carefully to prevent bleeding and blend edges intentionally.
- Apply dye in small, controlled amounts to avoid oversaturating areas, which could muddy the design.
- Proper dye preparation ensures consistent results and better color adherence.
- Incorporating attention to creative practice can elevate your tie-dye designs, making them more unique and expressive.
Work methodically, and remember to wear gloves to keep your hands clean. Proper mixing and careful application are key to vibrant, eye-catching results.
NEWOWNDS Craft Storage Cabinet with LED Lights – 72" Adjustable Shelves Sewing Organizer, Multi-Purpose Sewing Cabinet for Craft Room/Home Office Storage
Multi-Functional Craft Organizers and Storage Cabinet: This 30"W x 16"D x 72"H craft storage cabinet doubles as a...
As an affiliate, we earn on qualifying purchases.
Setting the Tie-Dye and Ensuring Vibrant Results

After applying the dye, it’s essential to set the colors properly to achieve vibrant, long-lasting results. Wrap your shirt in plastic wrap or place it in a sealed plastic bag to lock in moisture and prevent dye from leaking out.
Let it sit at room temperature for at least 6 to 8 hours, or overnight for more intense colors. This process allows the dye to bond fully with the fabric, ensuring bright, vivid shades. Proper dye fixation is crucial for achieving optimal vibrancy and durability, and understanding different types of dyes can help you choose the best option for your project.
Knowing the chemical reactions involved in dye fixation can also help you troubleshoot any issues and improve your results. Avoid moving or disturbing the shirt during this time to prevent smudging or uneven coloring. It’s also helpful to understand the role of local ingredients in promoting healthy eating, which can inspire you to incorporate natural dyes or ingredients into your craft.
Once the setting period is complete, carefully unwrap the shirt, being gentle to preserve the design. Proper setting guarantees bold, vibrant results that last through multiple washes.
Rinsing and Washing Your Finished Shirts
To guarantee your tie-dye shirts look their best and the colors stay vibrant, it’s important to rinse and wash them properly.
First, rinse your shirts in cold water until the excess dye stops bleeding. This prevents color from transferring to other clothing and helps set the dye for long-lasting vibrancy. Incorporating proper washing technique can further reduce the risk of color fading and bleeding. Ensuring the correct air circulation during drying can also help maintain the brightness of your colors, especially when combined with proper filtering systems in your washing machine that trap loose dye particles.
Second, wash the shirts separately for the first few washes to avoid dye transfer. Use a gentle cycle with cold water and mild detergent. Utilizing automation’s role in business intelligence in your washing process can help optimize water and energy use, making the process more efficient.
Third, turn your shirts inside out before washing to protect the dye and keep the colors bright.
Taking these steps ensures your shirts stay vibrant longer and look professionally finished. Remember, patience during rinsing and washing preserves the quality of your artwork and makes your DIY project stand out. Proper filtration systems in your washing machine can help trap loose dye particles and prevent staining.
Caring for Your Tie-Dye Creations to Keep Them Bright

To keep your tie-dye shirts looking vibrant, always wash them in cold water and with mild detergents. Proper storage when you’re not wearing them also helps preserve the colors. Additionally, avoiding harsh chemicals damaging the fabric can extend the brightness of your tie-dye creations. Being aware of AI safety developments can also inform responsible handling of smart devices used in laundry or storage. Recognizing the financial impact of entertainment industries, such as WWE Raw and other global markets, underscores the importance of protecting your investment in quality clothing. Monitoring app features that assist with garment care can further help maintain your shirts’ vividness over time.
Wash With Cold Water
Washing your tie-dye shirts with cold water helps preserve their vibrant colors and prevents fading. Cold water minimizes dye bleeding, keeping your designs sharp and bright over time.
To maximize this benefit, follow these tips:
- Turn shirts inside out before washing to reduce friction on the dye surface.
- Use a gentle cycle to avoid unnecessary agitation that can cause color transfer.
- Avoid overcrowding the washer, allowing water to circulate freely and evenly rinse the dye.
Use Mild Detergents
Using gentle detergents is essential for keeping your tie-dye shirts vibrant and looking their best. Harsh chemicals can fade colors and damage the fabric over time. Choose detergents labeled for delicate or color-safe washing, as they gently clean without stripping the dye.
Always use a small amount to prevent residue buildup that can dull the colors. When washing, turn your shirt inside out to protect the design, and opt for cold water, which helps preserve the dye’s brightness.
Avoid bleach or strong stain removers, as they can cause uneven fading. After washing, air dry your shirt instead of using a dryer, which can cause colors to fade faster.
Proper care with mild detergents ensures your tie-dye remains vibrant and eye-catching for a long time.
Store Properly When Not in Use
Proper storage plays a crucial role in maintaining the brightness of your tie-dye shirts. To keep them looking vibrant, store your shirts in a way that prevents fading and damage.
First, verify they’re completely dry before storing to avoid mold or mildew.
Second, fold them carefully to prevent creases or stretching that can distort the design.
Third, keep your shirts in a cool, dark place away from direct sunlight, which can cause colors to fade over time.
Use breathable fabric bags or cotton storage containers instead of plastic, as this allows airflow and prevents moisture buildup.
Regularly check on your stored shirts to ensure they remain in good condition.
Proper storage helps preserve your tie-dye shirts’ bright, bold look for many wears to come.
Frequently Asked Questions
Can I Use Natural or Food Dyes for Tie-Dyeing?
You can definitely use natural or food dyes for tie-dyeing. They’re a great eco-friendly option and produce vibrant, unique colors.
Just remember, natural dyes might require a mordant to set the color properly, and food dyes can be less colorfast.
Mix your dyes with water, prepare your fabric, and experiment with different folding and binding techniques.
With patience, you’ll create stunning, custom tie-dye shirts using natural or food dyes.
How Long Should I Let the Dye Set for Optimal Color?
Did you know that letting dye set for 6 to 8 hours yields vibrant, long-lasting colors?
For ideal results, you should leave your tie-dye shirts wrapped and undisturbed for at least 6 hours, preferably overnight. This allows the dye to fully bond with the fabric.
If you’re short on time, a minimum of 2-4 hours can work, but the colors might be less vivid and more prone to fading.
Are There Eco-Friendly Alternatives to Traditional Fabric Dyes?
You’re wondering if eco-friendly fabric dyes exist as alternatives to traditional options. Yes, they do! You can use natural dyes from plants, fruits, and vegetables, such as indigo, turmeric, or beetroot.
These dyes are biodegradable, non-toxic, and safer for the environment. By choosing them, you help reduce chemical pollution and create unique, vibrant designs.
What Fabric Types Work Best for Vibrant Tie-Dye Results?
You’ll want to choose natural fabrics like 100% cotton, rayon, or linen for vibrant tie-dye results. These materials absorb dye well, making your colors pop and stay bright.
Avoid synthetic fabrics like polyester, which don’t soak up dye effectively and can result in dull or uneven patterns.
For the best outcome, opt for tightly woven fabrics that hold dye better, ensuring your tie-dye shirts look bold and beautiful.
How Can I Fix or Correct Mistakes During the Dyeing Process?
If you notice mistakes during your dyeing process, don’t panic. Quickly rinse the affected area with cold water to stop the dye from spreading.
For small spots, you can re-dye or add more dye to even out the color.
If the mistake is significant, consider re-dyeing the entire shirt.
Conclusion
Now that you’ve created your own vibrant tie-dye shirts, you’re all set to showcase your unique style. Did you know that tie-dyeing has been popular since the 1960s, with over 80% of people claiming it’s a fun way to express creativity? Keep caring for your shirts by washing them inside out and avoiding harsh detergents. With a little effort, your bright designs will stay eye-catching for years to come.