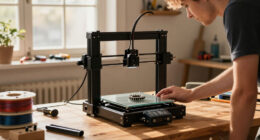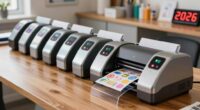
For most makers printing cosplay props, I’d choose the Bambu Lab P1S Combo as the best overall: its enclosed design and included multicolor system suit repeatable, detailed builds. The ANYCUBIC Photon Mono M7 Max is a standout for small, intricate pieces, while the Bambu Lab A1 is a more approachable choice for general FDM projects. The main tradeoffs are build volume, surface detail, material handling, and how much sanding or assembly a prop will need. No single printer excels at full-size armor and fine decorative parts equally. Read on for my rankings, buying advice, and picks by maker type.

Get business pricing on tools and workshop supplies
- Business-only prices and quantity discounts
- Tax-exempt purchasing
- Multiple users, one account, clear invoices
Complete the kit


Key Takeaways
- The P1S Combo ranks first for its enclosed FDM setup and multicolor workflow, a useful mix for makers who print varied prop parts.
- The Photon Mono M7 Max suits fine detail, but resin’s cleanup and handling demands make it a specialized choice rather than a general prop printer.
- The A1 is the approachable all-rounder in this lineup; the smaller A1 mini gives up room for large parts in exchange for a compact footprint.
- Fast tool changes and multicolor features do not remove finishing work: seams, supports, sanding, and paint still shape the final prop.
- The Handmade Poe Dameron blaster is a finished prop, not a printer, so it serves buyers who want the item itself rather than a machine for making their own.
| Bambu Lab A1 FDM 3D Printer |  | Best for Reliable Single-Color Props | Printer type: FDM 3D printer | Acceleration: 10,000 mm/s² | Calibration: Automatic, including bed leveling and Z-offset | VIEW ON AMAZON | See Our Full Breakdown |
| Bambu Lab A1 mini 3D Printer with LED Lamp Kit |  | Best Compact Starter | Product type: 3D printer with LED Lamp Kit | Dimensions: 15.21 × 16.77 × 17.94 inches | Weight: 12.1 pounds | VIEW ON AMAZON | See Our Full Breakdown |
| Snapmaker U1 3D Printer with Four Toolheads and 5-Second Tool Changing |  | Best for Multi-Color and Multi-Material Props | Toolheads: 4 independent toolheads | Tool change time: About 5 seconds | Maximum printing speed: 500 mm/s | VIEW ON AMAZON | See Our Full Breakdown |
| ANYCUBIC Photon Mono M7 Max Resin 3D Printer |  | Best for Highly Detailed Resin Components | Build volume: 298 × 164 × 300 mm | Resolution: 7K | Maximum print speed: 60 mm/h | VIEW ON AMAZON | See Our Full Breakdown |
| Bambu Lab P1S Combo 3D Printer with AMS |  | Best Enclosed Multi-Color FDM Pick | Printer type: Enclosed 3D printer | Included system: AMS | Multi-color printing: Up to 16 colors; AMS required | VIEW ON AMAZON | See Our Full Breakdown |
| Handmade Poe Dameron GLIE-44 Blaster Pistol Cosplay Prop |  | Best Ready-Made Prop | Item type: Handmade cosplay prop | Design: Poe Dameron GLIE-44 blaster pistol replica | Intended use: Cosplay and display | VIEW ON AMAZON | See Our Full Breakdown |
| Bambu Lab P2S 3D Printer Combo with AMS 2 Pro |  | Best for Multicolor Custom Props | Printer type: FDM 3D printer | Maximum print speed: 600 mm/s | Included system: AMS 2 Pro | VIEW ON AMAZON | See Our Full Breakdown |
| FLASHFORGE Adventurer 5M High-Speed 3D Printer |  | Best for Fast Single-Color Parts | Printer type: CoreXY FDM 3D printer | Print volume: 220 × 220 × 220 mm | Maximum printing speed: 600 mm/s | VIEW ON AMAZON | See Our Full Breakdown |
| Creality Ender 3 V3 SE 3D Printer |  | Best Beginner Value | Model: Ender 3 V3 SE | Maximum print speed: 250 mm/s | Acceleration: 2500 mm/s² | VIEW ON AMAZON | See Our Full Breakdown |
| Creality K2 SE 4C Multicolor 3D Printer |  | Best for Four-Color Builds | Print colors: 4 | Print speed: Up to 500 mm/s | Acceleration: 20,000 mm/s² | VIEW ON AMAZON | See Our Full Breakdown |
| 3d printer for cosplay prop | Dimensions |
|---|---|
| Bambu Lab A1 FDM 3D Printer | — |
| Bambu Lab A1 mini 3D Printer w | 15.21 × 16.77 × 17.94 inches |
| Snapmaker U1 3D Printer with F | — |
| ANYCUBIC Photon Mono M7 Max Re | 20.47 × 20 × 31 inches |
| Bambu Lab P1S Combo 3D Printer | — |
| Handmade Poe Dameron GLIE-44 B | — |
| Bambu Lab P2S 3D Printer Combo | — |
| FLASHFORGE Adventurer 5M High- | 15.83 × 14.29 × 17.64 inches |
| Creality Ender 3 V3 SE 3D Prin | 15 × 19.6 × 15 inches |
| Creality K2 SE 4C Multicolor 3 | 14.46 × 14.46 × 18.96 inches |
More Details on Our Top Picks
Bambu Lab A1 FDM 3D Printer
The Bambu Lab A1 makes sense for cosplay builders who want straightforward FDM printing for parts they plan to sand, fill, and paint. Automatic bed leveling and Z-offset adjustment reduce setup work, while active flow rate compensation helps keep extrusion consistent across long prop sections. Its 1-Clip nozzle is designed for quick swaps, which is handy when maintenance or nozzle changes interrupt a build. Compared with the Bambu Lab P1S Combo, the A1 lacks an enclosure and bundled AMS for multi-color work, so it is less suited to enclosed filament workflows or color changes during a print. Multi-color printing is possible with the separately sold AMS lite or an A1 Combo. The supplied details do not state its build volume or supported materials, which makes sizing a large prop harder to judge.
Pros:- Automatic bed leveling and Z-offset adjustment simplify setup
- Active flow rate compensation supports consistent extrusion
- Quick-swap nozzle eases maintenance
- Motor noise cancellation supports quieter operation
Cons:- AMS lite for multi-color printing is sold separately unless choosing the A1 Combo
- Build volume and supported materials are not specified in the supplied product data
Best for: Cosplay makers who mainly print single-color FDM parts and want automatic setup before finishing props by hand
Not ideal for: Builders who need confirmed capacity for oversized props, an enclosed printer, or multi-color hardware included
- Printer type:FDM 3D printer
- Acceleration:10,000 mm/s²
- Calibration:Automatic, including bed leveling and Z-offset
- Flow control:Active flow rate compensation
- Nozzle:1-Clip quick-swap
- Controls:Touchscreen
- Multi-color printing:Requires separately sold AMS lite or an A1 Combo
- Noise reduction:Active motor noise cancellation
Our verdict“Choose the A1 for streamlined single-color prop printing if its unspecified build volume fits your planned parts.”
Bambu Lab A1 mini 3D Printer with LED Lamp Kit
The Bambu Lab A1 mini is the small-footprint entry in this group, with automatic calibration and a listed noise level of ≤48 dB. Those details make it a practical starting point for a maker with limited workspace who wants to learn FDM printing on small costume details, badges, or decorative pieces. The included LED Lamp Kit also supports illuminated props and display projects. Its compact size is the main constraint: it may require splitting a larger prop into sections, adding alignment and assembly work. Compared with the full-size Bambu Lab A1, the mini is easier to place but less suitable when a project needs larger uninterrupted prints. The supplied data does not give a build volume, so I would check whether a particular prop part fits before choosing it.
Pros:- Automatic calibration supports beginner-friendly setup
- Listed noise level of ≤48 dB suits shared workspaces
- LED Lamp Kit is included for illuminated decorative projects
- MakerWorld models and Bambu Handy app provide access to project tools
Cons:- Compact size can limit prop dimensions and force multipart assembly
- Build volume is not stated in the supplied product data
Best for: New cosplay makers with limited bench space who want to print small accessories and learn the workflow
Not ideal for: Builders whose costume plans depend on large one-piece parts or who need a stated build-volume figure
- Product type:3D printer with LED Lamp Kit
- Dimensions:15.21 × 16.77 × 17.94 inches
- Weight:12.1 pounds
- Model number:PF002-M-EU
- Noise level:≤48 dB
- Calibration:Automatic
- Included kit:LED Lamp Kit
- Model and app access:MakerWorld models and Bambu Handy app
Our verdict“Pick the A1 mini for learning and small costume details when compact placement matters more than printing larger sections.”
Snapmaker U1 3D Printer with Four Toolheads and 5-Second Tool Changing
The Snapmaker U1 stands out for builders who want colors or materials handled during the print rather than added entirely by hand. Its four independent toolheads change in about five seconds, enabling multi-color and multi-material work with less tool-change delay than a single-nozzle approach. The 270 × 270 × 270 mm build volume gives cosplay makers room for substantial components, while CoreXY motion and a listed maximum speed of 500 mm/s target faster production. Compared with the Bambu Lab A1, the U1 offers a larger stated workspace and more toolheads, but that capability may be unnecessary for props finished with primer and paint. The maximum speed and waste reduction can vary by print. The supplied description does not specify an enclosure or heated chamber, a meaningful gap for buyers planning to use materials that benefit from controlled conditions.
Pros:- Four independent toolheads support multi-color and multi-material printing
- About five-second tool changes can reduce pauses between materials
- 270 × 270 × 270 mm build volume accommodates substantial components
- Automatic calibration and filament management simplify setup
Cons:- Maximum speed and waste reductions vary with print conditions
- No included enclosure or heated chamber is specified
Best for: Cosplay makers producing sizeable multicolor details or combining flexible and rigid materials in one project
Not ideal for: Painters who make mostly single-color PLA props and do not need multiple toolheads or the larger stated build volume
- Toolheads:4 independent toolheads
- Tool change time:About 5 seconds
- Maximum printing speed:500 mm/s
- Build volume:270 × 270 × 270 mm
- Motion system:CoreXY
- Compatible materials:PLA, PVA, TPU, PETG, PCTG, ABS, ASA, PA, PC, and more
- Touchscreen:3.5 inches
- Warranty:1 year
Our verdict“Choose the U1 when toolhead flexibility and a clearly stated large build volume matter more than a simpler single-color workflow.”
ANYCUBIC Photon Mono M7 Max Resin 3D Printer
The ANYCUBIC Photon Mono M7 Max brings resin detail and a tall, large-format build area to cosplay parts that call for fine surface features, such as armor accents or intricate masks. Its 7K resolution and COB light source are aimed at detailed prints, while the 298 × 164 × 300 mm volume gives more room than many detail-focused resin workflows. Resin temperature control and automatic filling and recycling add process support. Compared with the FDM Snapmaker U1, the M7 Max emphasizes surface detail rather than multiple filaments or a stated 500 mm/s speed; resin prints also call for post-processing. At 52.8 pounds and roughly 20 × 20 × 31 inches, it needs a dedicated, stable spot. It suits makers prioritizing detailed resin components over a compact, easy-to-move setup.
Pros:- Large 298 × 164 × 300 mm build volume fits substantial resin components
- 7K resolution and COB light source target fine detail
- Resin temperature control supports controlled printing conditions
- Automatic resin filling and recycling reduce some handling steps
Cons:- At 52.8 pounds, it is heavy to move and needs a stable location
- Resin printing requires post-processing for finished cosplay parts
Best for: Cosplay builders making finely detailed masks, armor accents, and other resin components with room for a large machine
Not ideal for: Makers who need a lightweight printer, multi-material FDM workflow, or large prints without resin post-processing
- Build volume:298 × 164 × 300 mm
- Resolution:7K
- Maximum print speed:60 mm/h
- Resin vat capacity:1300 ml
- Light source:COB with Fresnel lens
- Dimensions:20.47 × 20 × 31 inches
- Weight:52.8 pounds
- Model:Photon Mono M7 Max
Our verdict“Choose the M7 Max for detailed, sizable resin components if you can accommodate its weight and resin workflow.”
Bambu Lab P1S Combo 3D Printer with AMS
The Bambu Lab P1S Combo pairs an enclosed printer with an included AMS, making it the most ready-to-go choice here for cosplay makers who want multi-color or multi-material FDM prints. Automatic bed leveling and a setup process designed to take about 15 minutes lower the starting effort, while its listed maximum speed of 500 mm/s can help move through batches of costume components. The AMS supports up to 16 colors, though multicolor printing depends on that system and can involve material changes within a print. Compared with the Bambu Lab A1, the P1S Combo arrives with the AMS and an enclosure, but the A1 keeps the workflow simpler if props will be painted after printing. The P1S supports several common filaments and can handle PA and PC; carbon- or glass-fiber-reinforced polymer is not recommended.
Pros:- Included AMS supports printing in up to 16 colors
- Enclosed design supports a wider range of filament workflows
- Automatic bed leveling reduces setup work
- Listed maximum speed of 500 mm/s suits batches of costume components
Cons:- Multi-color and multi-material printing rely on the AMS system
- Carbon- and glass-fiber-reinforced polymers are not recommended
Best for: Cosplay builders who want an enclosed FDM setup with included AMS for multicolor costume parts and varied filament use
Not ideal for: Makers who only print single-color props for painting or need recommended carbon- or glass-fiber-reinforced filament support
- Printer type:Enclosed 3D printer
- Included system:AMS
- Multi-color printing:Up to 16 colors; AMS required
- Maximum printing speed:500 mm/s
- Maximum acceleration:20,000 mm/s²
- Bed leveling:Automatic
- Setup time:About 15 minutes
- Filament compatibility:Ideal: PLA, PETG, TPU, PVA, PET, ABS, ASA; capable: PA, PC
- Not recommended:Carbon- or glass-fiber-reinforced polymer
Our verdict“Pick the P1S Combo if you want an enclosed FDM printer with AMS included for multicolor cosplay parts.”
Handmade Poe Dameron GLIE-44 Blaster Pistol Cosplay Prop
This is a finished cosplay prop, not a 3D printer, so it suits a buyer who wants Poe Dameron’s GLIE-44 look without sourcing a printer, filament, and finishing supplies. Compared with the Bambu Lab P2S Combo, which can produce custom parts and props, this replica offers a ready-to-display character piece but no way to resize or customize its design from the information provided. Its handmade construction is the main appeal for costume and display use, while the lack of detailed specifications makes it difficult to judge dimensions, materials, or durability before buying. The description also cautions that it may be fragile, so it makes more sense as a carefully handled costume accessory than a prop for rough conventions or frequent action posing.
Pros:- Ready-made replica of Poe Dameron’s GLIE-44 blaster
- Handmade craftsmanship gives it a character-specific look
- Can serve as a costume accessory or display piece
Cons:- Not a 3D printer and cannot produce custom props
- No detailed dimensions or material specifications are provided
- May be fragile if handled roughly
Best for: Star Wars cosplayers who want a finished Poe Dameron blaster replica for display or careful costume use
Not ideal for: Makers who want to print custom, oversized, or replacement cosplay parts, or buyers who need detailed material and size information
- Item type:Handmade cosplay prop
- Design:Poe Dameron GLIE-44 blaster pistol replica
- Intended use:Cosplay and display
Our verdict“Choose this for a finished Poe Dameron costume prop; choose a printer such as the Bambu Lab P2S Combo if you want to make your own designs.”
Bambu Lab P2S 3D Printer Combo with AMS 2 Pro
The P2S Combo is the most flexible choice here for custom props with multiple colors or materials: its included AMS 2 Pro supports multicolor printing and can dry filament at up to 65 °C. That can reduce paintwork on color-blocked armor details, though a printed finish may still need sanding and other finishing for a polished costume. Compared with the FLASHFORGE Adventurer 5M, it adds the included multicolor and multi-material system, plus a chamber that reaches up to 50 °C. The tradeoff is that this capability depends on buying the Combo; the printer alone does not support multicolor printing. Its 600 mm/s maximum speed, automatic calibration, and AI failure detection also suit repeated prop-part production, but speed alone does not promise a clean, convention-ready surface.
Pros:- Included AMS 2 Pro supports multicolor and multi-material printing
- AMS 2 Pro dries filament at up to 65 °C
- Automatic calibration and AI failure detection support a more hands-off workflow
- Quick-swap nozzles and adaptive airflow add flexibility for different print jobs
Cons:- Multicolor printing requires the Combo with AMS 2 Pro
- High-speed printing may still require tuning to preserve surface quality on visible props
Best for: Cosplay makers who regularly print multicolor armor details, accessories, and prop components and want filament drying built in
Not ideal for: Buyers who only need occasional single-color parts and would rather keep the setup simple without an AMS system
- Printer type:FDM 3D printer
- Maximum print speed:600 mm/s
- Included system:AMS 2 Pro
- Filament drying temperature:Up to 65 °C
- Chamber temperature:Up to 50 °C
- Calibration:Automatic
- Failure detection:AI failure detection
- Other features:Quick-swap nozzles, adaptive airflow, carbon filter
Our verdict“Pick the P2S Combo if multicolor output and filament care matter for your custom cosplay builds; for simpler single-color printing, the Adventurer 5M is a leaner alternative.”
FLASHFORGE Adventurer 5M High-Speed 3D Printer
The Adventurer 5M is a practical pick for quickly printing single-color costume components, with a 220 mm cube build volume that fits many accessories and separated prop sections. Its CoreXY motion system reaches a stated 600 mm/s, while automatic bed leveling and a dual-sided PEI plate ease routine setup and print removal. Compared with the Bambu Lab P2S Combo, it lacks an included multicolor system, so detailed color schemes will need paint or separate assemblies. The 220 mm limit also means large helmets, blades, or armor panels may need to be split into pieces and joined. Quick nozzle changes are convenient when switching print setups, but larger nozzle sizes are optional rather than included, which can add a separate step for makers aiming to speed through bulky parts.
Pros:- 220 × 220 × 220 mm build volume fits many costume accessories and segmented parts
- Automatic bed leveling simplifies first-layer setup
- Dual-sided PEI build plate and quick nozzle changes ease routine use
- Remote monitoring and status alerts are available through the Flash Studio app
Cons:- Build volume can require large props to be divided and assembled
- Multicolor printing is not listed as an included capability
- Larger nozzle sizes are optional rather than included
Best for: Cosplay builders who print frequent single-color accessories and medium-size prop sections and value quick setup
Not ideal for: Makers who want to print large props in one piece or add color directly through an included multicolor system
- Printer type:CoreXY FDM 3D printer
- Print volume:220 × 220 × 220 mm
- Maximum printing speed:600 mm/s
- Acceleration:20,000 mm/s²
- Maximum extruder temperature:280°C
- Nozzle flow rate:32 mm³/s
- Build plate:Dual-sided PEI
- Dimensions:15.83 × 14.29 × 17.64 inches
Our verdict“Choose the Adventurer 5M for fast, straightforward single-color prop sections; the P2S Combo better fits makers who want included multicolor printing.”
Creality Ender 3 V3 SE 3D Printer
The Ender 3 V3 SE puts setup help ahead of headline speed, with CR Touch leveling and automatic Z-offset calibration that can make the first layer less of a hurdle for a new cosplay maker. Its Sprite direct-drive extruder supports PLA, PETG, and TPU, giving beginners room to try flexible costume details as well as common rigid parts. Compared with the FLASHFORGE Adventurer 5M, its 250 mm/s maximum speed is much lower, so it is less suited to rushing through batches of large armor pieces. In return, the flexible spring steel plate makes finished prints easier to remove, and the listed filament range offers useful material options. The stated maximum speed depends on compatible materials and recommended settings, so practical results can vary with prop geometry and surface-quality goals.
Pros:- CR Touch leveling and automatic Z-offset calibration simplify initial setup
- Sprite direct-drive extruder supports PLA, PETG, and TPU
- Flexible spring steel build plate helps release finished parts
- Dual synchronized Z-axis lead screws support the motion system
Cons:- 250 mm/s maximum speed is below the Adventurer 5M and P2S figures
- Actual speed depends on material compatibility and recommended settings
Best for: First-time cosplay makers learning to print PLA or PETG accessories, with the option to experiment with TPU
Not ideal for: Experienced builders prioritizing rapid production of large prop sections or multicolor output
- Model:Ender 3 V3 SE
- Maximum print speed:250 mm/s
- Acceleration:2500 mm/s²
- Extruder:Sprite direct drive
- Supported filaments:PLA, PETG, TPU
- Auto leveling:CR Touch with automatic Z-offset calibration
- Build plate:Flexible PC spring steel
- Dimensions:15 × 19.6 × 15 inches
Our verdict“Choose the Ender 3 V3 SE to learn cosplay printing with guided leveling and several filament options; pick a faster CoreXY model for higher-volume output.”
Creality K2 SE 4C Multicolor 3D Printer
The K2 SE 4C makes color part of the print workflow, with four-color printing and a CoreXY system rated for speeds up to 500 mm/s. That can help cosplay builders create layered-looking details and accents without relying on paint for every color boundary. Compared with the Bambu Lab P2S Combo, it lists four-color printing as part of the printer offer, while the P2S needs its AMS 2 Pro Combo for multicolor output. Its 220 × 215 × 245 mm volume still favors accessories and segmented armor over full-size props in one piece. The all-metal frame and runout, tangle, and power-loss protections are useful during longer jobs, but its listed materials are PLA and PETG, with dual-material breakaway supports potentially requiring extra material.
Pros:- Four-color printing is supported
- CoreXY motion system with speeds up to 500 mm/s
- Auto bed leveling simplifies setup
- Runout, tangle, and power-loss features help protect longer prints
Cons:- 220 × 215 × 245 mm print volume limits single-piece prop size
- Listed material support is PLA and PETG
- Dual-material breakaway supports may require additional material
Best for: Cosplay makers who want four-color PLA or PETG accessories and costume details with print recovery features
Not ideal for: Builders who need a large build area, broader listed material support, or one-piece helmets and oversized props
- Print colors:4
- Print speed:Up to 500 mm/s
- Acceleration:20,000 mm/s²
- Print volume:220 × 215 × 245 mm
- Materials:PLA, PETG, dual-material breakaway supports
- Frame:Rigid all-metal
- Connectivity:Offline USB printing
- Dimensions:14.46 × 14.46 × 18.96 inches
Our verdict“Pick the K2 SE 4C for four-color costume details in a compact format; choose a larger-volume option if your designs need fewer seams.”

How We Picked
I ranked these options around cosplay-making needs: usable build area for costume components, ability to produce convincing detail, ease of setup, material flexibility, and the practical work required after printing. For FDM machines, enclosure and workflow features matter because larger props often need durable parts and repeatable batches. For the resin printer, I weighed fine detail against the extra washing, curing, and handling steps. I also considered whether each product is a printer at all, since one listing is a finished prop.
The ranking favors machines that can handle a broad range of prop work without forcing every buyer into a narrow workflow. That puts the P1S Combo ahead as a versatile enclosed system, while the A1 and A1 mini offer simpler routes into FDM printing. Specialized strengths earn a place lower down when they come with limits: resin is better for detail than large armor, compact printers restrict part size, and multicolor systems add workflow complexity. The handmade blaster is listed for completeness but cannot compete as a tool for producing other props.
Factors to Consider When Choosing 3d Printer For Cosplay Props
I’d start with the props you plan to make most often, then work backward to the printer type and build area. A helmet, a handful of small emblems, and a painted blaster place very different demands on a machine.
Match Build Area to Your Largest Parts
Measure the largest component you expect to print, including room to angle it on the build plate. A printer’s stated dimensions do not tell you whether a curved helmet shell or long weapon part will fit in a useful orientation. Splitting a large model can solve the size problem, but it adds alignment, bonding, and seam cleanup. Before buying, check that your slicer supports cutting models and that your planned joints have enough surface area. Small accessories are easy to divide across many machines, so prioritize the footprint of your biggest recurring project. A compact unit can be a sensible first printer if you accept more joins on larger pieces.
Choose FDM or Resin for the Work You Actually Do
FDM is the more flexible starting point for large props, armor panels, and functional costume parts because it builds with filament and handles substantial pieces. Its layer lines and support marks usually call for sanding, filler, and paint. Resin can capture small sculpted details and sharp texture, but its print area and post-processing workflow make it less suited to bulky costume shells. Resin also involves washing and curing parts, plus careful handling of uncured material. Some makers use both processes: FDM for the structure and resin for small ornaments. That approach adds equipment and process steps, so it makes sense when fine details are a recurring need.
Plan for Assembly and Surface Finishing
A raw print is often only the start of a screen-ready prop. Large parts may need supports removed, seams bonded, gaps filled, and surfaces sanded before primer and paint. Model orientation affects both strength and visible layer lines, so a one-piece print is not always the cleanest result. Thin, decorative features can snap during cleanup even when the printer produces them accurately. Look at the model’s suggested split points and wall thickness before deciding that a bigger machine will save time. If you dislike finishing, favor simpler silhouettes and models designed with hidden joins.
Treat Speed as a Workflow Factor
High advertised motion speeds do not directly tell you how quickly a prop will be ready to wear. Print quality, model complexity, supports, cooling, and material choice all affect the result. A fast first layer matters less if you spend hours repairing a failed tall print or sanding rough surfaces. Reliable setup and predictable operation can save more project time than peak speed. For costume deadlines, leave room for test pieces and a replacement print. I’d choose a workflow I can repeat over a speed claim that does not account for cleanup.
Decide Whether Multicolor Is Worth the Extra Workflow
Multicolor printing can put several filament colors into a single part, which helps with badges, accents, and display pieces. It does not replace paint for metallic effects, weathering, or color matching across separately printed armor sections. Color changes can also create purge waste and add setup steps, depending on the printer and model. For large props that will be primed and painted, a single-color print may be simpler and just as useful. Think about how often the finished object will remain unpainted before paying more attention to color capability. A multicolor system pays off most when visible color separation is part of your regular design work.
Budget for Materials, Space, and Safe Post-Processing
The printer is only one part of a cosplay workshop. Filament, spare nozzles, adhesives, filler, primer, paint, and storage space all support the finished result. Resin printing also calls for a suitable washing and curing setup and a tidy area for handling materials. An enclosed printer needs room for ventilation and access, while a large-format machine occupies more bench space than its footprint may suggest. Check the recommended materials and any maintenance tasks before choosing a machine around a single project. A modest printer paired with a realistic finishing setup can serve a maker better than a larger machine with no room for post-processing.
Frequently Asked Questions
Can one printer make both armor pieces and small detailed accessories?
An FDM printer can cover both, but the results and effort differ by part. It handles broad armor sections and sturdy props well, while small relief details may need careful orientation and sanding. Resin can capture finer ornament but is less convenient for large wearable pieces. If your projects span both extremes, consider whether you would rather split and join FDM prints or add a separate resin workflow. The right compromise depends on which type of part you make most often.
Should I choose a multicolor printer if I plan to paint my props?
Usually, paint reduces the need for multicolor printing on large costume pieces. Primer and paint can unify joined panels and create metallic or weathered finishes that filament colors alone cannot match. Multicolor is more useful for small parts that will stay unpainted or need crisp color boundaries. It can also add material changes and cleanup to the print workflow. Choose it for a regular design need, rather than assuming it will eliminate finishing.
How can I tell whether a helmet will fit on a printer’s build plate?
Check the model’s actual dimensions and use the slicer to preview it on the intended printer’s build volume. Rotate the helmet to test different orientations, since the diagonal can sometimes fit when the upright dimensions do not. Then account for supports and any brim or raft the model calls for. If it still will not fit, inspect the model for sensible split points before committing to a machine. A split helmet can work well, but every added joint needs bonding and surface finishing.
Is resin a good choice for wearable cosplay props?
Resin is most useful for small decorative parts where fine detail matters more than size. It can be brittle for parts that may flex, get bumped, or attach to moving costume pieces, depending on the resin and design. Large wearable sections also take more space and post-processing than a typical resin workflow handles comfortably. For a mixed build, an FDM body with resin accents can be a practical division of labor. Check the material guidance and allow for washing and curing before choosing resin for a deadline project.
Is the handmade Poe Dameron blaster a printer recommendation?
No. It is a finished cosplay prop, so it serves someone who wants that specific blaster rather than someone choosing equipment to print their own designs. I keep it in the comparison because it appears among the listed products, but it does not provide build volume, printing workflow, or material flexibility. If you want to make several props or customize dimensions, choose a printer instead. If you only want this particular finished piece, compare its construction and listing details directly with your needs.
Conclusion
I’d pick the Bambu Lab P1S Combo as best overall for makers who want one enclosed FDM setup for varied prop projects. For a beginner who wants a more straightforward general-purpose entry, the Bambu Lab A1 is my pick; the Creality Ender 3 V3 SE is another value-minded route if you are comfortable with a more hands-on workflow. The Bambu Lab P2S Combo is the premium choice for buyers drawn to a newer combo system, while the ANYCUBIC Photon Mono M7 Max fits detail-focused makers who accept resin cleanup and handling. Choose the A1 mini when space matters more than large-part capacity, and the Handmade Poe Dameron blaster only if you want that finished prop rather than a printer. For multicolor experiments, compare the Snapmaker U1 and Creality K2 SE 4C against how often your builds need multiple filament colors.